
In the realm of application development, sending emails is an essential functionality that is prevalent across various industries. In this article, we will delve into the world of Next.js and uncover how we can seamlessly incorporate email sending capabilities into our applications. Note: This article assumes that you have already built your NextJS app with the npx create-next-app your-app-name command.
Step One:
First, we’ll go over the configurations we’ll need to make on our Gmail account.
In order to utilize this service, you will have to enable 2-Step Verification in your Google account.
After enabling 2-Step Verification Go to the Link: https://myaccount.google.com/apppasswords in your browser and generate a password for your new app.
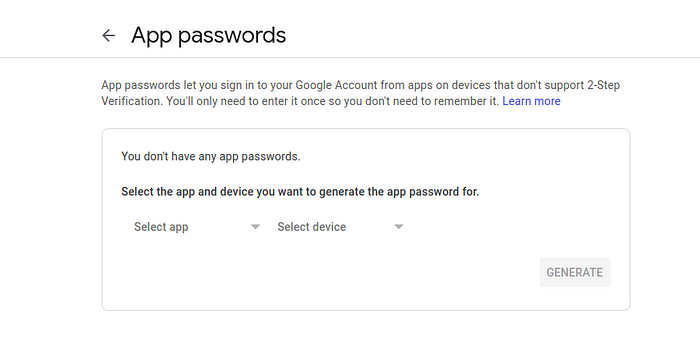
app password
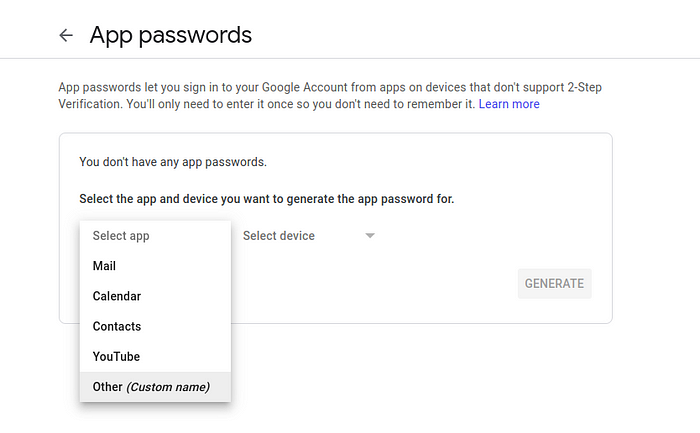
app password
Select Other, give your new app a name, and click Generate.
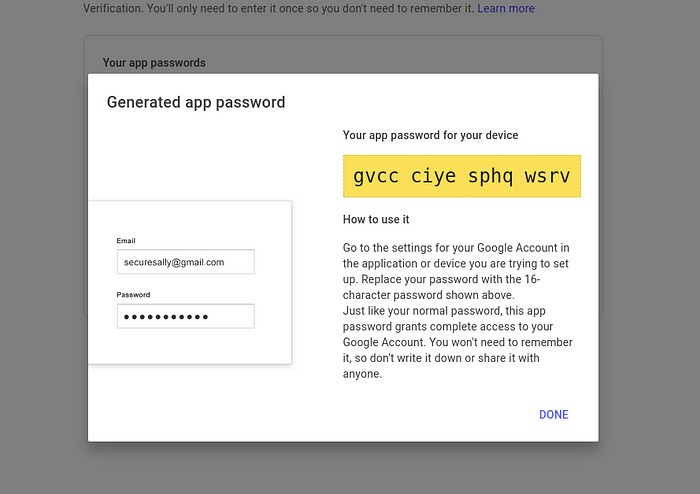
password generated
Copy the code and save it in your environment file. Do not reveal it to anybody; if your code is revealed, that person will have access to your account. In that case, you can simply delete this app.
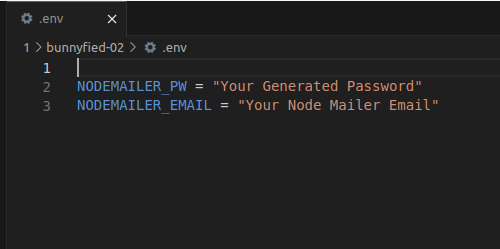
.env
Step Two:
Let's install the required dependencies.
npm i nodemailer dotenv
Now, let’s build a service that will use the nodemailer library to construct email objects and send emails. Create a new file called “service/mailService.js” and copy the following code into it:
var nodemailer = require("nodemailer");
//-----------------------------------------------------------------------------
export async function sendMail(subject, toEmail, otpText) {
  var transporter = nodemailer.createTransport({
    service: "gmail",
    auth: {
      user: process.env.NODEMAILER_EMAIL,
      pass: process.env.NODEMAILER_PW,
    },
  });

  var mailOptions = {
    from: process.env.NODEMAILER_EMAIL,
    to: toEmail,
    subject: subject,
    text: otpText,
  };

  transporter.sendMail(mailOptions, function (error, info) {
    if (error) {
      throw new Error(error);
    } else {
      console.log("Email Sent");
      return true;
    }
  });
}
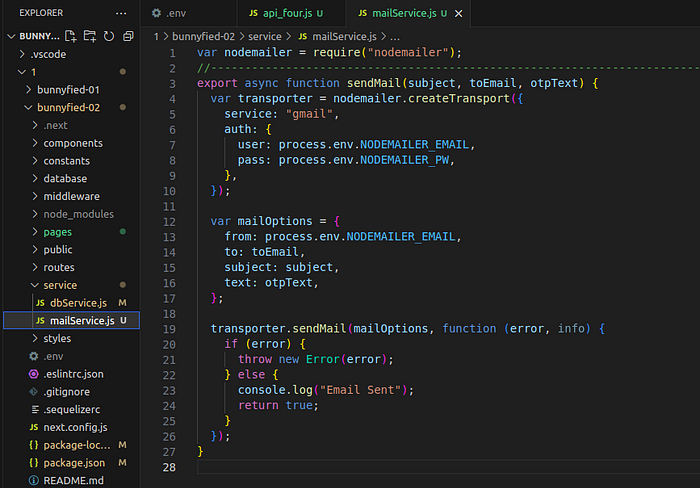
Folder structure
Next, create a new api called api_four.js inside the “/pages/api” folder.
import { sendMail } from "../../service/mailService";
const handler = async (req, res) => {
  try {
    const { method } = req;
    switch (method) {
      case "POST": {
        //Do some thing
        await sendMail(
          "TEST",
          "dontkillme@bunnyfiedlabs.com",
          "THI IS A TEST FOR MY MEDIUM USERS"
        );
        res.status(200).send("Success");
        break;
      }
      case "GET": {
        //Do some thing
        res.status(200).send(req.auth_data);
        break;
      }
      default:
        res.setHeader("Allow", ["POST", "GET", "PUT", "DELETE"]);
        res.status(405).end(`Method ${method} Not Allowed`);
        break;
    }
  } catch (err) {
    res.status(400).json({
      error_code: "api_one",
      message: err.message,
    });
  }
};

export default handler;
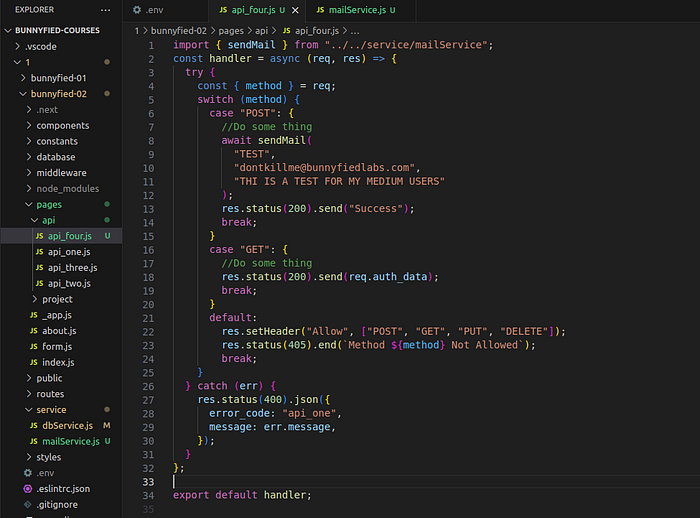
Folder Structure
In this API, we import the sendMail function, enabling us to send an email whenever the API receives a POST request.
Now run your app and make a POST request to http://localhost:3000/api/api%5Ffour
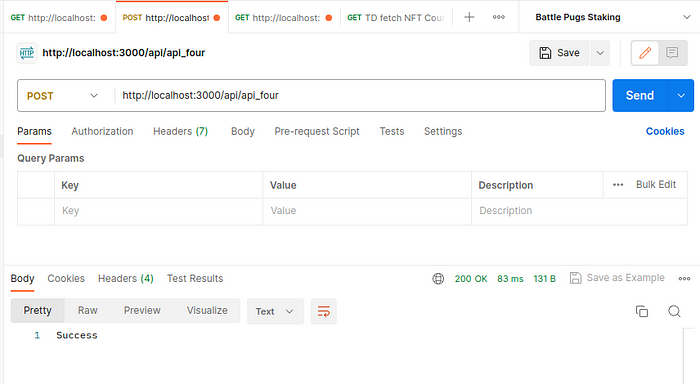
POSTMAN
You may verify that the test email we attempted to send through our API call has been delivered to your inbox.
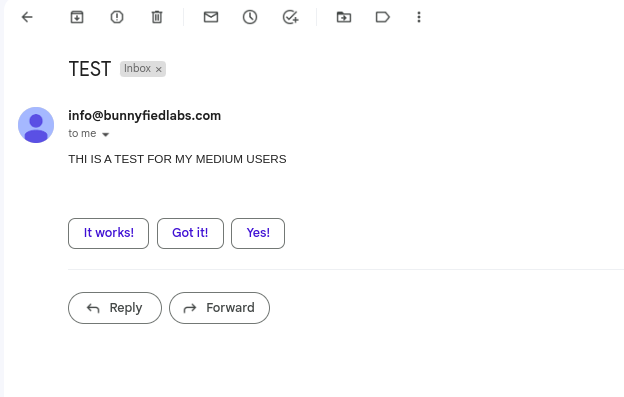
Congratulations! You have now gained the knowledge and skills required to send emails through Next.js using Nodemailer.
Update JUNE-22-2023:
I’ve recently discovered that to enable the functionality of the Node Mailer in a production environment, you’ll need to implement the code in a slightly different manner. In “service/mailService.js” just replace:
transporter.sendMail(mailOptions, function (error, info) {
  if (error) {
    throw new Error(error);
  } else {
    console.log("Email Sent");
    return true;
  }
});
With:
await new Promise((resolve, reject) => {
  // send mail
  transporter.sendMail(mailOptions, (err, response) => {
    if (err) {
      reject(err);
    } else {
      resolve(response);
    }
  });
});
Comments
Loading comments…