
Who Should Read This?
Have you ever been handed a piece of code or software with a dependency tree that resembles a messy circuit board:
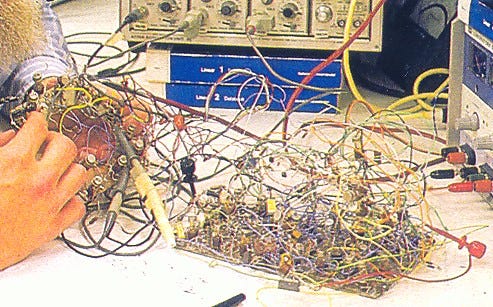 Dependency management in a nutshell
No worries, I'm sure the developer was kind enough to give you an installation script to get you up and running. So you run their script, and the next thing you know your shell is a massacre of error logs. *“Well it worked on my machine”, *is what the developer will normally retort when you ask for help.
Docker solves this issue by making Dockerized applications *almost *trivially portable. This article will show you how to quickly Dockerize your Python applications so that you can easily share them with anyone who has Docker.
In particular, we will be focused on scripts that are intended to be run as a background process, which is a similar theme to the last article I wrote.
Github and Docker Repo
If you are more of a visual learner, check out the Github and Docker repos where this code will be hosted.
So…why Docker?
Containerization is like placing your software in a shipping container, thus providing a standard interface for the shipping company (or another host computer) to interact with your software.
Containerizing your applications is the de-facto gold standard for portability.
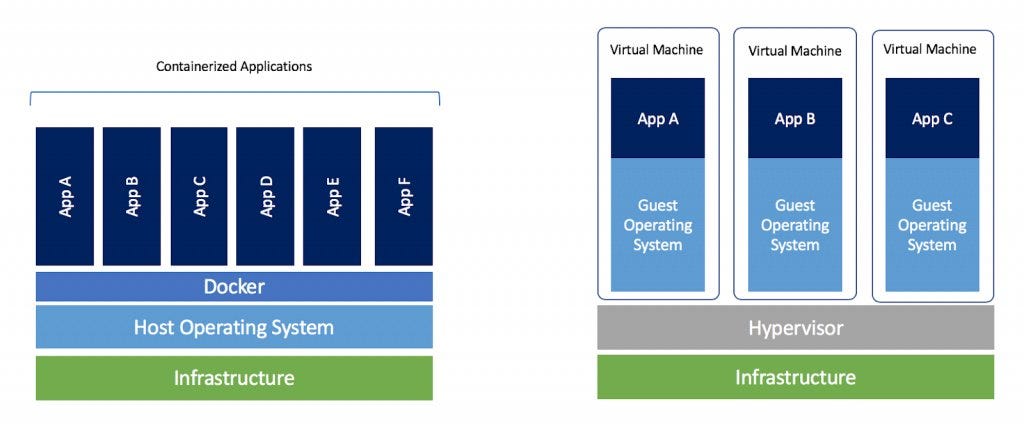 Docker/Containerization overview
Containerization (especially with docker) unlocks a host of possibilities for your fledgling software application. A properly containerized (i.e. Dockerized) application can be deployed scalably using Kubernetes or Scale Sets from
Our Application
Nothing too impressive here — once again we are working with a simple script that monitors a directory (in this case /tmp since I am on Linux) for changes. Our logs will be directed to stdout, which is important if we want them to appear in the docker logs (more on that later).
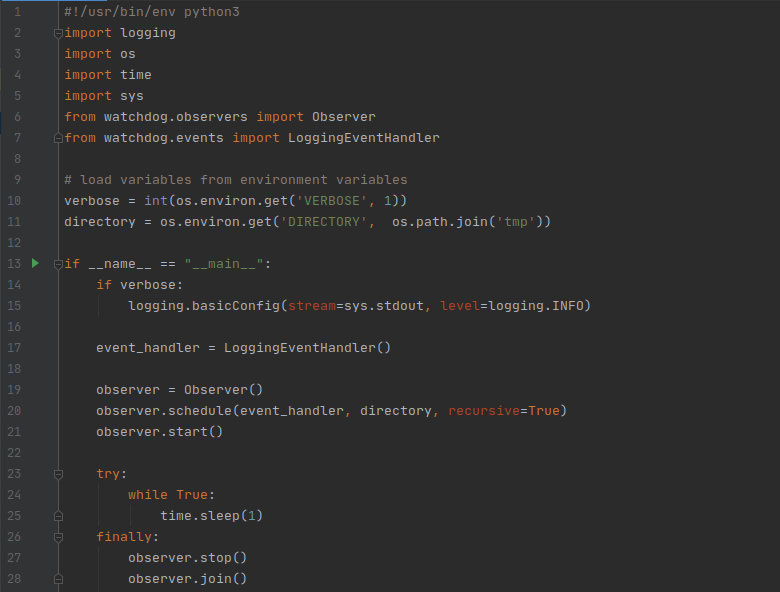 main.py: A simple file monitoring application
This program will run indefinitely.
As per usual, we have a requirements.txt file with our dependencies, in this case, just one:
 requirements.txt
Creating The Dockerfile
If you read my last article, you may recall that we scripted the installation process into a Makefile — which makes it very easy to share. This time around, we will be doing something similar — but in Docker.
 Dockerfile
We don't necessarily need to get into the nitty-gritty details of the Dockerfile and how it works, there are other more expansive Docker tutorials for that.
The TLDR of the Dockerfile — we are starting from a base image that contains the full Python interpreter and its packages, then we install our dependencies (line 6), create a new minimalist image (line 9), copy our dependencies and code over to the new image (line 13–14 this is called a multistage build, and in this case, it reduces our final image size from ~1GB to 200 MB), set an environment variable (line 17) and execution command (line 20), and we are done.
Building The Image
Once our Dockerfile is taken care of, simply run the following command from your project directory: sudo docker build -t directory-monitor .
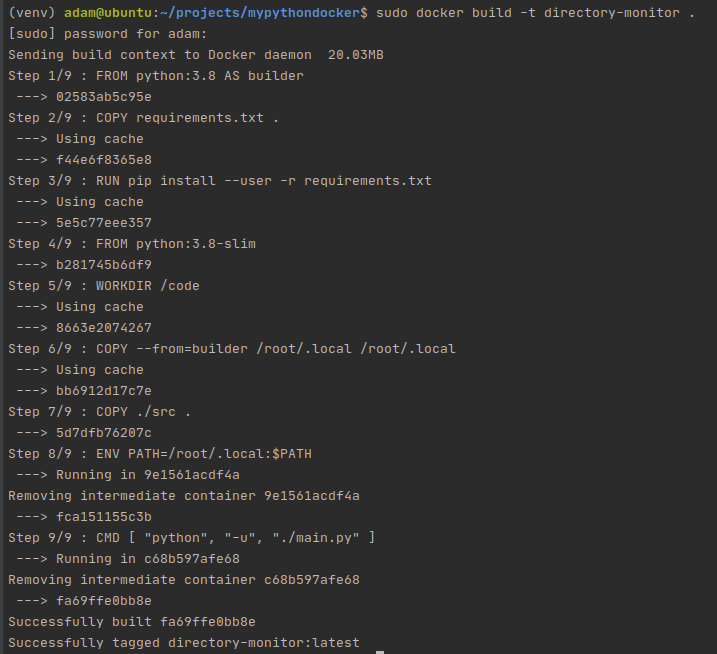 Building our image
Running The Image
Once our image is built — the magic can happen.
One of the great things about Docker is that it provides a standardized interface. So if you design your program properly, when you pass it along to somebody else — you simply need to tell them to learn how to use docker (if they don't know how to already), instead of having to teach them the peculiarities of your program.
Want to see what I mean?
To run our program, the command will look something like this:

There is a lot to unpack here, so let's break it down:
-d — run our image in detached mode, instead of foreground mode
--restart=always — if our docker container fails, it will restart itself. Distaster recovery! Yay!
--e DIRECTORY='/tmp/test' — We are passing in the directory to monitor using environment variables. (We could also design our python program to read arguments, and pass the directory to monitor that way.)
-v /tmp/:/tmp/ — mount the /tmp directory to the /tmp directory in the Docker container. This is important: whatever directory we are trying to monitor MUST be visible to our processes in the docker container, and this is how we accomplish this.
directory-monitor — the name of the image to run
Once you run the image, you can check on its status using docker ps :
 The output of docker ps
Docker creates crazy names for your running containers since humans aren't very good at memorizing hash values. In this case, crazy_wozniak refers to our container.
Now, since we are monitoring /tmp/test on my local machine, if I create a new file in that directory, my containers logs should reflect this:
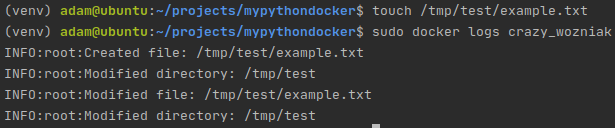 Docker logs show that the application is running properly
And just like that, your program is now dockerized and running on your machine. Next up — shareability.
Sharing
Sharing is caring. Your colleagues, friends, your future self, and the world in general, might benefit from your Dockerized program, so you should make it as easy as possible to distribute. Docker hub is the perfect solution for this.
If you don't already have an account, create one, then log in from the cli:
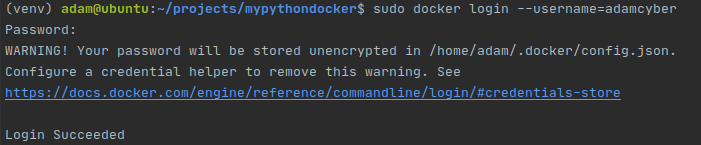 Logging in to Dockerhub
Next, tag and push the image that you just made to your account.
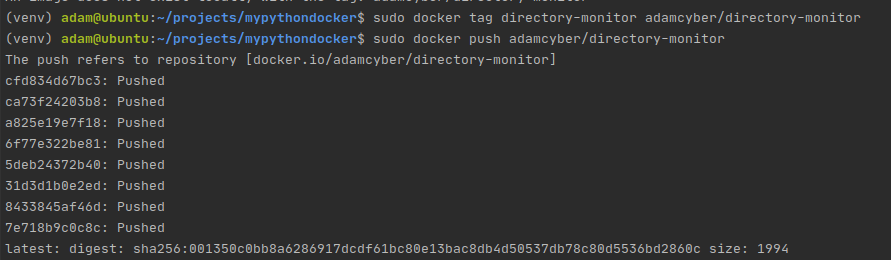 Tagging and pushing our image
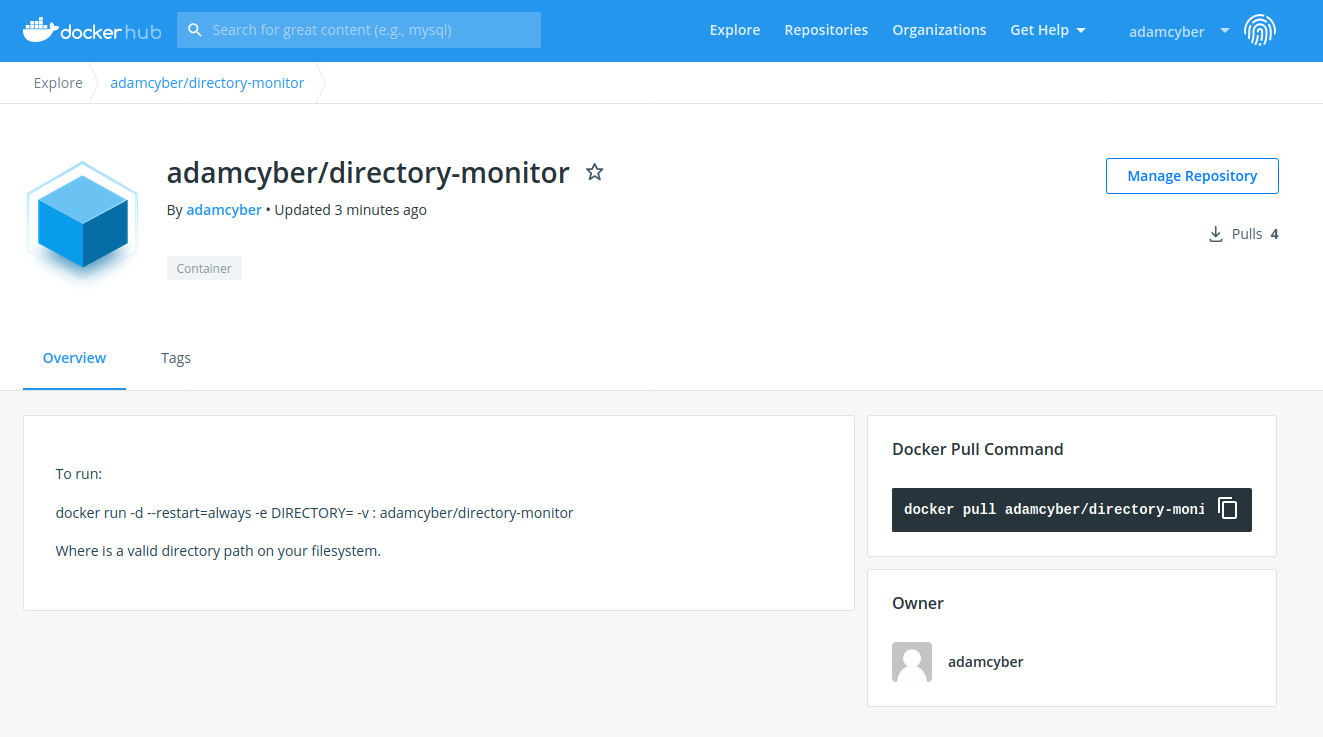 The image is now in your docker hub account
Just to prove that it works, let's try to pull this image and use it in an end to end test of the work we have done so far:
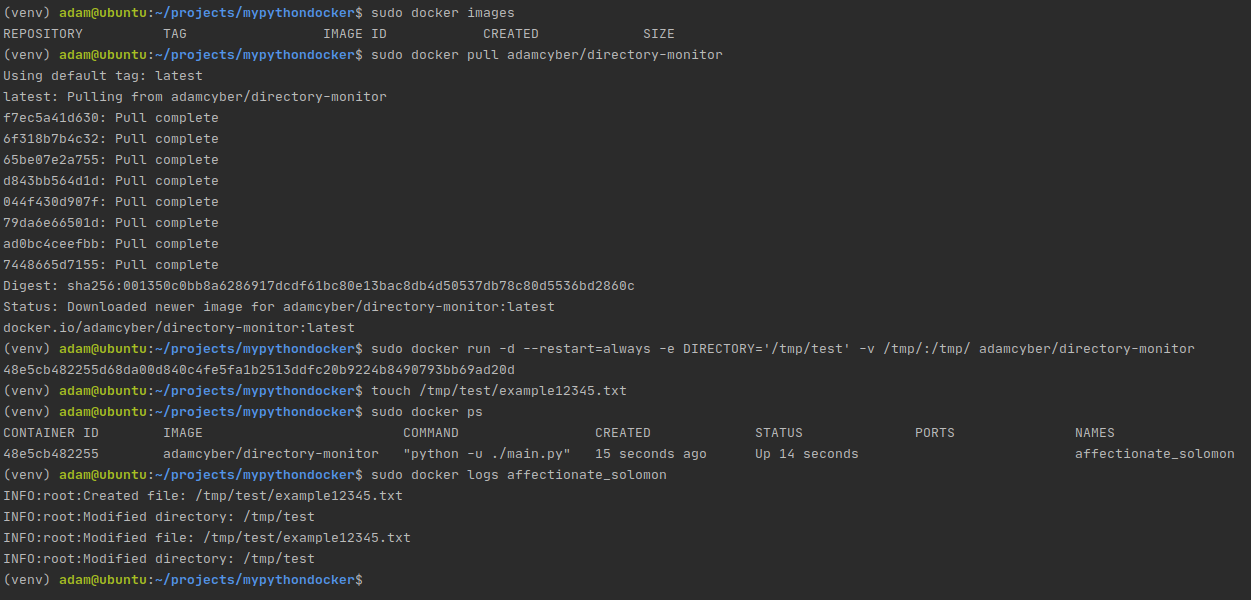 End to end test of our docker image
That entire process took 30 seconds.
What's Next?
I hope I have convinced you of the amazing practicality of containerization. Docker is here to stay — and the sooner you embrace it as a tool the more you will benefit from its advantages.
At its core, Docker reduces friction. In this example, it was a simple Python script, but you can use this exact tutorial to produce arbitrarily complex images with dependency trees that resemble a bowl of spaghetti, and the end-user will not care, because they won't be exposed to it.
Comments
Loading comments…