
Nowadays, many developers are using Spring Boot or Spring Mvc to develop their applications. Some of them prefer AWS as the deploying platform for it.
This article will be helpful for those who are developing applications on Spring Boot or Spring Mvc and want to deploy using Amazon EC2 instance. Each step is described in detail here.
Following are the steps for it:
- Create a WAR file of your Spring Boot Project
- Create an EC2 instance on the AWS console
- Install Java and Tomcat server on EC2
- Give permission to the user in tomcat to access Manage apps on the GUI
- Remove default localhost URL
- Select the WAR file and deploy it
Let’s see these steps in more detail:
- Create a WAR file of your Spring Boot Project
Include WAR packaging configuration in pom.xml, if not.
<packaging>war</packaging>
Now, run the app as Maven build:
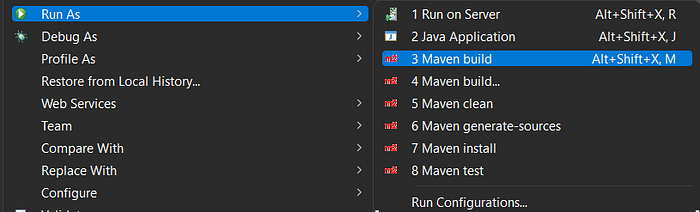
Once you click on the Maven build, the “Edit Configuration” window will be opened. Write the command “clean install” in Goals and click on Run.
Edit Configuration window:

You can find the generated WAR file in the target folder in your project structure.
2. Create an EC2 instance on the AWS console
Create a Linux EC2 instance from your AWS management console. Make sure you add a rule in the security group for the port you are using to host your application. Here, I am using the default port 8080.

3. Install Java and Tomcat server on EC2
Now, login to your EC2 instance and run the following commands to install the java and tomcat server on it.
First, update the instance:
sudo yum update -y
Install Java 8:
yum install java-1.8.0-openjdk
Verify whether Java is installed properly by checking its version:
java -version
Visit the following link for tomcat download:
https://tomcat.apache.org/download-90.cgi
Right-click on the tar.gz file and copy the link address of

Download the tomcat on EC2:
wget https://dlcdn.apache.org/tomcat/tomcat-9/v9.0.64/bin/apache-tomcat-9.0.64.tar.gz
Unzip the .tar.gz:
tar -zvxf apache-tomcat-9.0.64.tar.gz
That’s it! we have installed java and tomcat on the EC2 instance. Now, start the tomcat server and verify whether it is installed correctly.
cd apache-tomcat-9.0.64/
cd bin/
In the bin folder, startup.sh file is used to start the tomcat server. Run the following command to run the tomcat server.
./startup.sh
Now, copy the public IPv4 address or public DNS address of your instance, paste it on the browser, and attach:8080 which is the port number we configured.
for example, 12.34.56.78:8080
You will get the following page if the tomcat is installed properly.

4. Give permission to the user in tomcat to access Manage apps on the GUI
For this step, you have to open tomcat-users.xml file which is available in the conf folder
cd conf
Now, open the tomcat-users.xml. I am using vi editor for the same.
vi tomcat-users.xml
Add the following code to this file for creating the user and assigning the role for using Manager App in GUI for deploying the application:
<user username="your-username" password="your-password" roles="manager-gui"/>
5. Remove the default localhost URL
Now remove the following code from context.xml which is available in webapps/manager/META-INF folder:
<Valve className="org.apache.catalina.valves.RemoteAddValve" allow="127\.\d+\.\d+|::1|0:0:0:0:0:0:0:1"/>
Now, shut down the tomcat as we have made changes to it, and then start it again.
cd bin
./shutdown.sh
./startup.sh
6. Select the WAR file
Now, refresh the page and click on the Manager App.

It will ask you for the username and password. Use the username and password which you have used for creating the user in step 4.
Select the WAR file by clicking on “Choose file” in the “WAR file to Deploy” section under “Deploy”.

And click on deploy.
You can see your WAR file in the “Applications” section.

Now verify whether your WAR file deployed correctly or not by attaching the WAR file name with the URL we created in step 3 and check in the browser.

That’s it! Your application is deployed!
Thanks for reading!
Comments
Loading comments…