1. Use a Design System
Without consistent styling, it's hard to get the best possible results. A Design System is a set of rules and principles that set the foundation for how the application should look and feel. You need 4 things to keep in mind while working with your design system.
- Spacing: While working with a cross-platform application, the screen sizes might vary between different components present on a screen, but make sure to provide consistent spacing between them for a coherent look.
- Color: Choosing the right colors is not only the most important thing but also how you use them. A great solution is to use Color Palettes, where you can name your colors according to the preferred naming conventions, which increases your overall workflow.
Always name your colours in a way that you don't have to think about how they should look in your application, name your colours in a more defined way so that you can make faster decisions.
For example, 'Primary' as a primary colour in the application,'Danger' as the colour that would be used in danger icons or anywhere you are enforcing the red colour.
- Typography: We often forget about how the fonts change the way our application look in the results. It's best to stick to a limited set of font families, weights, and sizes to achieve a pleasant coherent look.
2. Responsive Style Properties
In Web Applications, the need for responsive design is apparent where the screen sizes can range from a small mobile device to a widescreen desktop device. But in React Native where the target is only mobile devices, it might not work with the same device size, but the variance in screen dimension is already big enough which makes it hard to find that one size that fits all for styling the application.
- To work with responsive design you can define some breakpoints by categorizing different screen devices.
For example:
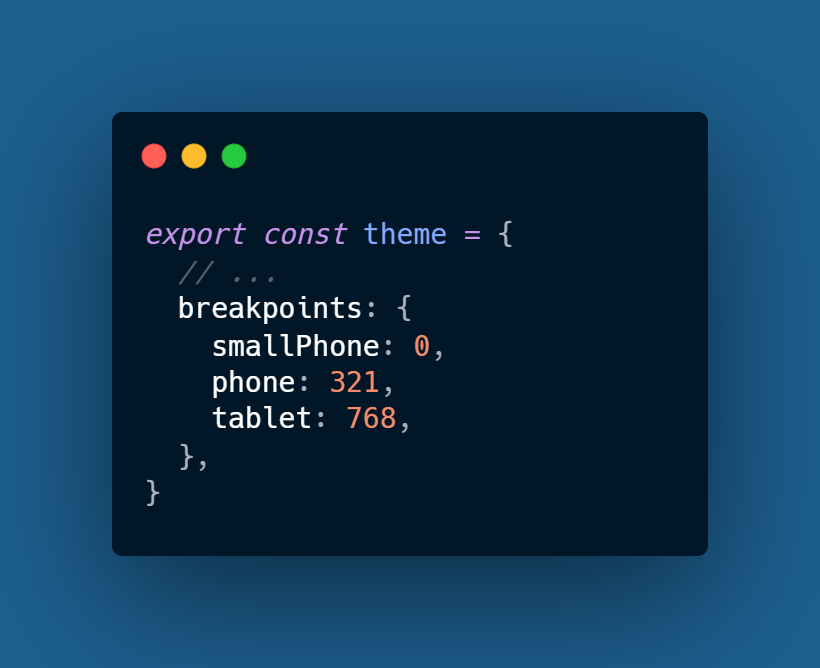
- With these breakpoints, anything below 321 pixels in width should fall in the category of being a smaller mobile device, and below 768 is a regular mobile device & anything wider than that is a tablet.
3. Use TypeScript
TypeScript and React make a perfect combination, especially if you are working in Visual Studio Code. The benefit that you get by using TypeScript is that instead of relying on React's PropTyes validation which only happens when the component is rendered at runtime, TypeScript allows you to validate any errors in your project. Also, you can define property types to only accept values available in the theme & with this, your editor will also autocomplete the valid values for you.
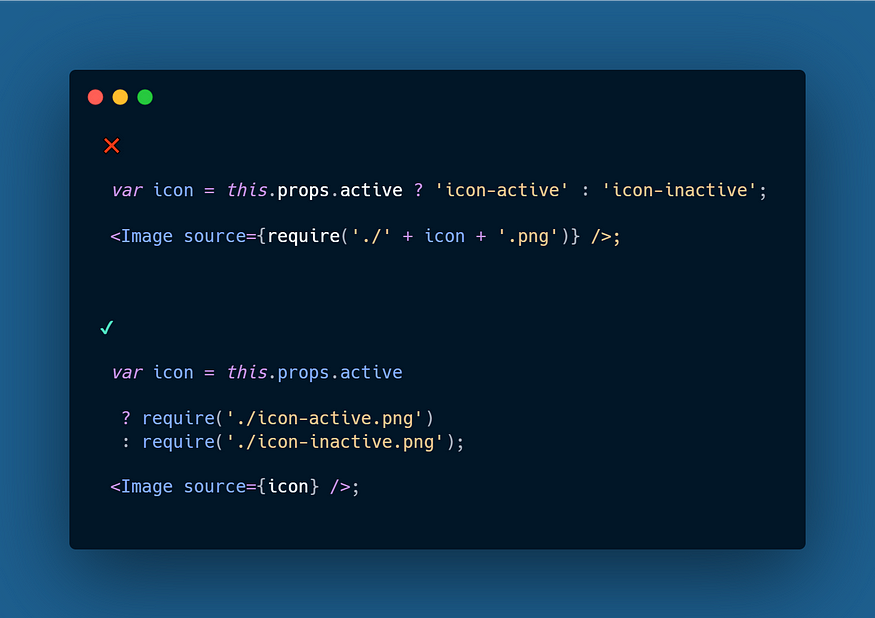
4. Static Image Resources
Always manage your static image resources the right way, otherwise, your application will be using a lot of time to work with static files event when it's not required. To add a static image in your application, you have to do it in such a way that the image name require is defined statically.
For example,
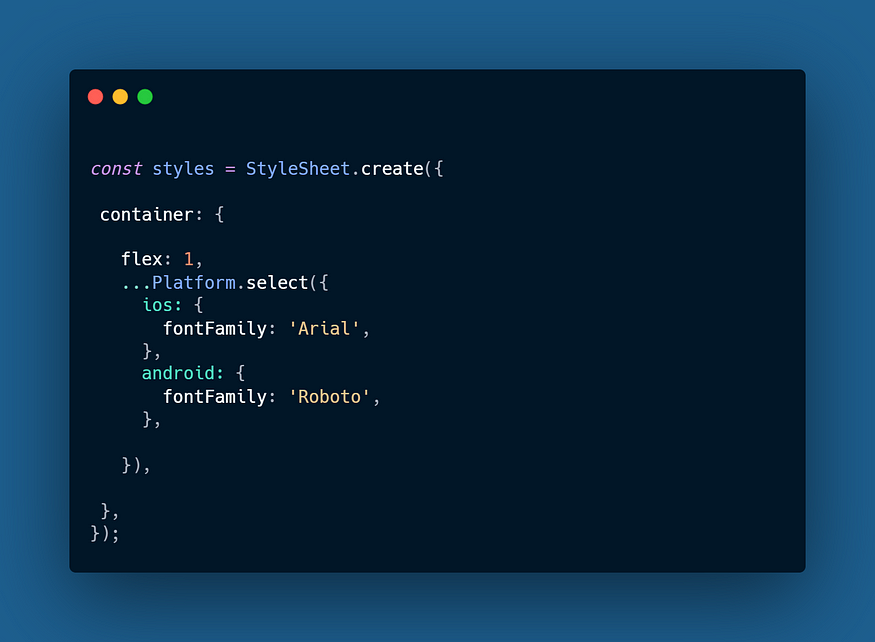
5. Use Platform Specific Styles
React Native offers a built-in API to write platform-specific code, without the Platform API you will end up having a lot of different styles for different platforms (Android & iOS), to organize these styles you can use the Platform module for Stylesheets. You can use the Platform.OS to automatically detect the OS and then apply the right styles.
For example,
6. Create Aliases
Creating aliases is the best way to get rid of the issue with nested imports, such as ActiveButton from '../../Components/Buttons'. You can use babel-plugin-module-resolver to create such aliases.
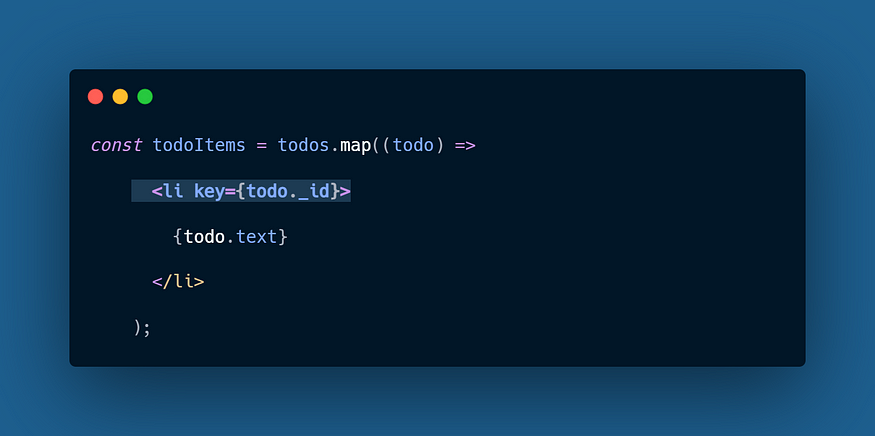
7. Always Assign Unique Key to Each Element
In React or React native assigning a unique key can solve many issues that make it harder to work with applications containing components such as Lists.
For example,
Comments
Loading comments…