In a project that I worked on a while ago, I was presented with a problem that wasn't very unique. It involved how we could safely pass identifiable user information such as phone numbers encoded and encrypted by a third party service in Ruby, to be decrypted and decoded into our application for the user.
//Link with encrypted token
https://example.com?token=XXXXX
Ruby provides straightforward handling for signed and unsigned big endians using pack() and unpack() methods for accessing underlying bits and bytes. However, JavaScript has the problem of not properly handling large integers, as it can only store signed or unsigned integers of up to 53 bits. See Number.MAX_SAFE_INTEGER.
In this case, we both shared the same encryption key, a process known as Symmetric Encryption. This means that the same encryption key must be used to decrypt the data.
In that project and some applications, where we want to encode and encrypt sensitive data, we also need to be able to decode and decrypt this information, when we need it, anywhere in our application, as such that the decrypted value is not altered during the process ensuring Data Integrity. Essentially:
const value = 0123456789 // Initial value
const token = encrypt(value) // Encrypted token
const decryptedValue = decrypt(token) // Decrypted value
value === decryptedValue // Must be TRUE
Simply using Base64 encoding, which will obfuscate and create short tokens is not a reliable security solution as Base64 strings can be easily decoded. For this article, I will demonstrate how you can create a simple, secure and fast symmetric encryption solution to encrypt data, and applied across any application even as short, SEO-friendly URL parameters using the following tools:-
- TypeScript — adds static typed definitions to JavaScript
- Symmetric Encryption — cryptographic encryption technique which uses the same encryption keys for both encryption and decryption of data
- Crypto — built-in Node.js module which provides cryptographic functionality
- Buffer — subclass of JavaScript's
Uint8Arrayclass used for character encoding and decoding - Testing using Mocha and Chai
- Automated testing, version management and package publishing using GitHub, CircleCI and Semantic release
Development
You also need to have npm and/or yarn globally installed. See how to install YARN and NPM. I also prefer using NVM to manage my Node versions.
Next, we create our project folder and set up typescript:
$ mkdir encrypt-decrypt-library
$ cd encrypt-decrypt-library
Initialize package.json for the project:
$ yarn init -y
Next, we need to install Typescript as a dev dependency. This is because we will be compiling our Typescript code into JavaScript for our production build.
$ yarn add -D typescript
Next, we need to install **ts-node** to enable us execute Typescript files without needing to compile them and also **@types/node** .
// TypeScript execution for node
$ yarn add -D ts-node @types/node
Next, we need to add a tsconfig.json file to the root of our project for our Typescript configuration. We initialize a tsconfig.json file as follows:
$ yarn tsc --init --rootDir src --outDir dist
This will generate an initial **tsconfig.json** file at the root of the project with possible configuration options, with non-essential options commented out. I have updated this file as follows:
Next, we need to install some additional packages for our library. Note that the NPM's crypto module has been deprecated as it is now a built-in Node module. This module provides us cryptographic functionalities like OpenSSL's hash, cipher, decipher, sign, verify and HMAC functions.
We will be using the Buffer class to write and read unsigned 64-bit integers because JavaScript has a maximum safe integer of 53 bits and our library must be able to handle 64-bit big endian especially when we need to encrypt and decrypt large integers such as phone numbers.
We also need to install dotenv to load environment variables from an .env file into process.env .
$ yarn add -D dotenv
Next, we need create our src directory and then our library file as follows:
$ mkdir src
$ touch src/encryption.ts
We also need to create an .env file to store our environmental variables and .env.example file to place all the keys of the .env variables. The .env file must be ignored in a .gitignore file to prevent our environmental variables from getting into source control for security reasons.
$ touch .env .env.example .gitignore
Encryption Key as Hex value
Next we create our encryption class by updating encryption.ts as follows:
On the browser, Javascript offers two functions for decoding and encoding base64 strings, btoa() and atob(), see Base64. As our code runs outside of a browser and due to the problems associated with encoding and decoding UTF-16-bit DOMString, we will be encoding and decoding 64-bit Big Integers to Big endian bytes and vice versa using the Buffer class including writeBigUInt64BE() and readBigUInt64BE() methods:
_// allocate Buffer instance_
const buf = Buffer._allocUnsafe_(8);

_// Write value to Buffer instance at the specified offset as big-endian.
_buf.writeBigUInt64BE(BigInt(value));

_// Read an unsigned, big-endian 64-bit integer from the Buffer instance at the specified offset
// and returns as a string
_buf.readBigUInt64BE(0).toString();
Next, we also need to implement cryptographic functionalities in our encrypt() and decrypt() functions. I have updated the Encryption class as follows:
For this, we use the built-in Node Crypto library and implement the crypto.createCipheriv()and crypto.createDecipheriv() methods to create and return a Cipher and Decipher instance respectively using the following parameters:
**algorithm**— underlying algorithm being used, which is based on OpenSSL**key**— the raw key used by the algorithm**iv**— initialization vector
To encrypt data, we use the crypto.createCipheriv() method to create a Cipher instance and then cipher.update() and cipher.final() methods to produce the encrypted data. To decrypt the data, we use the crypto.createDecipheriv() method to create a Decipher instance and decipher.update() and decipher.final() methods to produce the unencrypted data. See CreateCipherIV and CreateDecipherIV for more on crypto methods and options.
Both our encrypt() and decrypt() methods use symmetric encryption algorithms, ensuring that the same encryption key used in encrypting the data must be used in decrypting it. Learn more about Symmetric Encryption Algorithms. Next, we need to add some tests to our library.
Tests
To add tests to our library, we need to install some dependencies namely Mocha and Chai:
$ yarn add -D mocha @types/mocha chai @types/chai
We need to add some tests for our **encrypt** and **decrypt** methods. First, we need to create a **tests** folder in the root of our project. This folder will contain our test files. Next, we create a test file, **encryption.test.ts**:
$ mkdir tests
$ touch tests/encryption.test.ts
Update the encryption.test.ts file as follows:
The ALGORITHM, ENCRYPTION_KEY and SALT are environmental variables set in our .env file.
Next, we need to update the scripts property in our package.json with our test command:
// package.json

"scripts": {
  "test": "./node_modules/.bin/mocha \"tests/**/*.ts\" --require ts-node/register --require dotenv/config"
},
We are able to define node scripts to run within the scripts property of our package.json file.
We run the test using Node CLI arguments — Mocha requiring ts-node so we can execute the TypeScript test file without needing to compile them. We register the ts-node loader by using ts-node/register. We also specify the path to the test files. It will run every test file within the tests folder matching the pattern. It also requires dotenv/config, which allows us to use variables set in our .env file.
To start the test, we simply run in the command line yarn run test.
$ yarn run test**yarn run v1.22.4**$ ./node_modules/.bin/mocha "tests/**/*.ts" --require ts-node/register --require dotenv/configEncryption
    Ensuring encrypting and decrypting of string and number
      ✓ should encrypt and decrypt the string correctly
      ✓ should encrypt and decrypt the number as a big integer correctly
      ✓ should encrypt and decrypt the number as a string correctly
    Ensure decrypting of Big Integer token into a valid number
      ✓ should decrypt the encoded slug to a Big Integer correctly
    Ensure decrypting of string token into a valid string or number
      ✓ should decrypt the encoded slug to a valid string correctly
    Ensure decrypting of an 8-byte Big integer token into a valid number
      ✓ should decrypt the encoded slug to a Big Integer correctly
    Ensure validation of encrypt or decrypt methods
      ✓ should return an error message if encrypt has no value
      ✓ should return an error message if decrypt has no value
    Ensure validation of library with no configuration
      ✓ should fail to encrypt the string correctly
      ✓ should fail to decrypt the string correctly10 passing (25ms)
Linting
To ensure we have a clear and consistent coding convention in our library, it is important to add linting. Linting helps development by enforcing code style, identifying, reporting and fixing any inconsistencies and bugs in our code. For our Encryption library, I have opted to use ESLint because it supports both JavaScript and TypeScript.
First, install all the required dev dependencies:
-
eslint — ESLint linting library
-
@typescript-eslint/parser — TypeScript parser for ESLint
-
@typescript-eslint/eslint-plugin — A plugin with TypeScript specific ESLint rules
// Install ESLint and plugins
$ yarn add -D eslint @typescript-eslint/parser @typescript-eslint/eslint-plugin
We also need to install Prettier, which works very well with ESLint and is great at handling code formatting.
-
prettier — the core prettier library
-
eslint-config-prettier — disables ESLint rules that might conflict with prettier
-
eslint-plugin-prettier — runs Prettier as an ESLint rule
// Install Prettier and plugins
$ yarn add -D prettier eslint-config-prettier eslint-plugin-prettier
// Installs husky and lint
$ yarn add -D husky lint-staged
We also installed lint-staged which ensures that linting is run on files before they are committed. This ensures that all files committed to GIT don't have any linting or formatting errors. Husky used in combination with lint-staged enables us to run specified linting commands on pre-commit and helps make git hooks easier. You can read more about Git Hooks here.
We then need to set up a configuration file for ESLint:
$ npx eslint --init
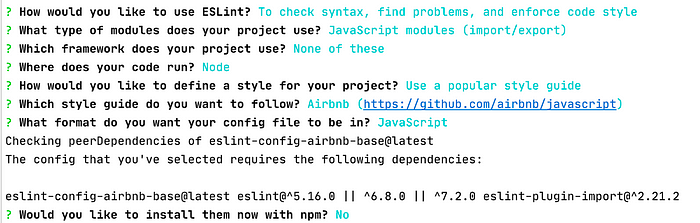
ESLint init
This generates a configuration file .eslintrc.js. I have added some modifications with our plugins and rules:
Next, create an .eslintignore file that tells ESLint the directories or files to ignore and add the following:
node_modules
dist
tests
coverage
styleguide.config.jssrc/**/*.test.tsx
src/**/*.md
src/serviceWorker.ts
Update our package.json by adding our lint command to the scripts property:
// package.json

"scripts": {
  ...
  "lint": "eslint 'src/**/*.{js,ts}' --quiet --fix"
},
The above script can be run from the command line using npm run lint or yarn lint. This command will run ESLint through all the .js and .ts files. It will automatically fix any ESLint errors, but any other errors will be printed out in the command line.
To configure lint-staged and husky, we also add the following configuration to the package.json:
// package.json
"husky": {
  "hooks": {
    "pre-commit": "lint-staged"
  }
},
"lint-staged": {
  "src/**/*.{js,ts}": [
    "prettier --single-quote --write",
    "eslint --fix"
  ]
},
With the configuration above, anytime a commit is made to git, lint-staged will run Prettier and ESLint on any staged files with matching extensions. It will automatically fix any errors that can be amended and add them to the current commit. However, it will fail if there are linting errors that cannot be fixed automatically. These errors will need to be fixed manually before trying to commit the code again.

Husky -pre-commit
Production
To use our Encryption library as an NPM module, we need to export our Encryption class and then compile our Typescript files into JavaScript.
First, we create our export file index.ts in our src folder as follows:
$ touch src/index.ts
and export our Encryption class as follows:
import Encryption from "./encryption";

export default Encryption;
For production, we add a build script to the scripts property of our package.json:
// package.json

"scripts": {
  ...
  "build": "NODE_ENV=production tsc"
},
The rootDir and outDir properties of the compiler options in the tsconfig.json file specifies the root directory of the input files and the output directory for the compiled files. Running yarn build will compile the TypeScript files into JavaScript files in the dist folder.
We also need to install rimraf dev dependency, which acts like the rm -rf command.
$ yarn add -D rimraf
Next we update package.json by updating our build script and adding main and module properties to set the entry point for our library, which is our compiled JavaScript file and the types property to points to our TypeScript declaration entry file:
// package.json
"scripts": {
  ...
  "build": "rimraf ./dist && NODE_ENV=production tsc"
},
......
"main": "dist/index.js",
"module": "dist/index.js",
"types": "dist/index.d.ts"
Now, when we run yarn build, rimraf will remove our old dist folder before the TypeScript compiler emits new code to dist.
Documentation
It is always important to include reliable documentation to help us keep track of the various aspects of an application. It helps improve on the quality of the code and makes it easier for further development, maintenance and knowledge transfer.
Next, we need to create a README.md file at the root of our project:
$ touch README.md
And update as follows:
Publishing
Before we can publish our library, we want to exclude certain files from our final package. We will be doing this by adding a files property to our package.json, which tells NPM which files and/or directories to include in our package:
// package.json
"files": [ "dist" ],
We also create an .**npmignore** file at the root of our project, which also specifies which directories or files for NPM to ignore:
// .npmignore

src
node_modules
tests
.idea
coverage
Next, we publish our package to NPM by running npm publish in the command line. You need to have an account on NPM and may need to run npm login to log into your NPM account before you can publish. Accounts on NPM are free. NPM also requires that the name of your package is unique.
npm publish CLI
Automated Workflow
It is important that we automate the release process as this saves time and improves code quality. It allows us to be able to automate the various steps above, such as installing dependencies, linting, testing, versioning and publishing our library to NPM.
Please see my article, How to Automate Continuous Integration and Development, Versioning and Publishing for a step by step guide on how to setup CI/CD using Github, CircleCI and Semantic Release to automate your workflows including test automation, linting, versioning, deployment and publishing to NPM.
Status Badges
We may need to include build badges in our project to provide public access to the build status of our package. Status badges can be embedded at the top of the project's README file.
We will be adding CircleCI and Semantic Release status badges at the top of our project's README file. See CircleCI — Adding Status Badges.
### CircleCI Template:
[](<LINK>)
### Semantic Release Template:
[](<NPM-PACKAGE-LINK>)
// CircleCI Build Status
[](_https://app.circleci.com/pipelines/github/s-barrah/encrypt-decrypt-library_)
// Semantic Release
[](_https://github.com/semantic-release/semantic-release_)
// NPM Status
[](_https://www.npmjs.com/package/encrypt-decrypt-library_)

Status Badges
Usage
To use our library in any project, install using YARN or NPM:
// Via Yarn
$ yarn add encrypt-decrypt-library

// Via NPM
$ npm install --save encrypt-decrypt-library
And we can import and use anywhere in the project:
import Encryption from "encrypt-decrypt-library";

const config = {
   algorithm: process.env.ALGORITHM,
   encryptionKey: process.env.ENCRYPTION_KEY,
   salt: process.env.SALT,
}
const encryption = new Encryption(config);

// Encrypt a string
encryption.encrypt('Hello world')

// Encrypted as an unsigned 64-bit Integer
encryption.encrypt(123, true)

// Encrypted as string
encryption.decrypt('gmmBh17Q4QA=')

// Encrypted as an integer
encryption.decrypt('NF1r855MimY=', true)
Conclusion
There are various reasons why we may need to encrypt and decrypt data. We may want to pass sensitive information as URL parameters and want it obfuscated from users. Base64 encoding can create short and SEO-friendly URL tokens and in Node, libraries such as atob and btoa can emulate the browsers functionality, however, Base64 encoding is not secure. You can read more about JavaScript Base64.
The aim of this article was to demonstrate how to create a simple and easy-to-use encryption library that can be imported and used in any of our projects to encode and encrypt simple strings and numbers into short, secure and SEO-friendly URL parameters.
There are a few NPM libraries that provide encryption and encoding such as CryptoJS. You can also explore this list of JavaScript Crypto libraries and decide what fits your use case.
Feel free to clone, fork or star my Simple Encryption library GitHub repository below if it helps you:
Comments
Loading comments…