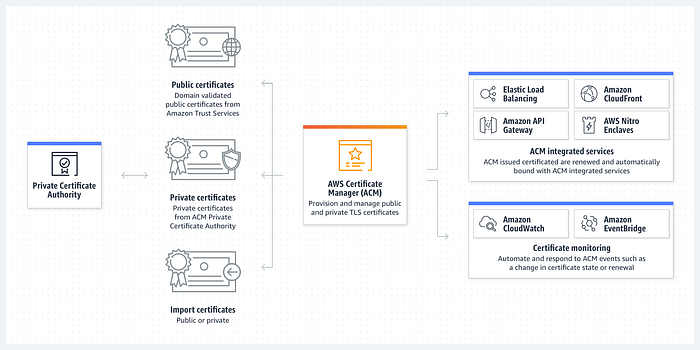
AWS Certificate Manager
AWS Certificate Manager(ACM) is a service that allows you to create, manage, and deploy public and private Secure Sockets Layer/Transport Layer Security (SSL/TLS) certificates for use with AWS services. ACM simplifies the certificate process by removing the manual process of purchasing, uploading, and renewing SSL/TLS certificates. Once created, the SSL/TLS certificate can be deployed on ACM-integrated AWS resources. Certificates provisioned through ACM for use with ACM-integrated services are free and certificates will auto-renew.
Why Use SSL/TLS Certificates
A SSL/TLS certificate is a digital certificate that authenticates your site identity and secures connections between browsers, applications and your site. SSL/TLS certificates are used to secure network traffic and establish the identity of websites over the Internet and private networks by creating an encrypted link between a web server and a web browser.
Prerequisites
- AWS Account
- Existing Application Load Balancer
- EC2 instances in a Target Group
My Current Environment
I used Terraform to create a custom VPC, Subnets, One EC2 in each Subnet with an internet facing Application Load Balancer in us-east-1. If you want to use this code to spin up a quick environment to test this out you can here: https://github.com/troy-ingram/terraform-alb Please note that as mentioned in the Prerequisites you will need to have a purchased Domain through Route53. For this project to make things easy I just used A Cloud Guru’s AWS Sandbox environment that has their own DNS Records.
Certificate
- Navigate to Certificate Manager.
- Click Request a certificate.
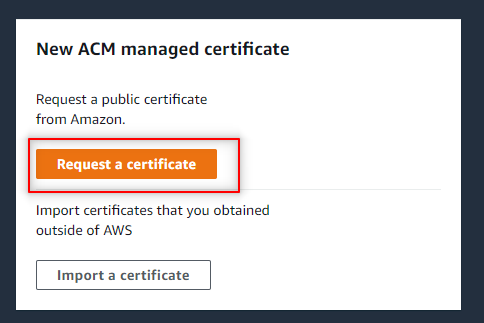 3. Select Request a public certificate. Click Next.
4. On the Request public certificate page you will need to enter a Fully qualified domain name. To protect several sites in the same domain I will be using an asterisk (*) to request a wildcard certificate. Then select DNS validation. Click Request.
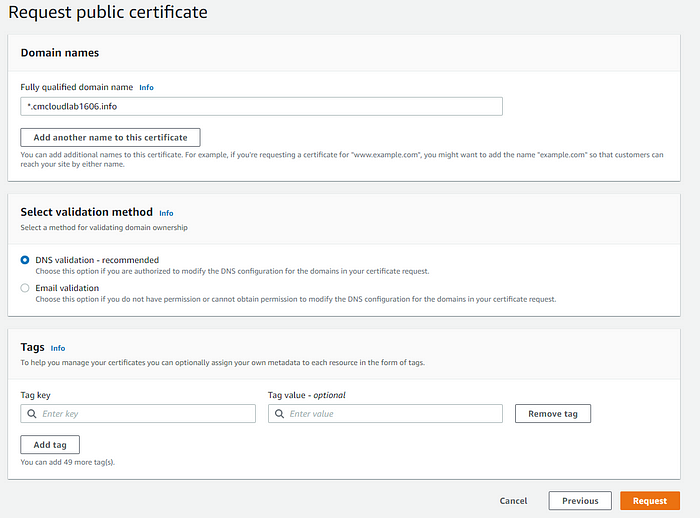
DNS Validation
The status for the certificate request states the Status is Pending validation. We will need to create a CNAME record to validate.

- Click on the Certificate ID.
 2. Under the Domain section click Create records in Route 53 button. We could mainly create the CNAME record using the CNAME name and CNAME value, but AWS has made the process easier for users.
 3. Click Create records.
4. Now wait for DNS to validate the new CNAME record. This process could take several minutes. Refresh until the Status shows as Issued.

Update Security Group
- Navigate to EC2 > Security Groups.
- Make sure to modify the ALB Security Group to allow HTTPS inbound traffic from 0.0.0.0/0 or desired CIDR.
Assign the Certificate to the ALB
- Navigate to EC2 > Load Balancers.
- Select Listeners tab and click Add listener button
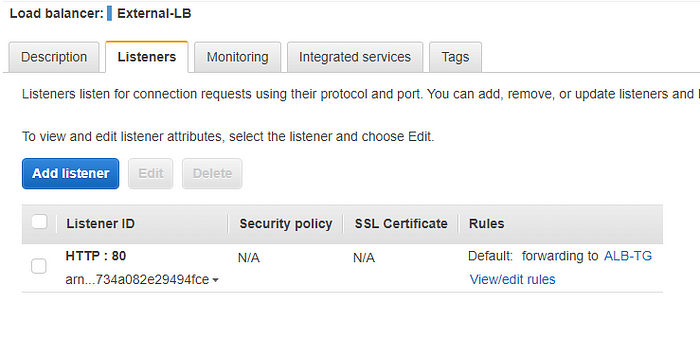 3. Input the following on the Add listener page:
 - Protocol HTTPS
- Port 443
- Default actions: Forward to desired Target Group
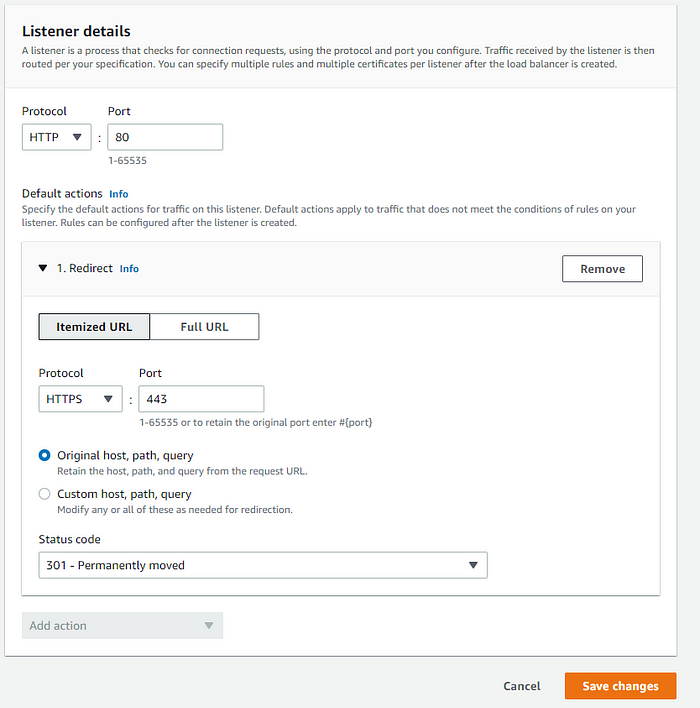
- Default SSL/TLS certificate: Select your certificate from the drop down Then click Add. 4. Modify the existing HTTP listener by removing the current Forward to and adding a new HTTP:80 Redirect action:
- Select Itemized URL
- HTTPS:443
Create DNS Record for ALB
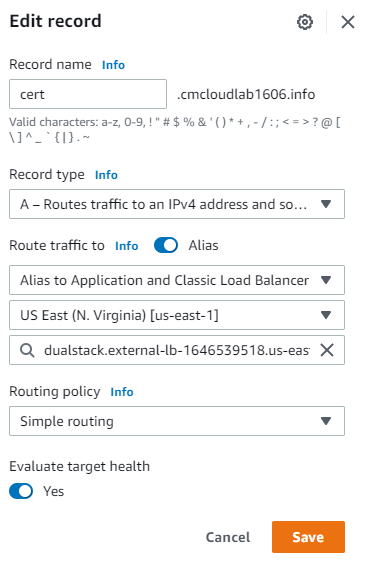
- Copy the DNS name of the ALB.
- Navigate to Route53 > Hosted zones.
- Click the Domain name to view the current records.
- Create a new A record using the following inputs from the screenshot then click Create records. I prepended the site with “cert”, but you can name yours whatever you want. Click Save.
Testing
- Copy and paste the record name into a browser using https.
 2. Now attempt the same but use HTTP instead of HTTPS
3. The same page should still appear and this time it redirects the HTTP request to HTTPS.
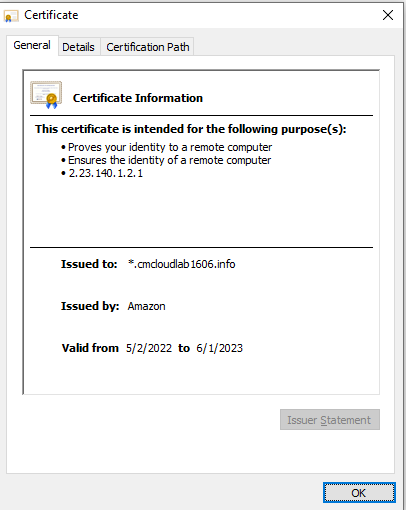
4. If you click on the lock symbol in the browser you can see the certificate details.
Comments
Loading comments…