Introduction
In this post, we are going to build and deploy a simple blog web page developed in Python using flask. Then, we will build a CI/CD process using GitLab and deploy it to an EKS cluster. Therefore, to accomplish it, we will use docker, create an EKS cluster, set up GitLab and its integration with Kubernetes, build our continuous integration and delivery in GitLab, custom our YAML files using helm, publish our app using ingress and finally, test a rollback deployment process. All the source code is available through this GitLab repository or with the GitHub repository. Let’s go ahead.
GitLab
It’s not new that GitLab is a powerful CI/CD tool for software development. In addition to providing continuous integration and continuous delivery, GitLab also helps to provide Continuous Deployment.
As you know, the Continuous Integration process works by pushing small code to your application codebase hosted in a Git repository, and to every push, run a pipeline of scripts to build, test, and validate the code changes.
Continuous Delivery and Deployment consist of a step further CI, deploying your application to production at every push to the default branch of the repository.
In this post, we will not cover all the GitLab concepts like GitLab runner, explore all the CI/CD variables, deploy an application to different environments, jobs artifacts, and so on… We will only focus on the CI/CD process and all that needs to do to accomplish it.
The App
The app that will be deployed is so simple (app.py). It just renders a custom web page (templates/app/index.html). This big app simulates a web blog, but, to do the process easier, we just do it as a static web page. You can download the app source code as the entire CI/CD code through this GitLab repository or with the GitHub repository.
Here is the structure of the app:
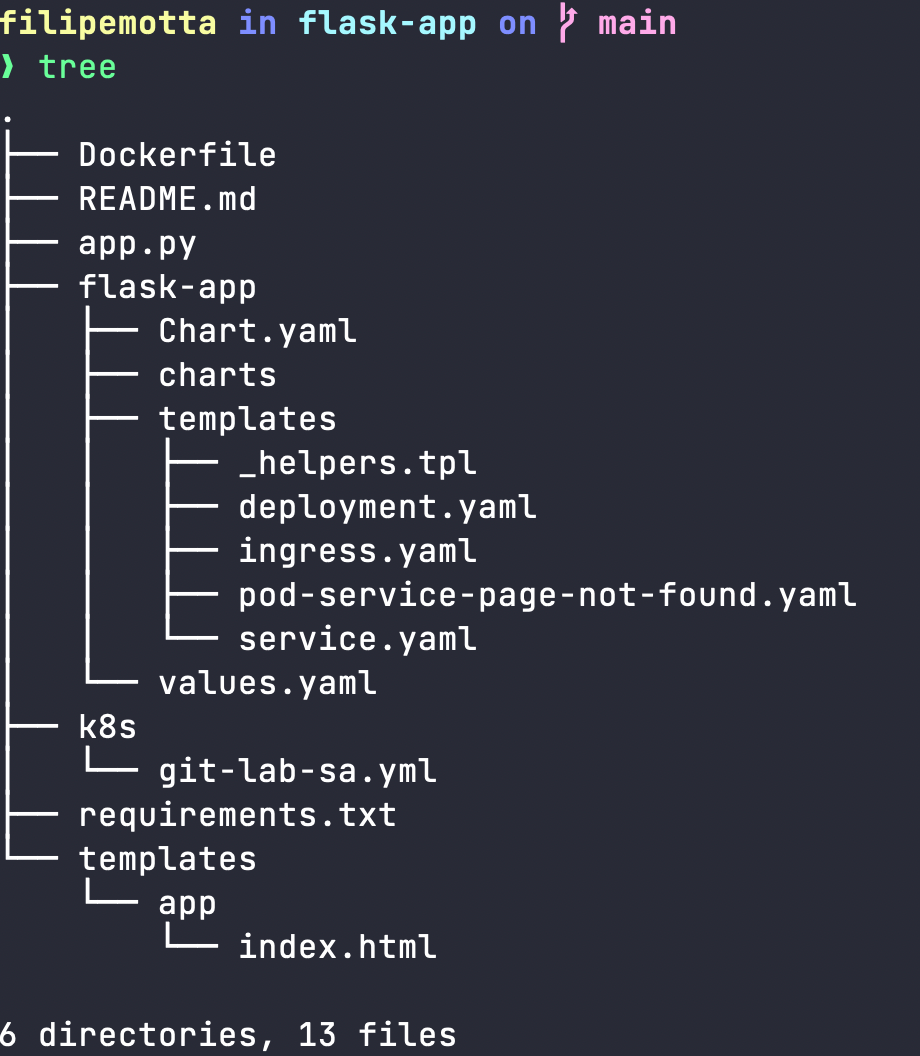
App’s structure
app.py
from flask import Flask, render_template
import flask
app = Flask(__name__)

@app.route('/')
def index():
    return render_template('app/index.html')

if __name__ == '__main__':
    app.run(debug=True,host='0.0.0.0')
The templates/app/index.html was omitted because it is big and does not matter with the main purpose.
Docker Registry and Dockerizing
Next up we’re going to set up a Docker registry to which we can push our application that we’ll dockerize. You can choose any register you want. Here, we are going to use the docker registry, so, if you don’t have an account yet you can create one on the Docker Hub Page.
Building our image
First of all, let’s dockerize and build our image. So we are going to create a Dockerfile in our root directory with the following content:
FROM alpine:latest

ENV PYTHONUNBUFFERED=1

RUN mkdir /app

RUN apk add --update --no-cache python3 && ln -sf python3 /usr/bin/python

RUN python3 -m ensurepip

RUN pip3 install --no-cache --upgrade pip setuptools

WORKDIR /app/

ADD . /app/

RUN pip install -r requirements.txt

CMD ["python", "/app/app.py"]
Before setting up and building these configurations in a CICD pipeline, It’s interesting to test in our local environment. Note that we are not using multistage building for this setup, but it’s strongly recommended in a production environment.
By default, flask and gunicorn will expose our app to 5000 port. Therefore, in the same Dockerfile directory, let’s test our image:
docker build -t filipemotta/flask-app:latest .
After build, let’s test our app:
docker run -d -p 5000:5000 filipemotta/flask-app:latest
Then access http://localhost:5000 and you should access the application.
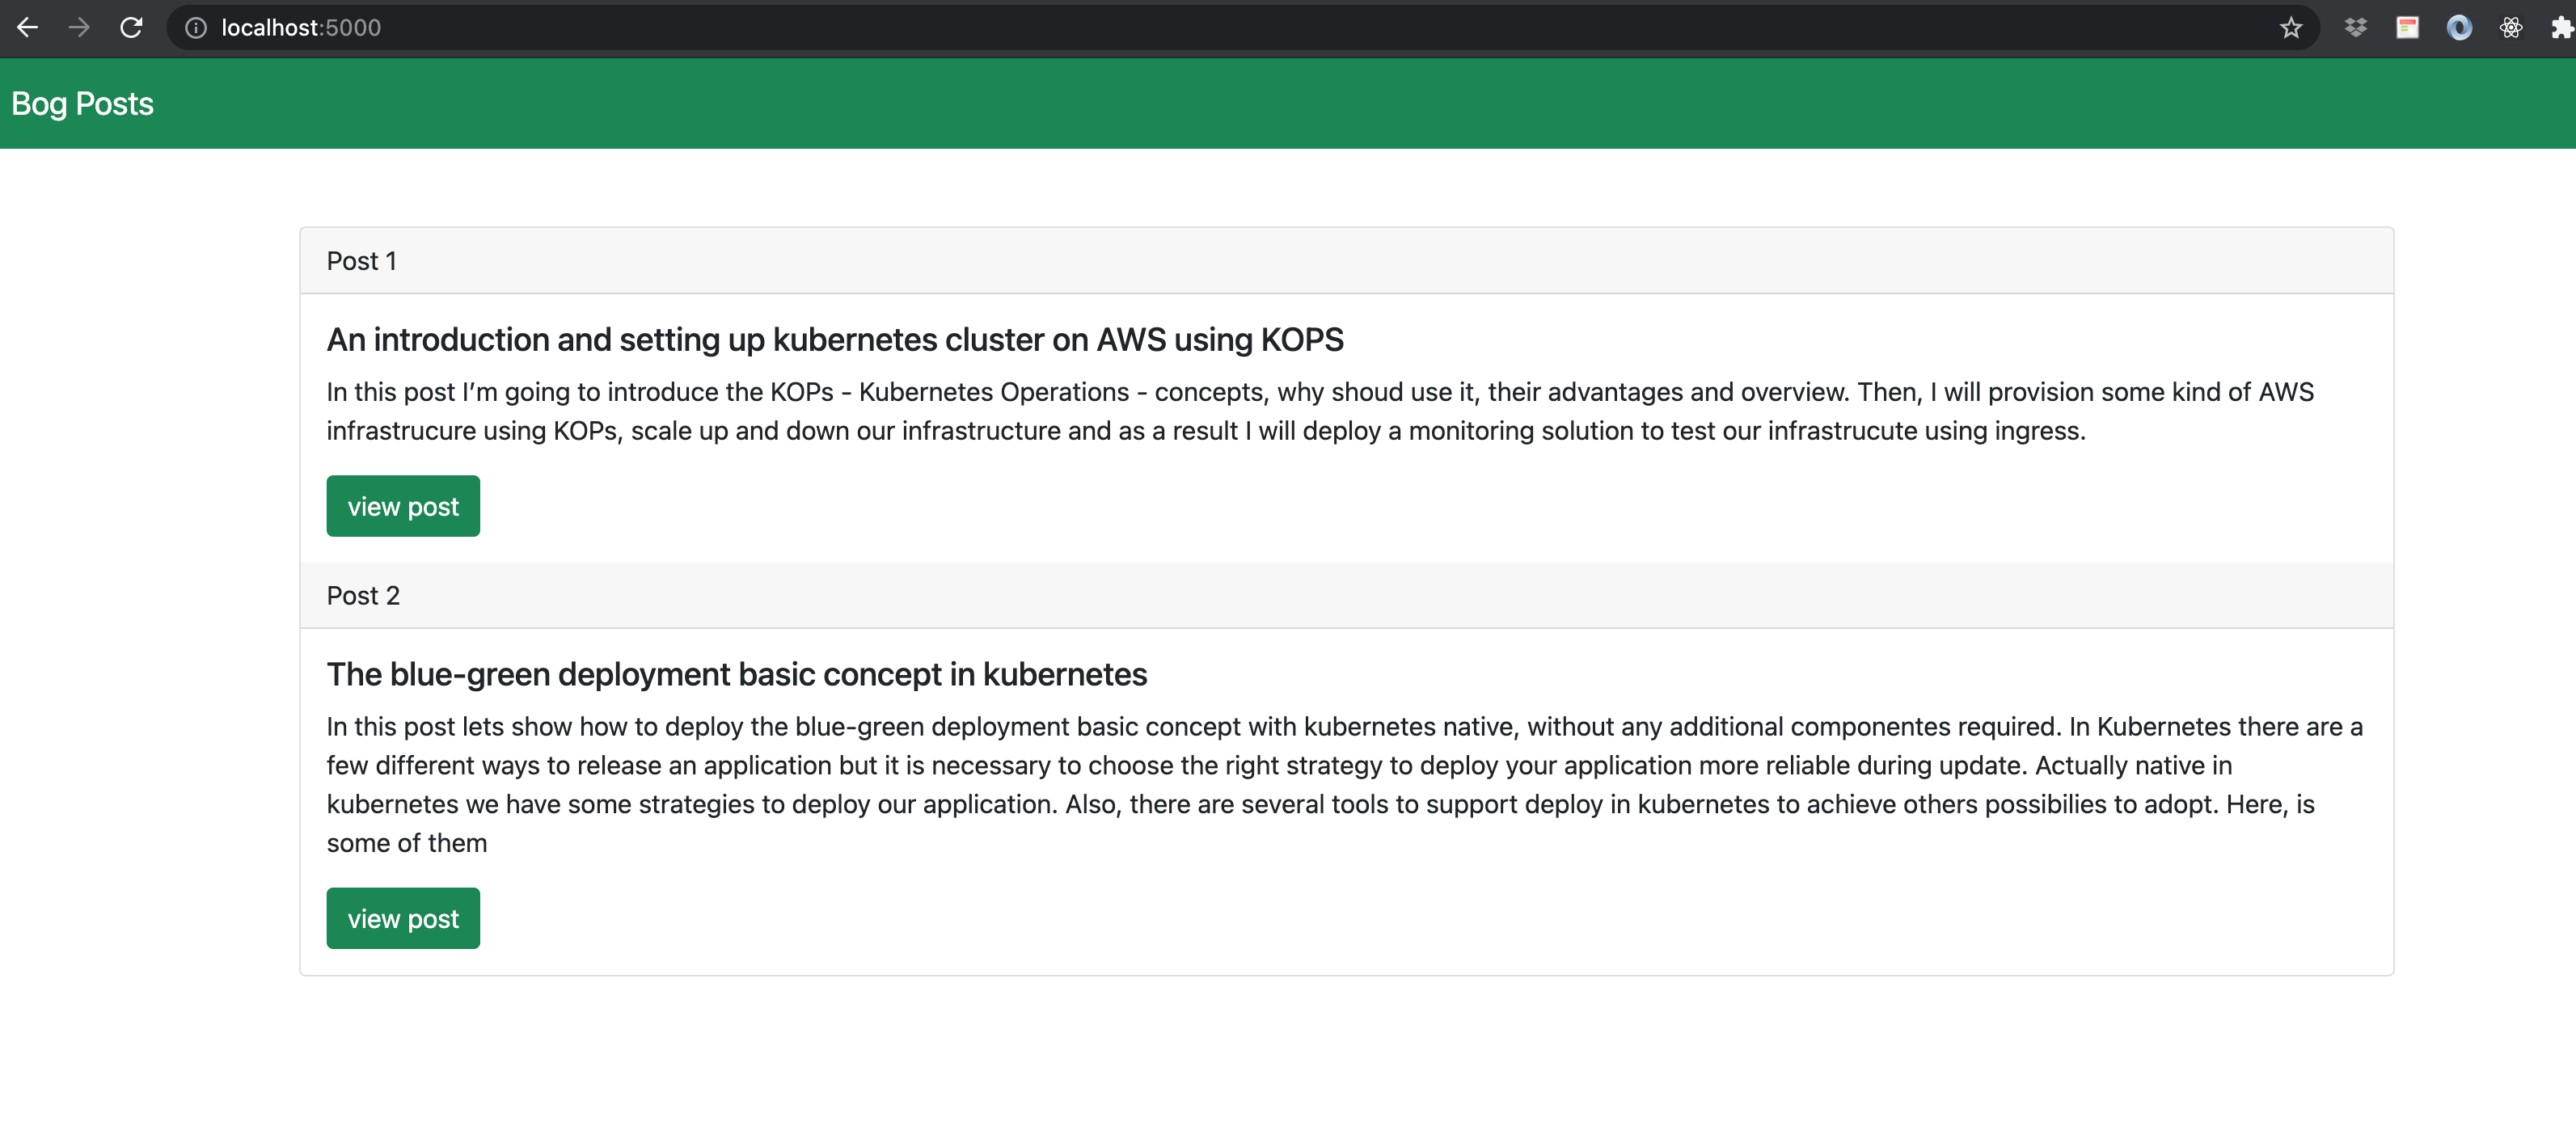
Sample APP
Once you’ve accessed the application in your local environment it’s time to go to the next steps.
Creating Kubernetes a Cluster in EKS
In this post we won’t get details about EKS, I will leave it for future posts. For now, we are going to just provision a simple Kubernetes Cluster in EKS with only one node.
GitLab Setup and Integration with Kubernetes
Now we are going to set up a Kubernetes cluster. As we know, there are many ways to accomplish it… but for now, we’ll use eksctl — The official CLI for Amazon EKS.
Basically, you’ll need kubectl, eksctl and Required IAM permissions. For more details, you can use the link specified above or use Getting started with Amazon EKS — eksctl.
Let’s create our first EKS Cluster with a single Node :).
eksctl create cluster --name=flask-app-demo --nodes=1 --node-type t3.small
After few minutes, you can interact with your node:
❯ kubectl get nodes
NAME                                           STATUS   ROLES    AGE    VERSION
ip-192-168-79-235.us-west-2.compute.internal   Ready    <none>   1d1h   v1.20.4-eks-6b7464
CI — Building and pushing our image through GitLab
Let’s start building our image through GitLab
Service Account
First of all, we need to create a service-account to interact with our cluster. In our repository, there is a file in k8s/git-lab-sa-yml specifying a service account and associate it with a specific ClusterRoleBinding. For purpose learning, we’ll specify a cluster-admin role, but if used in a production environment it is necessary according to their specific needs.
git-lab-sa-yml
---

apiVersion: v1

kind: ServiceAccount
metadata:
  name: gitlab-service-account
---

apiVersion: rbac.authorization.k8s.io/v1

kind: ClusterRoleBinding
metadata:
  name: gitlab-service-account-role-binding
roleRef:
  apiGroup: rbac.authorization.k8s.io
  kind: ClusterRole
  name: cluster-admin
subjects:
  - kind: ServiceAccount
    name: gitlab-service-account
    namespace: default
Setting variables
Then we need to set up environment variables in our Gitlab account. In GitLab, navigate to your repository -> Settings -> CI / CD -> variables ( expand ). Then, we are going to add the following configuration:
-
CI_REGISTRY_USER — Your docker hub user
-
CI_REGISTRY_PASSWORD — Your docker password you use to login to the docker hub
-
SERVER — The endpoint to the Kubernetes API for our cluster. You can find it running the following command:
❯ kubectl cluster-info Kubernetes master is running at https://BB2EFEF7EC0858A603SDFF9A67BEBA1.gr7.us-west-2.eks.amazonaws.com -
CERTIFICATE_AUTHORITY_DATA — This is the CA configuration for the Kubernetes cluster. There are some ways to get it, one of them is in your ~/.kube/config file.
-
USER_TOKEN — This value is the service account token created earlier. You can get this value running the following command:
kubectl describe secret gitlab-service-account-token-mnf4
Use kubectl get secret before to get the secret’s name.
Use protected flag for sensitive data.
Building our Image through Gitlab
The next step is to create .gitlab-ci.yml file in your root repository. This file is where you configure specific instructions for GitLab CI/CD defining the structure and order of jobs that the runner should execute and the decisions the runner should make when specific conditions are encountered. The file uses the YAML configuration syntax in GitLab CI to define the actions that should be taken, the order in which they should be performed, under what conditions they should be performed, and the resources needed to complete each task.
Now we are going to develop our pipeline. Before that, ensure you have runners available to run your jobs. If you don’t have a runner, install GitLab Runner and register a runner for your project.
Our pipeline there will have basically two stages — build and deploy. Keep in mind that the production pipeline generally has many stages like tests, security issues, build, deploy and many jobs to support the entire pipeline.
There, let’s start with a build stage.
image: docker:latest
services:
  - docker:dind

stages:
  - build

variables:
  CONTAINER_TAG: ${CI_COMMIT_SHORT_SHA}
  REPO_DOCKERHUB: ${CI_REGISTRY_USER}/flask-app

build:
  stage: build
  before_script:
    - docker login -u ${CI_REGISTRY_USER} -p ${CI_REGISTRY_PASSWORD}
  script:
    - docker build -t ${REPO_DOCKERHUB}:${CONTAINER_TAG} .
    - docker tag ${REPO_DOCKERHUB}:${CONTAINER_TAG} ${REPO_DOCKERHUB}:${CONTAINER_TAG}
    - docker tag ${REPO_DOCKERHUB}:${CONTAINER_TAG} ${CI_REGISTRY_USER}/flask-app:latest
    - docker push ${REPO_DOCKERHUB}:${CONTAINER_TAG}
First, the file starts to declare an image, in this case, we’ve used a (docker image inside of another docker image)[https://hub.docker.com/_/docker], so we can create a docker image of our application to publish in a container registry.
The services keyword defines a Docker image that runs during a job linked to the docker image that the image keyword defines. This allows you to access the service image during build time.
The variables keyword is used for the behavior of jobs and pipelines, stores values you want to re-use it and avoid hard-coding values in your .gitlab-ci.yml file. Here is variables keyword we defined custom variables to be used globally or locally, that is we can use inside a job ( local variable ) or as the top level (in this case), used for all jobs and stages (global variable).
You can use pre-definides variables like CI_COMMIT_SHORT_SHA in our pipeline file. Beside this link, you can print output all the variables available for a job through this command.
stages:
  - export
  ...
env:
  stage: export
  script:
    - export
We’ve used CI_COMMIT_SHORT_SHA to store the commit revision the project is built for and stores it in a CONTAINER_TAG variable. Also, we’ve defined REPO_DOCKERHUB that is a repository name of our container registry.
After that, we’ve declared the first job called build that is a kind of step on the stage declared earlier. So, before running all the steps to build our image let’s login in our container registry using keyword before_script. The script keyword we’ve used to really build our images. After that are very common steps to publish images in any container register, so only attend for we’ve published our images with a short tag, because with it is possible to track and rollback our deployment if needed. Note that we’ve used Dockerfile config images created earlier to build our image.
See an example:
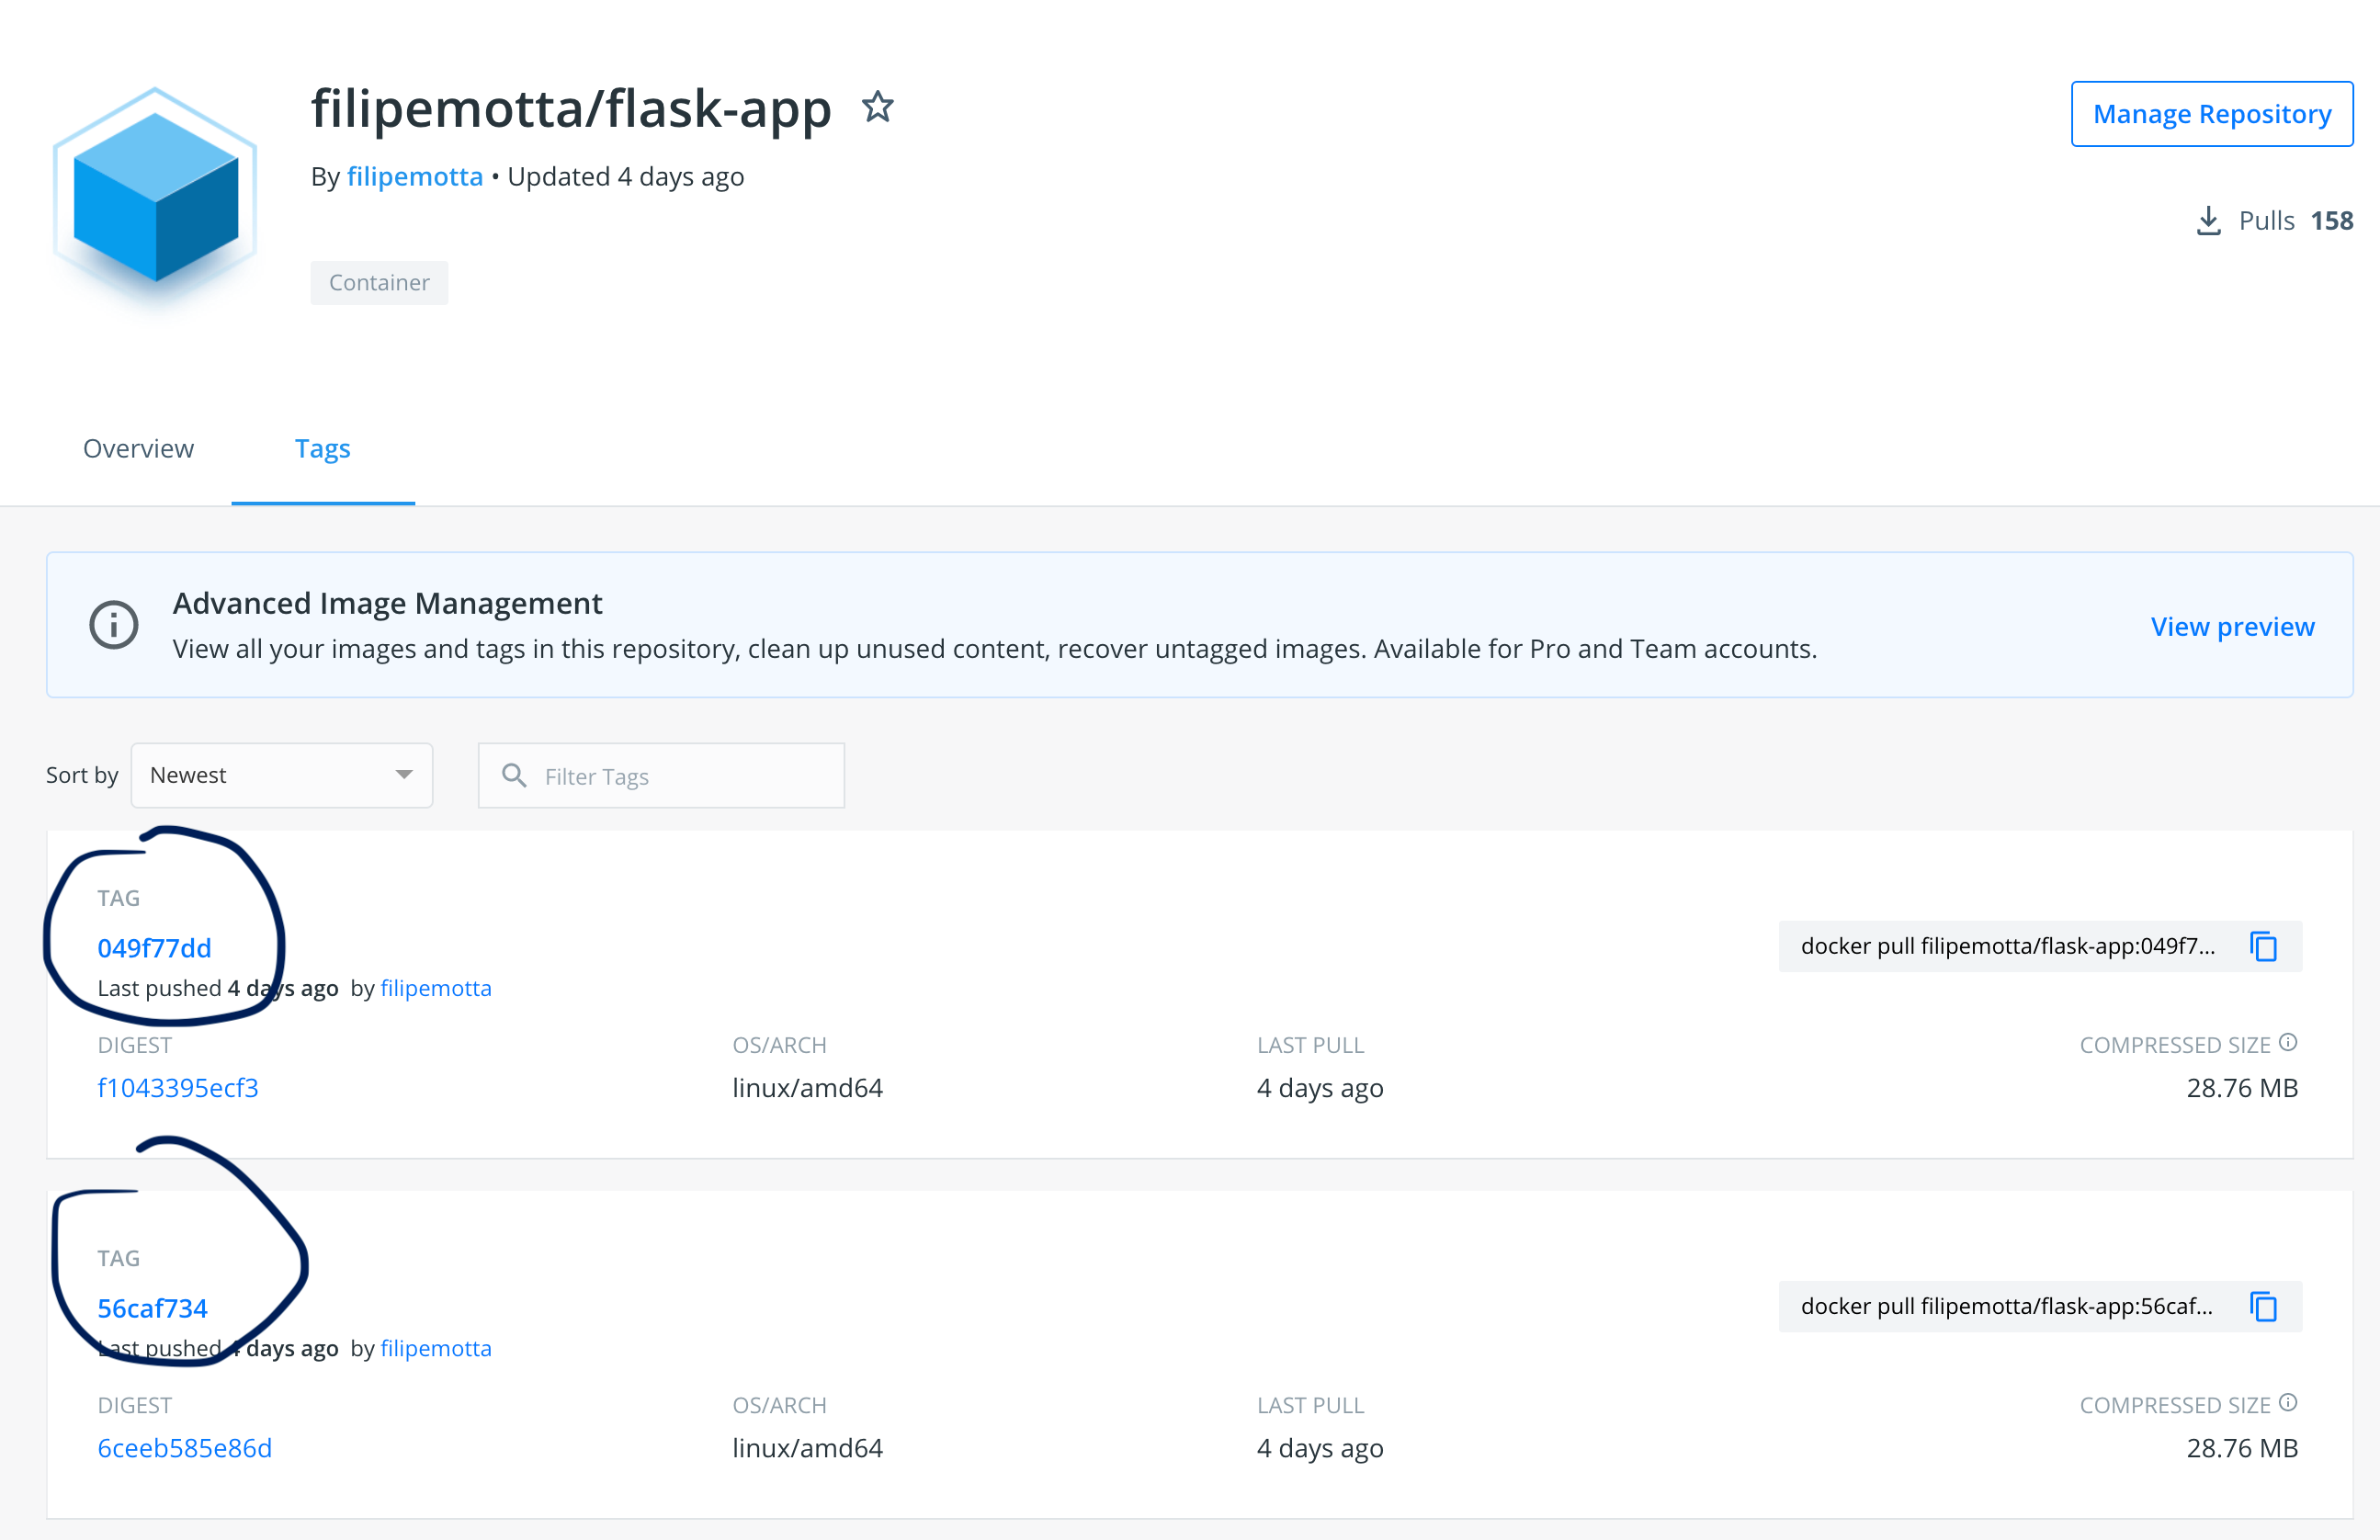
Docker Hub
Deploying our app through GitLab
After doing the first steps to our Continuous Integration, let’s start to integrate our Kubernetes Cluster in CI/CD process. The first goal is to do a Kubernetes deployment to run our application and start to use helm to custom our YAML files.
Deploy Stage — gitlab-ci.yml
Here is the fully .gitlab-ci.yml file:
image: docker:latest
services:
  - docker:dind

stages:
  - build
  - deploy

variables:
  CONTAINER_TAG: ${CI_COMMIT_SHORT_SHA}
  REPO_DOCKERHUB: filipemotta/flask-app

build:
  stage: build
  before_script:
    - docker login -u ${CI_REGISTRY_USER} -p ${CI_REGISTRY_PASSWORD}
  script:
    - docker build -t ${REPO_DOCKERHUB}:${CONTAINER_TAG} .
    - docker tag ${REPO_DOCKERHUB}:${CONTAINER_TAG} ${REPO_DOCKERHUB}:${CONTAINER_TAG}
    - docker tag ${REPO_DOCKERHUB}:${CONTAINER_TAG} filipemotta/flask-app:latest
    - docker push ${REPO_DOCKERHUB}:${CONTAINER_TAG}

deploy:
  stage: deploy
  image: dtzar/helm-kubectl
  script:
    - kubectl config set-cluster k8s --server="${SERVER}"
    - kubectl config set clusters.k8s.certificate-authority-data ${CERTIFICATE_AUTHORITY_DATA}
    - kubectl config set-credentials gitlab --token="${USER_TOKEN}"
    - kubectl config set-context default --cluster=k8s --user=gitlab
    - kubectl config use-context default
    - helm upgrade flask-app ./flask-app --install --set deployment.image.tag=${CI_COMMIT_SHORT_SHA}
  only:
   - main
Note that we wrote another job called deploy. This deploy will be part of the deploy stage and declares a built-in image that is ready for use for both Kubernetes and helm. There are many ways that you can integrate and deploy your image with Kubernetes, but my choice for this post is that. In the first steps, we’ve set up our cluster with env variables in the CI/CD GitLab setting earlier.
Using helm
I’ve created the helm chart called flask-app creating a chart directory along with the common files and directories used in a common chart.
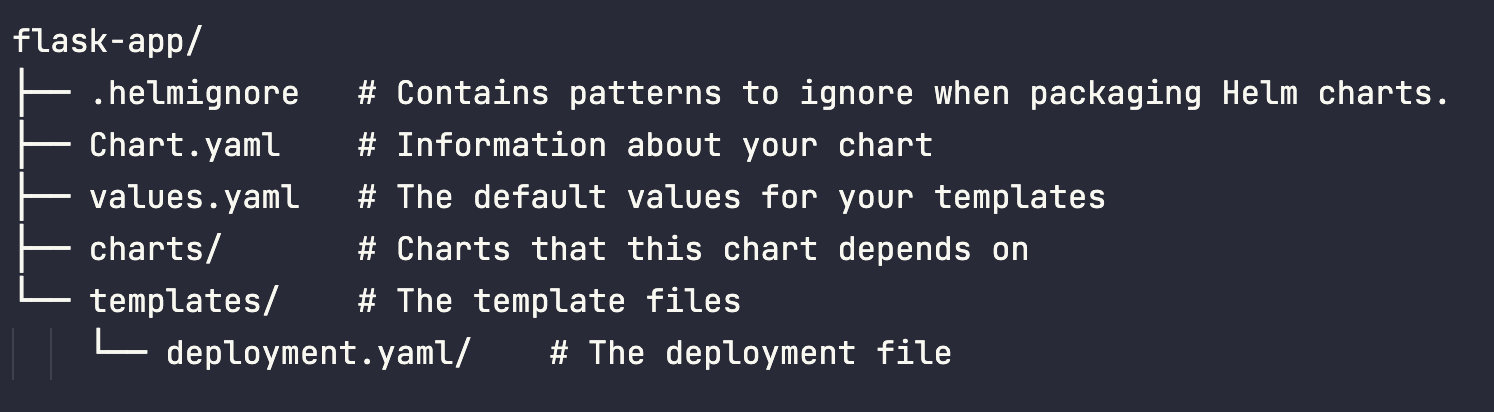
Helm tree
Please to custom values, pay attention for both values.yaml and Chart.yaml files. Our first deployment file is described below:
Setting the Deployment yml
└── templates/ └── deployment.yaml/
apiVersion: apps/v1
kind: Deployment
metadata:
  name: deploy-{{ .Chart.Name }}
  namespace: {{ .Values.deployment.namespace }}
  labels:
    app: {{ .Values.deployment.app }}
spec:
  replicas: {{ .Values.deployment.replicas }}
  selector:
    matchLabels:
      app: {{ .Values.deployment.app }}
  strategy:
    type: RollingUpdate
    rollingUpdate:
      maxSurge: 1
      maxUnavailable: 33%
  template:
    metadata:
      labels:
        app: {{ .Values.deployment.app }}
    spec:
      containers:
        - name: {{ .Values.deployment.capp }}
          image: filipemotta/flask-app:{{ .Values.deployment.image.tag }}
          ports:
            - containerPort: {{ .Values.deployment.cport }}
          livenessProbe:
            httpGet:
              path: /
              port: {{ .Values.deployment.cport }}
            initialDelaySeconds: 2
            periodSeconds: 2
          readinessProbe:
            httpGet:
              path: /
              port: {{ .Values.deployment.cport }}
            initialDelaySeconds: 2
            periodSeconds: 2
Important to mention this file was set up with 3 replicas, using the Rolling update strategy (default strategy), tag image that used the latest tag in the container registry and the container port that is our application port (5000) according to our docker built image.
Running our first CI/CD process
Now, we are going to commit our changes to the repository. The expected behavior is that when committed, GitLab starts the build and deploy stages. In the end, we expect the app was deployed in the Kubernetes cluster and there are three pods to accomplish the deployment required with the last image deployed in the container registry. Let’s try:
filipemotta in flask-app on main
❯ kubectl get deployment
NAME READY UP-TO-DATE AVAILABLE AGE
deploy-flask-app 3/3 3 3 6m15s
...
filipemotta in flask-app on main took 2s
❯ kubectl get pods
NAME READY STATUS RESTARTS AGE
deploy-flask-app-548bddb5fd-4qm68 1/1 Running 0 5m51s
deploy-flask-app-548bddb5fd-hd8lr 1/1 Running 0 3m29s
deploy-flask-app-548bddb5fd-l4rj5 1/1 Running 0 3m32s
As we can see, now have one deployment with 3 three pods running. In the GitLab interface, we can see the status of the pipeline we’ve created inside your project -> CICD -> pipelines and related jobs.
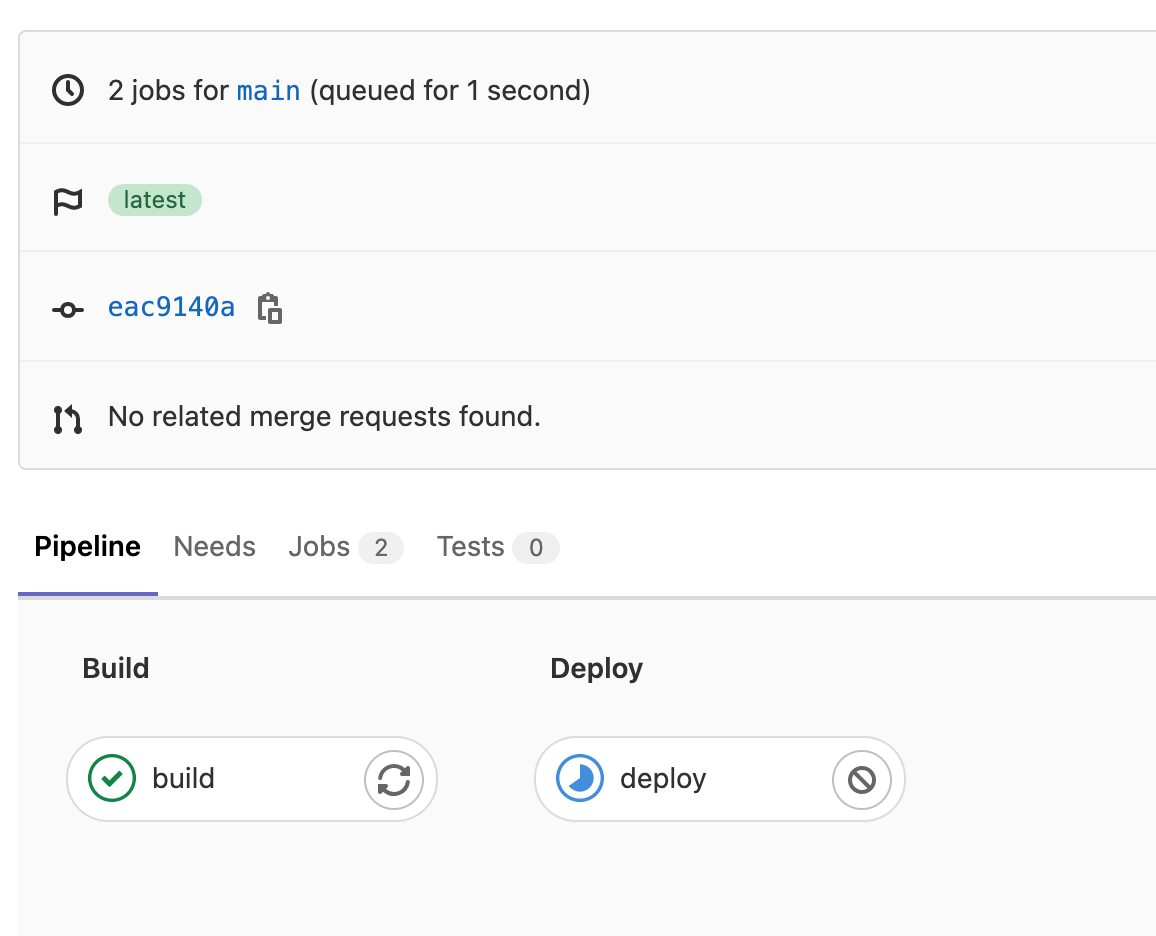
CICD Stages
Note that all the staged steps we’ve configured in the previous section and tag of the image that is building.
Notice that our new image is already in our docker hub registry.
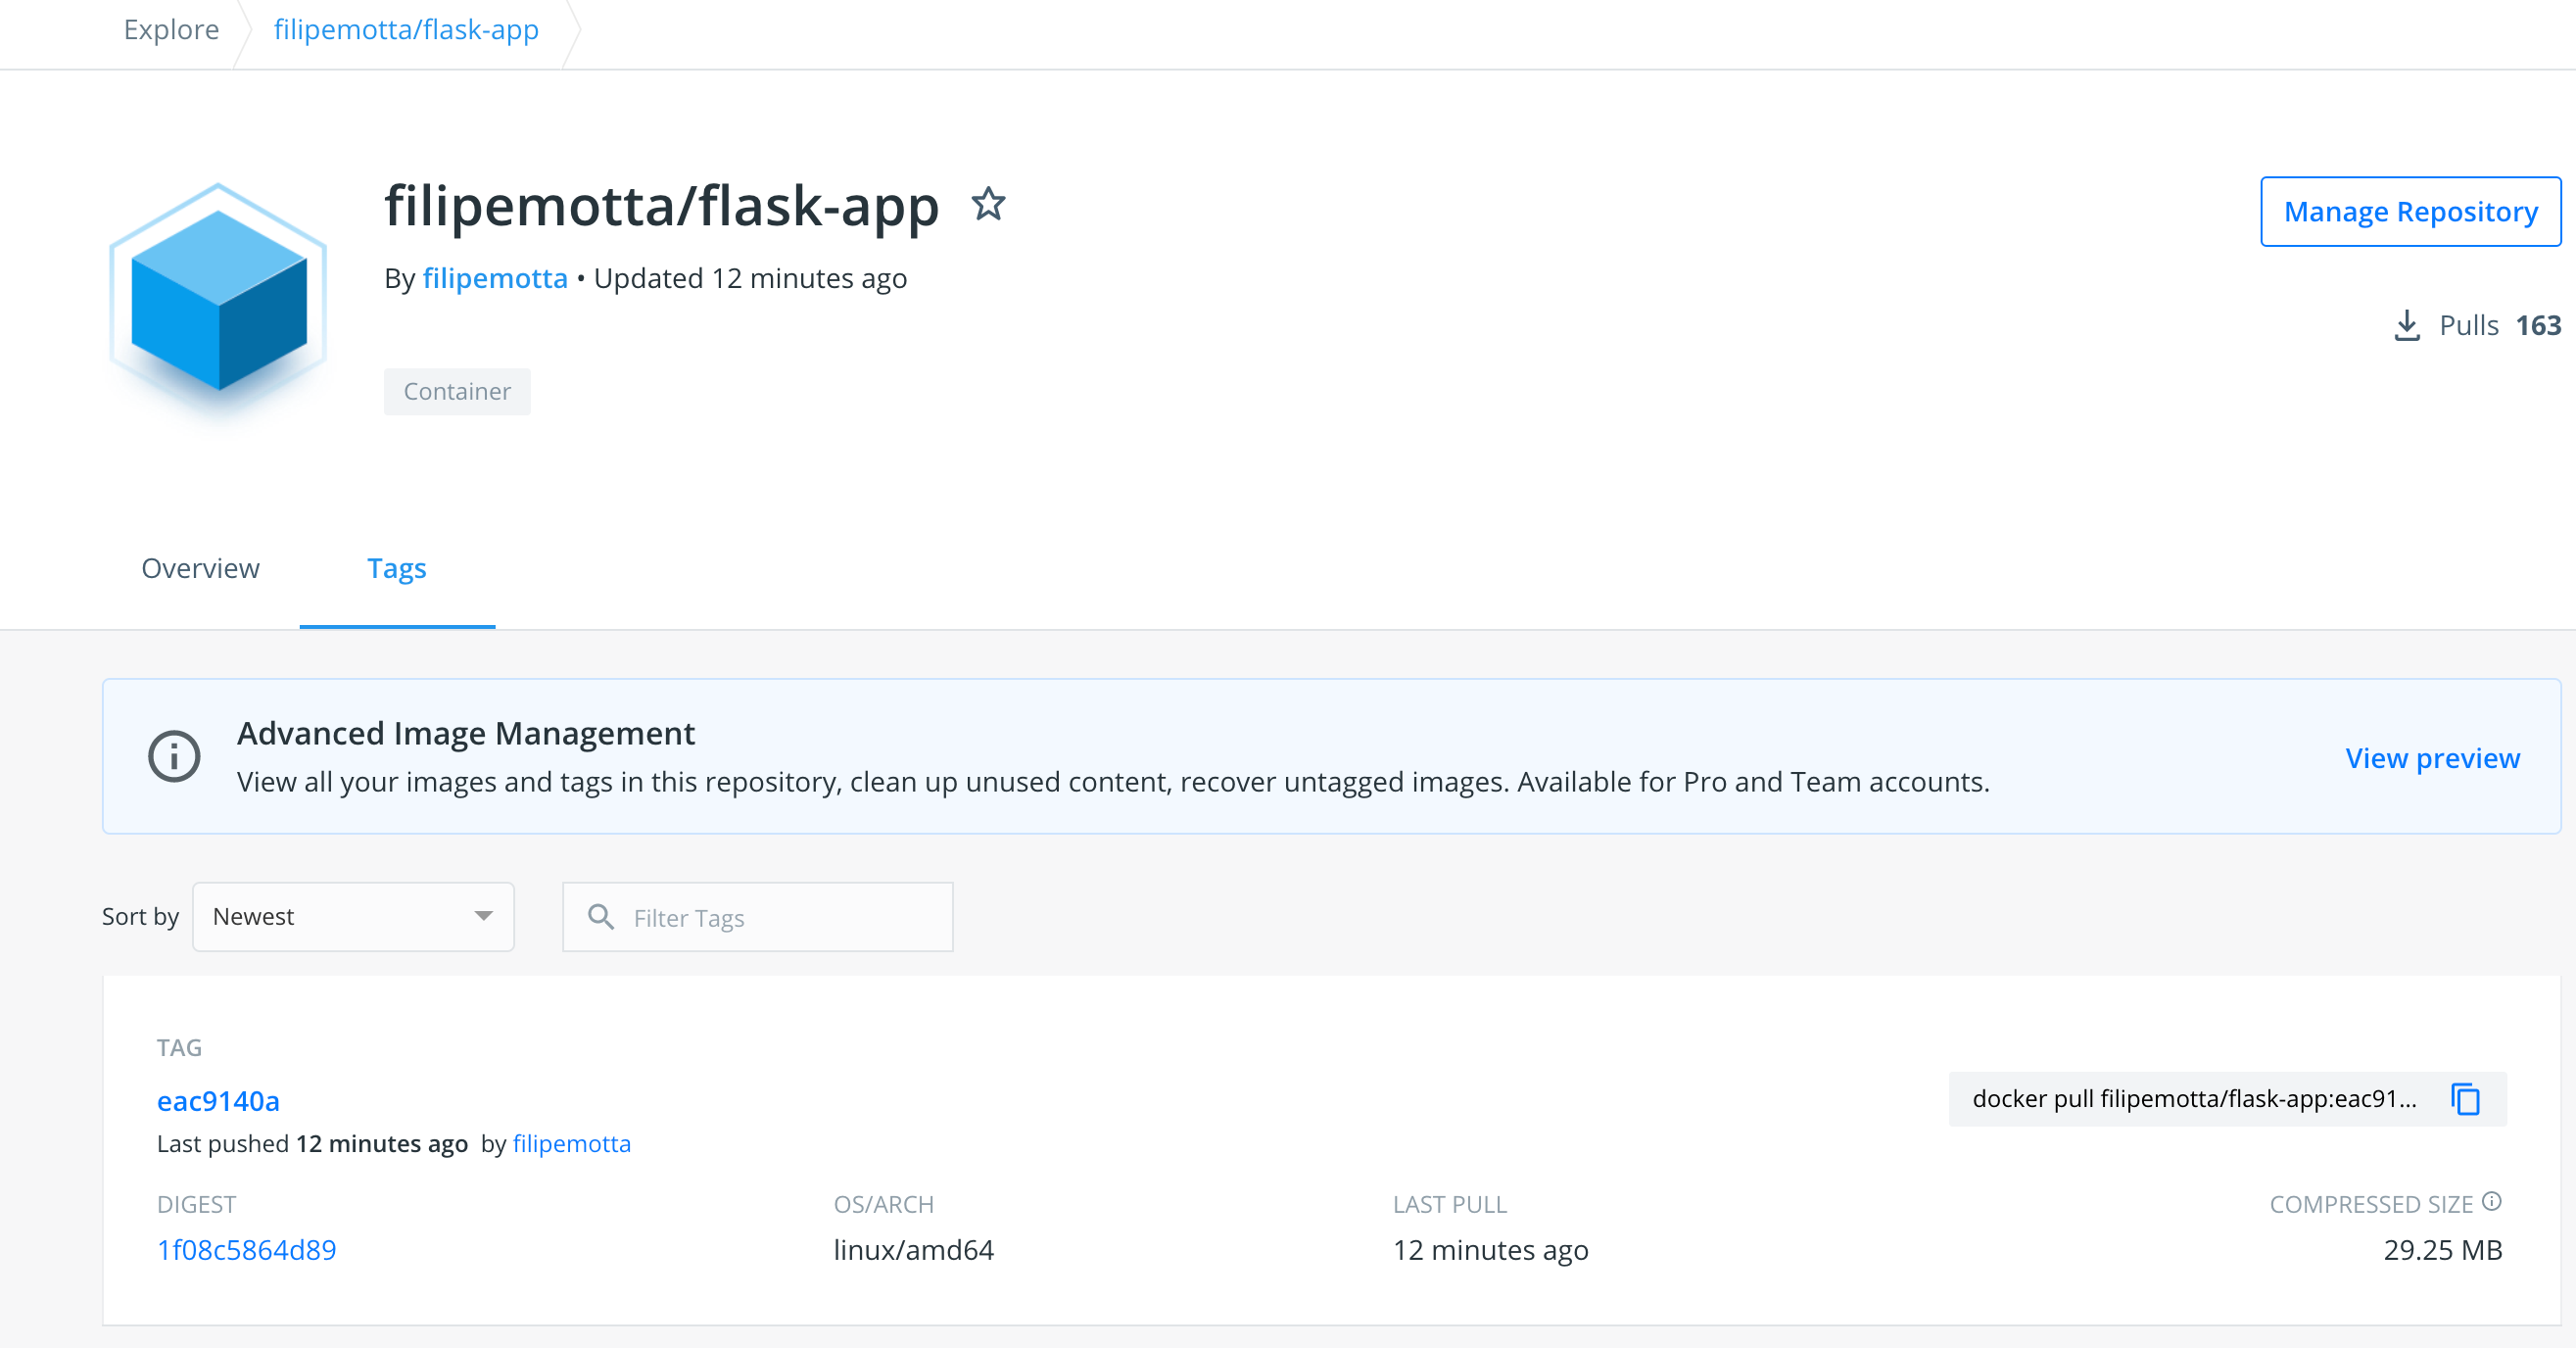
Docker hub new image
CD — Publishing our App using service and ingress
Now it’s time to publish our app using service and ingress. Under the template helm folder, first, let’s create the service config YAML file.
Service yaml
└── templates/
-
└── deployment.yaml
-
└── service.yaml
apiVersion: v1
kind: Service
metadata:
 creationTimestamp: null
 labels:
   app: {{ .Values.deployment.app }}
 name: service-{{ .Chart.Name }}
spec:
 ports:
 - port: {{ .Values.service.ports.port }}
   protocol: TCP
   targetPort: {{ .Values.service.ports.targetPort }}
 selector:
   app: {{ .Values.deployment.app }}
 type: {{ .Values.service.type }}
status:
 loadBalancer: {}
and here is value.yaml section related to a service:
service:
  type: LoadBalancer
  ports:
      port: 80
      targetPort: 5000
So, we are going to deploy a service with LoadBalance type in the 80 port getting an endpoint in the port 5000 (see related labels). In the cloud environments, we can set up the LoadBalancer type and get a valid external IP do access outside the cluster. It is not necessary to have a public IP in our service because we’ll use an ingress to access our service.
❯ kubectl get service service-flask-app
NAME                TYPE           CLUSTER-IP     EXTERNAL-IP                                                               PORT(S)        AGE
service-flask-app   LoadBalancer   10.100.59.49   a7f08460c49d54667876271bfa9e1651-1419988148.us-west-2.elb.amazonaws.com   80:31171/TCP   16m2s
Yes, with loadbalancer type, it is possible to access our app using the EXTERNAL-IP, but for now, we’ll use an ingress to publish our app with certain prerequisites and mapping and hold our URL with ingress address. Therefore, let’s deploy another file in a template helm folder, an ingress config file.
Ingress yaml
Before config our ingress file you have to deploy your ingress controller. In my case, I’ve deployed it nginx-ingress-controller using Network load balancer (NLB) to expose the NGINX Ingress controller behind a Service of Type=LoadBalancer. (See the official documentation).
└── templates/
-
└── deployment.yaml
-
└── service.yaml
-
└── ingress.yaml
apiVersion: networking.k8s.io/v1
kind: Ingress
metadata:
name: ingress-{{ .Chart.Name }}
annotations:
  nginx.ingress.kubernetes.io/rewrite-target: /
spec:
defaultBackend:
  service:
    name: {{ .Values.svcnotfound.name }}
    port:
      number: {{ .Values.svcnotfound.port }}
rules:
- host: {{ .Values.ingress.host }}
  http:
    paths:
    - path: /
      pathType: Prefix
      backend:
        service:
          name: service-{{ .Chart.Name }}
          port:
            number: {{ .Values.service.ports.port }}
and here is value.yaml section related with ingress:
ingress:
  host: gitlab.filipemotta.me
As we can note, there is a rule to catch the gitlab.filipemotta.me redirect to our service specified earlier. To reach Continuous Delivery in time when we push our code to the repository, we’ve to set up our DNS using wildcard registering with your ingress address supplied.
*.filipemotta.me A Simple INGRESS_ADRESS
In this way, all the subdomains from *.filipemotta.me will redirect to our service that will balance to our endpoints (pods) but this is not exactly what we exactly want. We would like all the requests to gitlab.filipemotta.me redirect to our service, but all the others, redirect to another subdomain. Therefore, pay attention in our ingress file, we’ve configured the default backend to point to another service that will be deployed with a default nginx page that we called page not found. So, all the requests to our ingress that do not catch with gitlab.filipemotta.me will redirect to service nginx ( page not found ).
└── templates/
-
└── deployment.yaml
-
└── service.yaml
-
└── ingress.yaml
-
└── pod-service-page-not-found.yaml
apiVersion: v1
kind: Pod
metadata:
creationTimestamp: null
labels:
  run: {{ .Values.podnotfound.labels.run }}
name: {{ .Values.podnotfound.name }}
spec:
containers:
- image: {{ .Values.podnotfound.image }}
  name: {{ .Values.podnotfound.name }}
  resources: {}
dnsPolicy: ClusterFirst
restartPolicy: Always
status: {}
---
apiVersion: v1
kind: Service
metadata:
creationTimestamp: null
labels:
  run: {{ .Values.svcnotfound.labels.run }}
name: {{ .Values.svcnotfound.name }}
spec:
ports:
- port: 80
  protocol: TCP
  targetPort: 80
selector:
  run: {{ .Values.podnotfound.labels.run }}
status:
loadBalancer: {}
It’s Ok, all the configurations were done. Let’s commit and push our code into the repository to trigger the CI/CD process.
See our web app deploy using gitlab CI CD process:
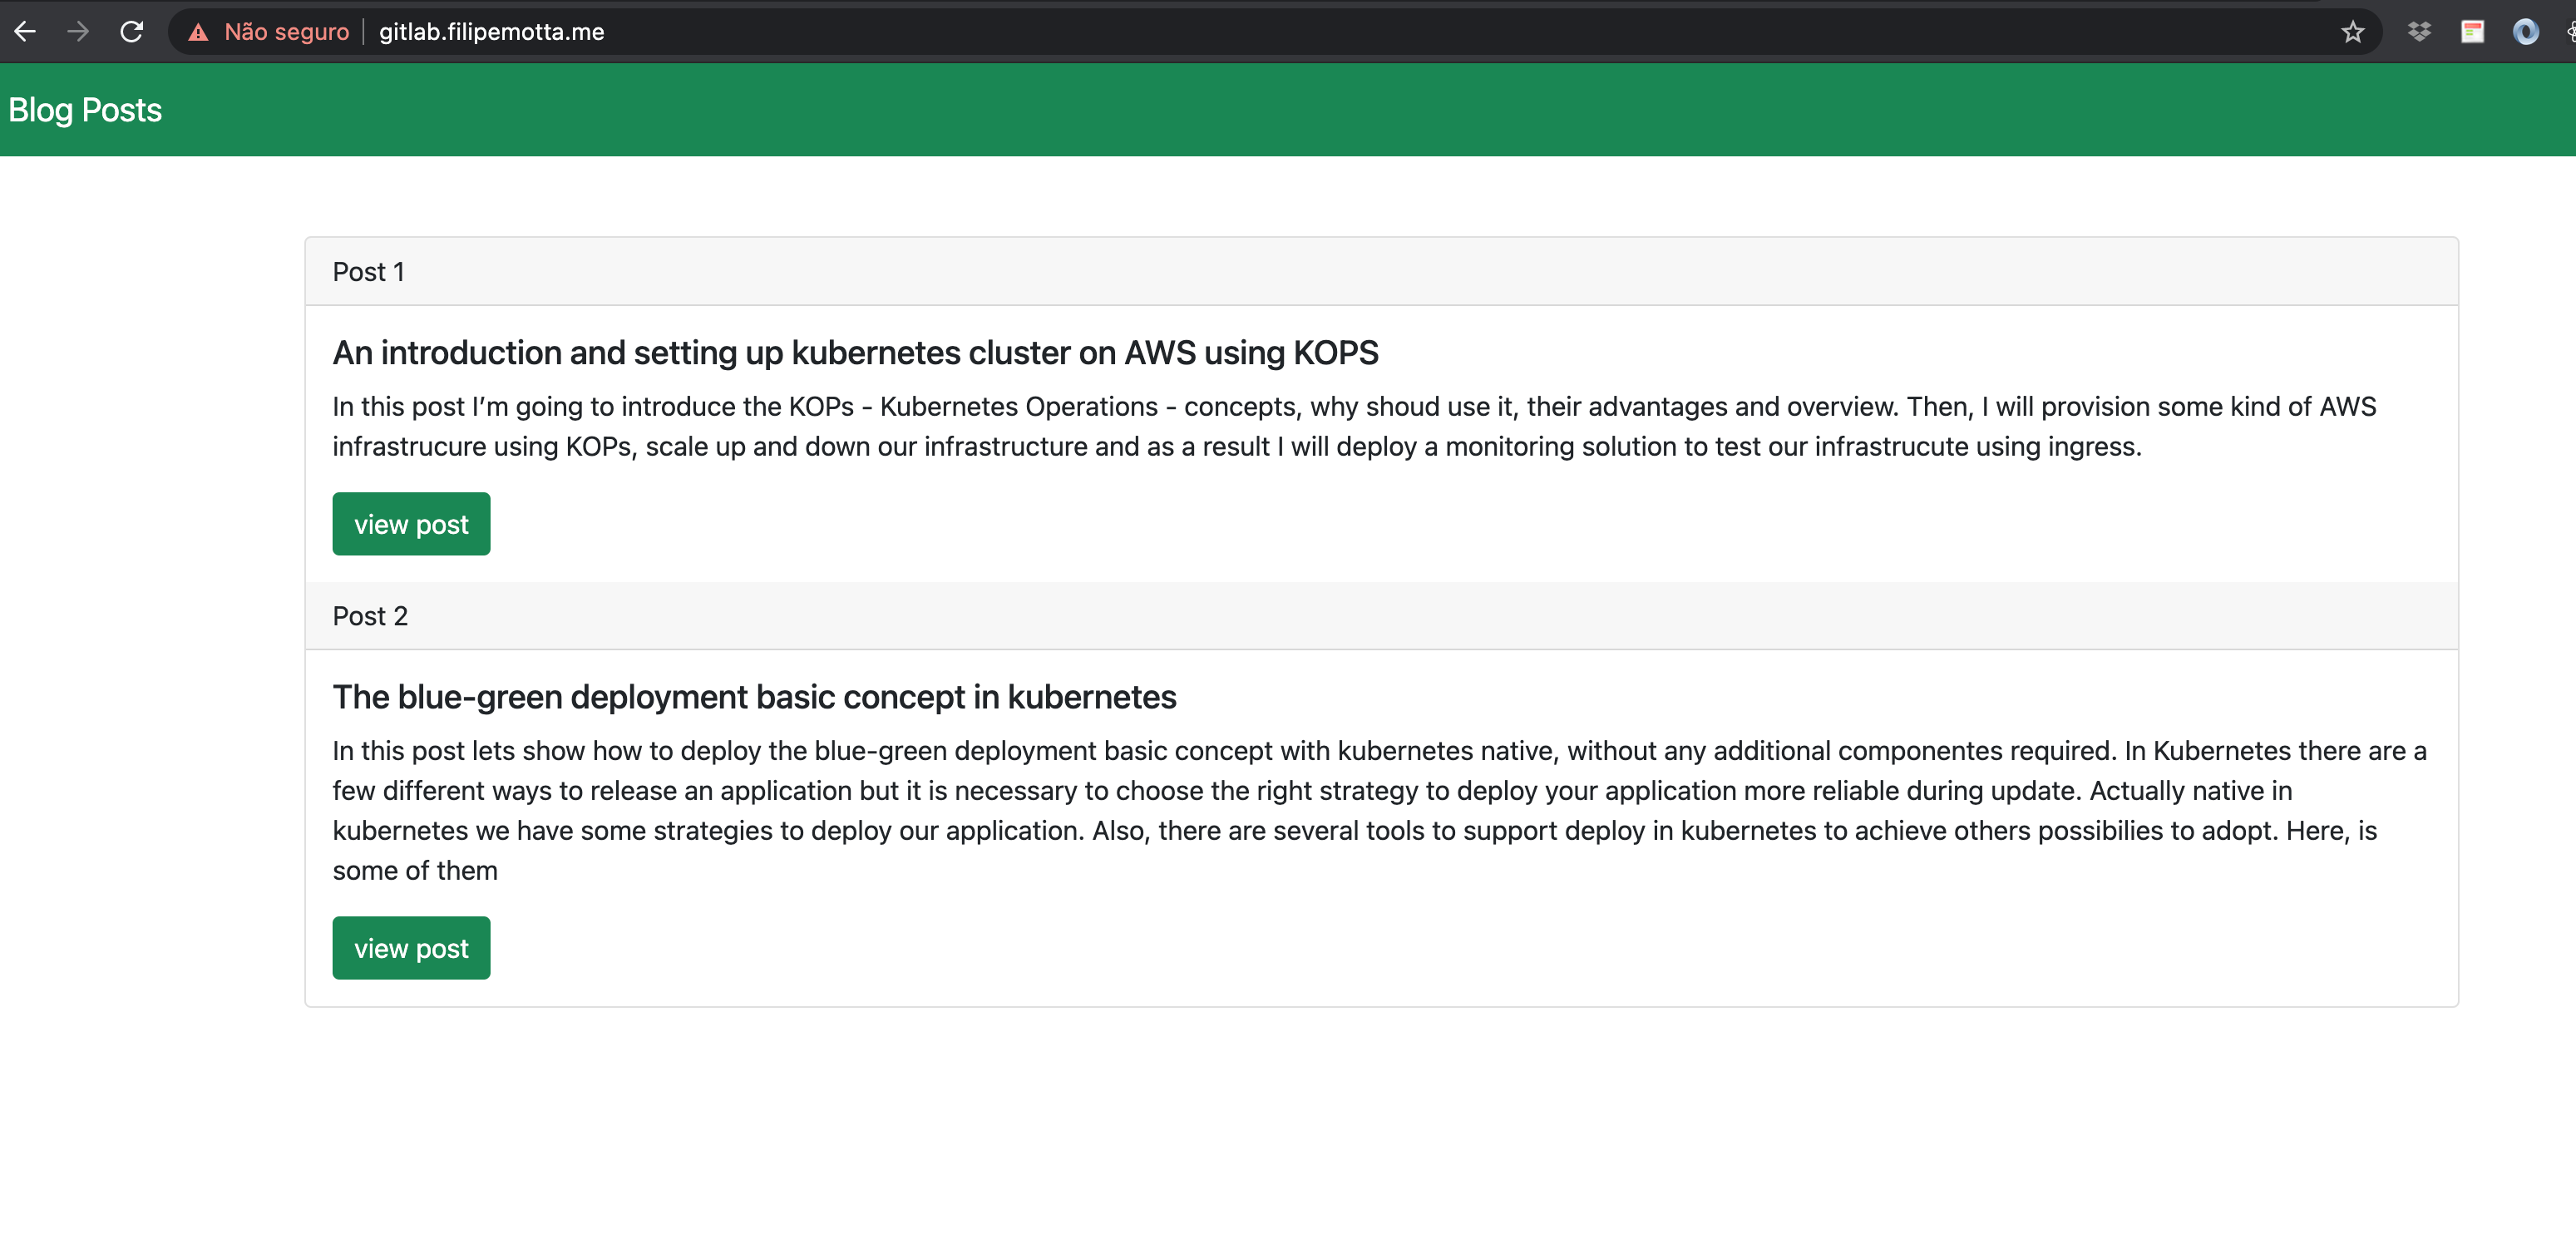
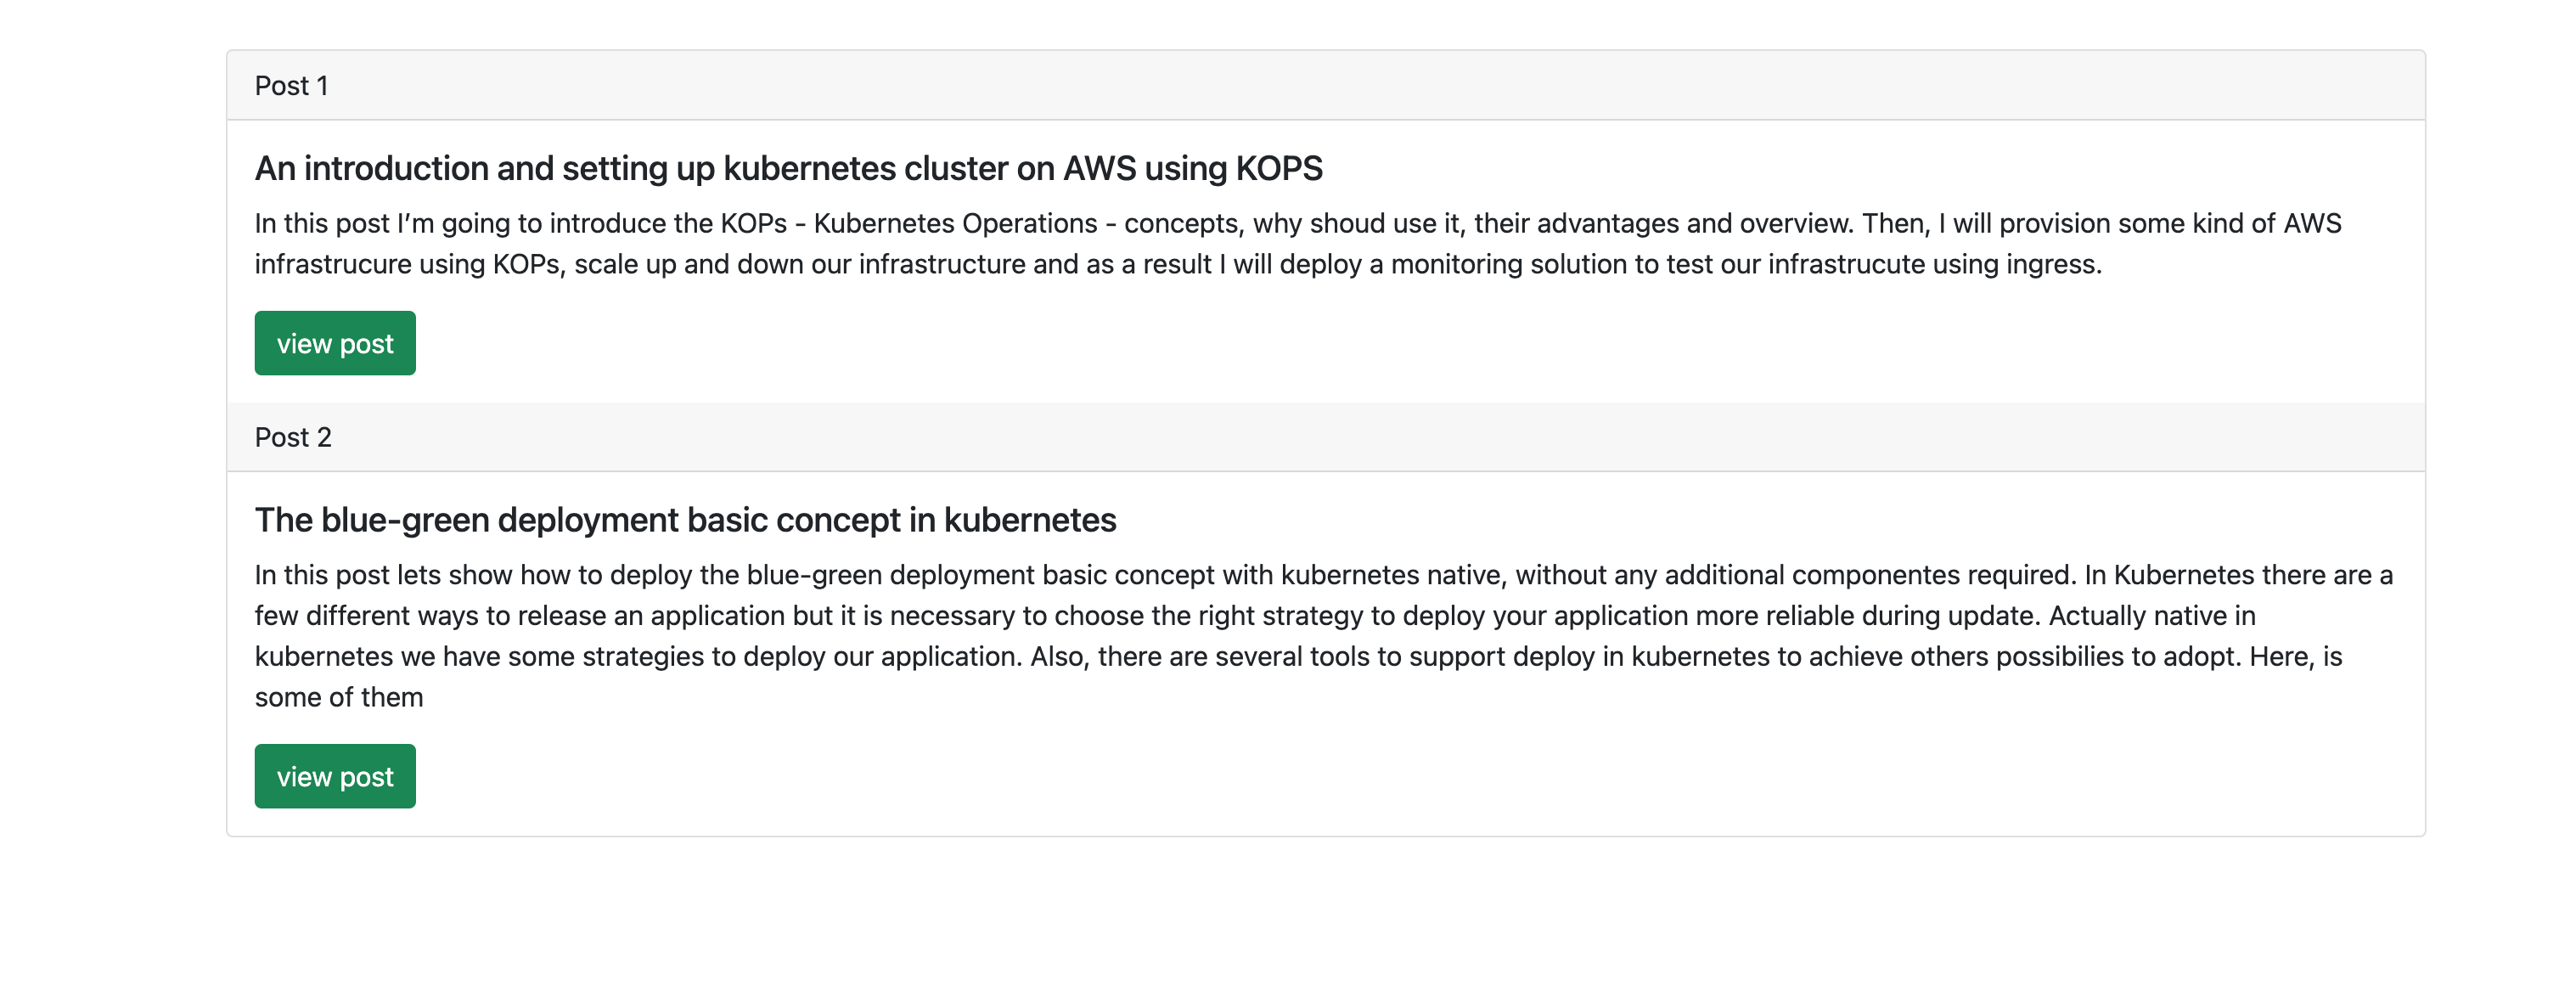
Blog Page
Rollback the deployment
As you can see before, we’ve deployed two posts in the web blog.
Let’s get the image tag to mark it.
❯ kubectl describe deployments.apps deploy-flask-app
Name:                   deploy-flask-app
Namespace:              default
CreationTimestamp:      Fri, 06 Aug 2021 13:58:23 -0300
Labels:                 app=prod
                        app.kubernetes.io/managed-by=Helm
Annotations:            deployment.kubernetes.io/revision: 4
                        meta.helm.sh/release-name: flask-app
                        meta.helm.sh/release-namespace: default
Selector:               app=prod
Replicas:               3 desired | 3 updated | 3 total | 3 available | 0 unavailable
StrategyType:           RollingUpdate
MinReadySeconds:        0
RollingUpdateStrategy:  33% max unavailable, 1 max surge
Pod Template:
  Labels:  app=prod
  Containers:
   c-flask-app:
    Image:        filipemotta/flask-app:eac9140a
Please, pay attention to the revision and tag image in our description deployment. Now we are going to do some changes adding one more post in our blog text and push the code.
See the result:
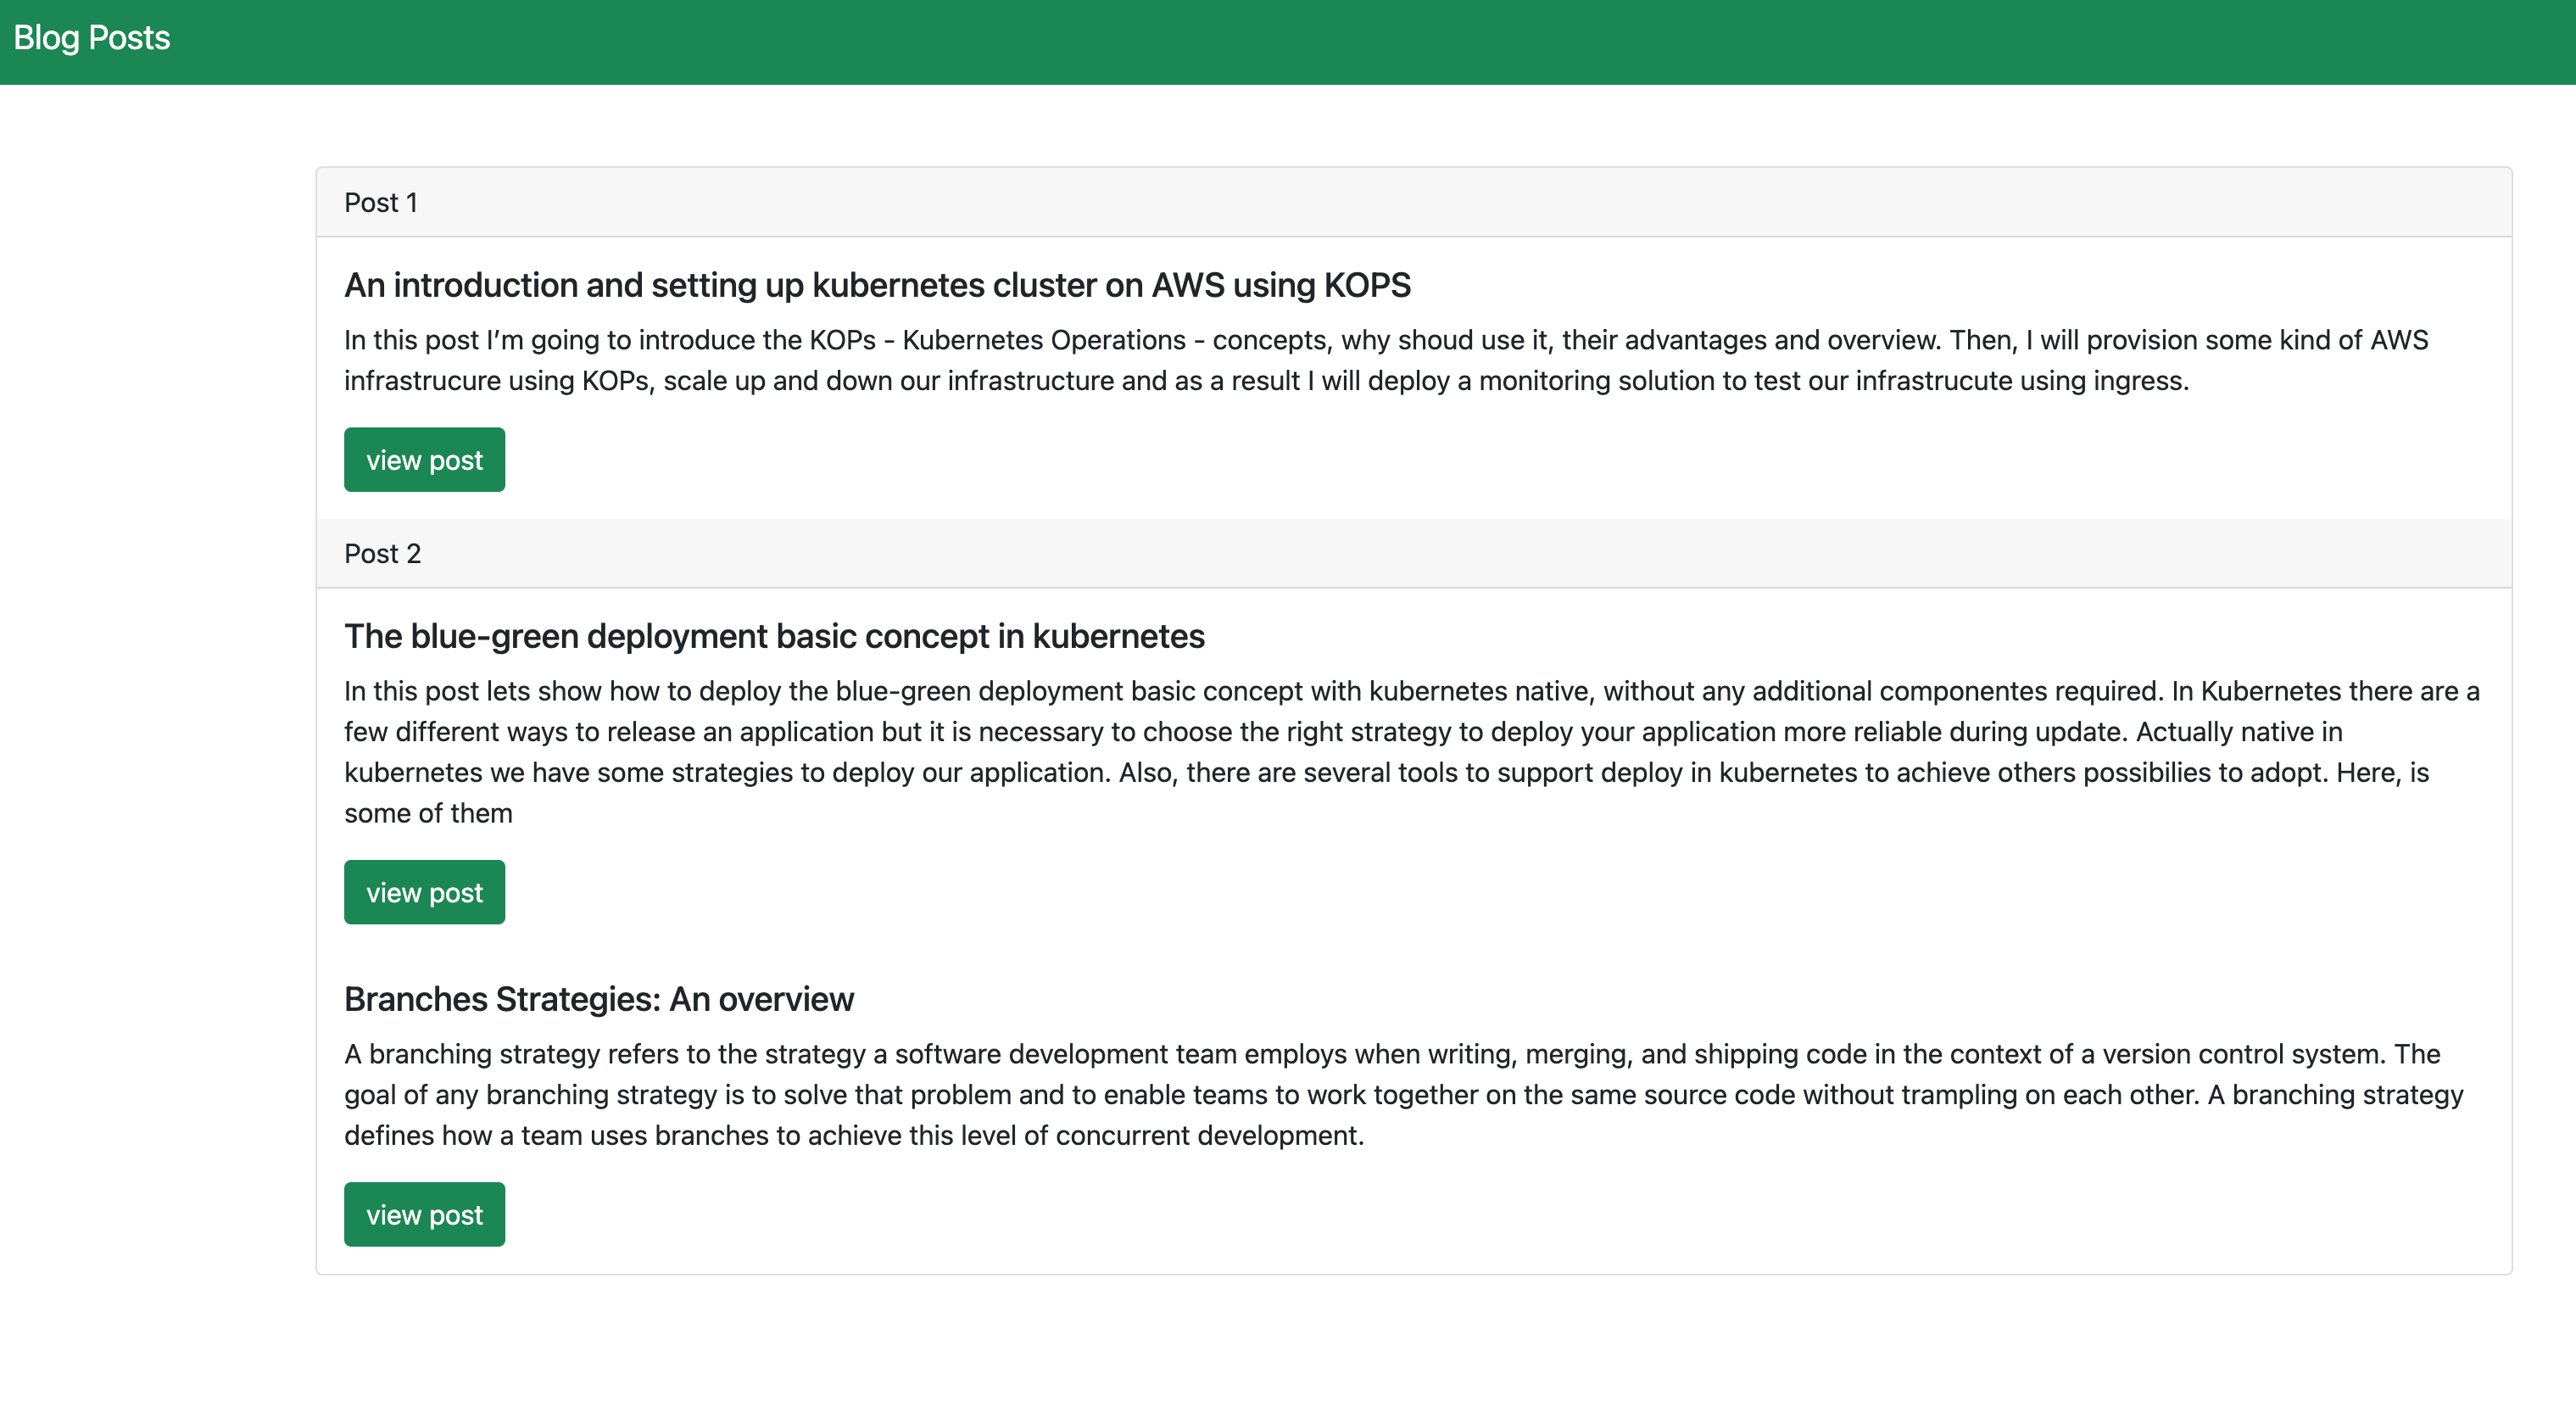
Blog Page Broken
As you can see, there are some issues in our frontend app, but we can deal with them easier. Let’s retrieve our deployment revision:
filipemotta in flask-app on main took 4s
❯ kubectl rollout history deployment
deployment.apps/deploy-flask-app
REVISION CHANGE-CAUSE
2 <none>
3 <none>
4 <none>
5 <none>
6 <none>
So, let’s rollback to revision 4 that worked well before.
filipemotta in flask-app on main
❯ kubectl rollout undo deployment deploy-flask-app --to-revision=4
deployment.apps/deploy-flask-app rolled back
Now we’ve successfully rolled back our app to a stable version. You can describe the deployment and verify the tag image now refers to the previous version.
Blog Rolled Back
Another approach, telling the truth, more reliable and trackable, is to roll back the app via git using merge request revision to a main branch.
Conclusion
Please, as EKS is a managed service you will pay for it. So, if you follow this tutorial, delete the respective resources.
filipemotta in flask-app on main
❯ eksctl delete cluster --name=flask-app
I really hope this post was useful.
Comments
Loading comments…