In this article, I will explain how to set up your own GitLab Runner on AWS Linux EC2 instance with docker.
Steps:
STEP 1: Launch an Amazon Linux EC2 instance and log in to the instance.
STEP 2: Install GIT on the Linux instance:
sudo yum -y install git
STEP 3: Download the Gitlab Runner Binary on the machine:
sudo curl -L --output /usr/bin/gitlab-runner "https://gitlab-runner-downloads.s3.amazonaws.com/latest/binaries/gitlab-runner-linux-amd64"
STEP 4: Provide executable permission to GitLab runner package:
sudo chmod +x /usr/bin/gitlab-runner
STEP 5: Create a GitLab CI user:
sudo useradd --comment 'GitLab Runner' --create-home gitlab-runner --shell /bin/bash
STEP 6: Install the runner:
sudo gitlab-runner install --user=gitlab-runner --working-directory=/home/gitlab-runner
STEP 7: Register a GitLab runner with GitLab.
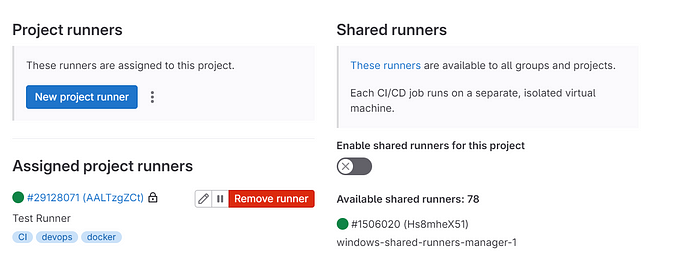
To register the runner with GitLab you will need a registration token. To obtain a registration token, navigate to:
GitLab-> Project Settings-> CI/CD-> Expand Runners.
Copy the token code.
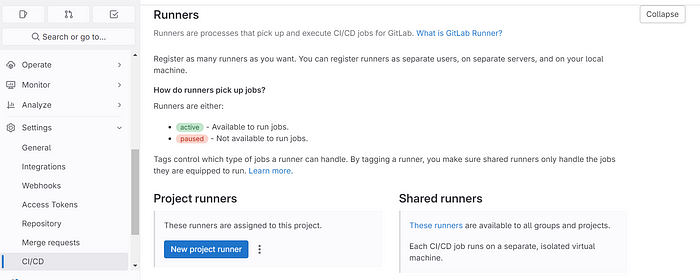
Make sure to disable the shared runner in your project setting.
sudo gitlab-runner register
It will prompt for a few details:
Enter the GitLab instance URL (for example, https://gitlab.com/):
https://gitlab.com/
Enter the registration token:
copied token code from project settings.
Enter a description for the runner:
Test Runner
Enter tags for the runner (comma-separated):
CI,devops,docker
Enter optional maintenance note for the runner:

Enter an executor
shell
NOTES: Tags are important as tags allow you to assign runners to specific jobs and ensure that the job runs on the appropriate runner based on the defined tag.
Executors used to run our builds in different environments. It can change depending on your use case.
STEP 8: Start the GitLab Runner service
sudo gitlab-runner start
Now you can verify runner in the GitLab console under the GitLab available runners section:
STEP 9: To set up the GitLab runner user as a sudo user:
This step allows you to elevate the permissions of the newly created user on the runner machine so that it won’t get any permission denied error while running the GitLab CI pipeline. The first way to do this is to add the user to the wheel group.
sudo usermod -aG wheel gitlab-runner
Now go to the sudoers file and add the below line:
gitlab-runner ALL=(ALL) NOPASSWD:ALL
sudo vi /etc/sudoers
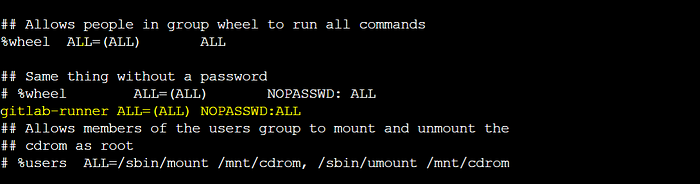
This will allow GitLab Runner to use the sudo commands without a password prompt.
STEP 10: Update the installer or any pending updates
sudo yum -y update
STEP 11: Install Docker on the Linux instance:
sudo yum -y install docker
STEP 12: Start the docker service:
sudo service docker start
You are now all set to run any pipeline by using the tags provided while registering the runner. It will automatically pick up the runner and execute the pipeline smoothly.
Thanks for Reading!
Comments
Loading comments…