 -
-
Use Case
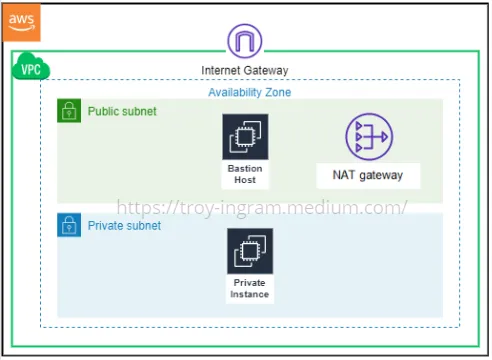
You are a cloud engineer tasked with setting up the security and network architecture for your organization’s environment. For extra security you have a server that needs to be in a private subnet and should only be accessible through a Bastion Host. Your private server will also need to have the ability to update software packages without being publicly accessible to the internet.
Create VPC
A Virtual Private Cloud (VPC) is a virtual network in the cloud that you define, where you can launch AWS resources. In a VPC you have the ability to customize the network configuration and add multiple layers of security.
-
Navigate to VPC.
-
Click Your VPC.
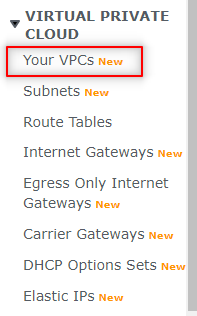
- Click Create VPC.

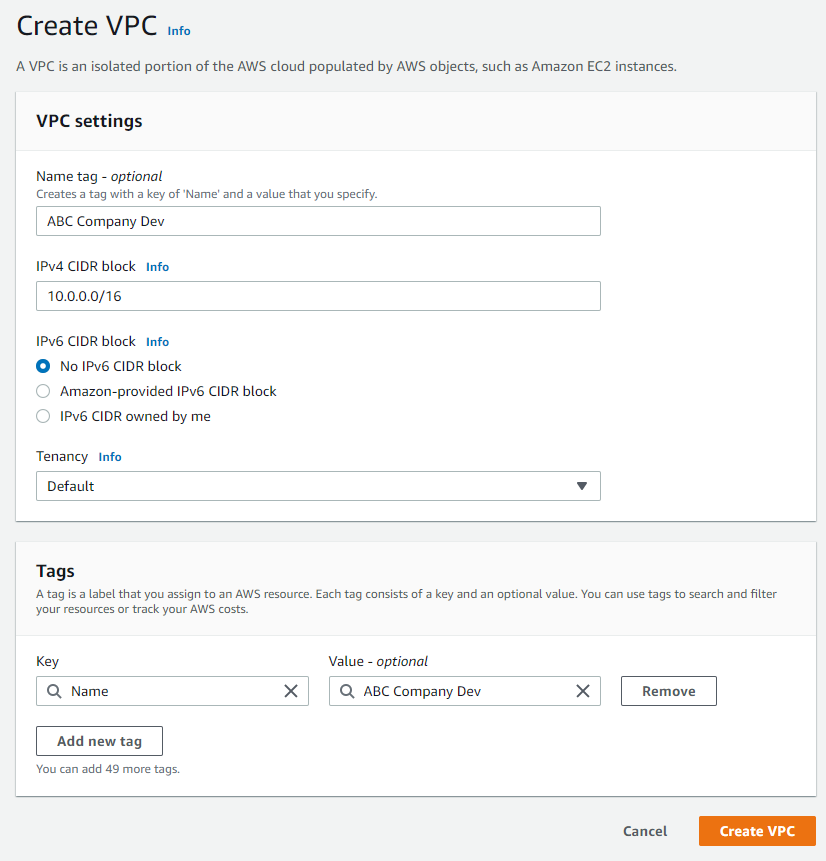
- Enter VPC settings and click Create VPC
-
Name tag: ABC Company Dev
-
IPv4 CIDR Block: 10.0.0.0/16
-
IPv6 CIDR block: No IPv6 CIDR block
Create Subnets
- Click Subnets.
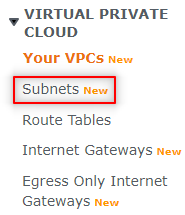
- Click Create Subnet.

-
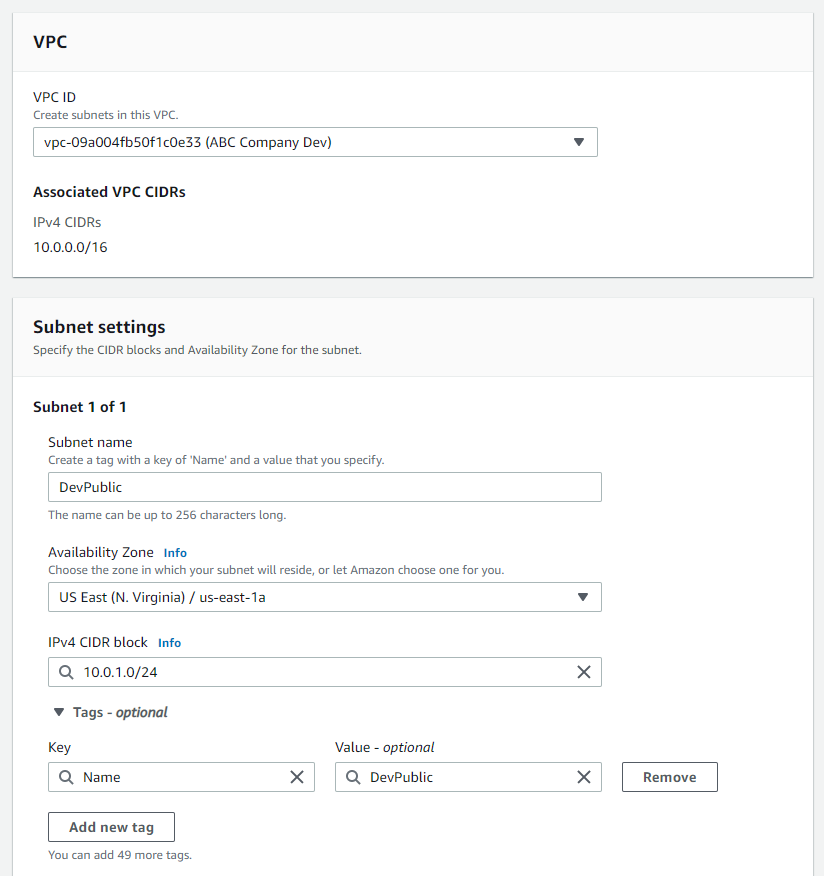
Select the newly created vpc from the drop down.
-
Enter the Subnet settings for our public subnet.
-
Subnet name: DevPublic
-
Availability Zone: us-east-1a
-
IPv4 CIDR block: 10.0.1.0/24
- Click Add new subnet.

- Enter the Subnet settings for our private subnet.
-
Subnet name: DevPrivate
-
Availability Zone: us-east-1a
-
IPv4 CIDR block: 10.0.2.0/24
- Click Create subnet.

- You should now see two new available subnets.

Making Our Public Subnet Truly Public
Just because we name our subnet “Public” doesn’t make it so. Currently our VPC has no way to connect, so we need to attach an Internet Gateway. That alone won’t do the trick. Next we will need to create a route table and create a route to our Internet Gateway.
Internet Gateway
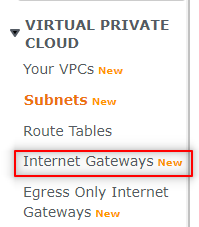
- Click Internet Gateways.
-
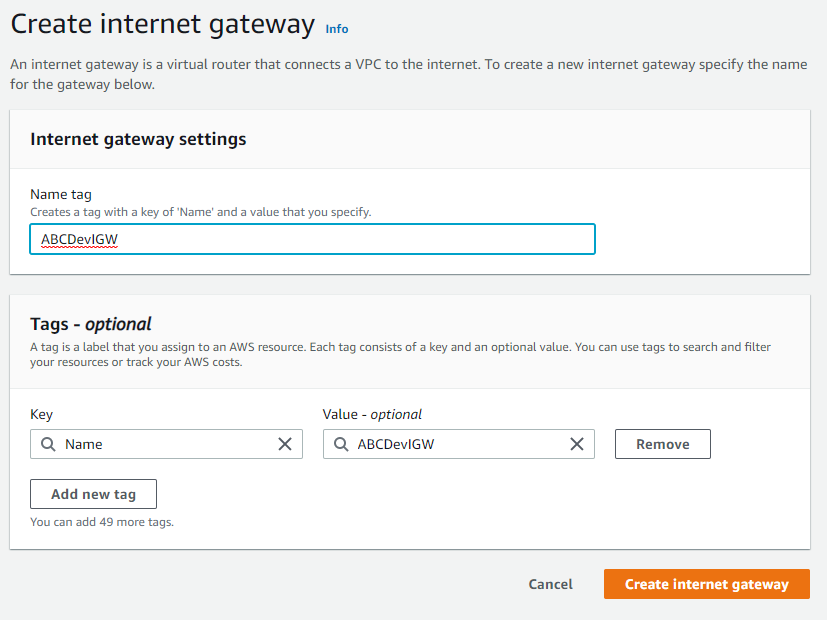
Click Create Internet Gateway.
-
Name your Internet Gateway and click Create internet gateway.
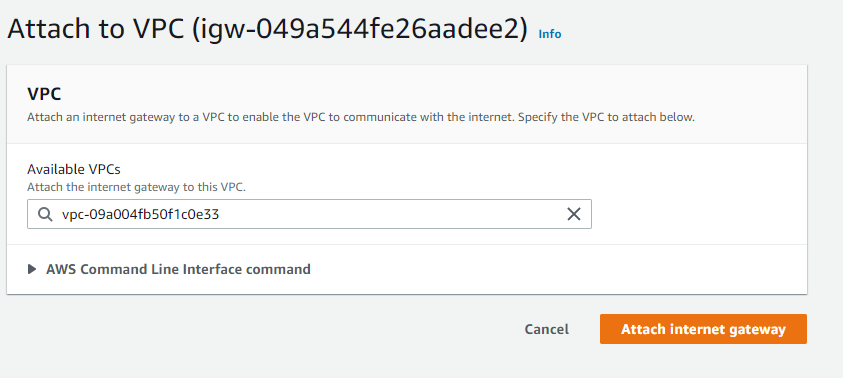
- Click Attach to VPC from the Actions drop down.

- Select the VPC from **Available VPCs **and click Attach Internet gateway.
Configure Route Table
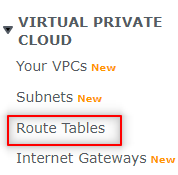
- Click Route Tables.
-
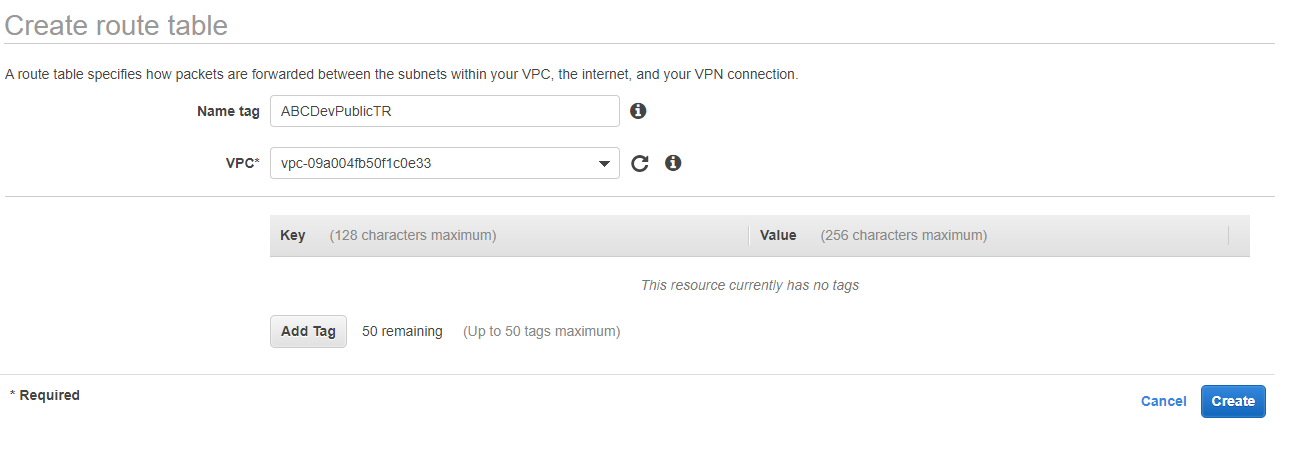
Click Create route table.
-
Enter Name tag: ABCDevPublicTR and VPC: ABC Company Dev.
- Select the newly created ABCDevPublicTR route table and select the Routes tab.
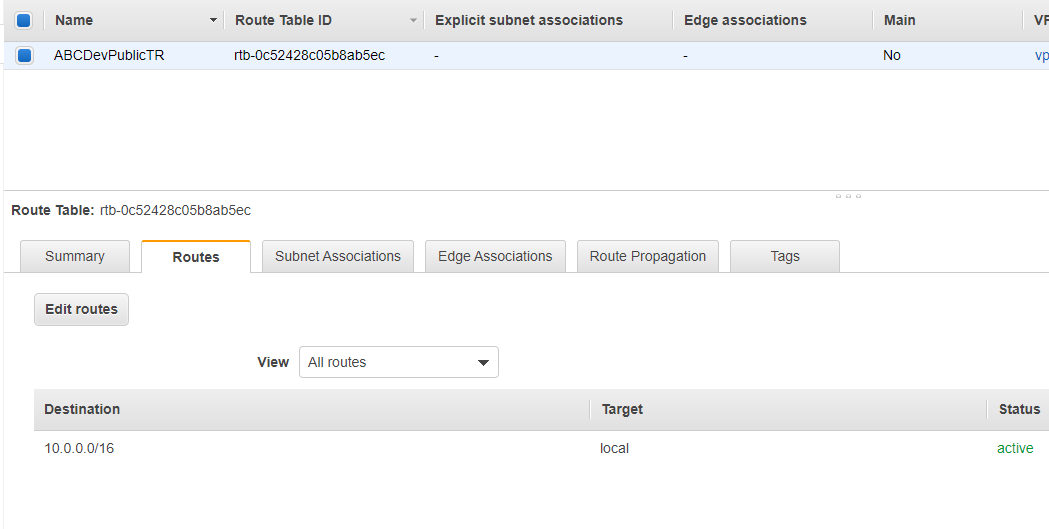
- Click Add route. For Destination type 0.0.0.0/0 and fo rTarget select the ABCDevIGW Internet Gateway we created. Then click Save routes.

-
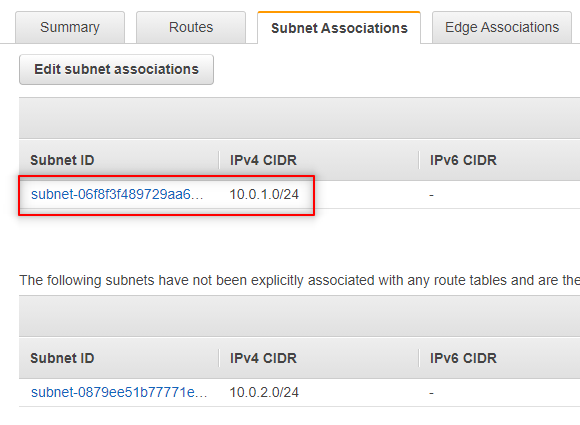
Select the Subnet Associations tab. Currently our two subnets are both associated with the main route table.
-
Click Edit subnet associations.
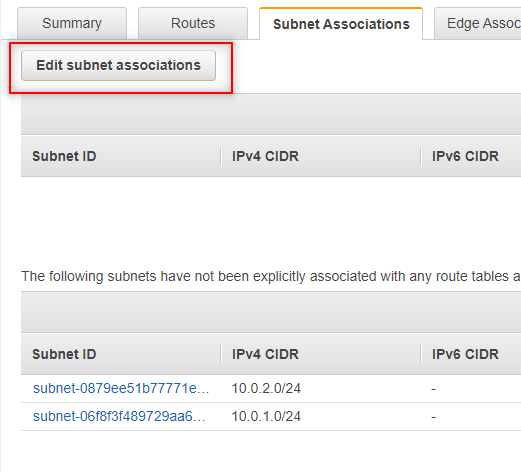
- Select the DevPublic subnet and click Save. This is a great example of why it’s important to use Name tags. If I didn’t have my Name tag set up then I’d have to go off of the IPv4 sider or Subnet ID to determine which was my public subnet.

Our public subnet is now associated with our public route table.
Modify Auto-Assign IP Settings
-
Navigate back to Subnets using the left navigation.
-
Select our public subnet.
-
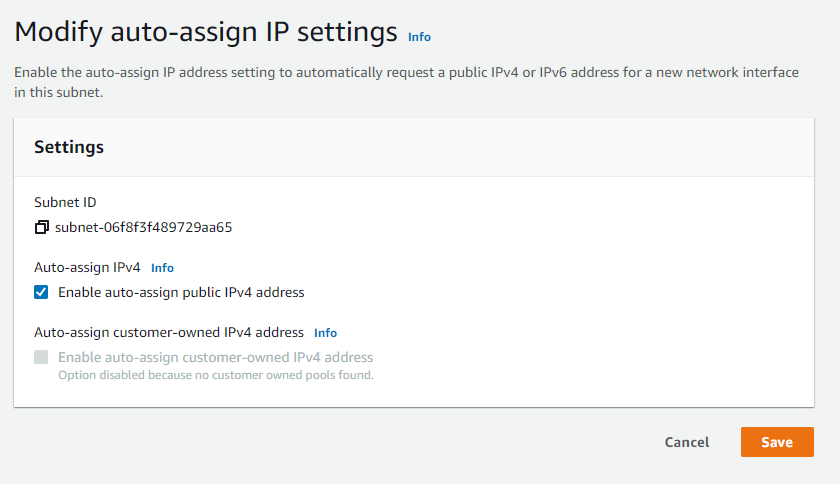
Click Actions and click Modify auto-assign IP settings.

- Select Enable auto-assign public IPv4 address. Click Save.
Bastion Host
A Bastion Host is an instance that is in a public subnet with hardened security, who’s primary purpose is connecting to instances in a private subnet.
- Navigate to EC2 > Instances and click Launch instances.

- For Choose AMI select Amazon Linux 2 AMI (HVM), SSD Volume Type.

- For Instance Type select t2.micro. Click Next.

- On the Configurate Instance settings change the Network from the default to the ABC Company Dev VPC.
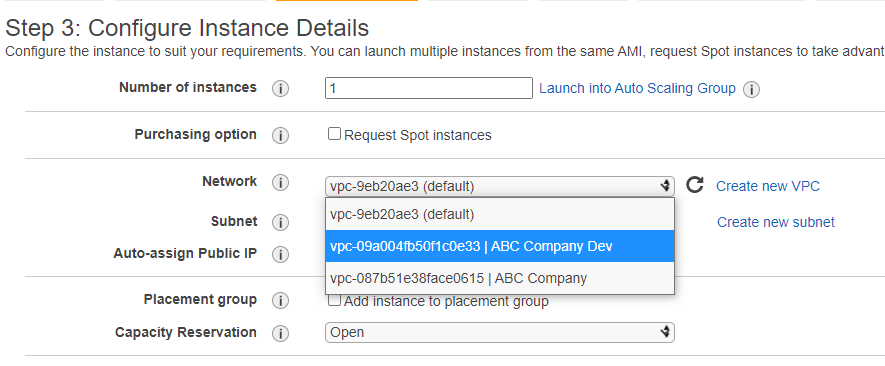
- For Subnet select the DevPublic Subnet. Check to make sure the Auto-assign Public IP displays Use subnet setting (Enable). If it doesn’t then you most likely forgot to modify the auto-assign ip settings. You can select Auto-assign Public IP and manually enable.

-
Click Next. Keep Storage defaults and click Next.
-
For Add Tags click Add another tag. Key: Name and Value: BastionHost. Click Next.
-
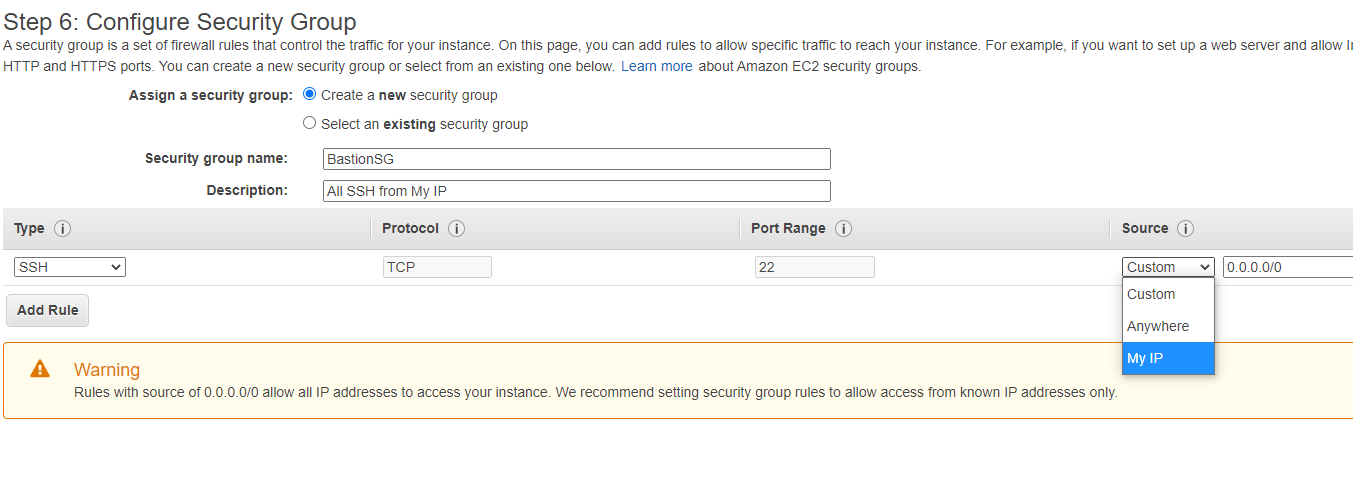
To Configure Security Group select Create a new security group and name the Security group.
-
Change Source to My IP for added security so that only your IP can SSH into your Bastion Host. Then click Review and Launch.
-
Click Launch.
-
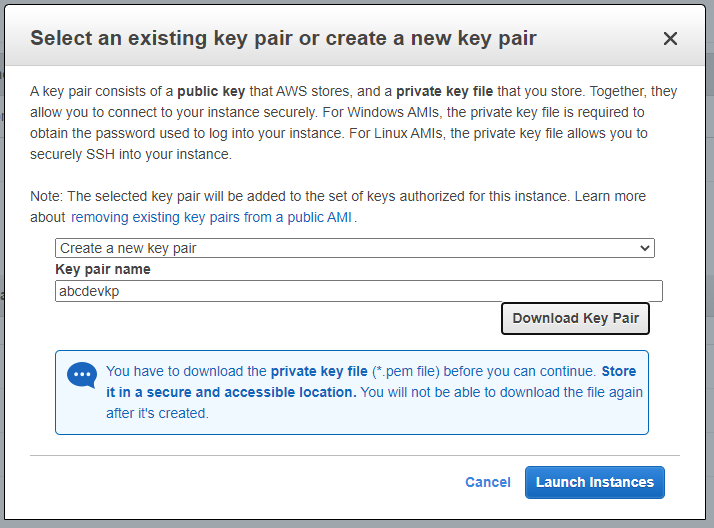
Create a new key pair and click Download Key Pair. Then click Launch Instances.
Private Instance
-
Click Launch instances.
-
Select Amazon Linux 2 AMI (HVM), SSD Volume Type
-
Select t2.micro. Click Next.
-
On Configure Instance Details settings for Network select ABC Company Dev VPC and for Subnet select DevPrivate. Click Next.
-
Keep the default storage. Click Next.
-
Add Tag: Key: Name, Value: PrivateServer. Click Next.
-
For **Configure Security Group **create a new security group.
-
Keep the existing SSH Rule, but modify the source to be our BastionHost Security Group. Select Custom and in the text box type sg, this will display a list of created security groups. Select BastionSG.
Note: I should have probably done a better job naming the security group or I should have referenced the name before selecting. I accidently selected the BastionHostSG and received an error when trying to launch. The naming was too similar to BastionSG. In the future I’ll need to keep this in mind.

-
Click Review and Launch. Click Launch.
-
Select the existing key pair created for the Bastion Host. Select the acknowledgement and click Launch instances.
Now while in the EC2 Dashboard, select the BastionHost and review the details. Notice that there should be a Public IPv4 address.
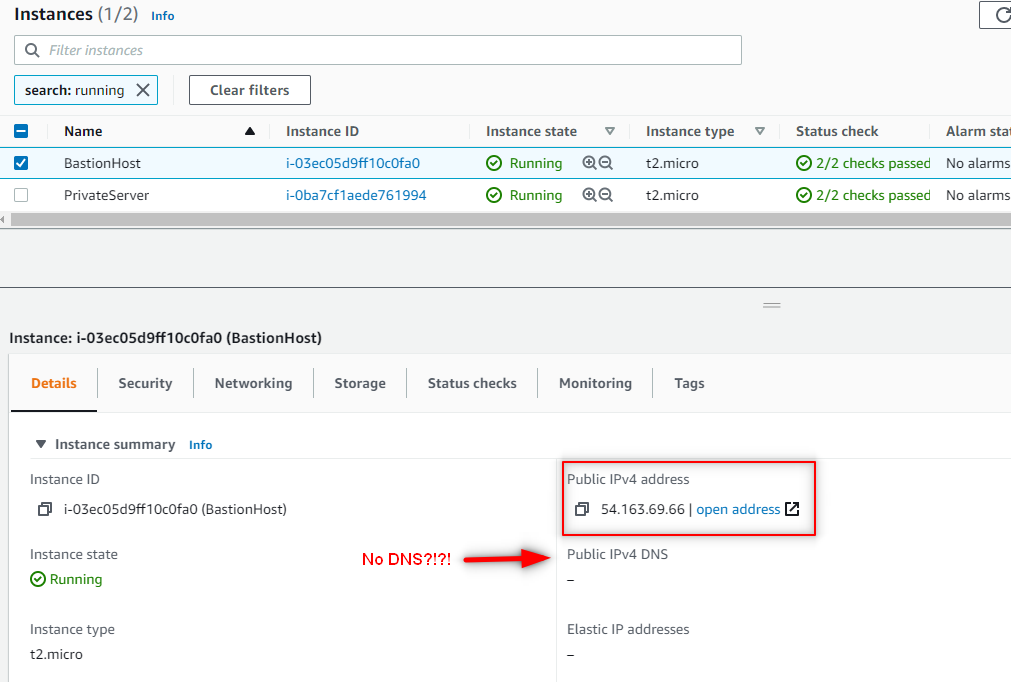
So I have my Public IPv4 address, but I noticed that I’m missing the Public IPv4 DNS. Although it’s not necessarily needed for this project, I’d still like to have it available. Let’s go back and enable auto assign.
-
Navigate to VPC > Your VPCs.
-
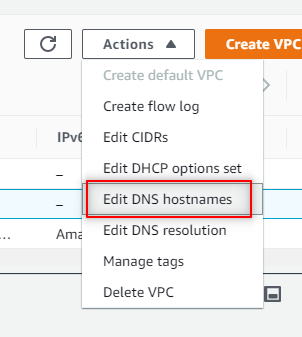
Select ABC Company Dev. Click Actions and click Edit DNS hostnames.
-
Select Enable and click Save changes.
-
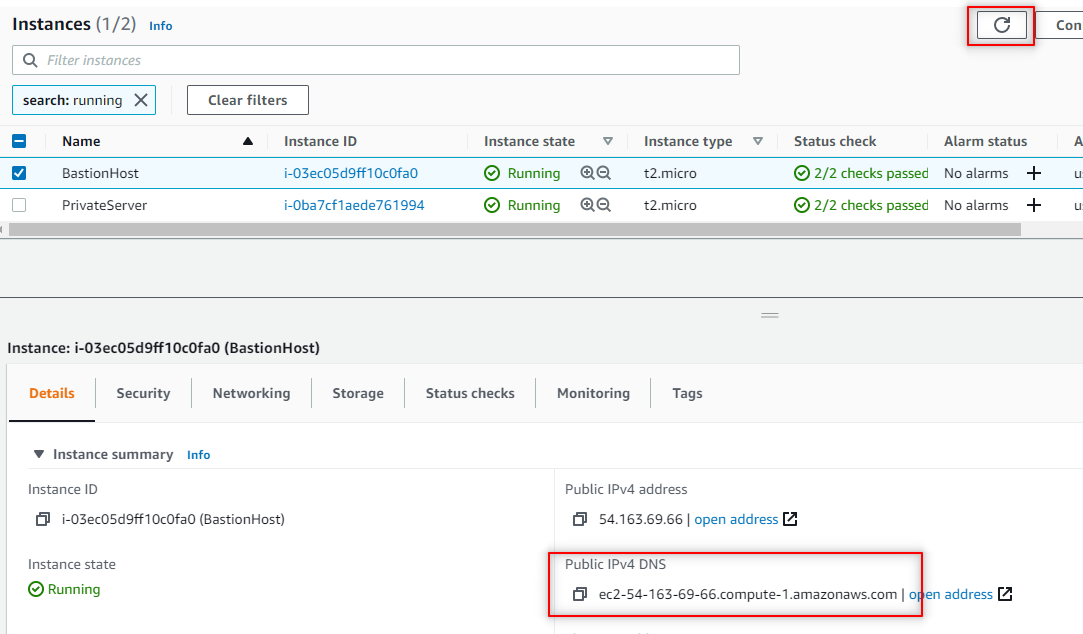
Navigate back to EC2 > Instances. Click the refresh button and the Public IPv4 should populate.
Using our Bastion Host to SSH into our Private Server
I’ll be using PuTTY, PuTTYgen and Pageant to SSH into my Bastion Host and then to SSH into my Private Instance. If you are not using a Windows machine please see Securely Connect to Linux Instances Running in a Private VPC.
First I’ll need to use PuttyGen to save my abcdevkp.pem file that I downloaded earlier to a .ppk file.
-
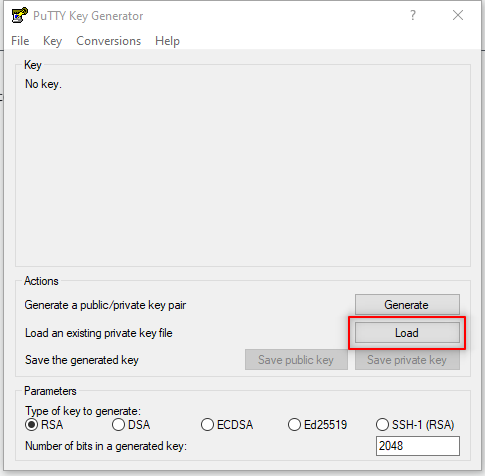
Open PuttyGen.
-
Click Load.
-
Select your abcdevkp key that was downloaded when we launched our instances. If you aren’t seeing it in your downloads folder make sure All Files are displayed and not just .ppk files.
-
Click Save private key. Click Yes to acknowledge. I use the same name as it will be saved as a .ppk file so won’t overwrite the .pem file.
Next to keep us from having to provide access keys manually when SSHing into our Private Instance from our Bastion Host I’ll be using Pageant for agent forwarding.
-
Launch Pageant.
-
Pageant doesn’t open in a pop up so you’ll need to find it on your task bar.
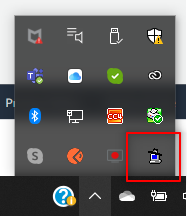
- Double click to open and click Add Key.
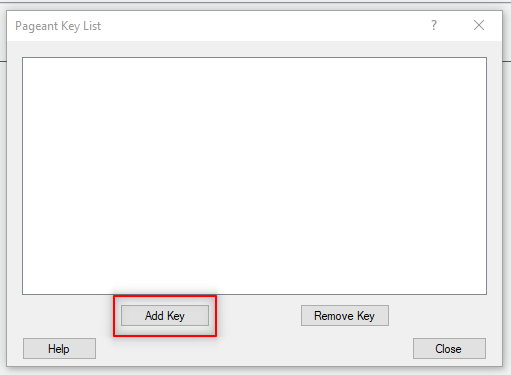
- Select your .ppk key and close.
Now we can SSH into our Bastion Host.
-
Launch PuTTY.
-
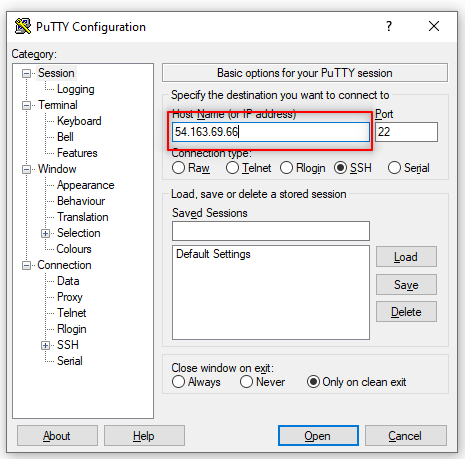
Enter the Public IPv4 address from the BastionHost.
-
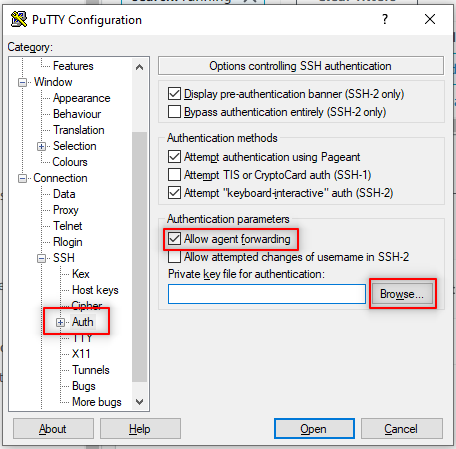
Select Auth. Connection > SSH > Auth
-
Select Allow agent forwarding.
-
Click Browse and select the .ppk.
-
Click Open.
-
This will open up your terminal. For Login as type ec2-user.
We have successfully SSHed into our Bastion Host. Now let’s SSH into our Private Instance.
-
Run the following (substituting your own private ip address):
ssh ec2-user@<private ip address> -
Type yes
-
SUCCESS! You should now see that the CLI has updated to your Private Instance ip.
-
Try and run the following commands to verify everything is working.
echo "Test 1 was a success" > file.txt cat file.txt -
Now that we have verified that we are able to type commands successfully to our Private Instance from our Bastion Host let’s run a yum update.
sudo su
yum update
After some time this command should fail. This is because although we can interact with our Private Instance through our Bastion Host, it is still cut off from the internet. We don’t want to just open it up to the internet now because that would defeat all the work we just put in to secure our network. Instead we will add a NAT Gateway to our public subnet and update our routing table to allow our private instance to connect to our Internet Gateway securely.
NAT Gateway
-
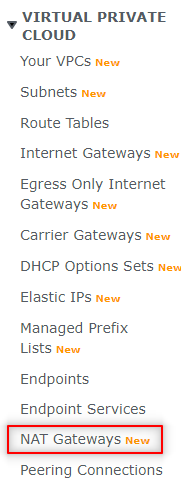
Navigate to VPC.
-
Click NAT Gateways.
-
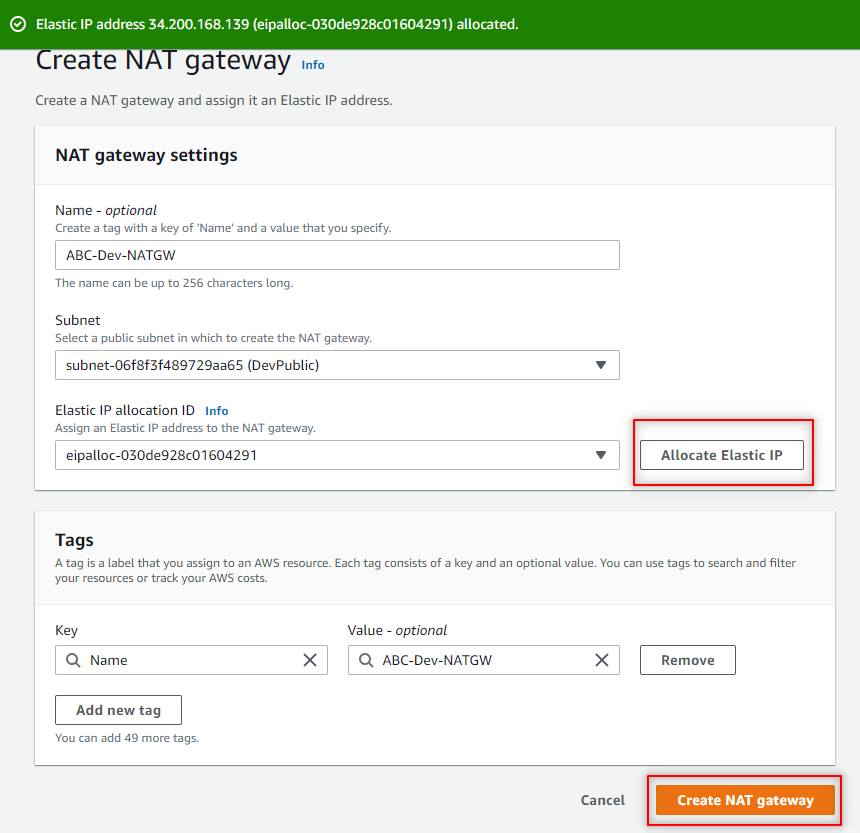
Click Create NAT gateway.
-
Name your NAT gateway. I chose ABC-Dev-NATGW.
-
For Subnet select the DevPublic subnet.
-
Click Allocate Elastic IP. Click Create NAT gateway.
Update Route Table
-
Navigate to Route Tables.
-
Click Create route table. Right now our private subnet is associated with our default route table. It’s a best practice to create a separate route table if there is any routes that are not for local traffic. So we are going to create a new private route table.
-
Add a Name tag and select the ABC Company Dev VPC.
-
Click Create.
-
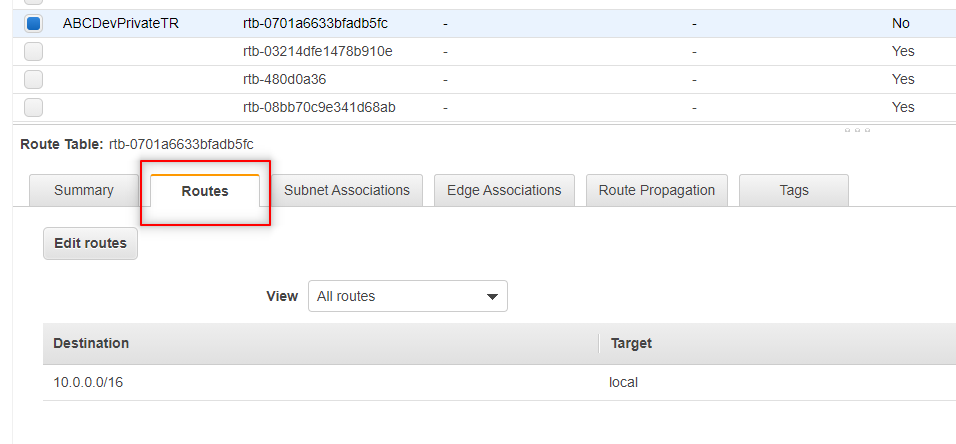
Select the private route table and click the Routes tab.
-
Click Edit routes. Then click Add route.
-
For Destination: 0.0.0.0/0 and for Target select NAT Gateway and then select the NAT Gateway we just created.
-
Click Save routes.
-
Now we need to associate the private subnet with our new private route table. With the private route table selected click the Subnet Associations tab and then click the Edit subnet associations button.
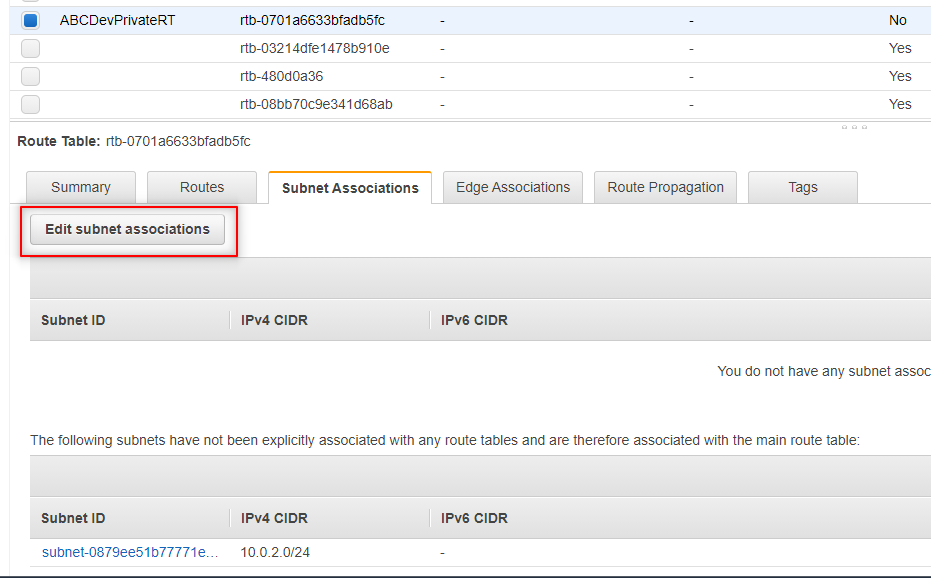
- Select the DevPrivate subnet and click Save.
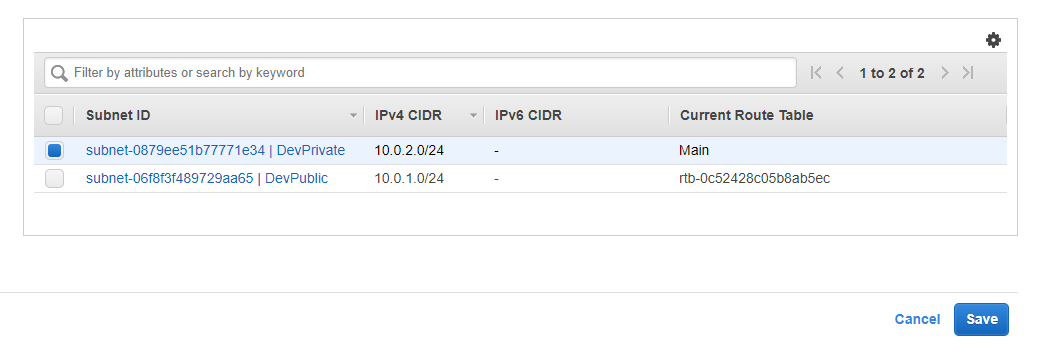
- You should now see the subnet is associated with the private route table.
Testing
-
SSH into your private instance with your Bastion Host using the same steps as before.
-
Once successfully connected to your private instance run:
sudo yum update -
The process should begin immediately and after some time the yum update will successfully complete.

Congratulations! You created and configured a custom VPC, used a bastion host to connect to our private server to receive updates. Now there is only one thing left to do. Tear it all down. When you are emotionally ready please see the clean up steps.
Clean Up
Your NAT Gateway and EC2 Instances are really the only things costing you currently.
-
Terminate your EC2 Instances. If you want to do some more testing feel free to keep them but stop them when not in use to avoid unnecessary charges.
-
Delete your NAT Gateway. Navigate to NAT Gateways > Actions > Delete NAT gateway. Type delete to confirm.

Important: Once your NAT Gateway is deleted you need to release your Elastic IP that was associated with your NAT Gateway.
- Navigate to Elastic IPs.
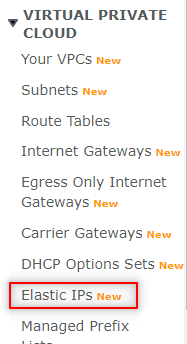
- Select the Elastic IP. Click Actions and click Release Elastic IP addresses.

- Lastly if you have no more need for the VPC you’ll want to detach and delete the Internet Gateway, delete the Route Tables, Subnets, Security Groups and VPC created.