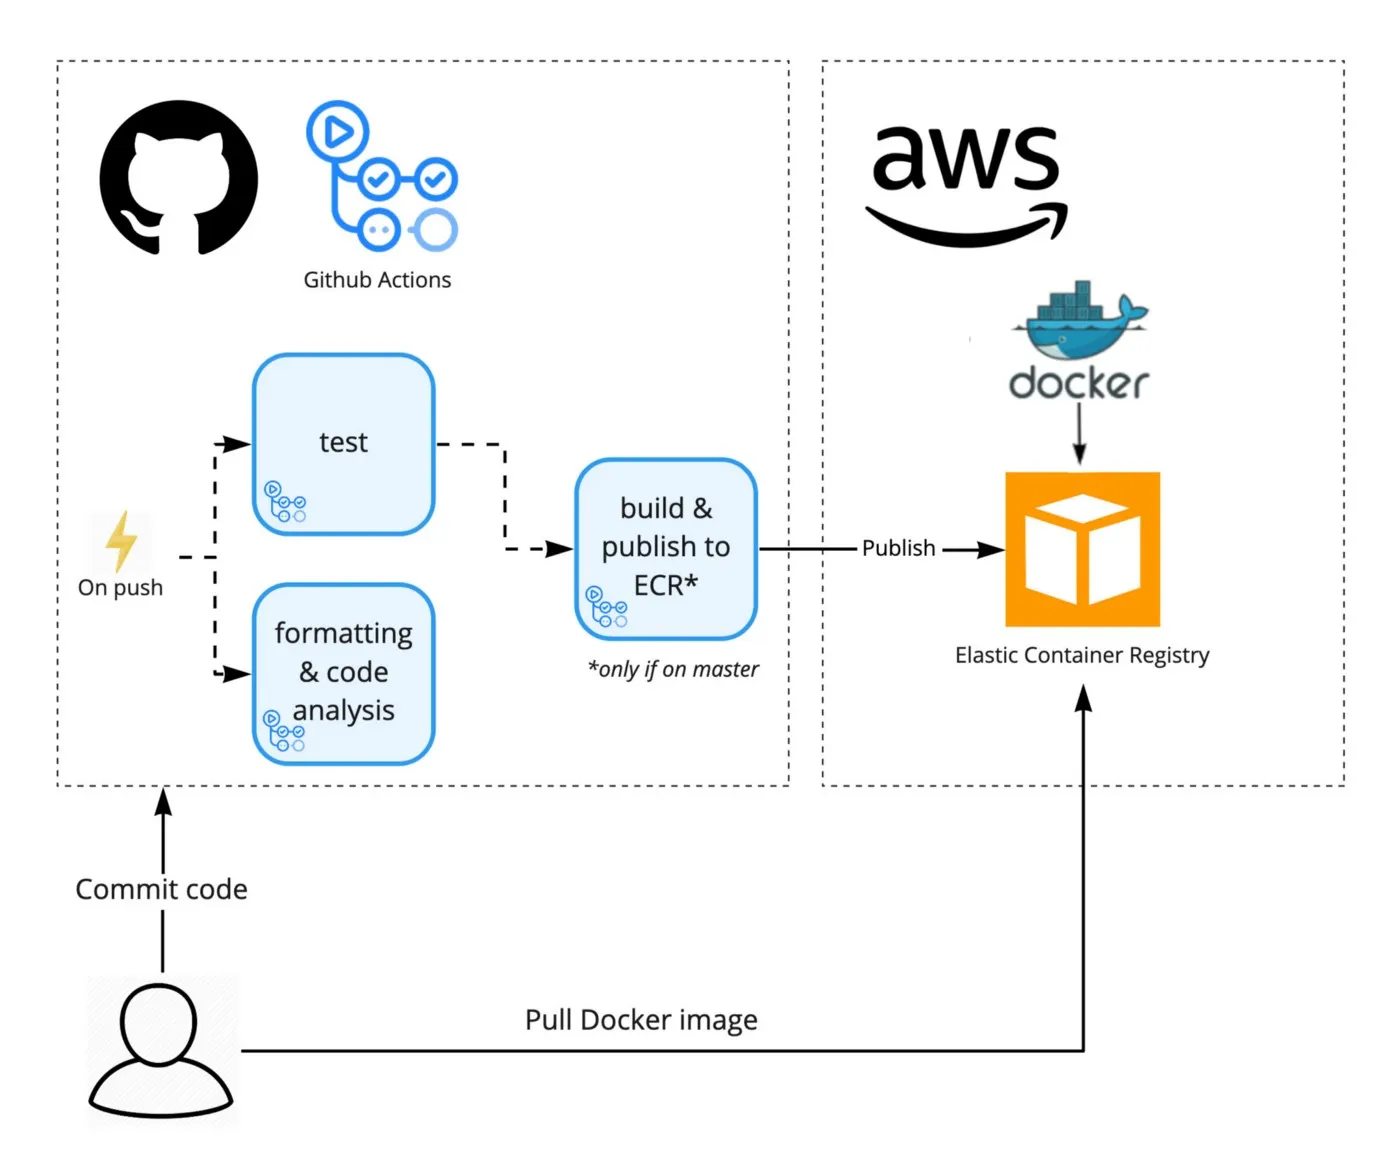
Pre-Requisites ✅
-
A Free Tier Eligible AWS Account.
-
Basic knowledge of Docker.
-
Basic prior knowledge of Instances, Remote Environment and Github
Brief Timeline ⏲
1. Getting Started
-
A Docker Image of an Application built on your local environment which is ready to be pushed on Cloud Registry. (Alt: You can also use this basic User Profile App to test directly by Forking)
-
Keeping an AWS Free Tier Eligible Account Ready for holding the Image.
2. Creating a Github Repository
-
Build the app on your local environment by creating the Docker Image.
-
Once the build is completed and Tested by you, Create a New Repository or you may use the existing one.
-
If created push the final code in your Github Repository with Docker File in the root directory.
 Code Overview
3. Configuring the Github Actions
For the Image Building workflow, we are using a great Tool from Github called Github Actions. A workflow is a collection of job definitions that will be executed concurrently as well as sequentially. A job consists of several steps of instructions that the remote system follows for performing the action.
In this Pipeline service, whenever an Action is Triggered, A temporary machine Environment is allotted to the specific build task which works as per the instruction mentioned in the Workflow File (To be created Later).
In our case, the Workflow in Actions is supposed to Build the image of our app on our behalf and push it to the Remote Image Registry i.e ECR.
Writing the Github Actions Workflow
After setting up the repository, Create two folders in the root **.github/workflows **and inside the workflow, folder create a TASK_NAME.yml file.
This TASK_NAME.yml contains the set of instructions that the Workflow will execute. Here **aws.yml **is the file that we need to write.
on:
  push:
    branches: [master]
  pull_request:
    branches: [master]

name: Node Project `my-app` CI on ECR

jobs:
  deploy:
    name: Deploy
    runs-on: ubuntu-latest

    steps:
      - name: Checkout
        uses: actions/checkout@v2

      - name: Configure AWS credentials
        uses: aws-actions/configure-aws-credentials@v1
        with:
          aws-access-key-id: ${{ secrets.AWS_ACCESS_KEY_ID }}
          aws-secret-access-key: ${{ secrets.AWS_SECRET_ACCESS_KEY }}
          aws-region: ap-south-1

      - name: Login to Amazon ECR
        id: login-ecr
        uses: aws-actions/amazon-ecr-login@v1

      - name: Build, tag, and push the image to Amazon ECR
        id: build-image
        env:
          ECR_REGISTRY: ${{ steps.login-ecr.outputs.registry }}
          ECR_REPOSITORY: ${{ secrets.REPO_NAME }}
          IMAGE_TAG: 1.0
        run: |
          # Build a docker container and push it to ECR
          docker build -t $ECR_REGISTRY/$ECR_REPOSITORY:$IMAGE_TAG .
          echo "Pushing image to ECR..."
          docker push $ECR_REGISTRY/$ECR_REPOSITORY:$IMAGE_TAG
          echo "::set-output name=image::$ECR_REGISTRY/$ECR_REPOSITORY:$IMAGE_TAG"
The .yml file must have proper Indentation, Text Formatting, and Arguments.
In case you edit or write your own .yml you must use** Online .yml Validators** before pushing the Code.
Working of Commands
-
Trigger the Action when a commit is made on the master branch.
-
Gives the name to the Workflow Run.
-
JOB-A: Create a Ubuntu remote environment/Runner where the workflow can run and build the Image. (Read more about the Environment Here)
-
JOB-B: To follow the steps mentioned on the Remote Machine when launched successfully.
-
JOB-B/STEP-A: Login to the Remote Machine via SSH using the pre-written workflow by Official Github Actions i.e Checkout.
-
JOB-B/STEP-B: Setting up AWS CLI/SDK on Remote Host and Configuring AWS Login Credentials and Assuming Roles using the pre-written workflow by Official AWS Teams i.e Configure AWS Credentials. For accessing the AWS ECR we need to define a custom Role in later steps.
**NOTE ⚠ **: To access our AWS ECR using AWS CLI on the Remote Machine it uses a custom Role which we will define later. The role would have a **KEY ID and ACCESS ID **for the CLI to log in. Since these are credentials we can’t reveal them in public hence need to set them as Environment Variables which are hidden and secured in the environment. (We will configure the Environment Variable in later steps)
- **JOB-B/STEP-C: **Building the Docker Image by copying using the Code in our Repository (Dockerfile), Tagging the Image with a version, and Pushing it to an Elastic Container Registry (Private ECR). (Will make in later steps)
The commands to do the above-mentioned tasks are written in the **RUN **which will be executed in the bash of Remote Machine.
Whoo Hoo!🥳 Really happy you’ve followed so far. Configuring the Action might take some time to learn and practice. For more knowledge, You can refer to the Official Github Docs.
4. Creating an AWS ECR
-
Login to your AWS Panel (Free Tier+) and search for Elastic Container Registry (ECR) in the Service search bar.
-
Choose Private and Click on Create Repository.
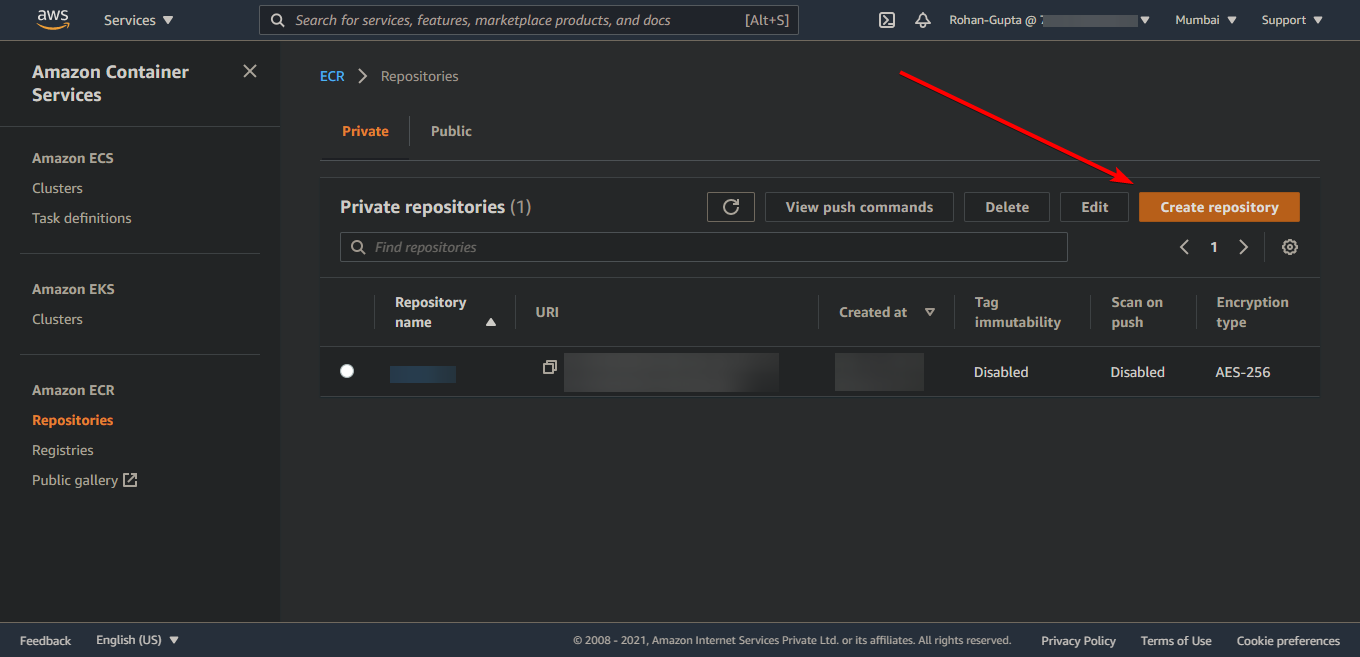 Amazon Elastic Container Registry
- Choose Visibility as Private and give a Name to your Repository after the host URL. “*Here: my-app” *and click on Create Repository.
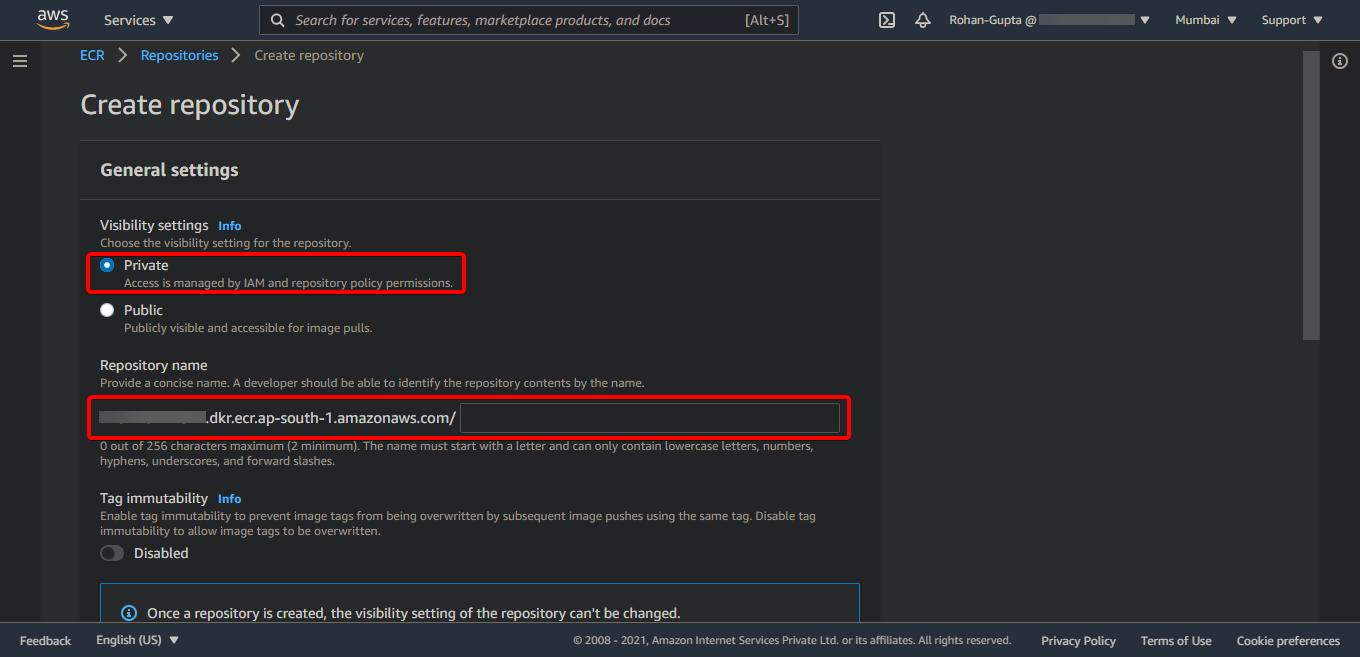 Creating a Private Image Repository
5. Create an AWS user & Setting Permissions
To allow Github Actions remote machine to upload the build image to our Private ECR we need to authenticate the user who has the right to upload. We must always create a User Role with limited required Permissions here restricted to ECR Only or as required.
- In the service search bar type Users and open the listed **IAM Feature **and click on Add Role.
 Creating a new User
- Inside give a User Name: **Github-Action-AWL-CLI-Allow-ECR **and check Programmatic Access which will allow us to create a Key Pair.
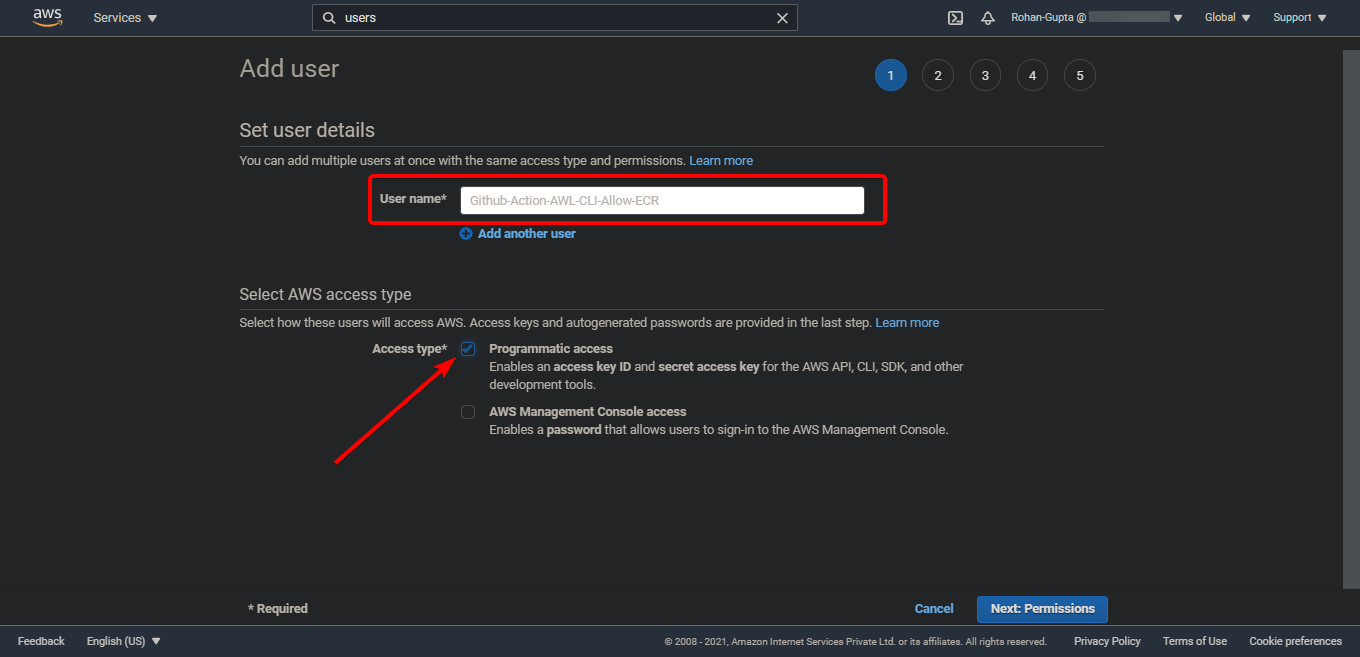
- Click on Next: Permissions and on the next screen choose “Attach existing policies directly”. In find policies search for “AmazonEC2ContainerRegistryFullAccess” and check it which will give this User Account permission to push on Private ECR.
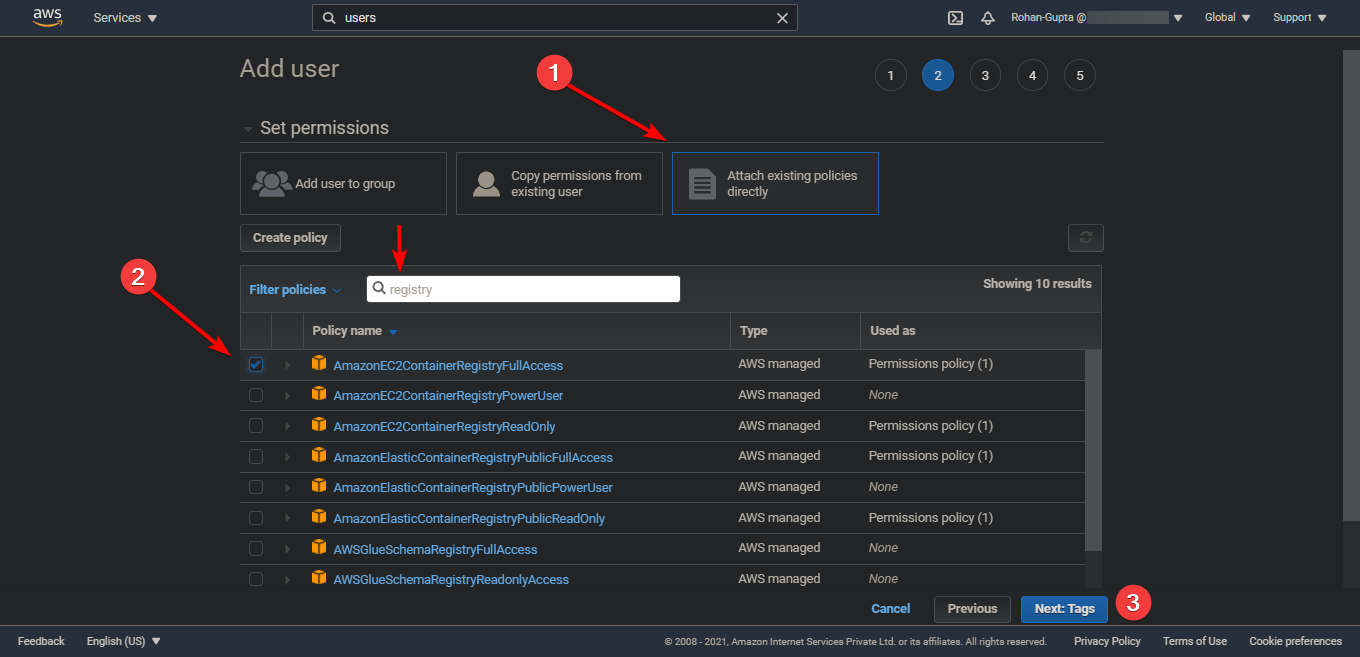 Account (User) Permissions
- Click on **Next: Tags **skip and click on **Next: Review **and confirm Create User.
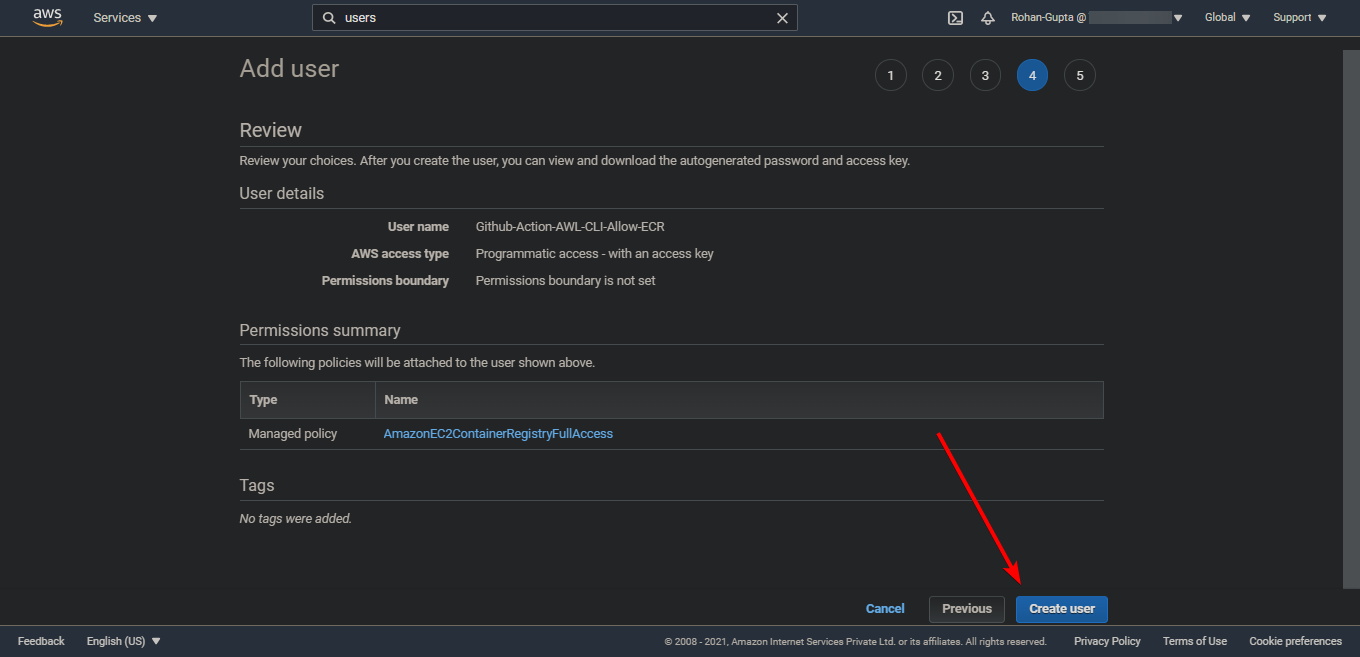
- Once created, You need to save the Credentials File and Copy the “Access Key ID” and “Secret Access Key”.
6. Connecting Github Actions with AWS ECR
Now we’re just a few steps away from testing our first CI/CD Build. To allow access to Github to our new user account we must give it the credentials.
- Open your Github Repository Settings and click on “Secrets”.
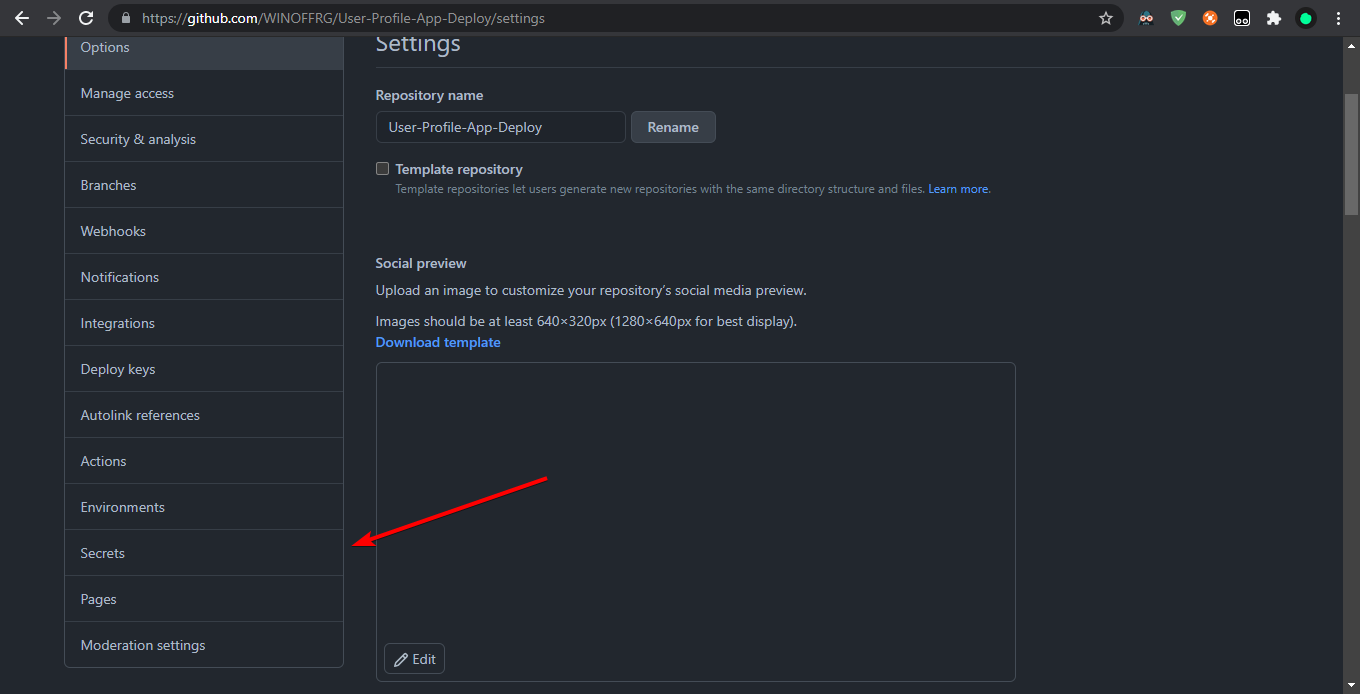 Github Secrets / Environment Variables
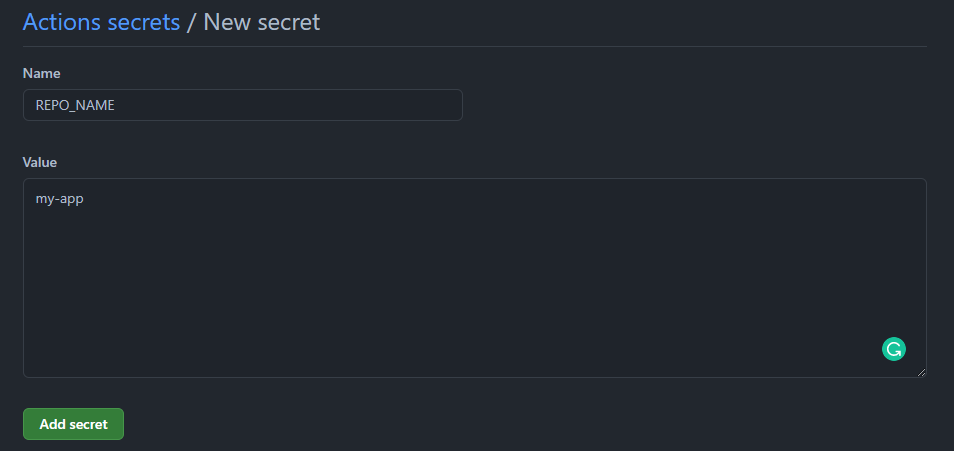
- Now click on New Repository Secret to add Variables and their values.
-
Add **REPO_NAME **as the name & your ECR Name as the Value, my-app
-
Similarly, add **AWS_ACCESS_KEY_ID **as the name and Paste the earlier copied Access Key ID as the value.
-
Similarly, add **AWS_SECRET_ACCESS_KEY **as the name and Paste the earlier copied Secret Access Key as the Value.
👉 You can also refer to the earlier download Credentials.csv for the above values


7. Monitoring, Building, and Pushing
🎉 We're almost there now...
-
Make a commitment to your Repository by adding the IMAGE_TAG value in AWS.yml File.
-
Once the changes are pushed to the repository checkout the Actions Tab.
 Github Actions
Here you will see a new Action has started which is indicated by yellow color stating that the Build is under Progress.
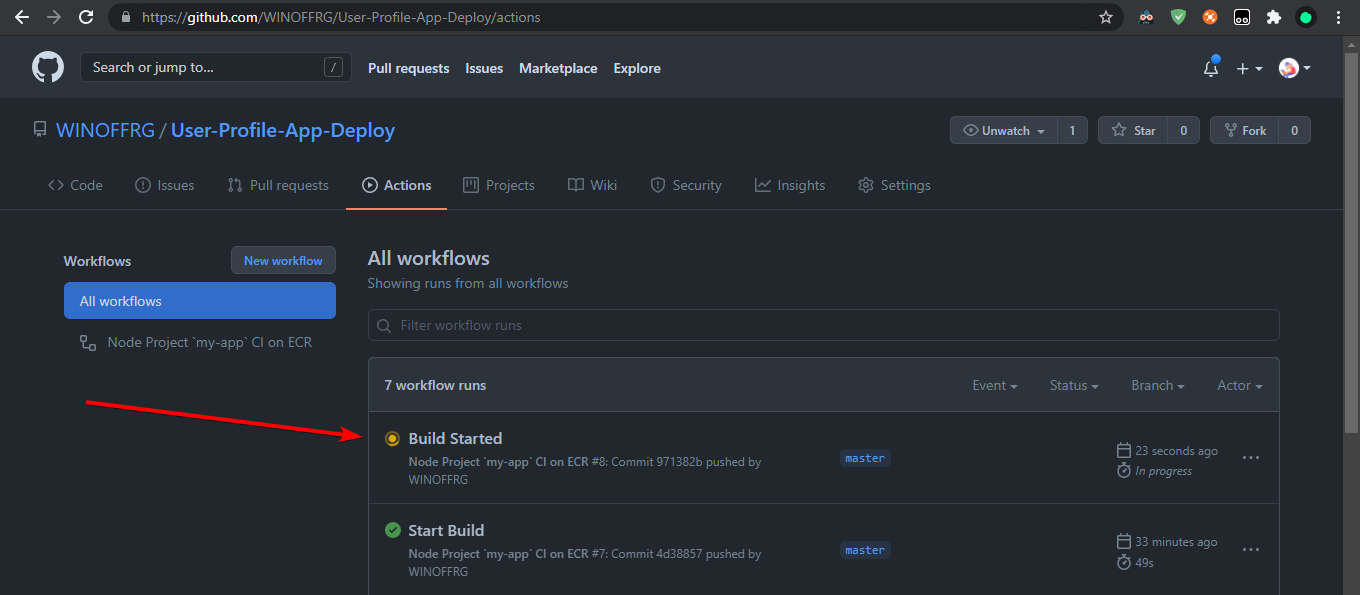 Workflows
- Click on the Build name which is under process and open the current Deployment.
 Workflow Diagram
- Here you can see the Build logs where each tab shows the current task and on expanding each tab you can see its Logs.
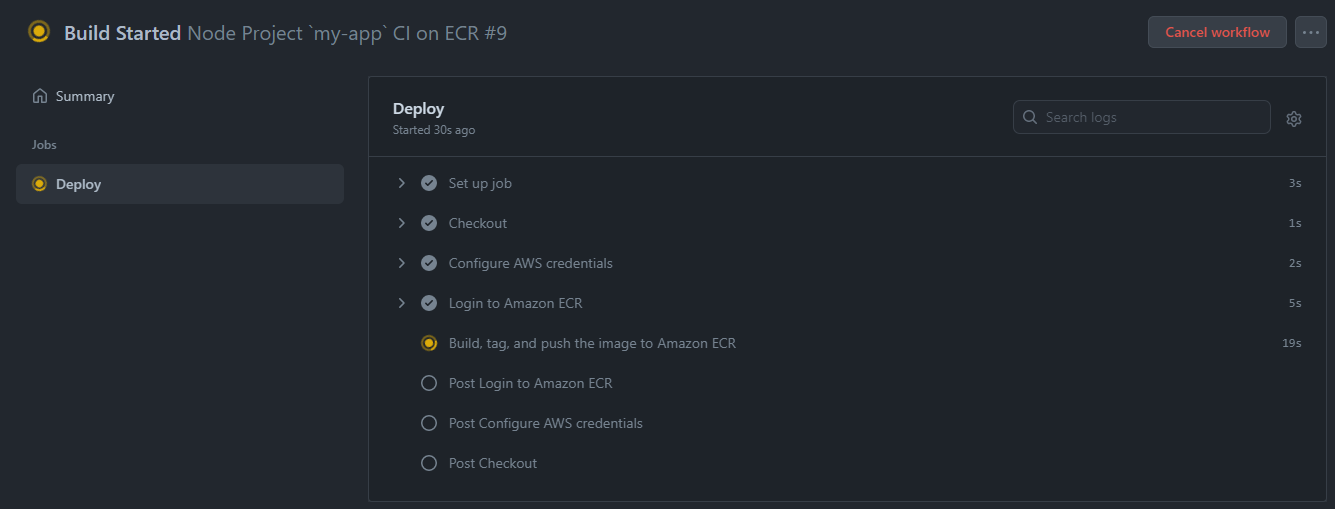 Build Status and Logs
- Now you need to wait for the Deployment to complete and make sure no errors occur. However, if you get an error in the 5th task, in all probability you’ve made a mistake in AWS ECR User Account Creation/Credentials Setup. Make sure you check the job logs by clicking on them.
In case you get one in the 5th Task you might have probably messed up in AWS ECR User Account Creation/Credentials Setup.
 Build Success Confirmation
And that's it! Now you can also open the ECR Private Repo and check for the final image with the latest tag inside it.
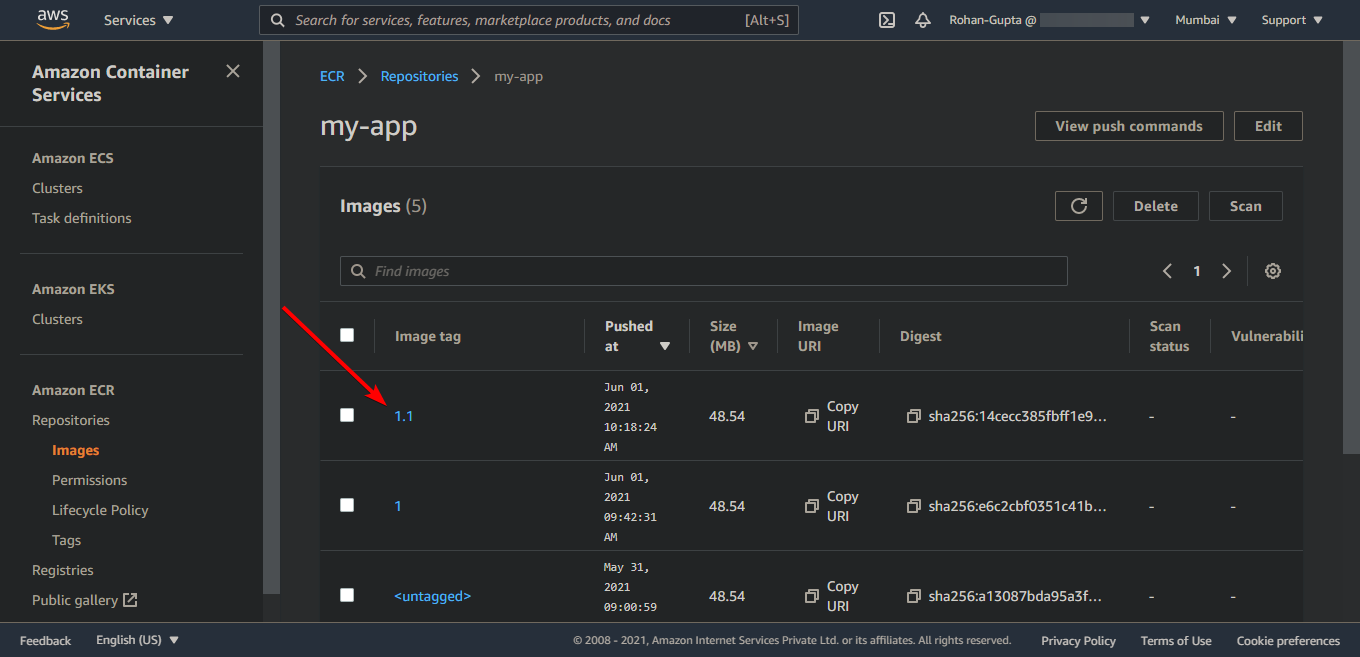 Docker Image in ECR
Whoop — Woohoo! We're done! Feel free to boost me — push me. If you think this was helpful, consider following me on Medium. You can reach out to me via my social media handles (linked below) in case you need any help.
Author: Rohan Gupta
Details
-
Development Operations
-
CI/CD Image Build S1