Objective of this Project
You want to serve a static page through S3 that is able to be cached at a Content Delivery Location for cost optimization. You need to first create an S3 bucket to host a static website. And serve your end-users through CloudFront endpoint.
What is a Static website?
Static web pages are made of “fixed code”, and unless the site developer makes changes, nothing will change on the page. Think of it like a brochure for a business. Static sites give a lot of the same type of information that you could get from a brochure, but it can’t just change itself.
Why would you use S3 to serve a static website?
AWS Simple Storage Service (S3), is the most fundamental and global Infrastructure as a Service (IaaS) solution provided.
Using AWS S3 facilitates highly-scalable, secured and low-latency data storage from the cloud. With its simple web service interface, it is easy to store and retrieve data on AWS S3 from anywhere on the web.
AWS S3 is a pioneer in cloud data storage and has uncountable benefits, but let’s have a look at the most prominent ones:
- Reliable Security: By providing access permissions, you can make sure that there is no unauthorized access to your data.
- Very Low cost: With AWS S3, you only pay for the data you use. Hosting a small to medium sized static website would cost only a few dollars monthly.
- Simplicity of Management: AWS S3 has a very user friendly web interface which takes out the usual hard work of maintaining security, optimizing storage classes and managing the data transfer in the most suitable way. So your website is up and running in few minutes.
What is CloudFront and why to use it?
Amazon CloudFront is a content delivery network (CDN) service built for high performance, security, and developer convenience.
In a simple term, we can say AWS CloudFront is a data/content caching technology that resides at the defined edge locations. If the content is already in the edge location with the lowest latency, CloudFront delivers it immediately. If the content is not in that edge location, CloudFront retrieves it from an origin that you’ve defined — such as an Amazon S3 bucket, that you have identified as the source for the definitive version of your content.
Benefits of AWS CloudFront
- Global Scaled Network for Fast Content Delivery: The CloudFront network has 225+ points of presence (PoPs) that are interconnected via the AWS backbone delivering ultra-low latency performance and high availability to your end-users.
- Security at the edge: All your CloudFront distributions are defended by default against the most frequently occurring network and transport layer DDoS attacks that target your websites or applications with AWS Shield Standard.
- Deep integration with AWS: Amazon CloudFront is integrated with AWS services such as Amazon S3, Amazon EC2, Elastic Load Balancing, Amazon Route 53, and AWS Elemental Media Services for easy set-up.
- Cost-Effective: Amazon CloudFront offers cost-effective content delivery globally. Integrated with AWS, there are no transfer fees for origin fetches from any AWS origin and AWS Certificate Manager (ACM) offers custom TLS certificates, at no charge.
Now let’s get started!
Login into your AWS account, head over to the search bar at the top and search for S3.

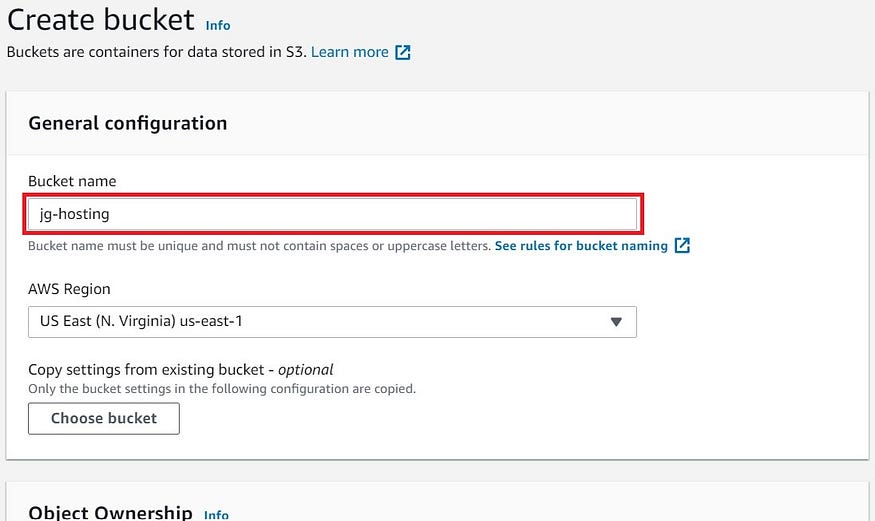
Inside of the S3 dashboard, click on “Create bucket”.

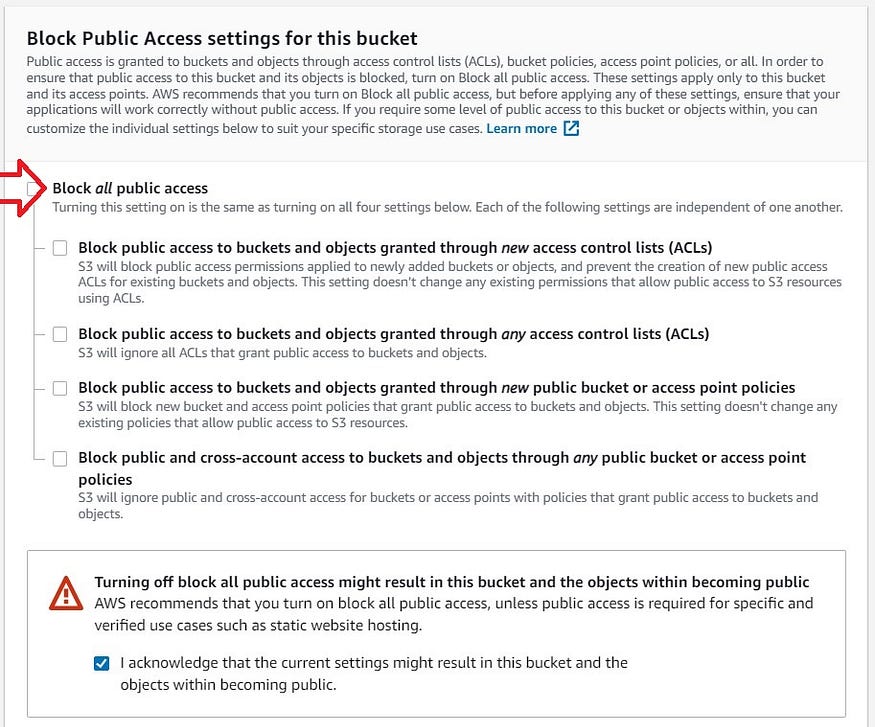
Give your bucket a unique name and select the options as shown below:
This is done to make the bucket accessible to the public because it is the host of your static website.
Scroll to the bottom and click “Create bucket”.

After creating the bucket, upload your website to the bucket to the bucket by clicking on the bucket name. Once inside of your bucket on the “Objects” tab, click on the “Upload” button.
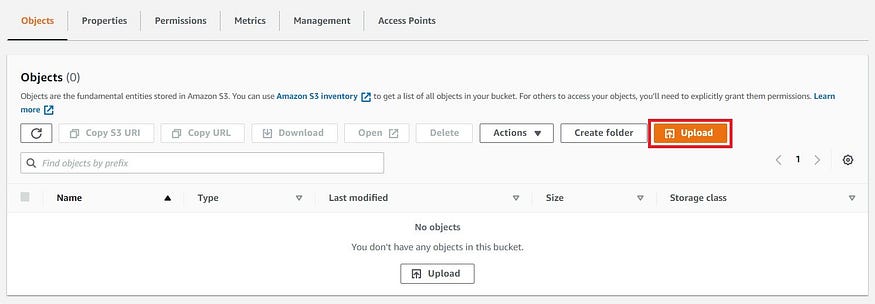
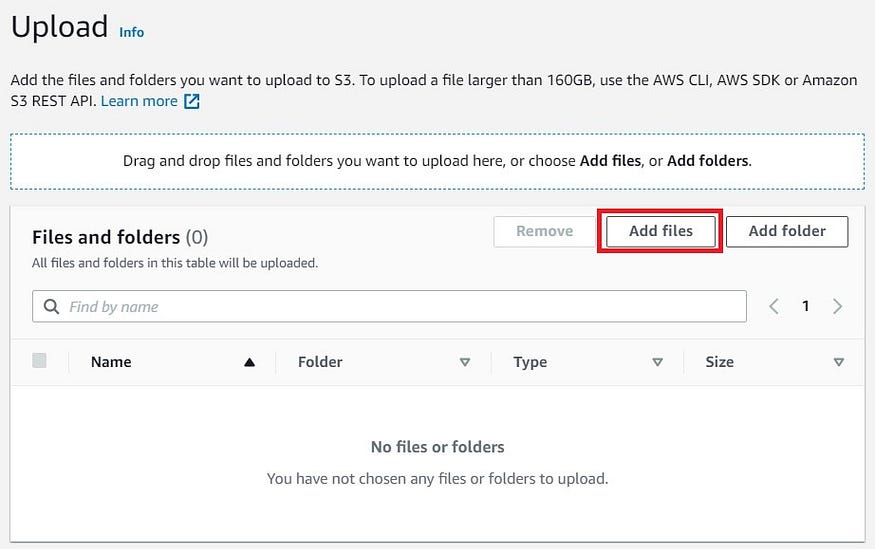
From here you can upload your files multiple ways. You can click “Add files”, “Add folder” or drag and drop your items. Once you’re done click “Upload”.
Now click on the “Properties” tab and scroll to the bottom to the “Static website hosting” section and click on the “Edit” button.


Select “Enable” for Static website hosting.
Also, select “Host a static website” for the Hosting type.
Enter the file for your “index” document. The error document is optional as this will load an error page if you try to access a file that isn’t available.
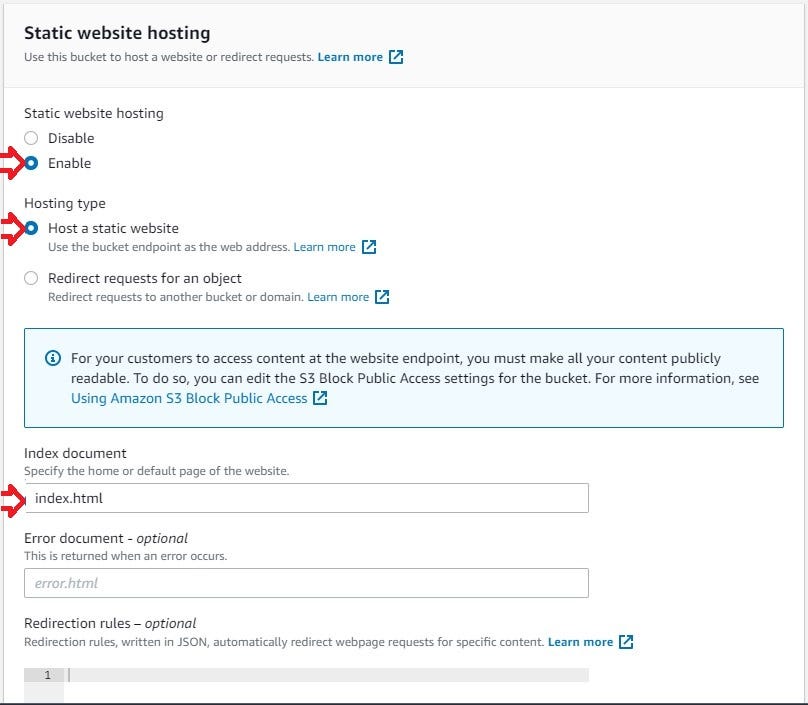
Scroll down and click on “Save Changes”.

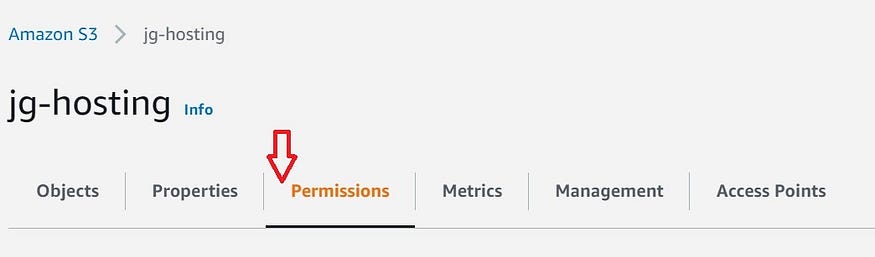
The next step is to grant permissions to your bucket so that this page is accessible by everyone.
To do that, head over to the “Permissions” tab of your bucket. Scroll down to the “Bucket policy” section and click on the “Edit” button.

Paste the below code into the bucket policy:
{
 "Version": "2012-10-17",
 "Statement": [
  {
   "Sid": "PublicReadGetObject",
   "Effect": "Allow",
   "Principal": "*",
   "Action": [
    "s3:GetObject"
   ],
   "Resource": [
    "arn:aws:s3:::<BUCKET_NAME>/*"
   ]
  }
 ]
}
Then scroll down and click on “Save changes”.

Now the last step is to create a CloudFront Distribution.
Head over to the search bar and type in “CloudFront”. The CloudFront dashboard will now be displayed.

From the dashboard, on the right-hand side click on the orange button “Create a CloudFront distribution”.

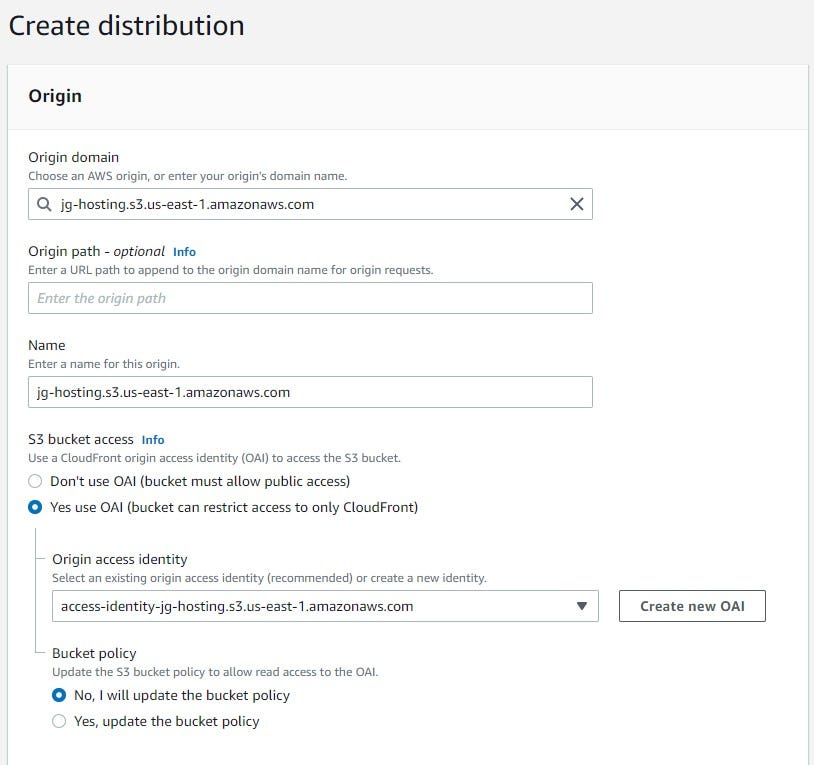
This should take you to the Create Distribution page, click on the Origin Domain Name field and select the S3 bucket you created earlier.
Also notice that name is already pre-filled. For Under “S3 Bucket Access”, select “Yes Use OAI”. Click on “Create new OAI”. OAI or Origin Access ID grants CloudFront the permissions to call our S3 bucket.
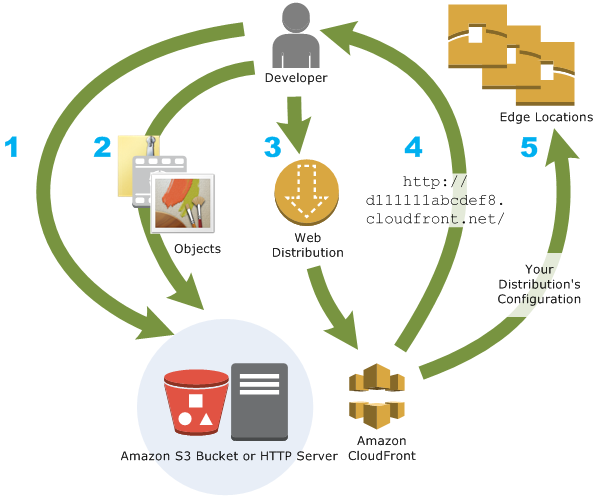
The picture below sums up everything discussed above:
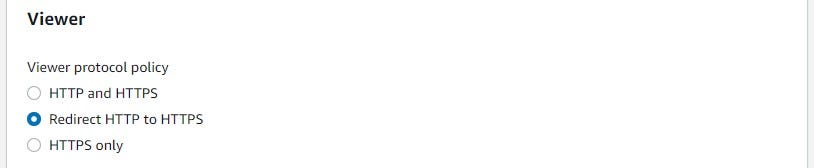
Scroll down to until you see “Viewer”, For “Viewer Protocol Policy”, select “Redirect HTTP to HTTPS”. And the reasons for this are mostly for security measures as HTTPS is more secure than HTTP.
From this point forward and for our project the rest of the options can remain as default and click on “Create Distribution”.

Your distribution should take a few minutes to deploy. But once deploy you should have the screen below.
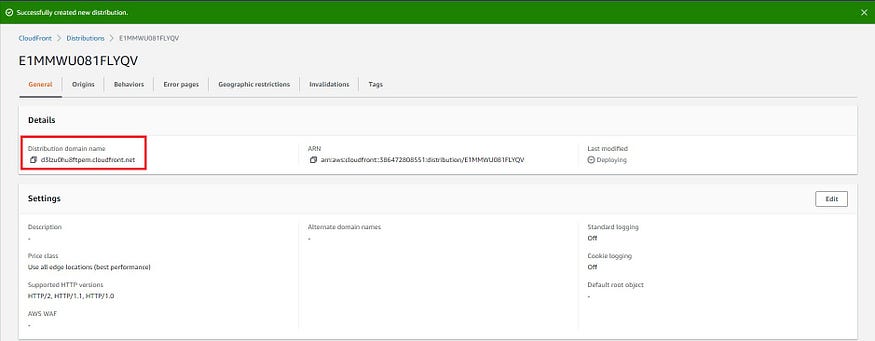
A domain name has been provided to you which can be used to access your static website.
Note: When pasting the domain on the url make sure you enter “/index.html” at the end.
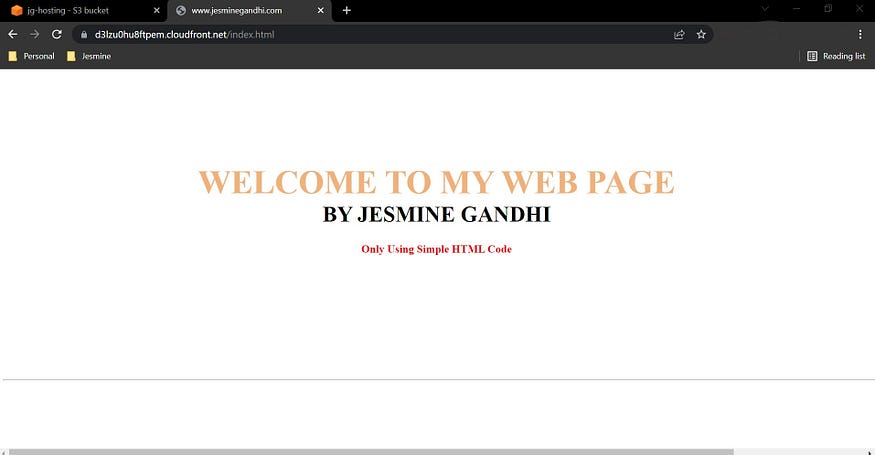
And if everything is set up correctly, you should be able to see a webpage like this!
Comments
Loading comments…