New day, New Topic…. Let’s learn along..!!😉
Welcome back to our cloud journey!
Today, we dive into the fascinating world of AWS S3 (Simple Storage Service). As an industry-leading object storage service, S3 provides unmatched scalability, data availability, security, and performance. In this blog post, we will explore the creation and management of S3 buckets using the power of Terraform.
Get ready to unlock the full potential of object storage and revolutionize your data management strategy.
Let’s go…

What is AWS s3 bucket..?
AWS S3 (Simple Storage Service) is a highly scalable, secure, and durable object storage service offered by Amazon Web Services. S3 allows you to store and retrieve vast amounts of data, ranging from a few bytes to terabytes or even petabytes.
It is widely used for a variety of use cases, including backup and restore, data archiving, web hosting, content distribution, big data analytics, and more.
In this task, you will learn how to create and manage S3 buckets in AWS.
Here is our Today’s Task-01 :
- Create an S3 bucket using Terraform.
- Set up your Terraform environment:
- Install Terraform: Visit the official Terraform website (https://www.terraform.io/) and download the appropriate version for your operating system.
- Set up AWS credentials: Configure your AWS access key and secret access key using the AWS CLI or environment variables.
-
Create a new directory for your Terraform project and navigate to it.
-
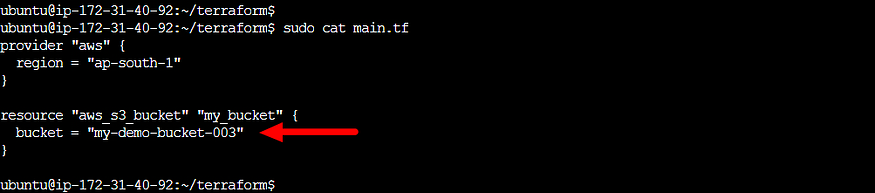
Create a file named
main.tfand add the following code:
resource "aws_s3_bucket"  "my_bucket" {
bucket = "my-demo-bucket-003"
}
The aws_s3_bucket resource creates a new S3 bucket.
demo-dev-bucket is a unique identifier for this resource that can be used in other parts of your Terraform code. You can use a different name for this identifier if you prefer.
Run the terraform init command to initialize the working directory and download the required providers.
- Use terraform init, plan and apply to get the providers and view the terraform changes.
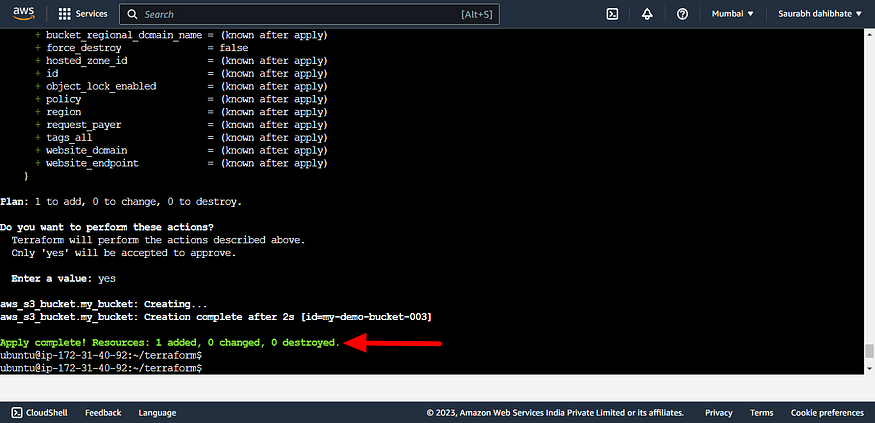
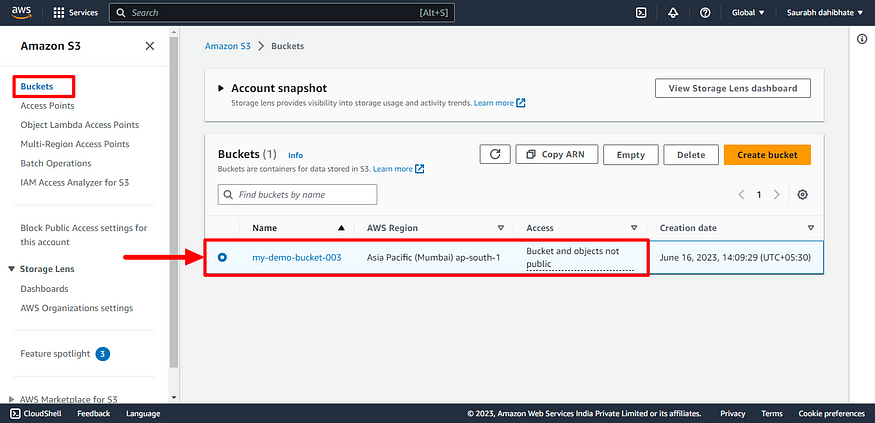
- S3 bucket successfully created.
Here is our Today’s Task-02 :
- Configure the bucket policy to allow public read access.
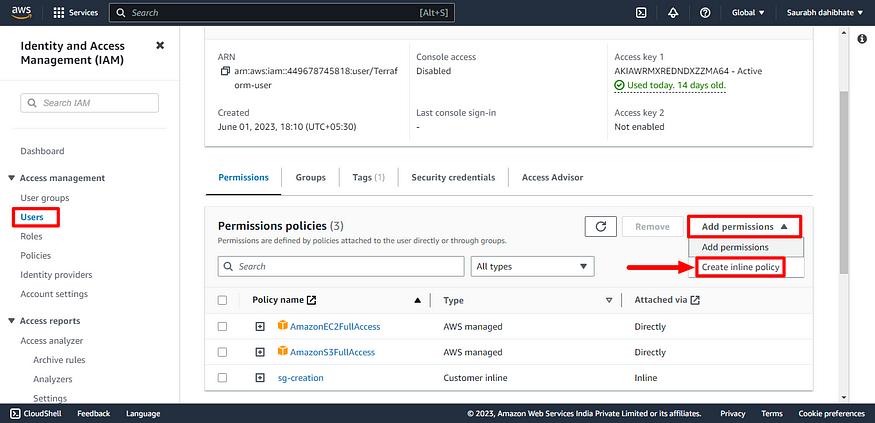
- You have to give permissions for your IAM user.
- Go to IAM console and select your user. In Permission policies click on create inline policy for user.
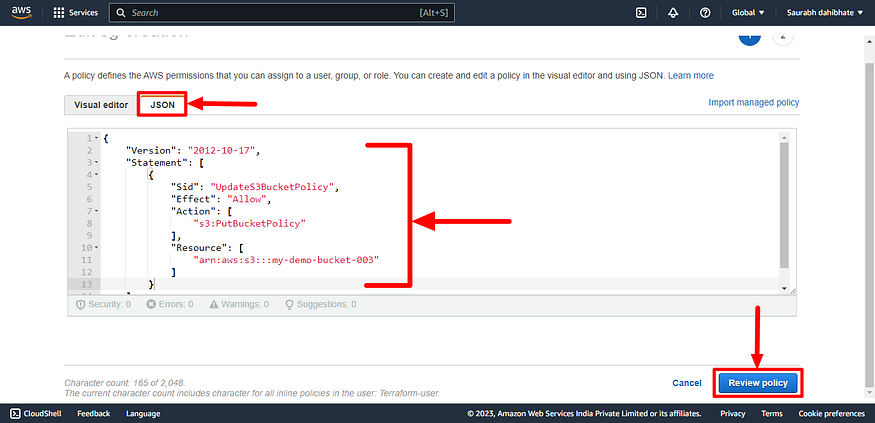
{
  "Version": "2012-10-17",
  "Statement": [
    {
      "Sid": "UpdateS3BucketPolicy",
      "Effect": "Allow",
      "Action": ["s3:PutBucketPolicy"],
      "Resource": ["arn:aws:s3:::my-demo-bucket-003"]
    }
  ]
}
- The above code is an IAM policy that allows the user to update the S3 bucket policy.
- In this case, the statement allows the user to update the S3 bucket policy for the bucket with the ARN
arn:aws:s3:::my-demo-bucket-003. - This policy can be used to grant users the ability to update the S3 bucket policy for a specific bucket. This can be useful for scenarios where you need to allow users or roles to make changes to the bucket policy, such as adding or removing permissions.
- Add above code to inline policy of user and save the policy.
- Let’s allow public access to s3 bucket.
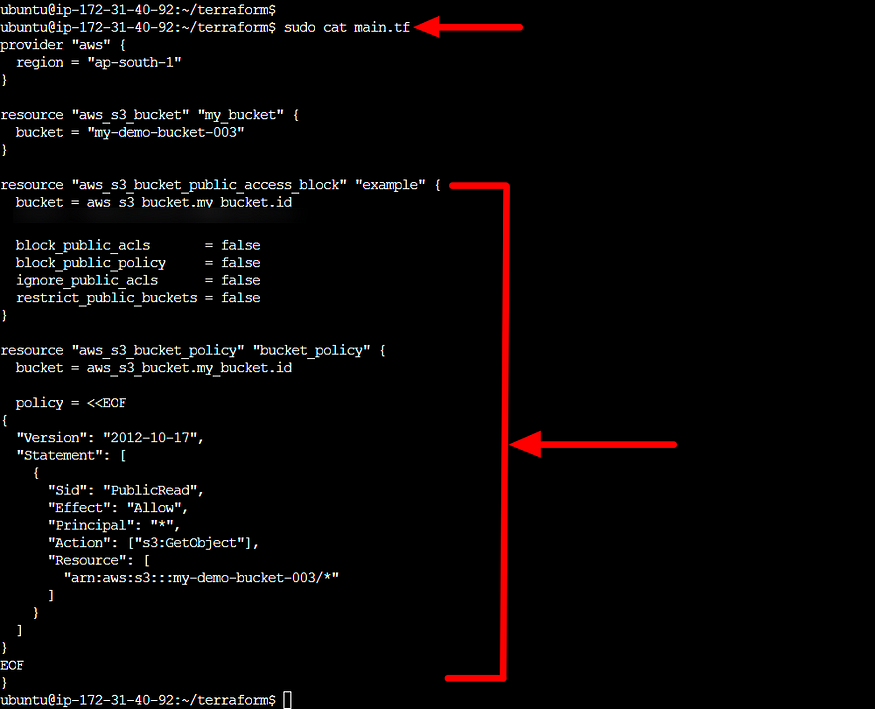
- The provided Terraform code creates an S3 bucket policy for the S3 bucket named “my-demo-bucket-003”. The bucket policy allows public read access to the objects within the bucket.
resource "aws_s3_bucket_public_access_block" "example" {
  bucket = aws_s3_bucket.my_bucket.id

  block_public_acls       = false
  block_public_policy     = false
  ignore_public_acls      = false
  restrict_public_buckets = false
}

resource "aws_s3_bucket_policy" "bucket_policy" {
  bucket = aws_s3_bucket.my_bucket.id

  policy = <<EOF
{
  "Version": "2012-10-17",
  "Statement": [
    {
      "Sid": "PublicRead",
      "Effect": "Allow",
      "Principal": "*",
      "Action": ["s3:GetObject"],
      "Resource": [
        "arn:aws:s3:::my-demo-bucket-003/*"
      ]
    }
  ]
}
EOF
}
- Edit the main.tf file with above code.
- Run terraform init, plan and apply run 2 times this commands to create public access for the S3 bucket.
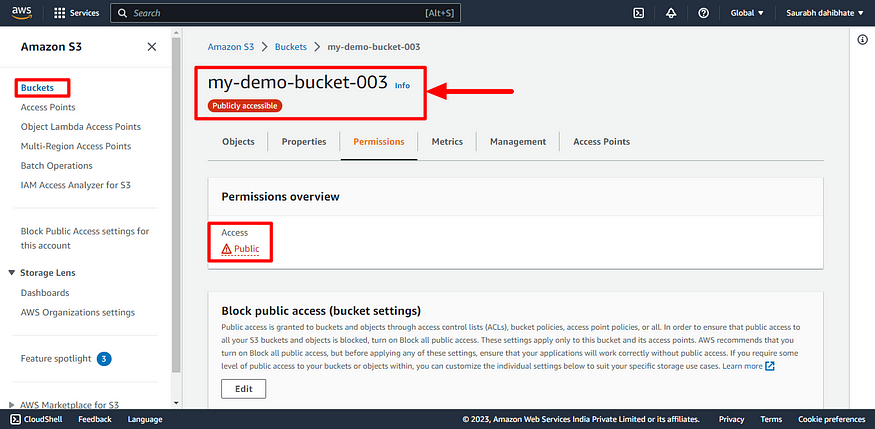
- Bucket is publicly accessible now.
Here is our Today’s Task-03 :
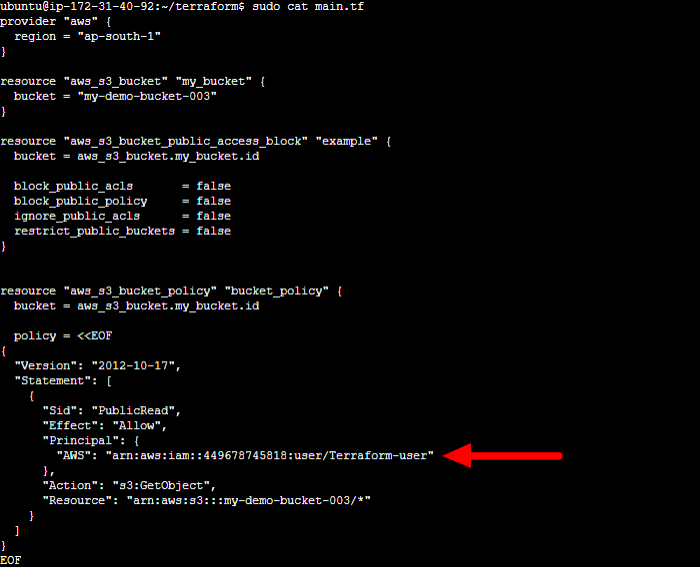
- Create an S3 bucket policy that allows read-only access to a specific IAM user or role.
resource "aws_s3_bucket_policy" "bucket_policy" {
  bucket = aws_s3_bucket.my_bucket.id

  policy = <<EOF
{
  "Version": "2012-10-17",
  "Statement": [
    {
      "Sid": "PublicRead",
      "Effect": "Allow",
      "Principal": {
        "AWS": "arn:aws:iam::449678745818:user/Terraform-user" #change access "*" to specific IAM user
      },
      "Action": "s3:GetObject",
      "Resource": "arn:aws:s3:::my-demo-bucket-003/*"
    }
  ]
}
EOF
}
- Make a small change in access configuration of IAM read access for the S3 bucket.
- Run terraform init, plan and apply run commands to create user access for the S3 bucket.
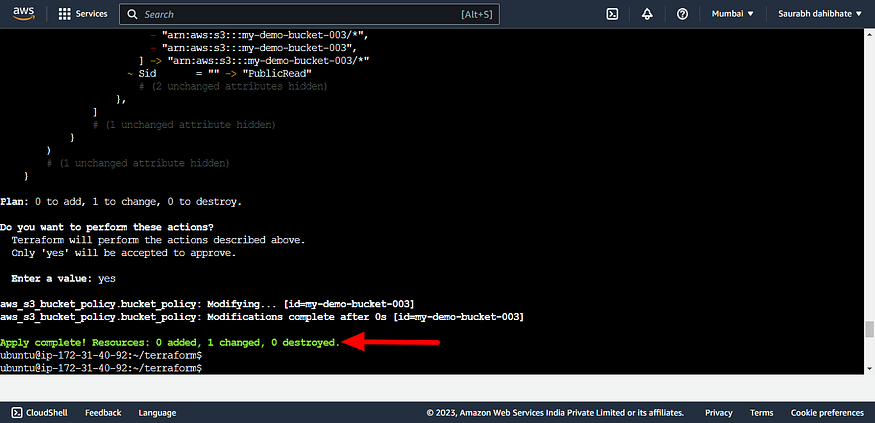
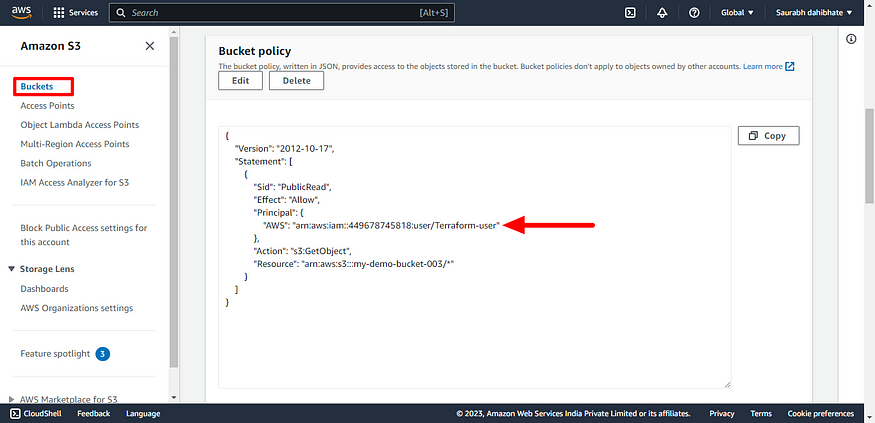
- S3 bucket policy is created that allows read-only access to a specific IAM user.
Here is our Today’s Task-04 :
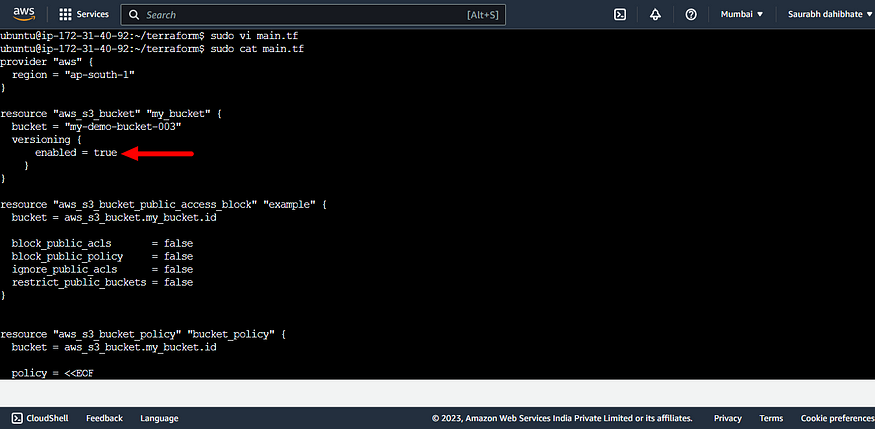
- Enable versioning on the S3 bucket.
  resource "aws_s3_bucket" "my_bucket" {
    bucket = "my-demo-bucket-003"
    versioning {
      enabled = true
    }
  }
- The versioning block is included, with enabled set to true. This enables versioning on the S3 bucket, which will keep multiple versions of each object stored in the bucket.
- Use the terraform apply to enable versioning in S3 bucket.
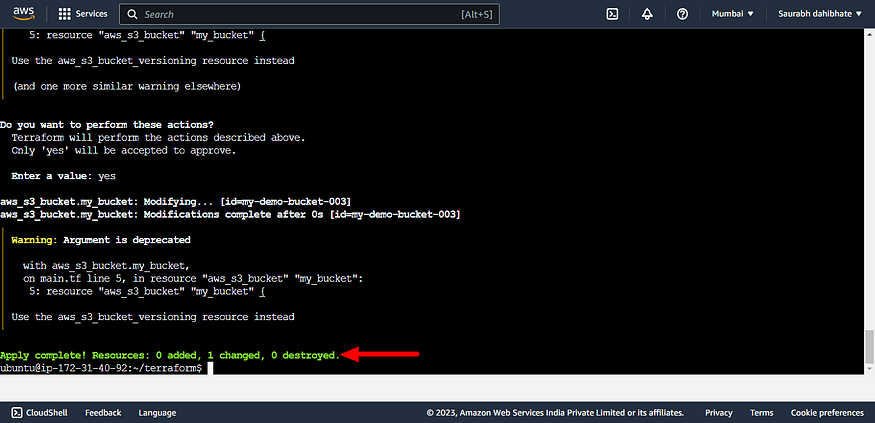
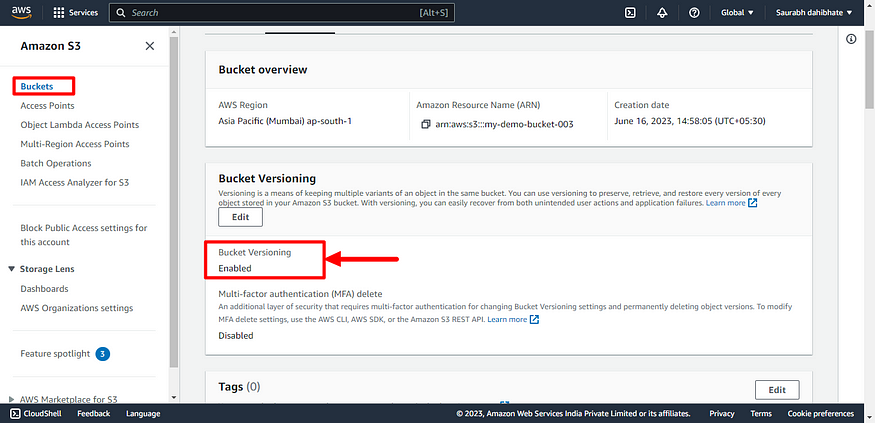
- We can see the changes in the S3 bucket in the AWS management console.
🔶That’s all about today’s task of DevOps journey
🔸Thankyou for reading 👍.
If you liked this story then click on 👏👏 do follow for more interesting and helpful stories.
— — — — — — — — #keepLearning_DevOpsCloud ♾️☁️ — — — — — —
Comments
Loading comments…