 The calendar view is useful for many people. Say, for example, Business, Hospital, Logistics, Schools, Colleges, etc., requires to view the data in the calendar mode. The monthly calendar is preferred most of the time. Recently I had a requirement from my client for this calendar view in Hospital Management System. So I thought to share this with you people.
In this tutorial, you will learn how to implement a calendar view using Angular. Implementing the calendar view is very easy. Just install the package and include it in your ts file and HTML file, it will work fine. Here we are going to see some additional things such as how to show the badge count and how to view info on a particular date.
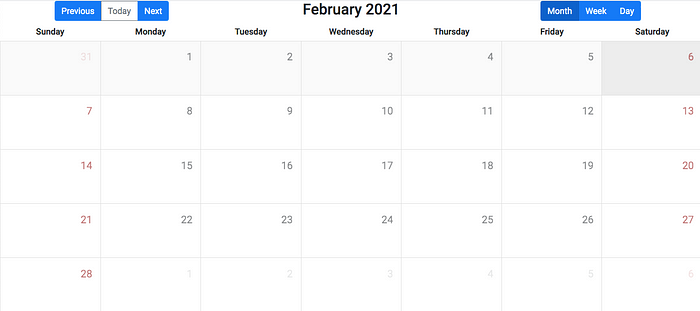
Sample Output Screen.
The calendar view is useful for many people. Say, for example, Business, Hospital, Logistics, Schools, Colleges, etc., requires to view the data in the calendar mode. The monthly calendar is preferred most of the time. Recently I had a requirement from my client for this calendar view in Hospital Management System. So I thought to share this with you people.
In this tutorial, you will learn how to implement a calendar view using Angular. Implementing the calendar view is very easy. Just install the package and include it in your ts file and HTML file, it will work fine. Here we are going to see some additional things such as how to show the badge count and how to view info on a particular date.
Sample Output Screen.
 Without wasting time, let’s jump into the topic. We will see them in a step by step example.
1. Create Angular Project
Open your command prompt or terminal and just type the below command to create a new Angular project.
ng new angular-calendar-example
The above command will create a project for you. The next step is to install the needed library. So open the newly created Angular project in the VS Code Editor. I am using the VS Code Editor. You can use any other editor. But the VS Code Editor had more functionality when compared to other editors.
2. Install Angular Calendar Library
By default, the Angular Calendar package depends on the Bootstrap CSS framework. However, it had a separate CSS library to show the calendar view. You can use the same CSS framework. Or you can use your desired CSS framework. For a simple explanation, I am going with the Bootstrap Framework. But in my project, I am implemented with Angular Material CSS framework. So it is not tough to work. However, you need to work on the placing of the element if you are using other CSS frameworks. So let’s first install the Bootstrap CSS by using the below command.
npm install --save bootstrap
And include the installed Bootstrap library to the style.scss file
[@import](http://twitter.com/import) "../node_modules/bootstrap/dist/css/bootstrap.min.css";
And now install the Angular Calendar package using the below command.
npm install --save angular-calendar date-fns
Next, import the calendar CSS file to the style.scss file.
[@import](http://twitter.com/import) "../node_modules/angular-calendar/css/angular-calendar.css";
If you are not doing this step, then the calendar view won’t render. Now import the CalendarModule, DateAdapter, adapterFactory to the app.module.ts file. And include the above modules in the import section of the app.module.ts file like below. Now we installed and configured the necessary libraries in our Angular project. The next step is to render the calendar view.
3.Render Calendar View
The Angular calendar package has three components in-built. They are listed below.
- mwl-calendar-month-view -Monthly Calendar
- mwl-calendar-week-view -Weekly Calendar
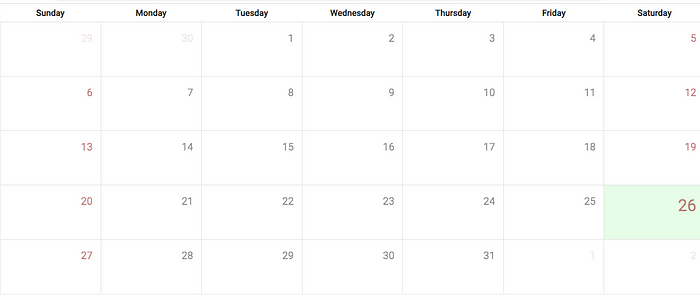
- mwl-calendar-day-view -Day Calendar 3.1.Render Monthly Calendar So add the below code in your app.component.html file to render the monthly view. Here we need to pass one important input.
- viewDate — It is a simple JavaScript date object. Used to represent today or your desired date.
So, create a new variable which is names as viewDate in your app.component.ts file.
Monthly view Output
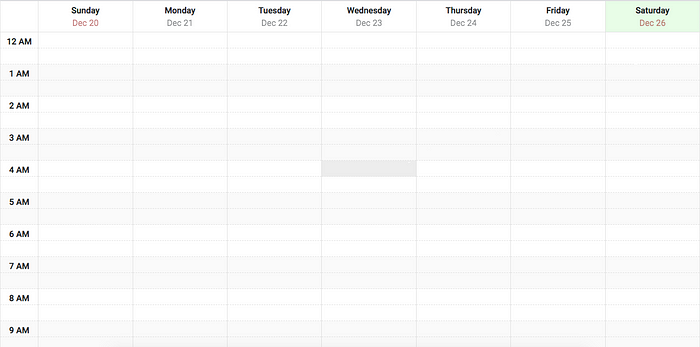
 3.2.Render Weekly Calendar
Use the below code to render the weekly view in the app.component.html file.
Weekly View
3.2.Render Weekly Calendar
Use the below code to render the weekly view in the app.component.html file.
Weekly View
 3.3.Render Day Calendar
Use the below code to render the day view in the app.component.html file.
3.3.Render Day Calendar
Use the below code to render the day view in the app.component.html file.
4.Previous, Next, and Today
The Angular Calendar package offers built-in functionality to navigate to previous, next, and today. These are HTML tag attributes.
- mwlCalendarPreviousView — Navigate to Previous
- mwlCalendarToday — Navigate to Today
- mwlCalendarNextView — Navigate to Next
The navigation is based on the current calendar view. Say, for example, if you have a monthly calendar view, then next will show next month. And the previous will show the previous month.
If you have a weekly calendar view, then the next will show the next week and the previous will show the previous week. The same concept applies to the day view also.
I am going to use these attributes with the button element. And we need to bind the calendar view to use the previous and next. So we need to import the CalendarView in your app.component.ts file and create a view like below.
By default, I am assigning it as a monthly view. You can change it to weekly or daily.
Now add the below code in your app.component.html file to navigate the desired view date.
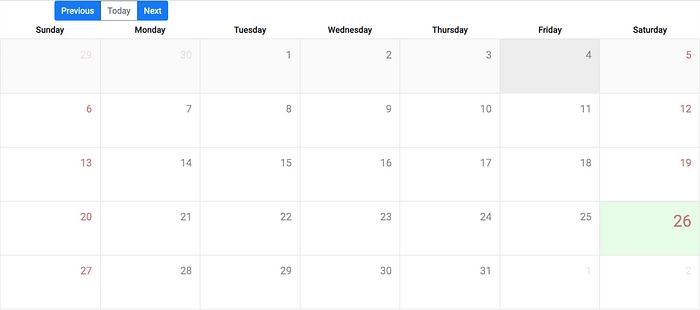 Here we attached the calendar view with the view attribute. If you click the previous button, it will show the previous month calendar. And if you click the next button, then it will show the next month calendar.
5.Swith the Calendar View
Now we have a static calendar view(Only monthly or weekly or daily). We can change this by using Angular Switch. We are going to modify the existing code with the switch. A button click event will switch the calendar view. Create three buttons with the click event to change the view in your app.component.html file.
Then create a setView() function on your ts file.
We need a little further modification in the HTML file also. It means we have not implemented the switch case. So, implement a switch case like the one below in your HTML file.
 If you click the Month or Week or Day, then it will show corresponding view.
6.Show Event Badge Count
So far, we have only done required things. The view part only. Now the main question is how to add the event to calendar or how to show event count on the calendar. In my client requirement, they need to see how many appointments are booked in a day(count of all appointment in a day) and when click the particular day, it have show all the booked appointments. Showing all the booked data in modal is very easy. It is simple click event. Now the tricky question is how to show the count in a date. We have to use the events attribute. For this we need to import the CalendarEvent class. And create an event object like below. Paste the above code in your app.component.ts file. The event needs few important paramaters.They are listed below.
- start — date or time object. Mandatory
- end — date or time object. Optional
- title — Your information. Mandatory
And add the event to the calendar view in app.component.html file.
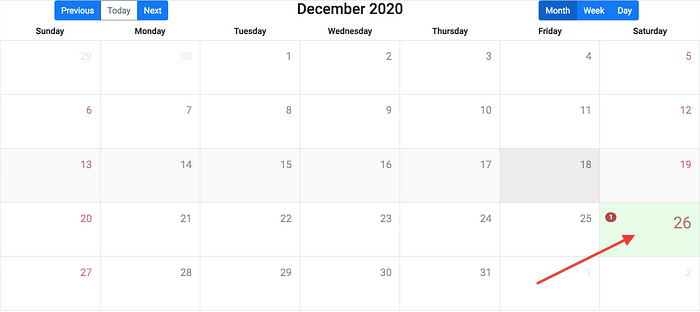 It will show the badge count 1 on your current date. It you want to show another event on same day, then add one more event in ts file.
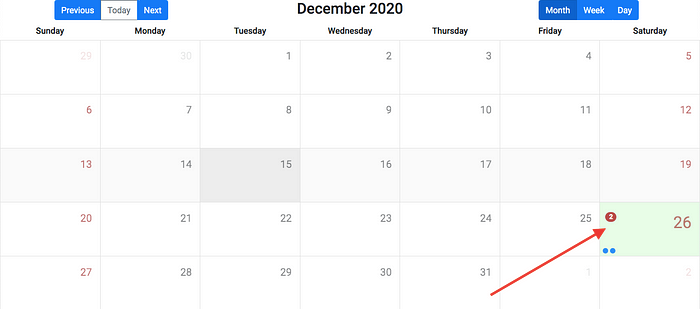 Now it will show the two count on the same day. Here the problem is, it will show the dots based on the count. If you have hundred event, then it will show the 100 dots. If you don’t want to show the dots, then simple use this code on your style.scss file.
.cal-events {
    display: none !important;
}
If you want to fetch the data from db, then pass the date or time to start parameter and give a title value using the CalendarEvent object. Iterate the data using the for loop like below.
7.Day Click Event
When the user clicks a date from the monthly view, then it have to show all the appointment info on the particular day in a modal. To achieve this,
in a monthly calendar view, we have dayClicked event. Add dayClicked event to your monthly view like below.
Then create a dayClicked() function your ts file like below.
Here I showed a demo code. You can implement a modal to show the data based on the user clicked date.
Summary
In this tutorial, we learned various stuffs. From basic installation to adding events to the calendar. Here is a quick list.
- How to create Monthly Calendar
- How to create Weekly Calendar
- How to create Day Calendar
- How to go Next and Previous Day / Week / Month
- How to Switch to Daily / Weekly / Monthly View dynamically.
- How to Add events to the particular date
- Day Click event That’s all. I hope you like this tutorial. If you have any queries, then comment it.
Get Full Source Code in GitHub. https://github.com/bharathirajatut/angular-examples/tree/master/angular-calendar-example
Demo Link https://angular-calendar.com/#/kitchen-sink Angular Calendar Package Link https://www.npmjs.com/package/angular-calendar
Comments
Loading comments…