We will be creating a banking application using PostgreSQL, Express, React and Node.js.
By building this application, you will learn
1. How to work with PostgreSQL database from Node.js
2. How to secure your APIs using JWT authentication
3. How to maintain login session until user manually performs a logout
4. How to perform CRUD operations in PostgreSQL from Node.js
5. How to dynamically generate pdf to get list of transactions within selected date range
6. How to automatically download any type of file including pdf file.
and much more.
This is a first part of the multipart series. Let’s start with the first part.
Let’s get started
Create a new project using create-react-app
create-react-app fullstack-banking-app
Once the project is created, delete all files from the src folder and create index.js file inside the src folder. Also create actions,components, css, reducers, router, store and utils folders inside the src folder.
Install the necessary dependencies
yarn add axios@0.19.2 bootstrap@4.4.1 history@4.10.1 jwt-decode@2.2.0 lodash@4.17.15 moment@2.25.3 node-sass@4.14.1 react-bootstrap@1.0.1 react-redux@7.2.0 react-router-dom@5.1.2 redux@4.0.5 redux-thunk@2.3.0
Create a new file Login.js inside components folder with following code
Create a new file constants.js inside utils folder with following content
export const SIGN_IN = 'SIGN_IN';
export const SIGN_OUT = 'SIGN_OUT';
Create a new file auth.js inside reducers folder with following content
Create a new file store.js inside store folder with following content
Here, we have created a redux store with a single authentication reducer for now. We also added configuration for the redux dev tool to see realtime actions dispatched. To learn how to configure it, click HERE
Create a new file AppRouter.js inside router folder with following content
Create a new file main.scss inside css folder with following content
Create a new file index.js inside src folder with the following content
Now, you can run the application by executing yarn start command and verify that Login component is displayed.
Create a new file common.js inside utils folder with the following content
Now, update the Login.js component with the following content
Create a new file Register.js inside components folder with the following content
In Login and Register component, we just displayed a form and added validation to check if all data is entered or not.
Now, If you check the application, you will see that the login and registration form is displayed and an error message is also displayed when we don’t enter any data
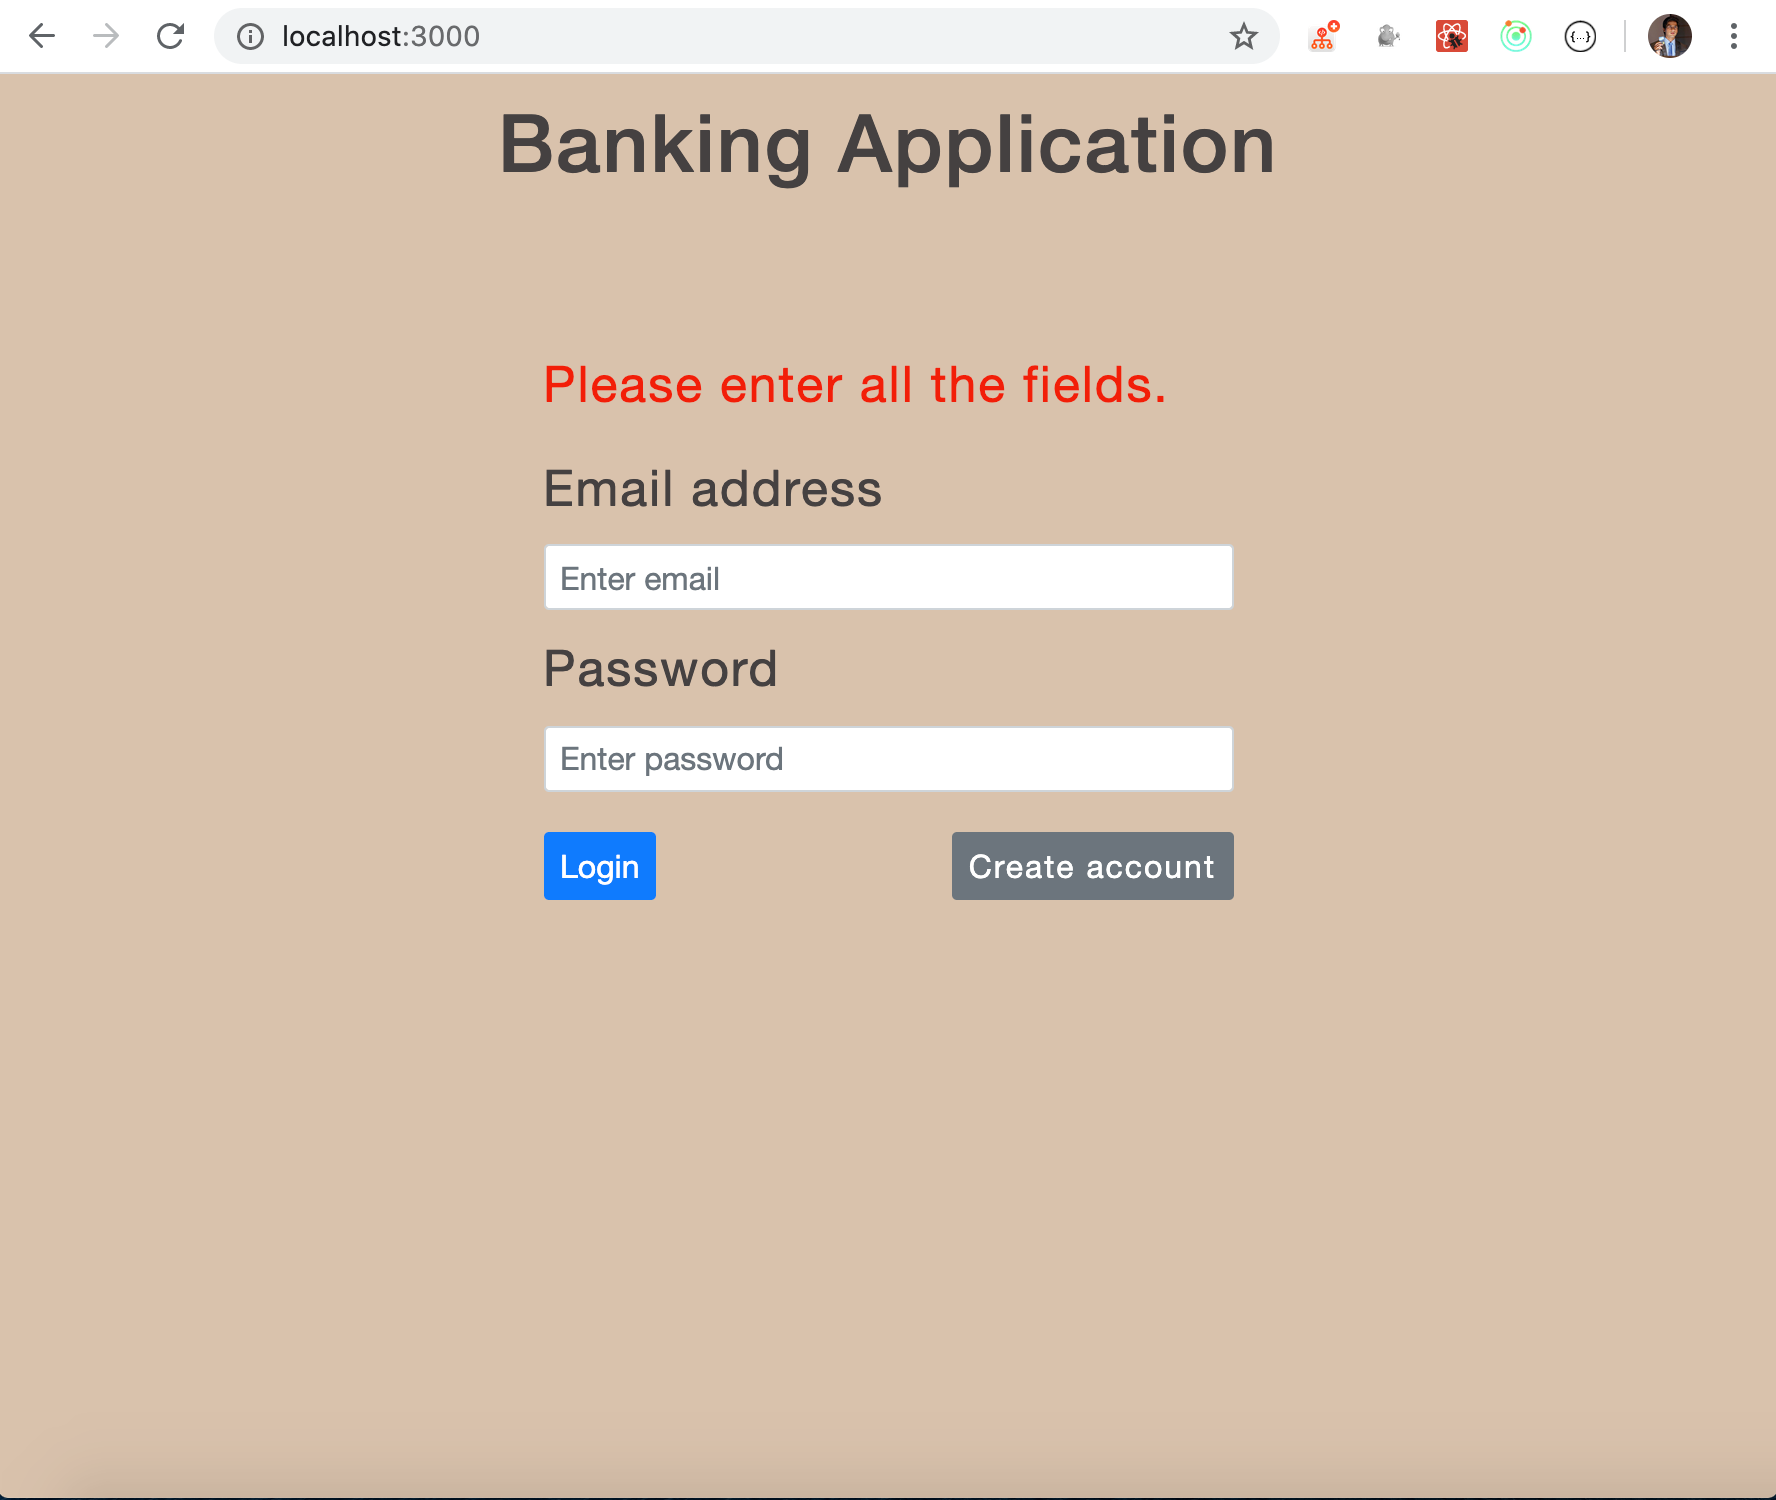
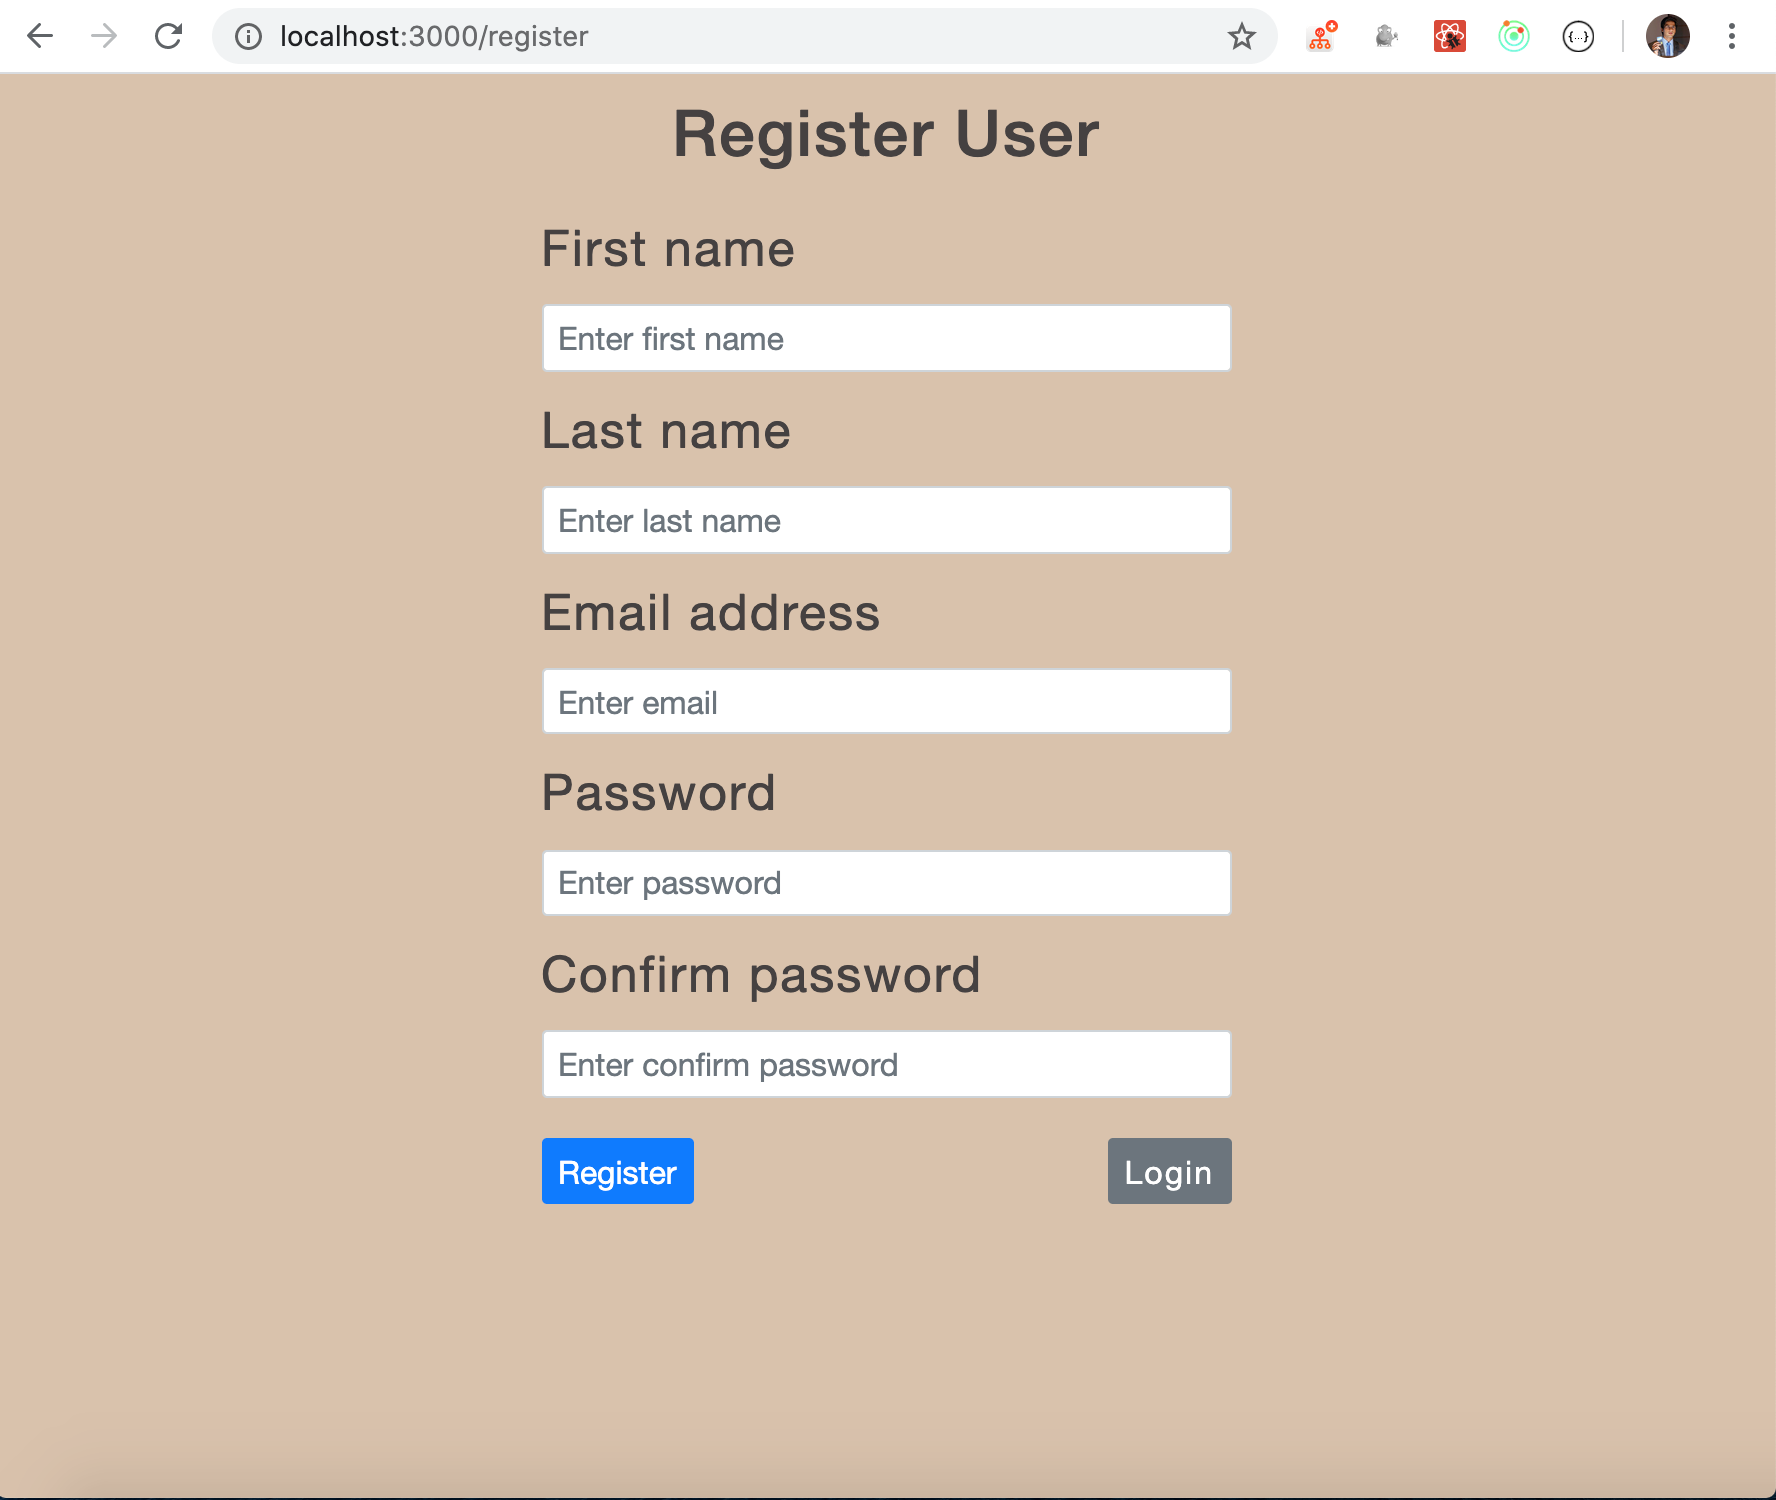
Login and Register Page
Now, let’s create a backend using Nodejs to handle the login functionality.
Create a new server folder alongside the src folder. So your project will now contain four folders namely node_modules, public, server and src.
Execute the following command from the terminal from server folder
yarn init -y
This will create a new package.json file inside server folder
Now create db, middleware, routes, utils and views folder inside the server folder. Also, create index.js inside server folder
Now, install the npm packages from inside the server folder
yarn add axios@0.19.2 bcryptjs@2.4.3 cors@2.8.5 dotenv@8.2.0 express@4.17.1 jsonwebtoken@8.5.1 moment@2.25.3 pg@8.0.3 nodemon@2.0.4
Inside the server/db folder, create a new file connect.js with following content
Provide your postgresql database connection details in the connect.js file.
Create a new file scripts.sql inside server folder with the following content
Connect to the PostgreSQL database and copy and paste the commands from scripts.sql to create a database and tables.
Inside utils folder, create a new file common.js with following content
Create a new file auth.js inside server/middleware folder and add the following content:
Inside routes folder, add auth.js with following code
Create a new .env file inside server folder with the following content
secret=ThisIsMySecretKey
Now, let’s create an express server. Add following code inside server/index.js file.
Add a new start script inside package.json
"scripts": {
 "start": "nodemon index.js"
}
Let’s understand the code from routes/auth.js
To query the PostgreSQL database, we have used a connection pool that handles multiple queries and gives a faster response.
We created the pool object in db/connect.js which we have imported in auth.js as
const { pool } = require("../db/connect");
Next, in /signup route inside auth.js, we first check if the data coming to the API contains the fields which are needed for registration using isInvalidField function defined in common.js
The data sent from the client will become available inside req.body object and we get it as JSON because we have added app.use(express.json()) in index.js
So all our current and future routes will receive data as JSON in req.body object.
Take a look at below code from utils/common.js
const isInvalidField = (receivedFields, validFieldsToUpdate) => {
  return receivedFields.some(
    (field) => validFieldsToUpdate.indexOf(field) === -1
  );
};
This will make sure, we are not trying to add some invalid field causing error while insertion. So we send back an error if there is some invalid field to insert
const isInvalidFieldProvided = isInvalidField(
  receivedFields,
  validFieldsToUpdate
);
if (isInvalidFieldProvided) {
  return res.status(400).send({
    signup_error: "Invalid field.",
  });
}
Then we query the database to check if the user with the same email does not exist in the database.
const result = await pool.query(
  "select count(*) as count from bank_user where email=$1",
  [email]
);
Here, we are using async await syntax instead of promises syntax. As we have added async keyword for the /signup route function, we have used await keyword for the query.
The result variable will contain some extra data. The data we are interested will always come in rows property from the result. As there is just a single count, we access it as
const count = result.rows[0].count;
If the count is greater than zero, that means there is already another user with same email, so we send back error
const count = result.rows[0].count;
if (count > 0) {
  return res.status(400).send({
    signup_error: "User with this email address already exists.",
  });
}
Note, we have added a return keyword here, so the next lines of code will not be executed. As without return keyword, the next lines of code will be executed causing error even if the response is sent to the client.
Now, if the count is zero then we can insert user details in the table.
Before adding the user details into the database, we first need to encrypt the password. We used the bcryptjs library for creating a secure password. To learn how it works, check out my previous article HERE
Here, we used the following code to generate a password.
const hashedPassword = await bcrypt.hash(password, 8);
Next, using pg npm package, allows us to write queries as we execute it in the database.
await pool.query(
  "insert into bank_user(first_name, last_name, email, password) values($1,$2,$3,$4)",
  [first_name, last_name, email, hashedPassword]
);
Here, we provided the dynamic values by assigning $count variable
So $1 will be replaced with first_name, $2 will be replaced with last_name and so on. Using $ instead of directly using values will prevent the SQL injection attack so it's always recommended to use $ for that.
Also note that, As we have added the entire code in the try block, if there is an error occurred while executing a query, the next code inside the try block will be skipped, and the catch block will be executed and we send back the error to the client.
res.status(400).send({
  signup_error: "Error while signing up..Try again later.",
});
If everything went well, then we call send method of response to complete the request and send back 201 status code which signifies that something is created. We could send 200 status code but 201 is more appropriate here.
Now, start the express server by running yarn start command from server folder.
We can now test the /signup API using Postman.
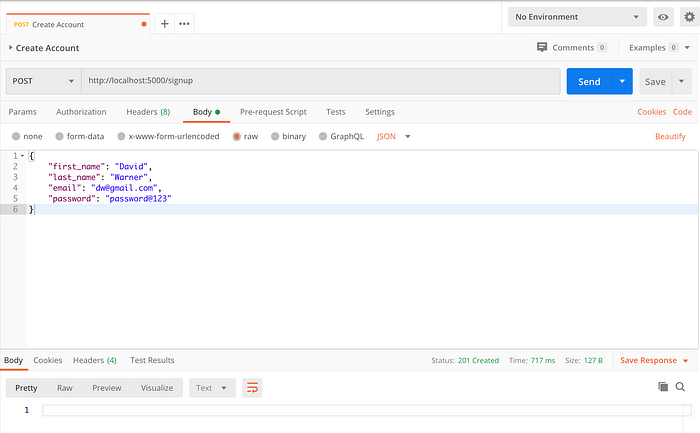
Successful signup
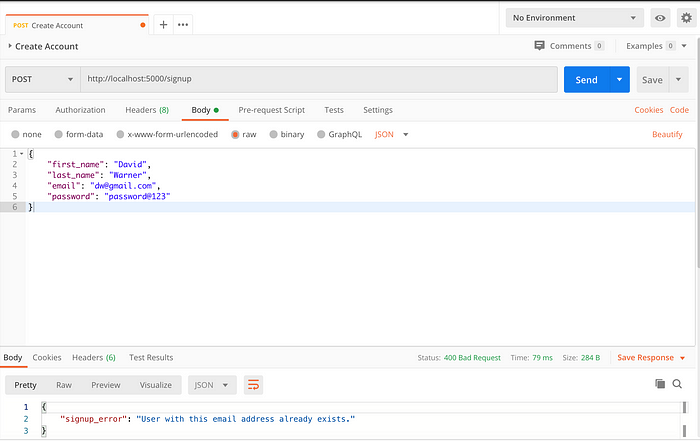
Email already exists error
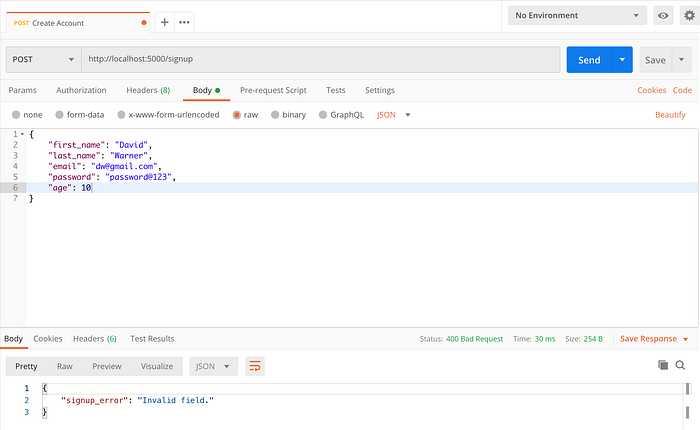
Invalid field error
Now, let’s understand the /signin route.
Here first, we call the validateUser function from common.js to check if there is a user with the provided email address.
const result = await pool.query(
  "select userid,  email, password from bank_user where email = $1",
  [email]
);
If such a user exists, then we compare the user-provided password and password stored in the database to check if it matches.
const isMatch = await bcrypt.compare(password, user.password);
if (isMatch) {
  delete user.password;
  return user;
} else {
  throw new Error();
}
If the password matches, then we remove the password from the response and then send the response back to the client so the response will not contain the encrypted password stored in the database.
If the user does not exist in the database then we throw an error using throw new Error();
Once we throw the error from validateUser function, the catch block from the /signin route, will be executed where we send back the error to the client.
res.status(400).send({
  signin_error: "Email/password does not match.",
});
If we get the user from validateUser function, then we call generateAuthToken to generate jwt token by passing that user object to it.
const generateAuthToken = async (user) => {
  const { userid, email } = user;
  const secret = process.env.secret;
  const token = await jwt.sign({ userid, email }, secret);
  return token;
};
To generate the token, we use the jsonwebtoken npm library. It provides a sign method that accepts the data we can provide to generate the token as the first argument and then the secret key as the second argument which is used while generating and validating the token.
Once the token is generated by generateAuthToken function, we insert that token along with the userid into the tokens table. So Whenever user logins, we generate a new token and add to the tokens table. This will ensure that we can log in from multiple devices to the application so the token will be valid only for that particular device and we will remove the token from the tokens table once the user logs out from the application.
const result = await pool.query(
  "insert into tokens(access_token, userid) values($1,$2) returning *",
  [token, user.userid]
);
once the token is successfully added to tokens table, we will send back the user details along with token back to the client
user.token = result.rows[0].access_token;
res.send(user);
We can now test the /signin API using Postman.

SignIn Error
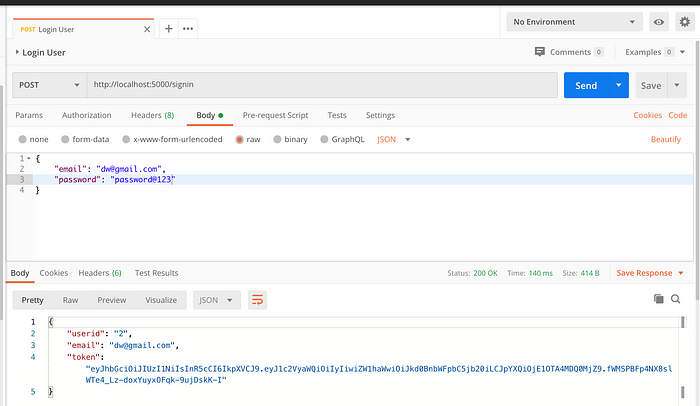
SignIn successful
Now, we will integrate these APIs in our React app.
Inside, src/utils/constants.js add another constant
export const BASE_API_URL = "http://localhost:5000";
Create a new file auth.js inside actions folder and add the following content
Here, in registerNewUser function, we are calling our server API http://localhost:5000/signup by passing the user data as the second parameter to it and sending back object {success: true } as a result of API for successful and {success: false} for failure.
This syntax of returning a function from the function with dispatch argument is provided by redux-thunk library. Check out my previous article HERE to learn about how to use it.
Open components/register.js and inside registerUser function after this.setState({ isSubmitted: true }); statement add following code
this.props
  .dispatch(registerNewUser({ first_name, last_name, email, password }))
  .then((response) => {
    if (response.success) {
      this.setState({
        successMsg: "User registered successfully.",
        errorMsg: "",
      });
    }
  });
Also, add an import for registerNewUser at the top of the file.
import { registerNewUser } from "../actions/auth";
Now, start the React app by running yarn start command and try registering a new user. After entering all the details, when you click on the register button, backend API will be called but now you will see an error in the console which is CORS(Cross-origin resource sharing) error.
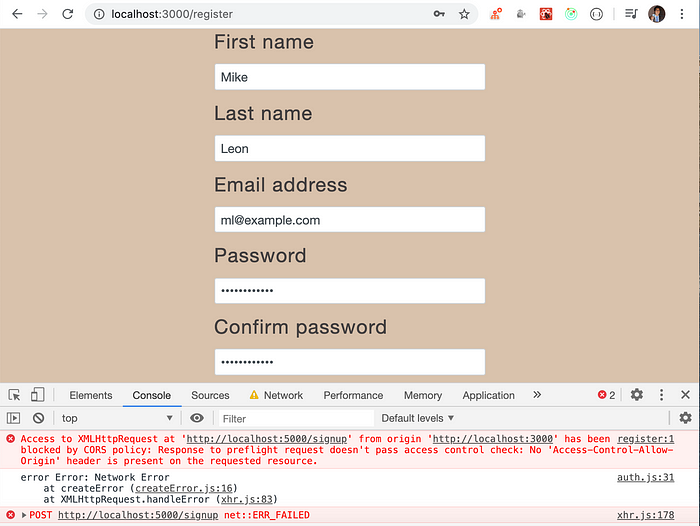
CORS Error
The error comes because we are making an API call from the app running on port 3000 to the server which is running on port 5000 so the browser blocks our request to the server. This is for security reasons and due to cross-domain policy.
To fix this we need to add extra middleware in our express app, so it will accept requests from any application.
Don’t worry, later in this article, we will see, how to remove the need for cors in our application.
To do that, open server/index.js and add an import for cors and add it’s use
const express = require("express");
const cors = require("cors");
const authRoute = require("./routes/auth");
require("dotenv").config();
const app = express();
const PORT = process.env.PORT || 5000;
app.use(express.json());
app.use(cors());
app.use(authRoute);
app.listen(PORT, () => {
  console.log(`server started on port ${PORT}`);
});
Now, restart your server if it not running by executing yarn start from server folder and now, try registering user again
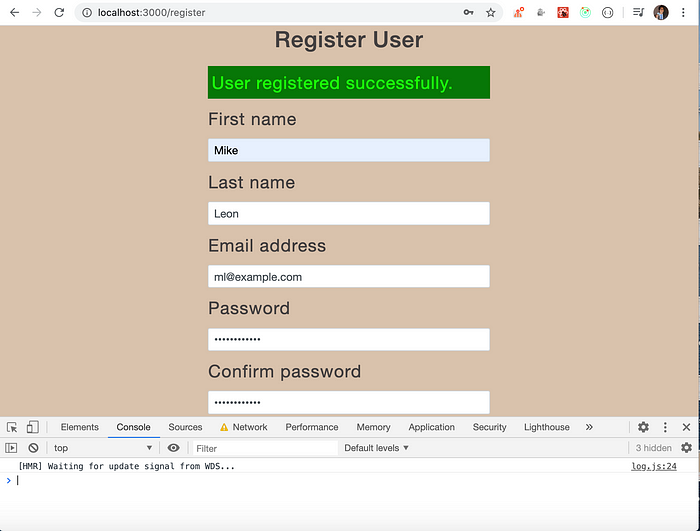
Registration successful
and the user also gets added in the database

Database Users
Congratulations, You have successfully integrated backend and front end for registering user. Wow!
Now, we will integrate the login API into our React app.
Open src/components/Login.js and inside handleLogin function, inside the else block add call for initiateLogin action. Also, add an import for it at the top
Re-start the React app if not already running and try logging in with the already registered user credentials.

Login success
As you can see, once you click the login button, as login is successful, data will be added to the redux store.
If you enter wrong credentials, you will see error in console
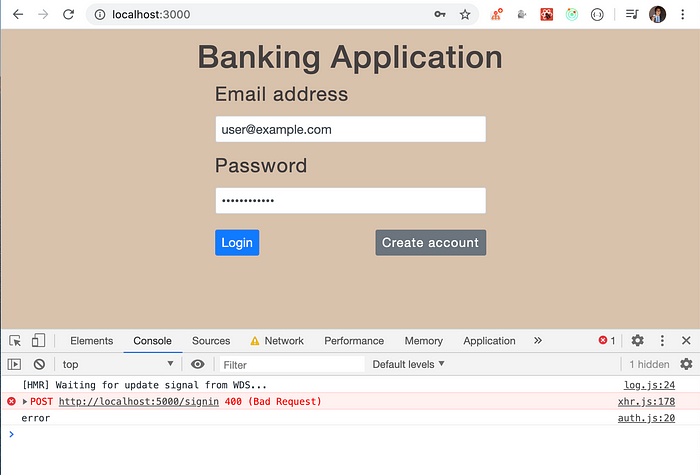
Login failed
If you open the network panel and check the sign-in request-response, you will see the actual response error from backend
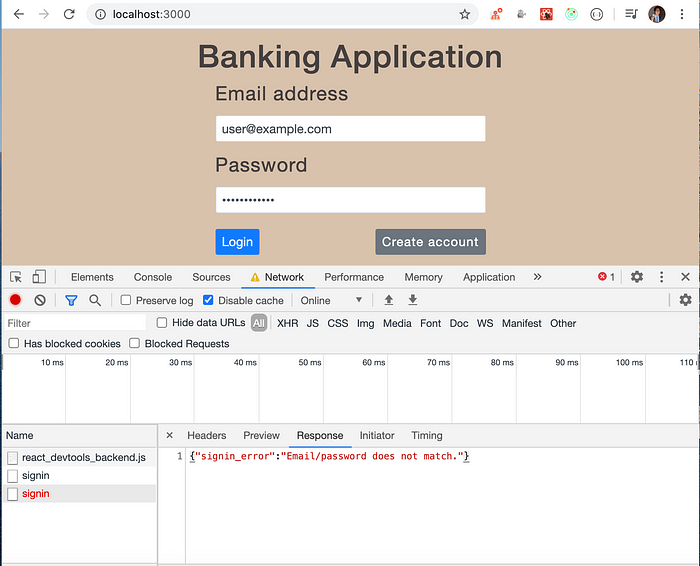
Server error
Now, we will display the backend server error for the login and register page on UI.
Open src/utils/constants.js and add two new constants
export const GET_ERRORS = "GET_ERRORS";
export const RESET_ERRORS = "RESET_ERRORS";
Create a new file errors.js inside src/reducers folder and add the following content
Create a new file errors.js inside src/actions folder with the following content
Now, open actions/auth.js and inside catch block of initiateLogin and registerNewUser function, add following code
error.response && dispatch(getErrors(error.response.data));
Here, the response sent from the server will be available in error.response.data object which we add in the reducer
Also, add an import for the getErrors action function at the top of the file
Now to get that error in the reducer, add the reducer in the store/store.js file
combineReducers({
  auth: authReducer,
  errors: errorsReducer,
});
Also add an import for it, at the top
Now, whenever we call getErrors function to dispatch GET_ERRORS action from initiateLogin function, it will call the reducer and the error will be added to the redux store
Now, try logging in with the invalid credentials and you will see the error added in the redux store.
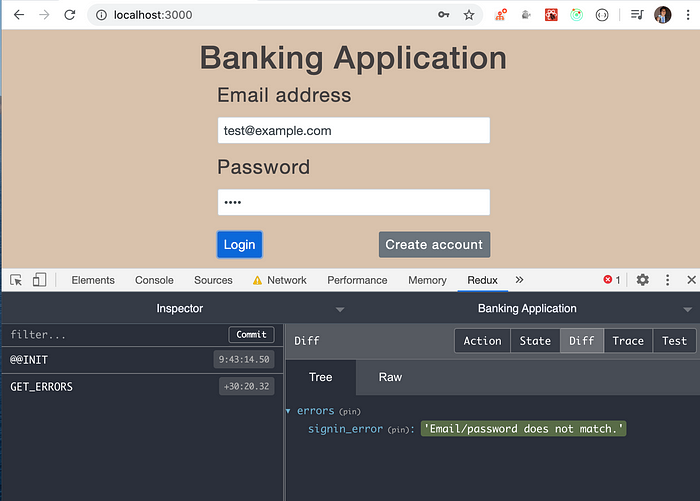
server error in the redux store
Now, we will display the error from the redux store on UI.
Open components/Login.js and add mapStateToProps function at the bottom of the file and pass it to the connect function.
const mapStateToProps = (state) => ({
  errors: state.errors,
});
export default connect(mapStateToProps)(Login);
Add componentDidUpdate and componentWillUnmount lifecycle methods and add an import for lodash and resetErrors at the top of the file
So now, whenever there is an error added in the redux store, we will get that error in props.errors because of our mapStateToProps function and we take that updated prop value by implementing the componentDidUpdate method.
In the componentDidUpdate method, we first check if previous props not equal to current props by using lodash isEqual method and only then set error in the errorMsg state. This condition is necessary to avoid the infinite loop error. To understand the importance of lodash methods check out my previous article HERE
Now, you will be able to see the backend error on UI If you enter invalid credentials for login
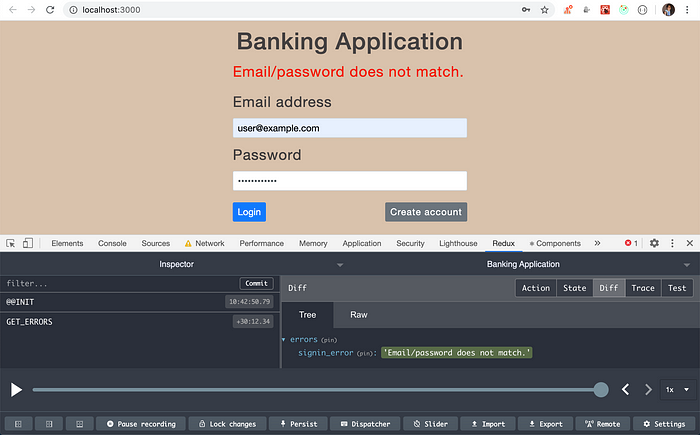
Server error on UI
Now, let’s display the error coming from backend on Register page.
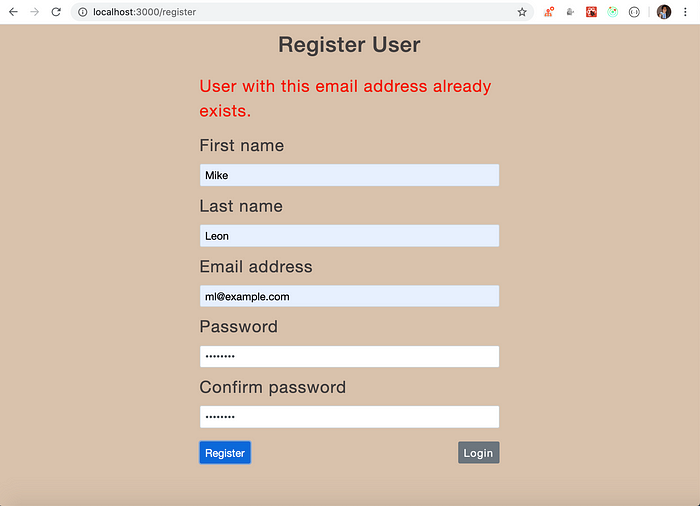
Registration server error
Now, let's create a Profile component to display profile page once user login into the application
Create a new file Profile.js inside components folder and add the following content
Create a new file profile.js inside actions folder and add the following content
Open utils/constants.js and add another constant
export const UPDATE_PROFILE = "UPDATE_PROFILE";
Create a new file profile.js inside reducers folder and add the following content
Add profileReducer to store inside store/store.js file
combineReducers({
  auth: authReducer,
  errors: errorsReducer,
  profile: profileReducer,
});
Now, as we have added profileReducer to store, we can access the profile information from the store in any component from store.profile using the mapStateToProps function.
Add the Profile component in the router/AppRouter.js file
<Route path="/profile" component={Profile} />
If you remember, whenever we are clicking the login button on Login page, we are sending the login request to /signin API at the server and once it's successful, we are adding the data from the response to the redux store
Login success
But we are not redirecting to any component once the login is successful.
Let’s do that now.
In actions/auth.js, inside initiateLogin, we need to redirect to Profile component after success using props.history.push(‘/profile’) method of react-router-dom.
But history object is only available to the routes mentioned as Route in AppRouter.js like Profile, Login and Register component, so to access the history object outside those routes we need to use the npm history library.
We have already installed it initially along with other dependencies. So open AppRouter.js and add the import for the history package.
import { createBrowserHistory } from "history";
and call the createBrowserHistory function to get the history object and we can export that as named export
export const history = createBrowserHistory();
We also need to pass this history variable to our AppRouter.
so Change
<BrowserRouter>...</BrowserRouter>
to
<Router history={history}>...</Router>
and import Router from react-router-dom.
import { Router } from "react-router-dom";
So, as we have exported the history object, we can import it inside actions/auth.js
Inside initiateLogin function after dispatch(signIn(user)); add history.push(‘/profile’);
and add import for history at the top of the file
Now, login to the application and you will see that we are redirected to the profile page.
Login redirect demo
But you will notice that the Banking Application heading is not displayed on the profile page. So let’s create a Header component to display header only for logged in user.
Create a new file Header.js inside components folder and add the following content
Now, open AppRouter.js and add Header component inside the Router
Now, after successful login, you will see profile page along with the header
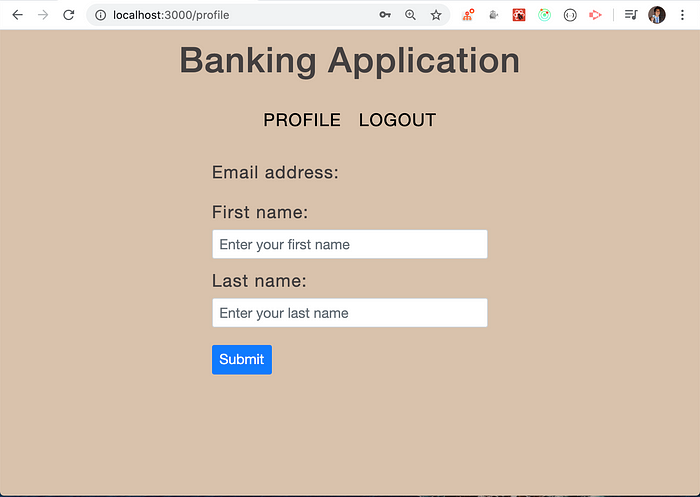
Profile page
Now, we will see how to maintain the session even after refresh.
Inside src/utils/common.js file add the following code
So, your complete common.js will look like this
Let’s understand the code.
If you remember, inside the /signin route of server/routers/auth.js, we are calling generateAuthToken
const token = await generateAuthToken(user);
Inside this function, we have called jwt.sign method by passing the userid and email for the first parameter. So the generated jwt token contains these values to identify the user.
To take out these values from the jwt token we have used jwt-decode npm package which accepts the token and returns those values.
Therefore, inside maintainSession we are using json_decode by passing token and we are passing that extracted information to updateStore function which dispatches the signIn action creator function.
const decoded = jwt_decode(user_token);
updateStore(decoded);
Now, If you log in again, you will see that, even after refreshing the profile page, you will see that, the auth object of data in the redux store is not removed.
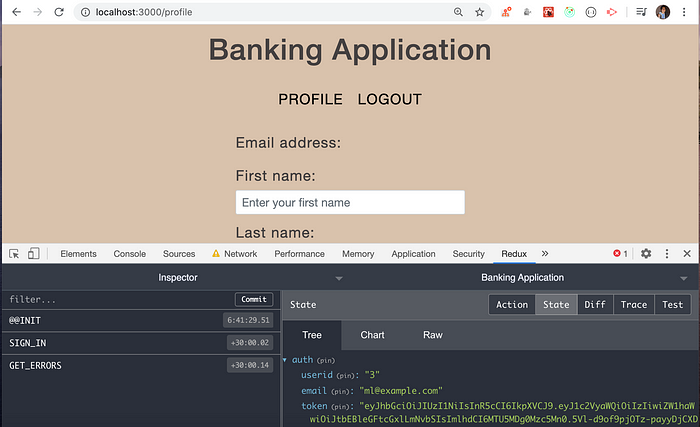
redux store data retained even after refresh
This is because, once we successfully log in and refresh the page, inside the maintainSession function, we are checking for the token in local storage and again calling signIn action creator function and updating the redux store with the values decoded from the jwt token.
If you noticed, the jwt token has 3 strings separated by two dots. The middle string value contains the actual value we used while generating the token.
Navigate to this site and paste the following value inside the text area and click on decode
eyJ1c2VyaWQiOiIzIiwiZW1haWwiOiJtbEBleGFtcGxlLmNvbSIsImlhdCI6MTU5MDg0NDU5OX0
you will see the actual data contained in the jwt token.

Decode jwt token data
Once the user is logged in, we should not log in or register again by visiting those pages. so we need to add a check for the current page route if it is /profile or /register then we redirect to /profile page.
Therefore, change
export const maintainSession = () => {
  const user_token = localStorage.getItem("user_token");
  if (user_token) {
    const decoded = jwt_decode(user_token);
    updateStore(decoded);
  } else {
    history.push("/");
  }
};
to
export const maintainSession = () => {
  const user_token = localStorage.getItem("user_token");
  if (user_token) {
    const currentPath = window.location.pathname;
    if (currentPath === "/" || currentPath === "/register") {
      history.push("/profile");
    }
    const decoded = jwt_decode(user_token);
    updateStore(decoded);
  } else {
    history.push("/");
  }
};
Now, we will not be able to visit the register or login page, once we are logged in.
Now, let’s add code to get the profile details once the component is loaded.
To get that done, inside initiateLogin function from actions/auth.js, before the history.push call, add following code
dispatch(initiateGetProfile(user.email));
This will add the profile data inside the redux store.
Now, let’s create a profile API at the server-side to get and update profile information.
Create a new file profile.js inside server/routes folder and add the following content
Now, add this route for app.use inside server/index.js
Let’s understand the code now.
In middleware/auth.js, we have added a middleware function.
What is middleware?
Middleware is a function that has access to request and response object and extra next parameter. So whenever we make an API request to the backend Express server, we can execute some code before or after the request is sent to the actual route. So we can do the following things.
1. We can perform logging like log URL of the request, it’s IP address, etc
2. Also based on certain conditions we can restrict access to the route.
In our case, we will be using the middleware to restrict access to the route.
So whenever we are making any request to the API route, we will check if the authentication token is sent by the client and is valid and only then send the request forward to the private routes otherwise we will send an error back immediately without executing the private route.
If you remember, in src/actions/auth.js, we have initiateLogin action creator inside which we have added this statement
localStorage.setItem("user_token", user.token);
So if login is successful, we are storing the jwt token coming from the server response into local storage. So now for any API route that should be accessed only when the user is logged in, we need to send this token to the server along with the request. Let’s see what happens when we don’t send the token while making API request for getting profile information.
We have already added code to get the profile data from a redux store in components/Profile.js inside componentDidMount and componentDidUpdate method.
But we can’t go to login or register page as we are already logged in so just, for now, to test the get profile API just type following code in the browser console and hit enter
localStorage.removeItem("user_token");
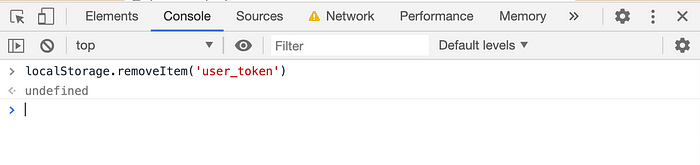
Deleting localStorage token value
So now when you go to http://localhost:3000/, you will be automatically redirected to the login page
Now login once again and you might be disappointed because you will see an error in the console.
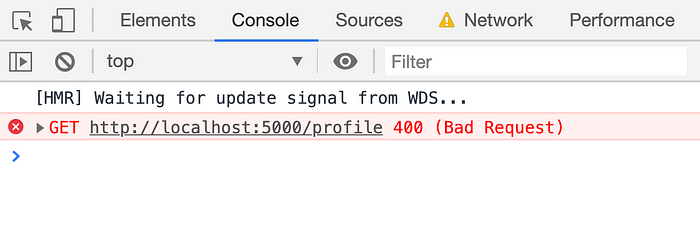 If you see the network panel, you will see the
 Authentication failed server error
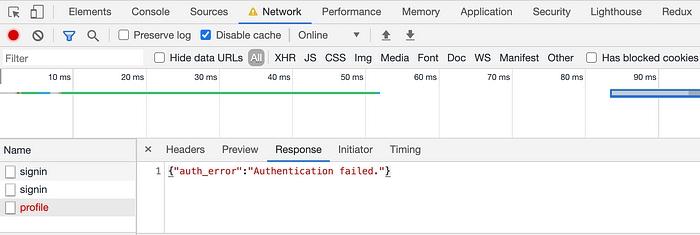
Authentication failed server error
This is because we have added authMiddleware to get /profile route in routes/profile.js file and because this is a private route and only logged in user should be able to access this route.
Router.get("/profile", authMiddleware, async (req, res) => {
  //...
});
The authMiddleware will be executed when we access the /profile route.
If you see the code of authMiddleware function, you will see that it requires an Authentication Header which we have not provided and because of this, we are getting Authentication failed error.
In the Authorization request header, we need to send the jwt token as a Bearer token in the following way
Header name: header valueFor ex. Authorization: Bearer eyJhbGciOiJIUzI1NiIsInR5cCI6IkpXVCJ9.eyJ1c2VyaWQiOiIzIiwiZW1haWwiOiJtbEBleGFtcGxlLmNvbSIsImlhdCI6MTU5MDg1NzMwNH0.uTwti-O79u_8sT-H70WsR4LyQDN3mttR6xYxn2a6VeQ
Let’s do that through Postman first, so you will get an idea.
Let’s hit the login API through postman.
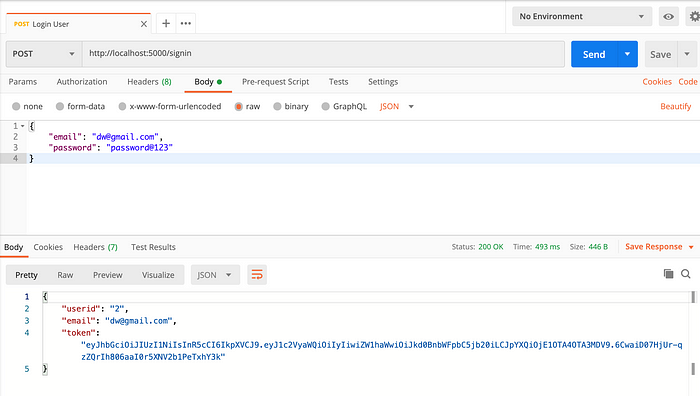
Login API postman
Now, we will take the token that we got from login response and we will use the same for profile route
In the headers tab, we will add Authorization header with the token value

Adding Authorization header
Once you click the send button to send the API request, we get the profile information without authentication error
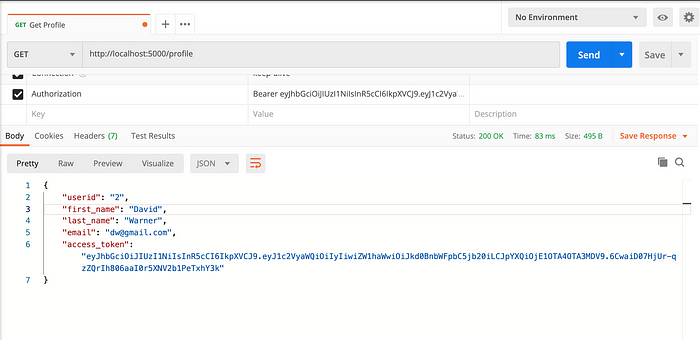
profile API response
So now, let’s see how we can send the Authorization header using Axios from our code.
Add the following two functions inside src/utils/common.js file
As you can see, we have added a header in the following way
axios.defaults.headers.common["Authorization"] = `Bearer ${token}`;
So before making the API call, we will execute this function and the header will be automatically added to the default request header.
Open src/actions/profile.js and inside initiateGetProfile function, before axios.get call add a call for setAuthHeader function and add an import for it from common.js.
Now, let’s see if profile information is displayed or not on page load. Type localStorage.removeItem(‘user_token’) in the browser console and go to http://localhost:3000/ and log in again
This time now, you will see profile information automatically populated
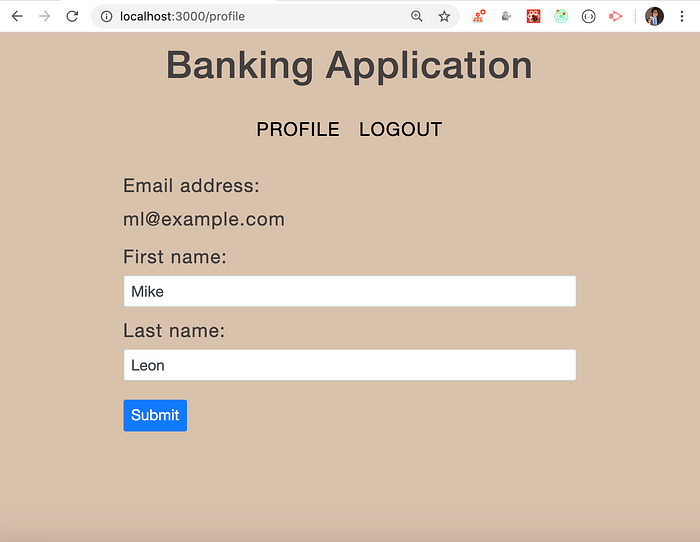
Profile information populated
You will also be able to update the profile information.
Awesome! If you check the network tab, you can see our Authorization header under the request headers section.
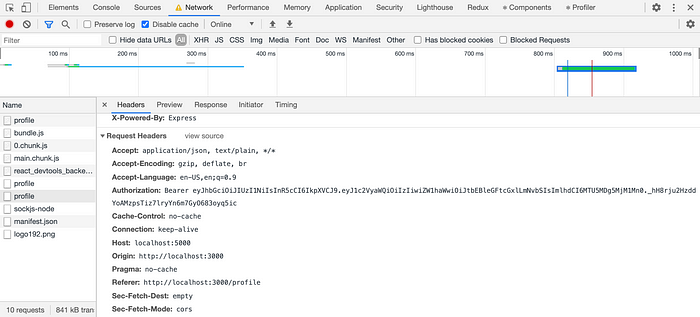
Profile API Headers
Now, you are aware of how to send the authorization header, we can take a look at the code for authMiddleware inside middleware/auth.js
from req.header we get header as
Bearer eyJhbGciOiJIUzI1NiIsInR5cCI6IkpXVCJ9.eyJ1c2VyaWQiOiIzIiwiZW1haWwiOiJtbEBleGFtcGxlLmNvbSIsImlhdCI6MTU5MDg1NzMwNH0.uTwti-O79u_8sT-H70WsR4LyQDN3mttR6xYxn2a6VeQ
so we are splitting this by space and taking only the token value
const token = req.header("Authorization").split(" ")[1];
Then using the same secret key from .env file, which we used to create the jwt token, we are verifying that the token is valid using jwt.verify method and take out the userid and email stored in that token and storing it as a decoded variable.
Then we check if the token exists in the tokens table and if found, we return the details of the user along with the token added to the request object and call the next function which will execute the code for the intended route.
As we have authMiddleware in getting /profile route
Router.get("/profile", authMiddleware, async (req, res) => {
  // ...
});
when we call the next function next(), the code from /profile route will be executed.
If there is any error while verifying the token or decoding it, the catch block from authMiddleware will be executed and we will send the Authentication failed error back to the client
res.status(400).send({
  auth_error: "Authentication failed.",
});
Now, let’s add logout functionality
Inside server/routes/auth.js add following code
create a new file Logout.js inside components folder with the following content
Open actions/auth.js and add following code
Complete auth.js code looks like this
If you check the initiateLogout function above, you will see that, before making Axios call, we are calling setAuthHeader function, because this is also a private route as only logged in user is allowed to logout. After the call is done, we are removing the Authorization header and deleting the token from local storage and calling out signOut action creator function so it will empty the auth object from the redux store.
Note, we have added a return keyword before dispatching signOut.
return dispatch(signOut());
so as this is inside an async function, we will get a promise after we call this initiateLogout function and in Logout.js we have added .then call so once we are logged out, we will be redirected to login page
dispatch(initiateLogout()).then(() => history.push("/"));
Now, add the /logout route to the AppRouter component
<Route path="/logout" component={Logout} />
Now, we can test the logout functionality.
Click, the logout button and you will be redirected to the login page.
Working application functionality
A couple of improvements:
Now we are done with our one flow of our application but there is one improvement we can do. If you recall, for every private route like get or post /profile , before making the API call, we are calling setAuthHeader()function. We have many other routes that we will explore in the next part but It’s cumbersome to call the function every time before making an API call or It may happen that, We may forget to call the function and we will receive the Authentication failed error. So we can separate out that functionality which will do that job of calling that function and then make an API call which is the proper way of handling APIs. So let’s do that
Create a new file api.js inside src/utils folder and add following code
Here, we are sending the following parameters to every get, post and patch route.
1. API URL as the first parameter
2. Data to send to API as the second parameter
3. If we need to set the Authorization header before making API call, send true as the third parameter
4. If we need to remove the auth header after making API call, send true as the fourth parameter
Inside src/actions/profile.js, inside initiateGetProfile function, remove axios.get and call get function from api.js
const profile = await get(`${BASE_API_URL}/profile`);
and inside initiateUpdateProfile function remove axios.post and add the following line instead
const profile = await post(`${BASE_API_URL}/profile`, profileData);
Also inside src/actions/auth.js, inside initiateLogout function, remove axios.post and add the following line instead
await post(`${BASE_API_URL}/logout`, true, true);
That’s it... Thanks for bearing with me for so long. You can find Github source code until this point
Comments
Loading comments…