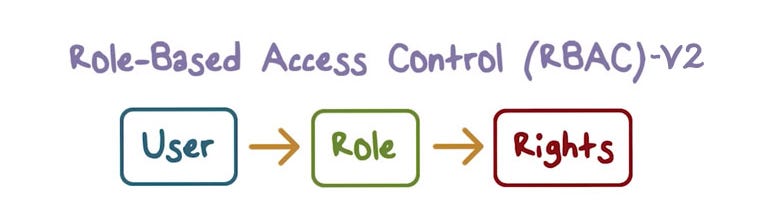
Yay, I have come up with another super cool story I would call it RBAC-V2 because it is my second story on the same topic, there was some reason behind version-2 that are listed below.
- Version 1 is tightly coupled with the project in which I have introduced this technique.
- No child/nested route support.
- No technique to define roles in one place.
- Updating route access is complicated.
- Have to maintain common routes for all roles.
Updates in version-2:
- I have come up with a more generic approach so it’ll better serve the community.
- Added child/nested route support.
- Define roles in one place so it’s easy to maintain.
- Easy to update route access just by adding or removing role.
- If you skip the permission it’ll automatically accessible to everyone.
The solution is exactly the same which I used in version-1 so if you didn’t check version-1, I would highly recommend going through so, you can better understand what exactly going on…
The idea is simply prevent the app to generate unnecessary routes,** rather checking the role on each route and showing fallback UI it would be a great idea to generate only the routes in which user have access, so if the user navigate manually to a route ie: (typing in the address bar) he/she will get 404 Not Found screen because route is not registered.

🙋🏻♂️ Stop Stop Stop
Is this really possible?
Yes, it is possible if you have heard about react-router 4 philosophy it supports dynamic routing and we can take advantage of it.
When we say dynamic routing, we mean routing that takes place as your app is rendering, not in a configuration or convention outside of a running app.

Let’s start
Step #1
Because we are looking for a role-based solution so let’s define the roles first, roles are nothing just a plain javascript object having key-value pair, below is the placeholder roles for my demo app you can replace these with yours.

User Roles
// File: src/config/Roles

export default {
  SUPER_ADMIN: "SUPER_ADMIN",
  ADMIN: "ADMIN",
  MANAGER: "MANAGER",
  CUSTOMER: "CUSTOMER",
  GUEST: "GUEST",
};
Step #2
Define the private routes configuration, route config object supports all the react-router’s route component props with some additional props ie: (title, permission, children) you can add or remove props from config object it means it is super customizable and support up to N nesting, child routes must follow the same parent shape, it means the config object is same for both there is no additional key for the child nor for a parent.
// File: src / config / PrivateRoutesConfig;
import { Roles } from "config";

// Components
import {
  Module1,
  Module2,
  Module3,
  ModuleN,
  ModuleNChild1,
  ModuleNChild2,
  ModuleNChild3,
  Dashboard,
  Profile,
} from "components";

// TODO:
/*
 * 1. Make title optional
 * 2. Make title multi type support ie: (string, node, react element)
 * */

export default [
  {
    component: Module1,
    path: "/",
    title: "Module - 1",
    exact: true,
  },
  {
    component: Module2,
    path: "/module-2",
    title: "Module - 2",
  },
  {
    component: Module3,
    path: "/module-3",
    title: "Module - 3",
  },
  {
    component: ModuleN,
    path: "/module-n",
    title: "Module - N",
    permission: [Roles.SUPER_ADMIN, Roles.ADMIN, Roles.MANAGER],
    children: [
      {
        component: ModuleNChild1,
        path: "/child-1",
        title: "Child - 1",
      },
      {
        component: ModuleNChild2,
        path: "/child-2",
        title: "Child - 2",
      },
      {
        component: ModuleNChild3,
        path: "/child-3",
        title: "Child - 3",
        permission: [Roles.SUPER_ADMIN, Roles.ADMIN],
      },
    ],
  },
  {
    component: Dashboard,
    path: "/dashboard",
    title: "Dashboard",
    permission: [Roles.SUPER_ADMIN, Roles.ADMIN],
  },
  {
    component: Profile,
    path: "/profile",
    title: "Profile",
    permission: [Roles.SUPER_ADMIN, Roles.ADMIN, Roles.MANAGER, Roles.CUSTOMER],
  },
];
We have done with the configuration.
What we have completed so far?
one is the roles and the other is private routes array, right? 🤔🤔🤔 Yesss
🆗 so it’s time to jump into the code…

Step #3
Let’s filter the private routes with user role or roles if your app supports multiple roles like our demo app supports
// File: src/utils/index
import { intersection } from "lodash";

export function isArrayWithLength(arr) {
  return Array.isArray(arr) && arr.length;
}

export function getAllowedRoutes(routes) {
  const roles = JSON.parse(localStorage.getItem("roles"));
  return routes.filter(({ permission }) => {
    if (!permission) return true;
    else if (!isArrayWithLength(permission)) return true;
    else return intersection(permission, roles).length;
  });
}
Now we have a utility method getAllowedRoutes in which we can pass routes array and it’ll return filtered routes array and pass that array into routes mapping component
// File: src/routes/PrivateRoutes
import React, { Fragment } from "react";
import { Redirect, useRouteMatch } from "react-router-dom";
import { getAllowedRoutes, isLoggedIn } from "utils";
import { PrivateRoutesConfig } from "config";
import { TopNav } from "components/common";
import MapAllowedRoutes from "routes/MapAllowedRoutes";

function PrivateRoutes() {
  const match = useRouteMatch("/app");
  let allowedRoutes = [];

  if (isLoggedIn()) {
    allowedRoutes = getAllowedRoutes(PrivateRoutesConfig);
  } else {
    return <Redirect to="/" />;
  }

  return (
    <Fragment>
      <TopNav routes={allowedRoutes} path={match.path} className="bg-white" />
      <MapAllowedRoutes routes={allowedRoutes} basePath="/app" isAddNotFound />
    </Fragment>
  );
}

export default PrivateRoutes;

Step #4 Now the last step is to render the filtered routes, I have created a component for that so the same component is used for rendering the parent as well as the child routes, this component requires filtered routes array and basePath as a prop.
// File: src/routes/MapAllowedRoutes
import React, { memo } from "react";
import { Switch, Route, useRouteMatch } from "react-router-dom";
import { NotFound } from "components/common";

/*
 * This is the route utility component used for generating
 * routes and child routes it only requires routes array and basePath
 */
function MapAllowedRoutes({ routes, basePath, isAddNotFound }) {
  const match = useRouteMatch(basePath);
  return (
    <Switch>
      {routes.map((route) => {
        const {
          path,
          component: Component,
          children,
          title,
          permission,
          ...rest
        } = route;
        return (
          <Route {...rest} key={path} path={`${match.path}${path}`}>
            <Component children={children} />
          </Route>
        );
      })}
      {isAddNotFound && (
        <Route>
          <NotFound />
        </Route>
      )}
    </Switch>
  );
}

export default memo(MapAllowedRoutes);
If you have seen 👀 in a PrivateRoutes we just filtered private routes using the getAllowedRoutes utility method that we have created in step #3 and pass that filtered routes array into a route mapper component, route mapper is nothing just a reusable component used for a map over the routes array.
We are done with the routing.
What do you say if I synchronize your main navigation with routes? 🤔
That would be awesome.
You don’t need to put extra efforts on navigation, just create navigation from filtered routes array and it’ll automatically in sync with routes and also display as per user roles so that the user can’t see other’s navigation options if a user navigates manually to a route ie: (typing in the address bar) user will get 404 Not Found screen.😍
Here is the code
// File: src/components/common/TopNav
import React, { memo } from "react";
import { Button } from "react-bootstrap";
import PropTypes from "prop-types";
import { Link, useHistory } from "react-router-dom";
import { isLoggedIn } from "utils";

function TopNav(props) {
  let history = useHistory();

  function handleLogout() {
    localStorage.removeItem("roles");
    history.push("/");
  }

  return (
    <div className={`w3-bar w3-padding w3-card ${props.className}`}>
      <div className="w3-display-topleft w3-padding-large w3-xlarge">
        RBAC-V2
      </div>
      <div className="w3-right">
        {props.routes.map(({ path, title }) => (
          <Link
            key={path}
            className="w3-bar-item"
            to={`${props.prefix}${path}`}
          >
            {title}
          </Link>
        ))}
        {isLoggedIn() && <Button onClick={handleLogout}>Logout</Button>}
      </div>
    </div>
  );
}

TopNav.propTypes = {
  routes: PropTypes.arrayOf(
    PropTypes.shape({
      path: PropTypes.string.isRequired,
      title: PropTypes.string.isRequired,
    })
  ).isRequired,
  prefix: PropTypes.string,
  className: PropTypes.string,
};

TopNav.defaultProps = {
  prefix: "",
  className: "",
};

export default memo(TopNav);


Benefits
- Check route access only once when parent route renders
- Generate only routes that user have access
- Central roles and private routes configuration file
- Easy to add/remove a role
- Easy to add/remove route access from user role
- Synchronization between routes and navigation
- Single + Multiple role support
Conclusion
Well, this is easy to maintain and scalable approach for achieving role-based access on routes as well as on navigation with support of multi roles and nested routes with permission
Links
Github: https://github.com/umair-khanzada/role-based-access-control
Demo App: https://umair-khanzada.github.io/role-based-access-control
Comments
Loading comments…