Multistep forms a.k.a. wizard or funnel forms have a wide range of uses. They are most common when collecting different types of information into one data structure but are also useful for breaking down very large forms into the less user-intimidating multistep process. Some of the most popular examples of multistep forms are checkout and user registration forms.
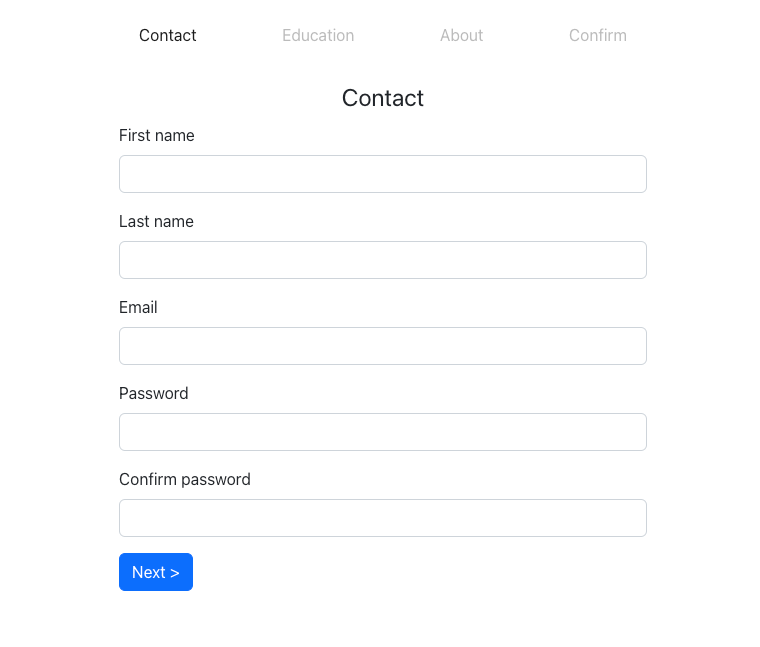
In this post, we'll build a basic multi-step registration form, which collects the user's info and then presents it in a confirmation view, which can be reviewed and edited before the submission. It'd be noted that the form is greatly simplified and would probably have more fields in a real-life application, however, we'll keep it simple for the sake of being easier to understand. Additionally, the focus is on the JS part and proper form styling is outside the scope of this tutorial. The final form looks like this (there is also CodeSandbox available):
Choosing the form structure
One of the hardest and the most important things when working with multistep forms is deciding on their structure. Ultimately the choice depends on the project requirements and what exactly the form is supposed to do. The first option is often to use one form component, inside which an active step is rendered. In this tutorial we will use a different approach - each step component will be a separate form, collecting the data from its fields and sending it to the central store on submit. This way we achieve a nice separation of concerns, making it easier to adapt to future requirement changes. For the form logic, we'll use React Hook Form, which makes working with forms easier. For the central store, we'll use React context, although for more complicated cases a separate state management library (e.g. Redux) could be a better fit. Lastly, each form step will have its own route, for which we'll use React Router.
To summarise, the app flow is this:
- Each step is a separate form with its own handlers and local state.
- Pressing
Nextsubmits the data from the current step to the centralized store and redirects to the route for the next step. - In the final step, all the data is shown and users can edit any of the steps before submitting.
Setting up
As mentioned earlier, we're using Context for persisting the state between the steps, and later show the form data in the preview before submitting. We'll abstract the context providers and consumers into a separate file, for easier use.
// state.js

import React, { createContext, useContext, useState } from "react";

export const AppStateContext = createContext();

export function AppProvider({ children }) {
  const value = useState({});
  return (
    <AppStateContext.Provider value={value}>
      {children}
    </AppStateContext.Provider>
  );
}

export function useAppState() {
  const context = useContext(AppStateContext);
  if (!context) {
    throw new Error("useAppState must be used within the AppProvider");
  }
  return context;
}
Here we create an AppProvider, which handles the app state and related logic, and a custom hook useAppState. With this abstraction, we don't need to import AppStateContext into every component. Additionally, we can validate that the component that's calling this hook is used inside AppProvider.
Next, we add the routes to the app and create the components for the form steps, wrapping all of this into the AppProvider.
import { BrowserRouter as Router, Routes, Route } from "react-router-dom";
import { AppProvider } from "./state";
import { Contact } from "./Steps/Contact";
import { Education } from "./Steps/Education";
import { About } from "./Steps/About";
import { Confirm } from "./Steps/Confirm";
import "./styles.scss";

export const App = () => {
  return (
    <AppProvider>
      <Router>
        <Routes>
          <Route path="/" element={<Contact />} />
          <Route path="/education" element={<Education />} />
          <Route path="/about" element={<About />} />
          <Route path="/confirm" element={<Confirm />} />
        </Routes>
      </Router>
    </AppProvider>
  );
};
After that let's set up the components for each step. Since they all will be form components, the code for each one will be quite similar. To abstract some repeated functionality, we create a separate Field component:
import React from "react";

export const Field = ({ children, label, error }) => {
  const id = getChildId(children);

  return (
    <div className="col-sm-12 mb-3">
      <label htmlFor={id} className="form-label">
        {label}
      </label>
      {children}
      {error && <small className="error">{error.message}</small>}
    </div>
  );
};

// Get id prop from a child element
export const getChildId = (children) => {
  const child = React.Children.only(children);

  if ("id" in child?.props) {
    return child.props.id;
  }
};
This component also handles the error message and, as a bonus, sets the label's htmlFor attribute to match the id of the child input, making the input properly accessible. We just need to make sure that the input has an id. We'll also abstract the logic for the Form, Input, and Button components, although they are just wrappers for the native HTML elements with custom styling applied.
Now we can start creating the actual components for each step. They are deliberately simple, otherwise, it's easy to get lost in all the details and edge cases. The form will have 4 steps:
- Contact - get basic user details - name, email, and password
- Education - let's imagine that our form is used on some sort of education or career website, and we would like to know the user's education details.
- About - a step with a free text field for the users to provide more detailed info about themselves.
- Confirm - this step is not used for entering details, but for previewing them and editing, if necessary.
Additionally, all the fields in the first step will be required and have a basic validation, to show how it's usually done in React Hook Form.
// Steps/Contact.js
import { useForm } from "react-hook-form";
import { useAppState } from "../state";
import { useNavigate } from "react-router-dom";
import { Button, Field, Form, Input } from "../Forms";

export const Contact = () => {
  const [state, setState] = useAppState();
  const {
    handleSubmit,
    register,
    watch,
    formState: { errors },
  } = useForm({ defaultValues: state, mode: "onSubmit" });
  const watchPassword = watch("password");
  const navigate = useNavigate();

  const saveData = (data) => {
    setState({ ...state, ...data });
    navigate("/education");
  };

  return (
    <Form onSubmit={handleSubmit(saveData)}>
      <fieldset>
        <legend>Contact</legend>
        <Field label="First name" error={errors?.firstName}>
          <Input
            {...register("firstName", { required: "First name is required" })}
            id="first-name"
          />
        </Field>
        <Field label="Last name" error={errors?.lastName}>
          <Input {...register("lastName")} id="last-name" />
        </Field>
        <Field label="Email" error={errors?.email}>
          <Input
            {...register("email", { required: "Email is required" })}
            type="email"
            id="email"
          />
        </Field>
        <Field label="Password" error={errors?.password}>
          <Input
            {...register("password", { required: "Password is required" })}
            type="password"
            id="password"
          />
        </Field>
        <Field label="Confirm password" error={errors?.confirmPassword}>
          <Input
            {...register("confirmPassword", {
              required: "Confirm the password",
              validate: (value) =>
                value === watchPassword || "The passwords do not match",
            })}
            type="password"
            id="password-confirm"
          />
        </Field>
        <Button>Next {">"}</Button>
      </fieldset>
    </Form>
  );
};
// Steps/Education.js
import { useForm } from "react-hook-form";
import { useAppState } from "../state";
import { useNavigate } from "react-router-dom";
import { Button, Field, Form, Input } from "../Forms";

export const Education = () => {
  const [state, setState] = useAppState();
  const { handleSubmit, register } = useForm({ defaultValues: state });
  const navigate = useNavigate();

  const saveData = (data) => {
    setState({ ...state, ...data });
    navigate("/about");
  };

  return (
    <Form onSubmit={handleSubmit(saveData)}>
      <fieldset>
        <legend>Education</legend>
        <Field label="University">
          <Input {...register("university")} id="university" />
        </Field>
        <Field label="Degree">
          <Input {...register("degree")} id="degree" />
        </Field>
        <div className="button-row">
          <Button variant="secondary" onClick={() => navigate("/")}>
            {"<"} Previous
          </Button>
          <Button>Next {">"}</Button>
        </div>
      </fieldset>
    </Form>
  );
};
// Steps/About.js
import { useForm } from "react-hook-form";
import { useAppState } from "../state";
import { useNavigate } from "react-router-dom";
import { Button, Field, Form } from "../Forms";

export const About = () => {
  const [state, setState] = useAppState();
  const { handleSubmit, register } = useForm({ defaultValues: state });
  const navigate = useNavigate();

  const saveData = (data) => {
    setState({ ...state, ...data });
    navigate("/confirm");
  };

  return (
    <Form onSubmit={handleSubmit(saveData)}>
      <fieldset>
        <legend>About</legend>
        <Field label="About me">
          <textarea
            {...register("about")}
            id="about"
            className="form-control"
          />
        </Field>
        <div className="button-row">
          <Button variant="secondary" onClick={() => navigate("/education")}>
            {"<"} Previous
          </Button>
          <Button>Next {">"}</Button>
        </div>
      </fieldset>
    </Form>
  );
};
React Hook Form internally handles the form state, so all we need to do is save it to our app state after it's been validated.
The final step, Confirm, is slightly different since we need to display the data entered by the user. We'll add a couple of section components, which we then compose to build the data presentation.
//Section.js
import { useNavigate } from "react-router-dom";
import { Button } from "./Button";

export const Section = ({ title, children, url }) => {
  const navigate = useNavigate();
  return (
    <div className="section mb-4">
      <div className="title-row mb-4">
        <h4>{title}</h4>
        <Button type="button" variant="secondary" onClick={() => navigate(url)}>
          Edit
        </Button>
      </div>
      <div className="content">{children}</div>
    </div>
  );
};

export const SectionRow = ({ children }) => {
  return <div className="section-row">{children}</div>;
};
// Steps/Confirm.js
import { useAppState } from "../state";
import { useForm } from "react-hook-form";
import { Button, Form, Section, SectionRow } from "../Forms";

export const Confirm = () => {
  const [state] = useAppState();
  const { handleSubmit } = useForm({ defaultValues: state });

  const submitData = (data) => {
    console.info(data);
    // Submit data to the server
  };

  return (
    <Form onSubmit={handleSubmit(submitData)}>
      <h1 className="mb-4">Confirm</h1>
      <Section title="Personal info" url="/">
        <SectionRow>
          <div>First name</div>
          <div>{state.firstName}</div>
        </SectionRow>
        <SectionRow>
          <div>Last name</div>
          <div>{state.lastName}</div>
        </SectionRow>
        <SectionRow>
          <div>Email</div>
          <div>{state.email}</div>
        </SectionRow>
      </Section>
      <Section title="Education" url="/education">
        <SectionRow>
          <div>University</div>
          <div>{state.university}</div>
        </SectionRow>
        <SectionRow>
          <div>Degree</div>
          <div>{state.degree}</div>
        </SectionRow>
      </Section>
      <Section title="About" url="/about">
        <SectionRow>
          <div>About me</div>
          <div>{state.about}</div>
        </SectionRow>
      </Section>
      <div className="clo-md-12 d-flex justify-content-start">
        <Button>Submit</Button>
      </div>
    </Form>
  );
};
We could have gone further with abstractions and collected the data for display into a separate structure, which we'd then iterate over and render. However, going that much DRY with the code could prove problematic when we get new requirements, to which the code is not robust enough to adapt. One important rule to keep in mind is that it's way easier to DRY the code than to un-DRY it.
Adding a step indicator
The form, although scantily styled, is functional, which we can confirm by filling in all the details and submitting them. As it currently stands, the users have no clear idea how many steps in total there are and where they are currently in the process. This is not a good UX and makes multistep forms more intimidating than they actually are. We'll fix this by adding a step indicator a.k.a. the stepper. The Stepper component is basically a navigation for the form, but with the links disabled:
import { useLocation } from "react-router-dom";

export const Stepper = () => {
  const location = useLocation();

  const getLinkClass = (path) => {
    return (
      "nav-link disabled " + (path === location.pathname ? "active" : undefined)
    );
  };

  return (
    <nav className="stepper navbar navbar-expand-lg">
      <div className="collapse navbar-collapse">
        <ol className="navbar-nav">
          <li className="step nav-item">
            <span className={getLinkClass("/")}>Contact</span>
          </li>
          <li className="step nav-item">
            <span className={getLinkClass("/education")}>Education</span>
          </li>
          <li className="step nav-item">
            <span className={getLinkClass("/about")}>About</span>
          </li>
          <li className="step nav-item">
            <span className={getLinkClass("/confirm")}>Confirm</span>
          </li>
        </ol>
      </div>
    </nav>
  );
};
Now we can add this component to the App:
export const App = () => {
  return (
    <AppProvider>
      <Router>
        <Stepper />
        <Routes>
          <Route path="/" element={<Contact />} />
          <Route path="/education" element={<Education />} />
          <Route path="/about" element={<About />} />
          <Route path="/confirm" element={<Confirm />} />
        </Routes>
      </Router>
    </AppProvider>
  );
};
With this change, we have a fully working multistep form with a progress indicator.
Avenues for improvement
The form example in this tutorial is deliberately basic and concise. Several various improvements can be done here, and some of them will be discussed in future tutorials. A few examples of the most obvious improvements are:
- The step indicator improves the UX quite a bit, however, once the user goes back to a step to edit it, they need to click
Nextuntil the last step is reached. This is quite annoying, particularly when going to the first step. To help with this we can enable navigation via the stepper. - If we enable navigation via the stepper, we'd also look into saving the form state when navigating via the stepper to make sure that the field validation is not bypassed.
- Alternatively, we could disable validation for the required form fields and display the status of each step (if any required data is missing) in the stepper. This is helpful when we allow saving partial data as a draft.
- Currently, if the user enters some data and decides to navigate away from the form, they lose all the progress. This becomes a problem when such navigation is done by mistake. In this case, we could add a prompt that would ask the user to confirm if they want to move to another page and lose all their progress.
The first two improvements and their implementation are discussed in the next post.
Testing the form
Even though multistep forms seem more complex than the usual, one-page forms, the approach to testing here is the same. My preferred way would be to test each step component separately with the basic user flow - fill in the fields, test that they are validated, and verify that correct data is sent on submit. Thinking about testing from the user's perspective makes it easier. I have previously written about the form testing and some best practices, most of which could be also applied here.
Comments
Loading comments…