
Hey there,
AWS Lambda is currently one of the top used resources for so-called Serverless Applications. The versatility abstracted from this tool can't be misused with an excuse like - "it does not contain libs X or Y in its environment."
In this post, my goal is to share a handy tip that comes along with Lambda Functions: your own built layers.
A Layer allows you to deploy .zip files containing any sort of dependency need for the function, such as code libraries or custom runtimes. In what follows, I will demonstrate how to
- Install Python libraries on a specific folder and properly zip it.
- Set this zip file on a layer format.
- Import your custom Layer from any lambda function.
Building your .zip file
I'll use the Rice n' Beans from the pythonic world as the example libraries, pandas and NumPy. This step should be very simple once you can execute anywhere you'd like.
In the following lines of code, we are installing all packages placed on a .txt file which is on the same directory where the command will be executed (the good old requirements.txt).
1. Install it!
$ python3 -m pip install -r requirements.txt -t ./python
The [!] in front of these statements are allowing this command to run on a Jupyter Notebook.
The [-t] command sets the target path where you want the packages to be installed at -On this case, on a folder called python.
Requirements?
This file layout basically contains the name of each library. You can specify the version from it, but the name is the only mandatory attribute (of course).
[lib name]==[lib version]
(In case you don't specify the dependency version, the most recent one existing will be the one installed).
Do I need to write all these package names myself?
If you want to install all existing library dependencies in your current environment you can run the following statement and build a .txt file on the fly,
$ pip freeze > requirements.txt
Disclaimer: This is a good tip in case you want an easy way to document the libs you have installed, but ideally you should not import your entire dependencies into a single layer. It does not make that much sense.
2. Zip it!
The following line will zip your recent built-in libs folder once the compressed format is necessary to go through with the layer importing process.
$ zip -r python_layer.zip ./python/
Watch out for the size of your file!
The total size of the lambda function AND all unzipped layer files being used should respect the limitation of 250 MB. And that's one of many reasons you don't want to use the freeze thing in these cases.
3. Import it!
Cool. At this point, you have a python_layer.zip file on your local machine. Now, let's set this as an actual layer over our AWS Account (If I didn't mention it before, it will be helpful if you have one of those).

AWS Lambda Function
Go for the Create Layer button to reach the following configuration options:

Name is how you will name this layer; Description is the description wished for this layer — I know right? High-value information brought to you by medium sponsorship!
An actual useful thing that I think is worth mentioning here is that your .zip file can be uploaded as a local file, or from an S3 Bucket path. If your file size is greater than 10MB, you might not have the power to choose this.
Runtimes, Python, Python, Python! And it's done! Now you just need to add this layer on any lambda function of your choice and you will be able to use these libraries in your code execution.
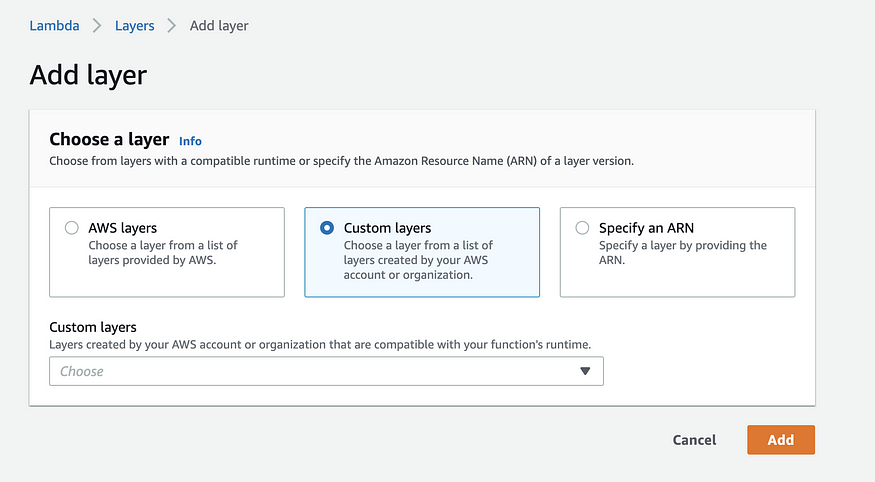
Add Layer Option
Before You Go…
In case of any layer content update need in the future, you don't have to delete your original file to have this update going. Multiple versions of layers can be added…in layers! So, you can always come back to a previous version in case something goes wrong.
And talking about always coming back — please do! Hope you find this article useful.
Cheers!
Comments
Loading comments…