Not all Text Editors are Created Equal
Atom is a fantastic starting point for people who would like to learn to code but either don’t know where to start or would like to keep their options open.
Writing python scripts in Atom and running them within the Atom framework is simple and can save a lot of time when it comes to switching between terminal shell commands in Windows, installing libraries and creating or managing files and folders.
Atoms layout is great for the beginners and professionals alike and has the flexibility to create customized interfaces for the user depending on their preferences.
Let’s set one up!
1. Download and Installing Atom
Atom can be downloaded from their website, atom.io
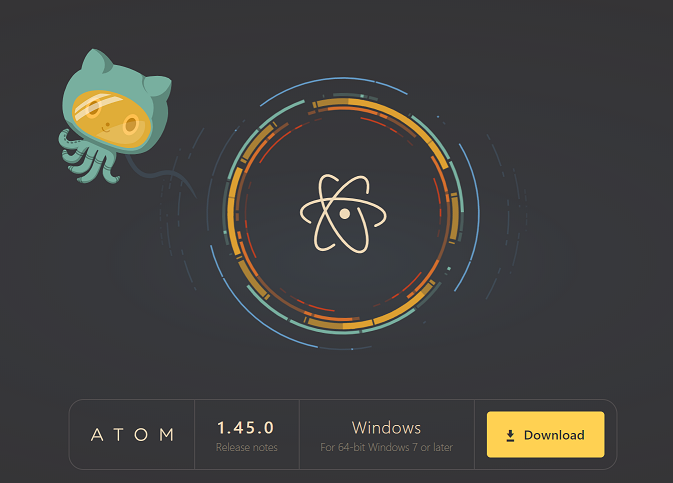 Latest stable release of Atom for 64-bit Windows 7 or later download page
Make sure you download the latest stable release and install as normal.
2. Download Python and Install
Python — the coding language, needs to be installed on your windows OS. Download the latest release of Python here
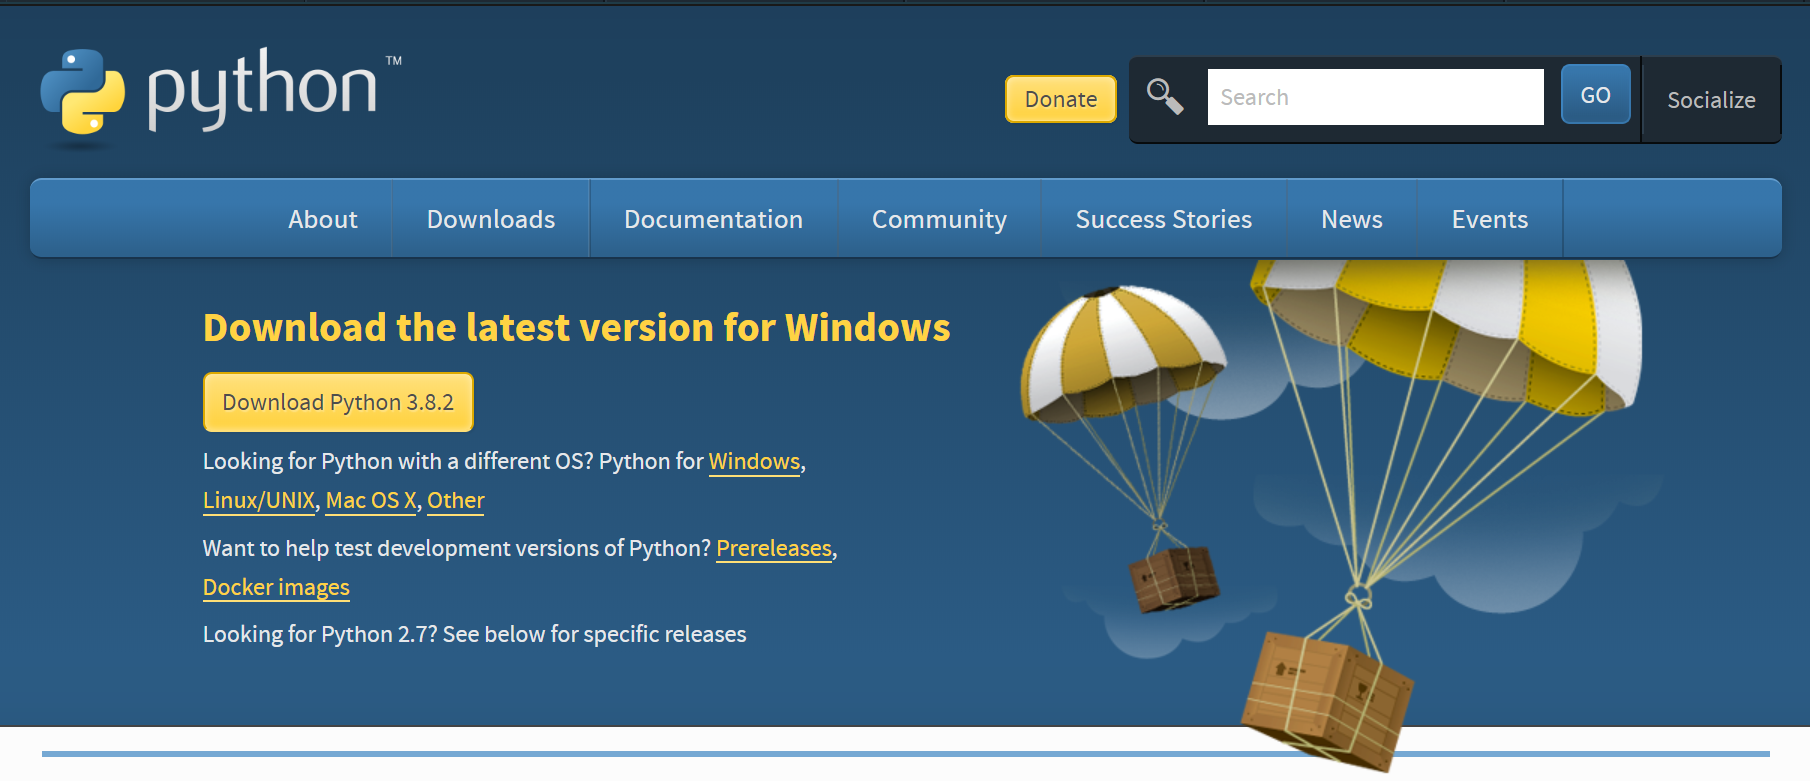 Latest version of Python for Windows download page
At the time of writing, Python 3.8.2 was the latest version. It’s important to keep up with the latest release — but we can update this from within Atom later!
IMPORTANT NOTE: When installing Python, always remember to check the box next to Add Python to PATH!!
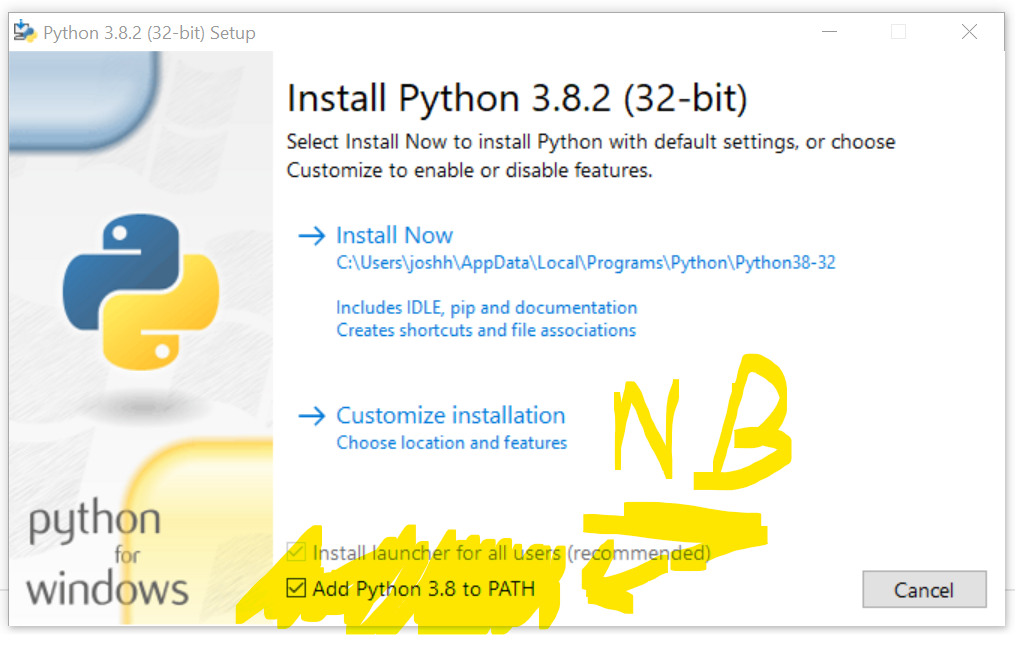 Add Python to PATH. this will help you later — trust me
3. Setting up Atom to Operate with Python
Atom is already configured to understand and process text files where Python files are denoted with the ‘.py’ at the end of the file name.
Atom will allow you to edit these files and since you’ve downloaded the latest version of it, they will automatically recognize Python scripts.
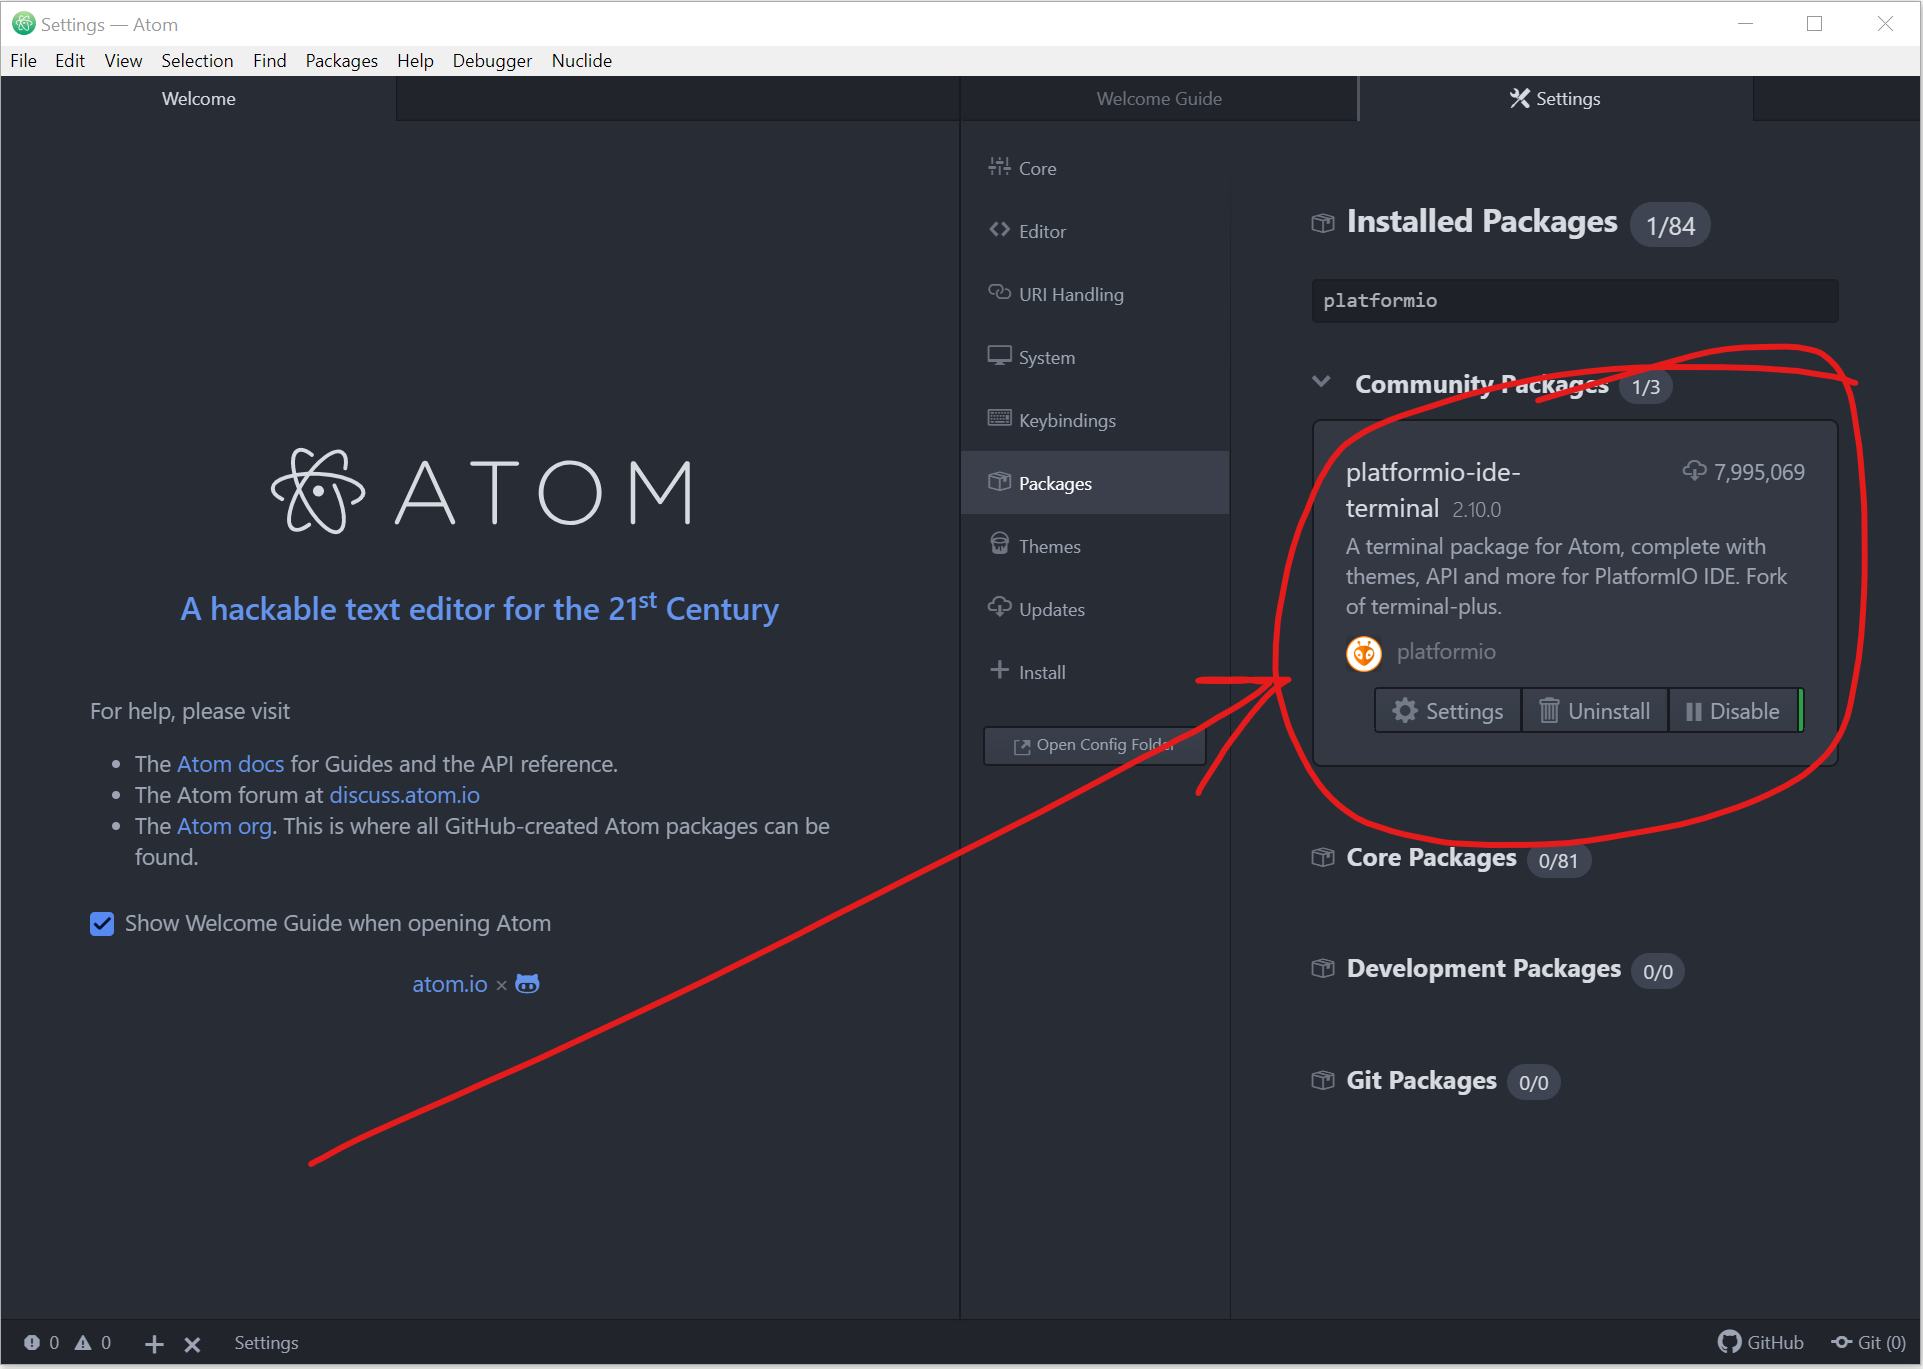
To run the scripts, we need a terminal window to issue shell commands.
I prefer to use Platformio Terminal but you may choose whichever as long as it allows you to open up a terminal shell within atom.
Open atom and go to packages and install Platformio Terminal:
4. Optional: Create a project folder
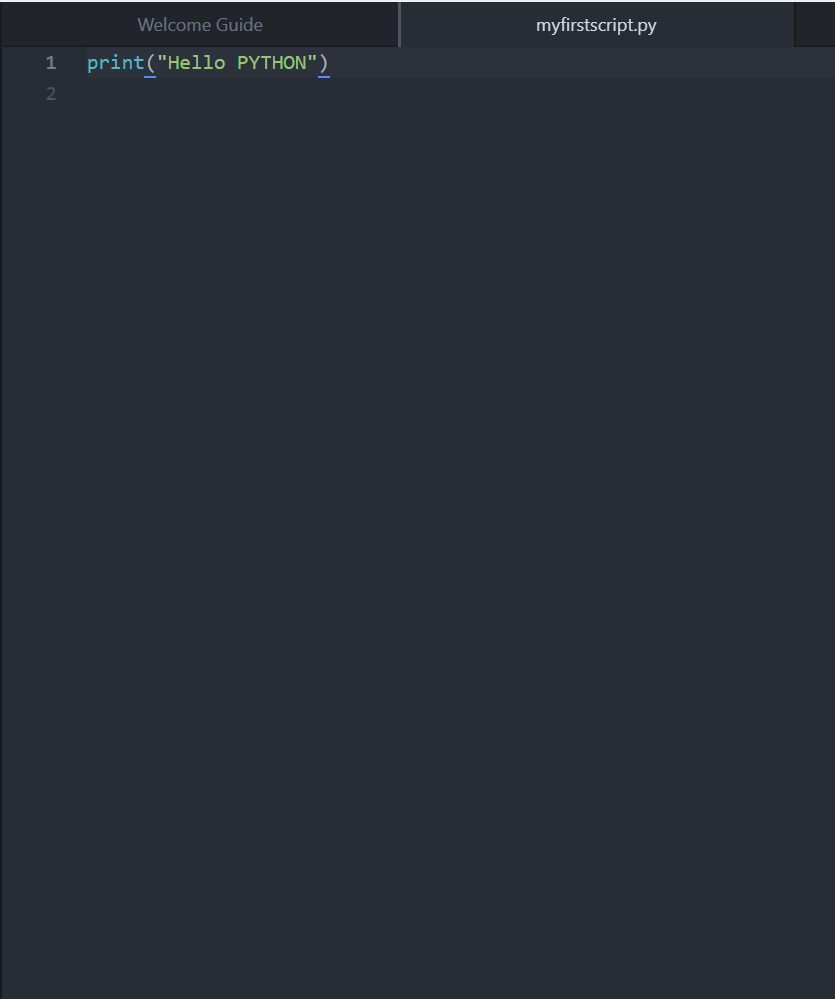
You’re going to need to collect your project files in a repository that’s easy to manage and access. Create a project folder and then create a file inside called
“myfirstscript.py”
The project window on the left will show you the active project and the file within it.
Inside the ‘myfirstscript.py’ file type the following and save
It’s easiest to do this inside Atom but you’re welcome to do it your way, once your done, lets move onto the terminal.
5. Accessing the terminal window
Now that you have the terminal installed and a project folder, open the terminal by clicking the plus button at the bottom left corner panel
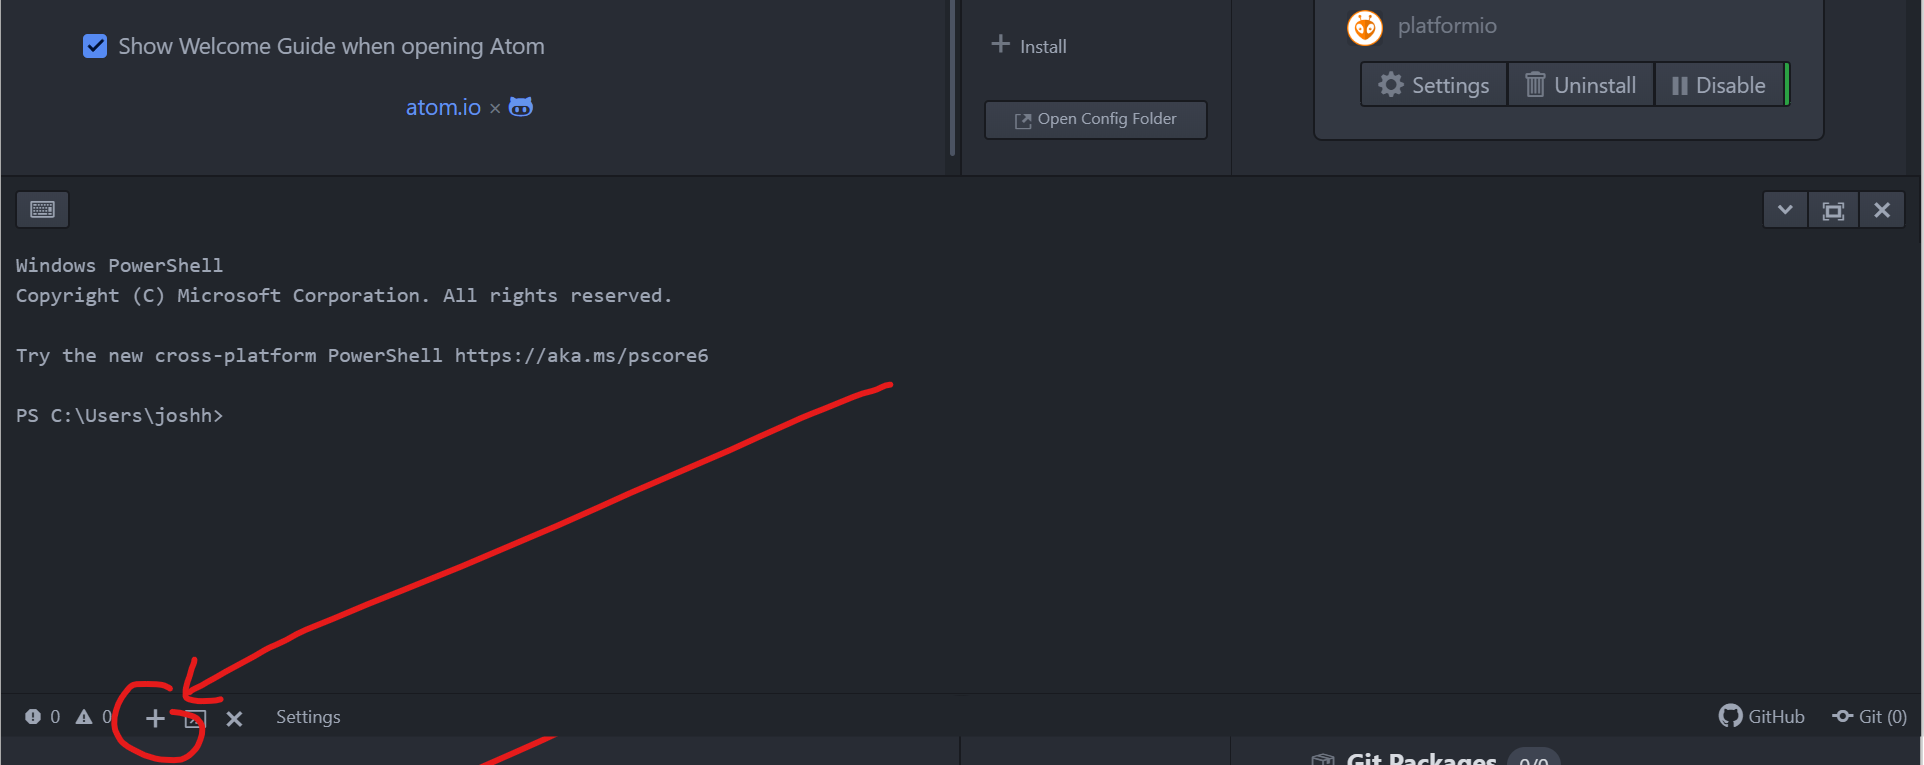
An embedded version of Windows Powershell will open for you to be able to issue commands.
6. Checking your Python is installed and ready
Once the terminal window is open, all that is left is to check whether or not your Python executable can be seen within the Atom terminal shell.
Type into the terminal window:
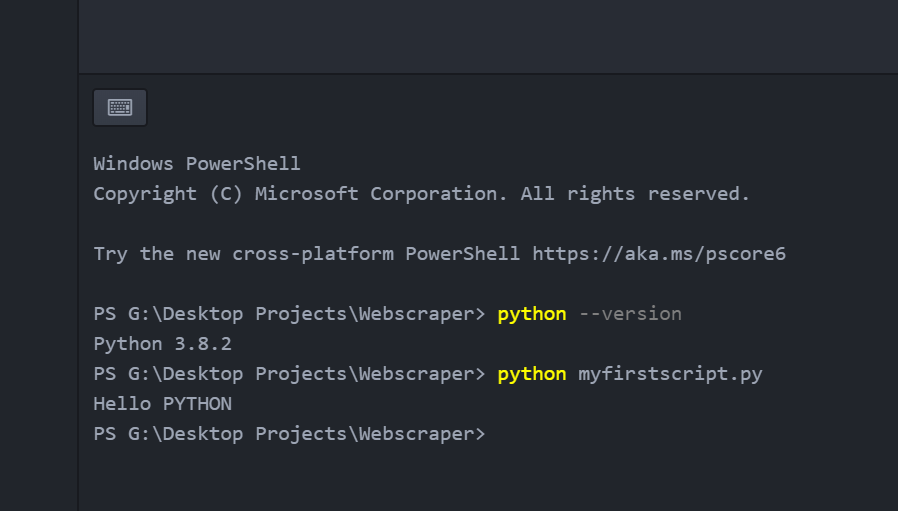
 python — version to check the correct version of python and if it is installed correctly
Your terminal should respond with the ‘python 3.8.2’ or whichever version is installed.
If it doesn’t respond correctly, check to see whether you added it to your PATH variable!
Now whenever you run a Python script, use your terminal window to execute it, just like this:
That’s it! You’re ready to begin coding!
If this helped you or showed you something interesting…
Please hit me up with a couple of claps and give me a follow! I’ll be posting regular python tutorials for beginners on a weekly basis!
Comments
Loading comments…