Explore the step-by-step process of deploying a lambda backed API using AWS CDK in this detailed guide. From setting up your environment to implementing and testing the API, this blog post covers it all. Ideal for both beginners and experienced developers, this guide offers practical examples and clear explanations to help you manage complex cloud infrastructure effectively. Dive in to enhance your understanding of AWS CDK and learn how to deploy a functional web API.
Step 1: Setting Up Your Environment
Before you can start using AWS CDK, ensure you have Node.js, AWS CLI, and AWS CDK Toolkit installed. Configure your AWS credentials using the AWS CLI.. Here’s a more detailed breakdown:
- Install Node.js: AWS CDK requires Node.js, which is a JavaScript runtime that lets you run JavaScript code on your computer. You can download Node.js from the official website. AWS CDK requires Node.js version 10.x or later. After installing, you can verify the installation by running
node --versionin your terminal or command prompt.

- Install AWS CLI: The AWS Command Line Interface (CLI) is a tool that allows you to interact with AWS services from your terminal or command prompt. You can download AWS CLI from the official AWS website. After installing, you can verify the installation by running
aws --version.

- Configure AWS CLI: After installing AWS CLI, you need to configure it with your AWS credentials. You can do this by running
aws configureand then entering your Access Key ID, Secret Access Key, Default Region Name, and Default Output Format when prompted. These credentials are associated with your AWS account and are used to authenticate your requests. - Install AWS CDK Toolkit: The AWS CDK Toolkit, also known as AWS CDK Command Line Interface (CLI), is a command-line tool that allows you to work with AWS CDK apps. You can install it by running
npm install -g aws-cdkin your terminal or command prompt. The-goption installs the toolkit globally, making it available to all your projects. After installing, you can verify the installation by runningcdk --version.

Once you’ve completed these steps, your environment is set up and ready for AWS CDK development. Remember to keep your software up to date, as new versions often come with important features, improvements, and bug fixes.
Step 2: Creating a New CDK Project
Create a new CDK project using the cdk init command. For this example, we'll use TypeScript:
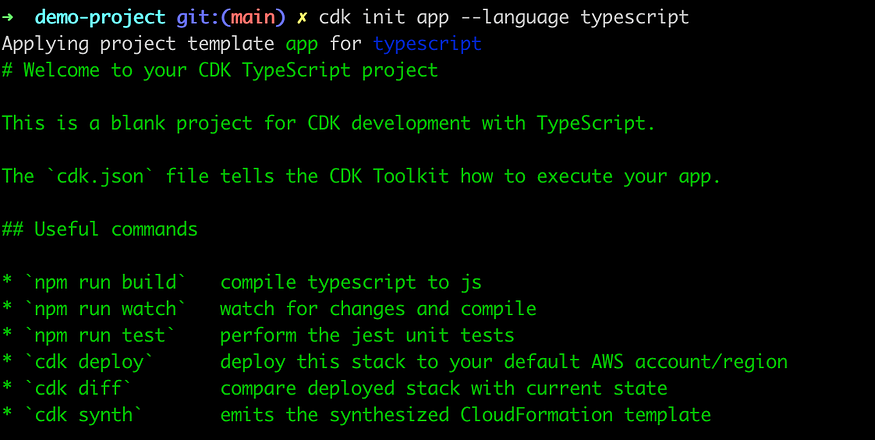
cdk init app --language typescript
Your output should look like this.
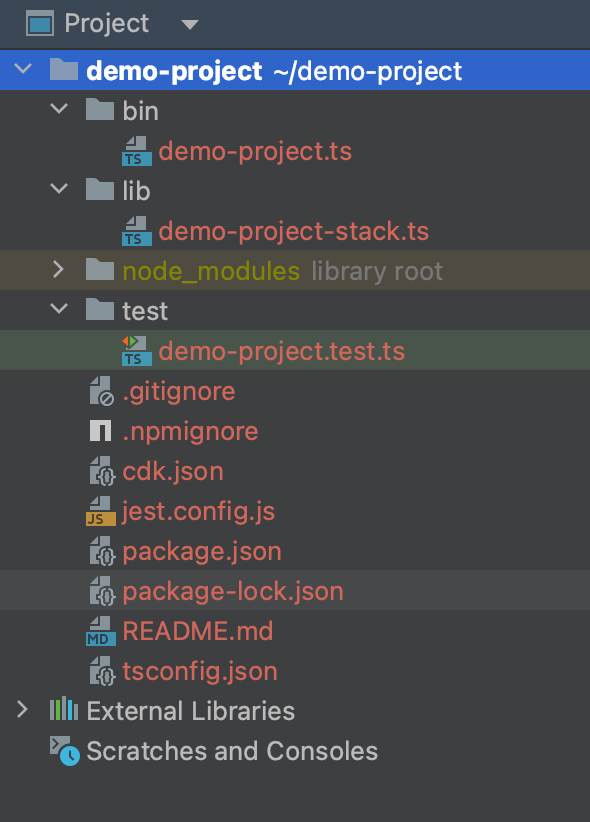
After the execution is finished, you’ll notice that your project directory is populated with several new directories and files. These files form the basic structure of your CDK application. To give you a clearer picture, here’s what your filesystem should look like:
Step 3: Defining the Infrastructure
We’ll be creating a simple hit counter API. For that, we'll need an Amazon API Gateway to handle requests, an AWS Lambda function to process these requests and increment the hit counter, and an Amazon DynamoDB table to store the hit count. Start by navigating to the lib directory of your CDK project. This is where you’ll define your infrastructure.
Within the lib directory, create a new directory called lambda at the root level and, within this directory, create a file named hitcounter.js. This directory and file will serve as the storage location and the codebase respectively for our backing lambda function.
const { DynamoDB } = require("aws-sdk");

exports.handler = async function (event) {
  console.log("request:", JSON.stringify(event, undefined, 2));

  try {
    // create AWS SDK clients
    const dynamo = new DynamoDB();

    // update dynamo entry for "path" with hits++
    const response = await dynamo
      .updateItem({
        TableName: process.env.HITS_TABLE_NAME,
        Key: { path: { S: event.path } },
        UpdateExpression: "ADD hits :incr",
        ExpressionAttributeValues: { ":incr": { N: "1" } },
        ReturnValues: "UPDATED_NEW",
      })
      .promise();

    const hits = Number(response.Attributes.hits.N);

    return {
      statusCode: 200,
      body: `This page has been viewed ${hits} times!`,
    };
  } catch (error) {
    console.error("Error:", error);
    return {
      statusCode: 500,
      body: "An error occurred. Please try again later.",
    };
  }
};
Now, it’s time to create a Construct that will wire everything together. Back in the lib directory, create a file named hitcounter.ts. This file will define the Construct.
import { Construct } from "constructs";
import { aws_apigateway as apigw, StackProps } from "aws-cdk-lib";
import { aws_dynamodb as dynamo } from "aws-cdk-lib";
import { aws_lambda as _lambda } from "aws-cdk-lib";

export class HitCounter extends Construct {
  constructor(scope: Construct, id: string, props: StackProps) {
    super(scope, id);

    const table = new dynamo.Table(this, "Hits", {
      partitionKey: { name: "path", type: dynamo.AttributeType.STRING },
    });

    const func = new _lambda.Function(this, "HitCounterHandler", {
      runtime: _lambda.Runtime.NODEJS_14_X,
      handler: "hitcounter.handler",
      code: _lambda.Code.fromAsset("lambda"),
      environment: {
        HITS_TABLE_NAME: table.tableName,
      },
    });

    // grant the lambda role read/write permissions to our table
    table.grantReadWriteData(func);

    // defines an API Gateway REST API resource backed by our lambda function.
    new apigw.LambdaRestApi(this, "Endpoint", {
      handler: func,
    });
  }
}
Lastly, we need to instantiate our Construct within a Stack to make it deployable. To do this, open the file lib/demo-project-stack.ts and add the necessary code to create an instance of the Construct.
import * as cdk from "aws-cdk-lib";
import { HitCounter } from "./hitcounter";

export class DemoProjectStack extends cdk.Stack {
  constructor(scope: cdk.App, id: string, props?: cdk.StackProps) {
    super(scope, id, props);

    new HitCounter(this, "HelloHitCounter", {});
  }
}
Step 4: Deploying the Infrastructure
At this stage, we’re ready to deploy. Deploy the infrastructure using the cdk deploy command. This will create a CloudFormation stack with your API Gateway, Lambda function, and DynamoDB table.
Here’s what happens in the backend when you run cdk deploy:
- CloudFormation Template Synthesis: AWS CDK first takes your app and compiles it into a CloudFormation template. This template is a JSON or YAML file that describes all the AWS resources your app is composed of.
- CloudFormation Stack Creation: AWS CDK then takes this CloudFormation template and deploys it as a CloudFormation stack. A stack is a collection of AWS resources that you can manage as a single unit. In other words, all the resources in a stack are created, updated, or deleted together.
- Resource Provisioning: AWS CloudFormation then looks at the template and provisions all the resources described in it. This includes creating AWS Lambda functions, setting up API Gateways, creating DynamoDB tables, and more.
- Stack Outputs: After the stack is successfully created, AWS CDK will display any outputs specified in your CDK app. Outputs are a way to export information about the resources in your stack, such as a URL for an API Gateway or the name of a DynamoDB table.
Step 5: Testing the Hit Counter API
You can test your hit counter API by making a GET request to the API Gateway URL. Each time you make a request, the hit counter should increment and the new count should be displayed and stored in the DynamoDB table.


Step 6: Cleaning Up
After you’ve finished with your project, it’s crucial to clean up and remove the resources you’ve deployed. This can be done by executing the cdk destroy command. This command will delete the CloudFormation stack, effectively removing all the resources that were provisioned as part of the stack.
It’s important to note that if you neglect this cleanup step, AWS may continue to charge you for the resources that are still running. Therefore, to avoid any unnecessary costs, always remember to destroy your resources once you’re done using them.
Conclusion
By following these steps, you can deploy a hit counter API using AWS CDK. This API increments a hit counter every time it’s accessed, displays the latest count, and stores this data in a DynamoDB table. This example demonstrates the power and flexibility of AWS CDK, and how it can be used to manage complex cloud infrastructure.
Comments
Loading comments…