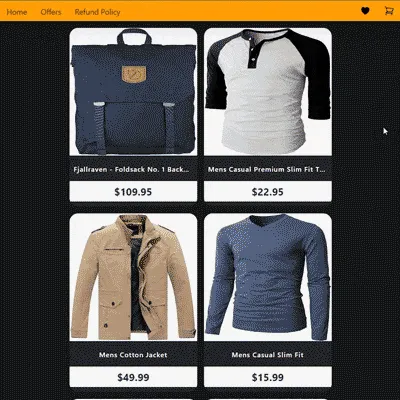
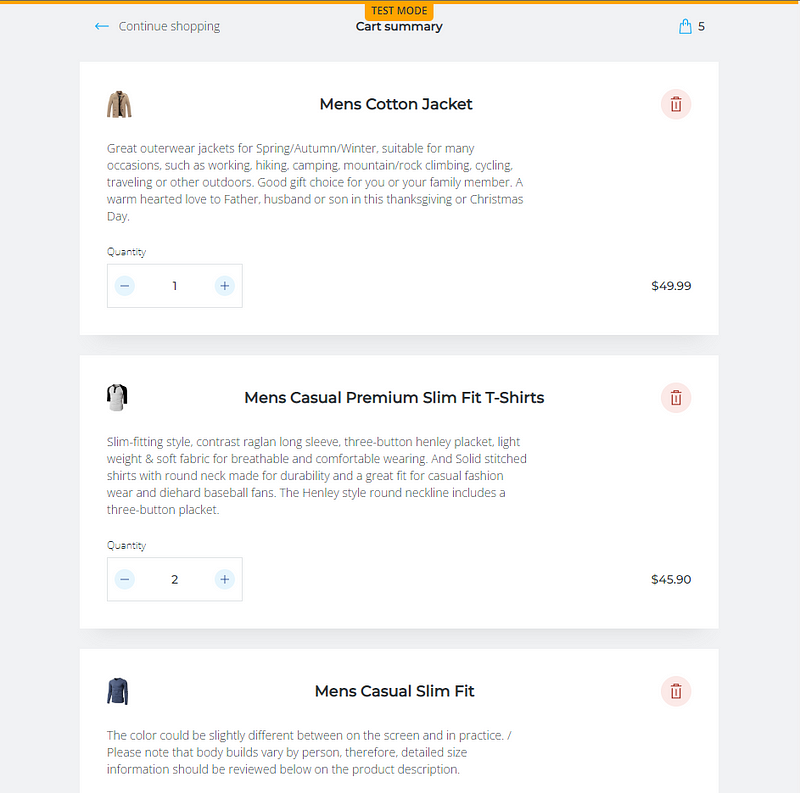
This is what you'll be building!
A survey by Accenture (n>20,000 consumers, across 19 countries) found that 47% of online shoppers would actually consider paying more - if they were provided with an eCommerce experience that exceeded expectations.
Great news if you're an e-retailer, right? But caveat emptor: the exact same percentage also said that they'd avoid purchasing from the retailer if their experience was frustrating, instead.
A snappy, responsive, intuitive experience for your shoppers is critical, so the JAMstack - JavaScript, APIs, Markup - has proven popular for eCommerce. However, that's not all you need.
The key here is to decouple your frontend and your backend, bridging the gap with GraphQL and clever management of content rendering...and that's why WunderGraph - a tool to bring together REST, GraphQL, and all your datasources into a single, secure, typesafe, end-to-end avenue for all of your user experiences - makes perfect sense.
Rock-solid tech, with modern design sensibility sprinkled on top.
So let's take a look at how we can bring some of these JAMstack technologies - Next.js, Strapi, GraphQL, and Snipcart - together in a way that lets you build the exact shopping experience for your users that you want, while making zero compromises on developer experience.
The 30,000 foot view
Here's what you will need for this tutorial:
- Node.js & NPM, and Python (required for testing Strapi locally with
sqlite3) installed. - An intermediate knowledge of React/Next.js, TypeScript, and CSS (I'm using Tailwind here because I love utility-first CSS; but Tailwind classes translate quite well to pretty much any other styling solution because it's literally just a different way to write vanilla CSS).
- A headless CMS to quickly bootstrap our backend (and add GraphQL) without having to deal with bulky third-party clients that we'll have to ship client-side. Strapi is great, so that's the one we're using here.
- A Snipcart account to add a cart management system to our eCommerce app (free in test mode). This tutorial uses Snipcart V3.
Secondly, here's a quick diagram of our architecture so you know what you'll be building.
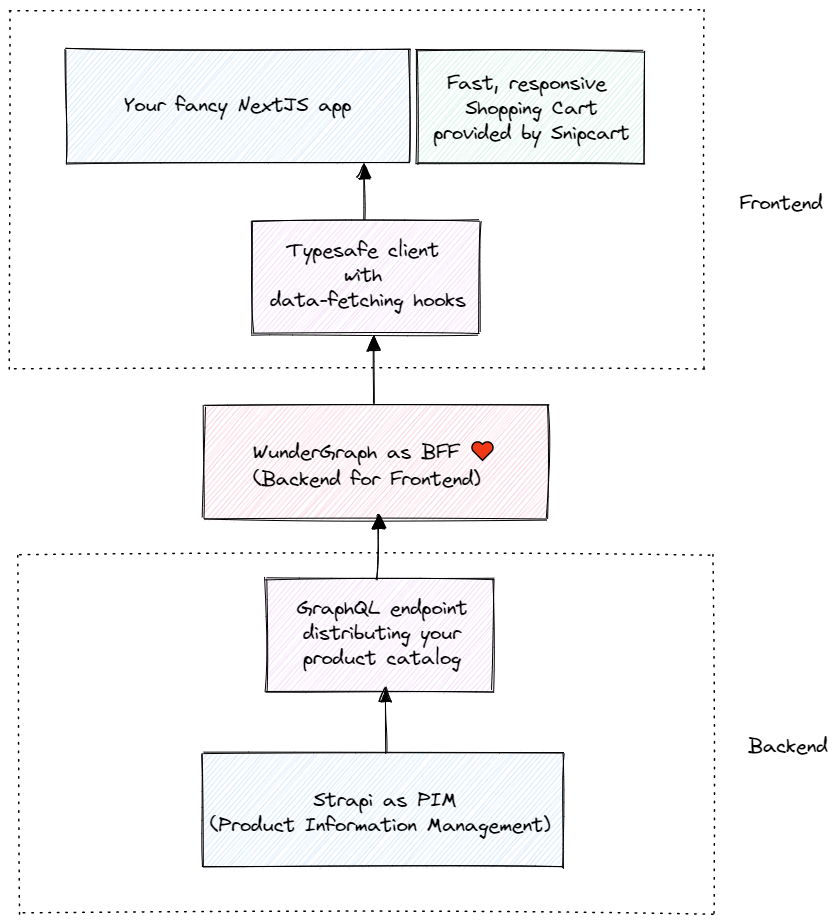
The Backend - Strapi + GraphQL
While a relational database alone would work for most use-cases, production-ready eCommerce is one where you want something more.
So we'll be using the headless JAMstack CMS, Strapi, as a PIM - a Product Information Management solution - a single source of truth for your eCommerce platform. This will be the hub for your product catalog, where you'd add, modify, enrich, and distribute your product catalog (as GraphQL via an easily-installed plugin) from.
This tutorial uses sqlite3 as the Strapi database, but you can swap that out in production with PostgreSQL - or another one of your choice - easily.
The BFF - WunderGraph
WunderGraph is the key to all of this. It sits in between our frontend and backend, at once serving as a lynchpin for their decoupling, and facilitating typesafe communication.
It is a BFF - Backend-for-Frontend - a service layer, or API gateway, whatever you wish to call it, that serves as the only 'backend' that your frontend can see.
This works by consolidating data from all your datasources (for us here, a GraphQL endpoint) and using GraphQL queries that you write to adapt that data (via secure JSON-RPC) for each separate user experience that you want to provide.
You can use filters, joins, translations, etc, whilst maintaining a clear separation-of-concerns between your Next.js app and your Strapi + DB backend and frees them up to do their own tasks.
The Frontend - Next.js + TailwindCSS + Snipcart
The frontend isn't too complex, really. WunderGraph generates incredibly useful ready-to-use hooks for querying and modifying data (again, based on the GraphQL operations that you write) so for Next.js, you can just use those.
Snipcart is a great way to add an easy to integrate, awesome-looking cart management system to any webapp, and it will serve us well.
This architecture lets you ship your eCommerce experience as a blazing fast, modular, extensible interface rather than the bulky all-in-one client-only apps from days long past.
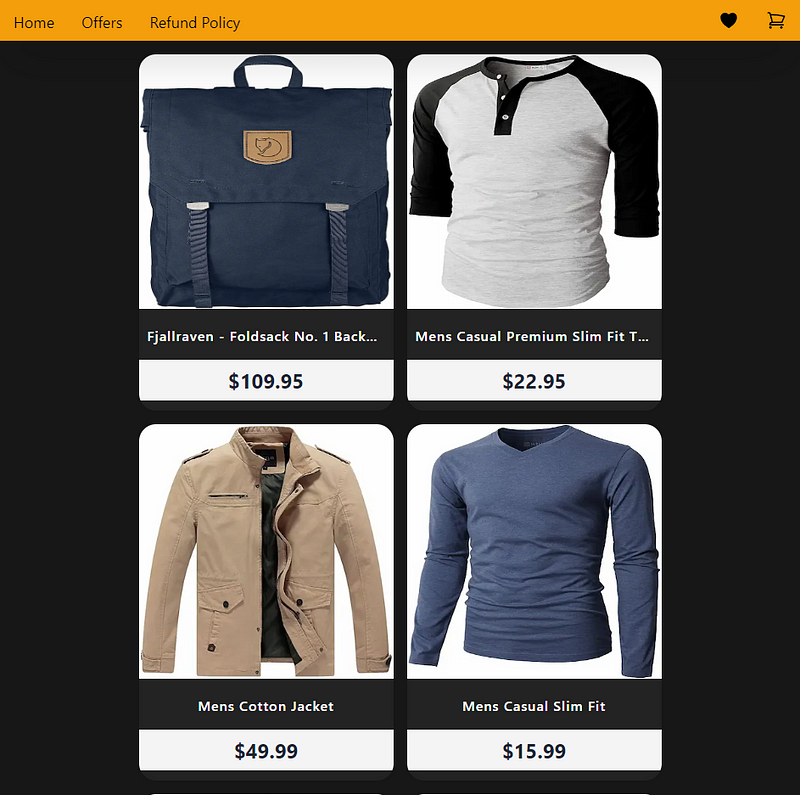
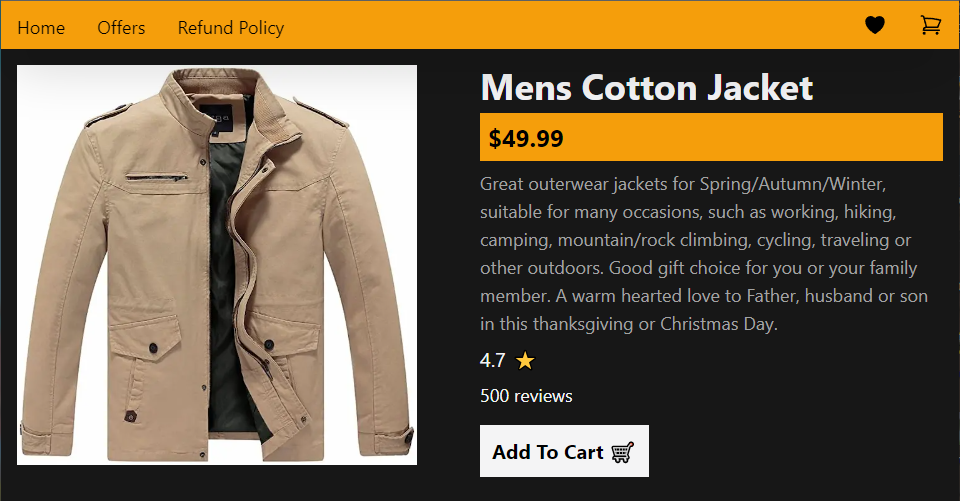
Here's the finished product, at different screen sizes.
1. Build the Strapi + GraphQL backend
Strapi is an open-source Node.js based headless CMS (Content Management System) that enables programmers to quickly create self-hosted, adaptable, and effective content APIs (RESTful and GraphQL) without writing any code at all.
Step 1: Scaffold a Strapi project
Create a new directory, cd into it, and run the following command:
npx create-strapi-app@latest my-project - quickstart
💡 The --quickstart flag gives you a SQLite3 database by default. If you prefer to switch databases, see here.
Your Strapi app is now up and running at localhost:1337.
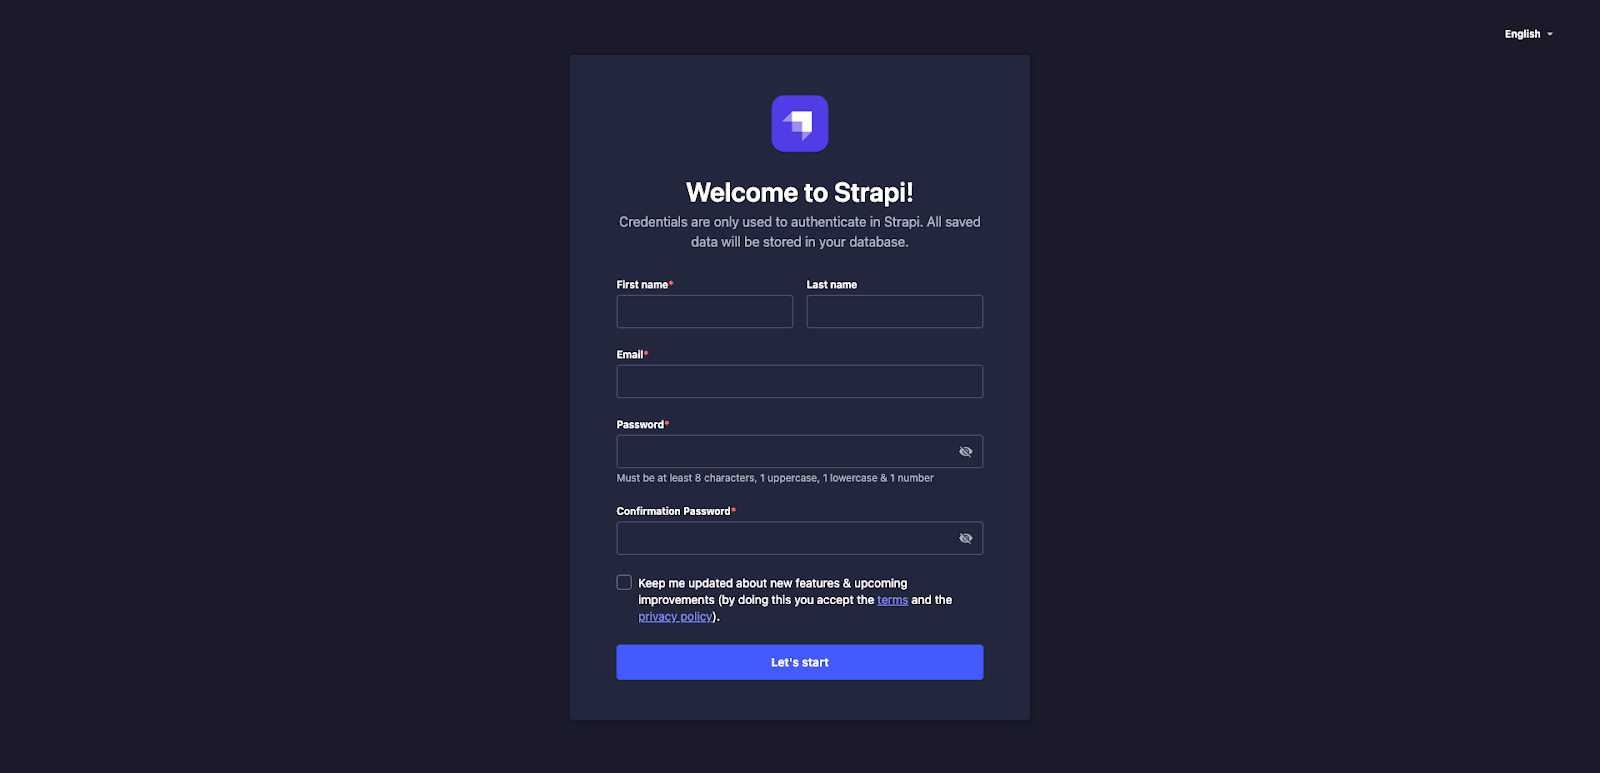
Go ahead and register an admin for the Strapi project. This is entirely local for development and testing. You don't have to worry about valid emails and strong passwords and the like...yet.
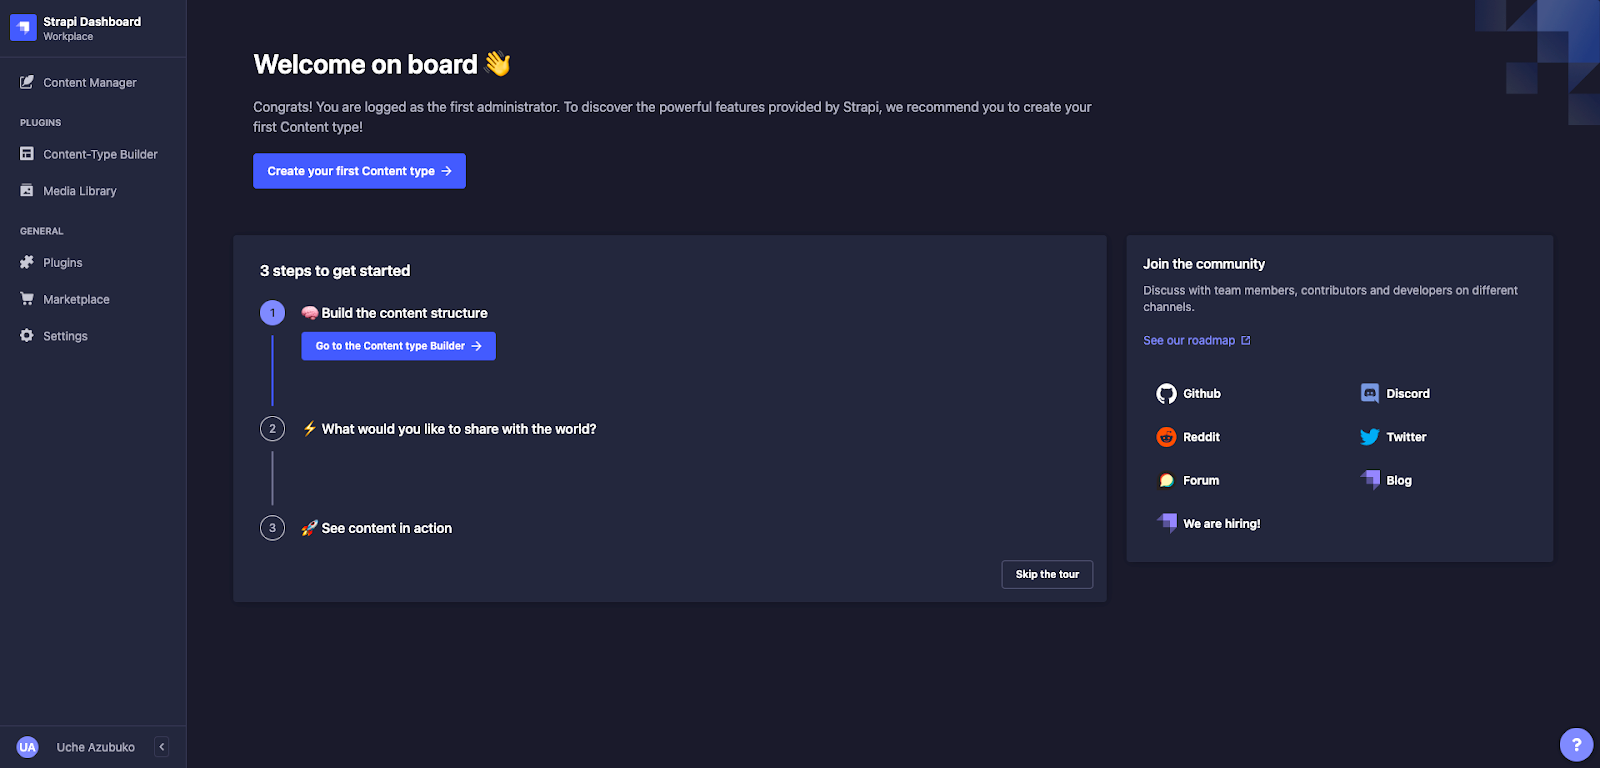
Now, you should have access to the Strapi dashboard, at localhost:1337/admin.
Step 2: Create Content Types for your product catalog.
The Strapi admin dashboard lets you quickly build the schema for your data without having to fiddle with the actual relational database. Strapi calls these models Content Types. They're pretty intuitive, all you have to do is create a new Content-Type, and add the fields that your products need.
Go to the Content-Type Builder section on the side bar then select Create new collection type. A modal will appear, where you will enter product as the display name, then click the Continue button.
The next part is busywork. You'll have to add your actual data next (Content Manager -> select a Collection Type -> Create New Entry, rinse and repeat for each product in your catalog) I'm seeding example data from FakeStoreAPI, so according to that, this is what my Content Types look like.
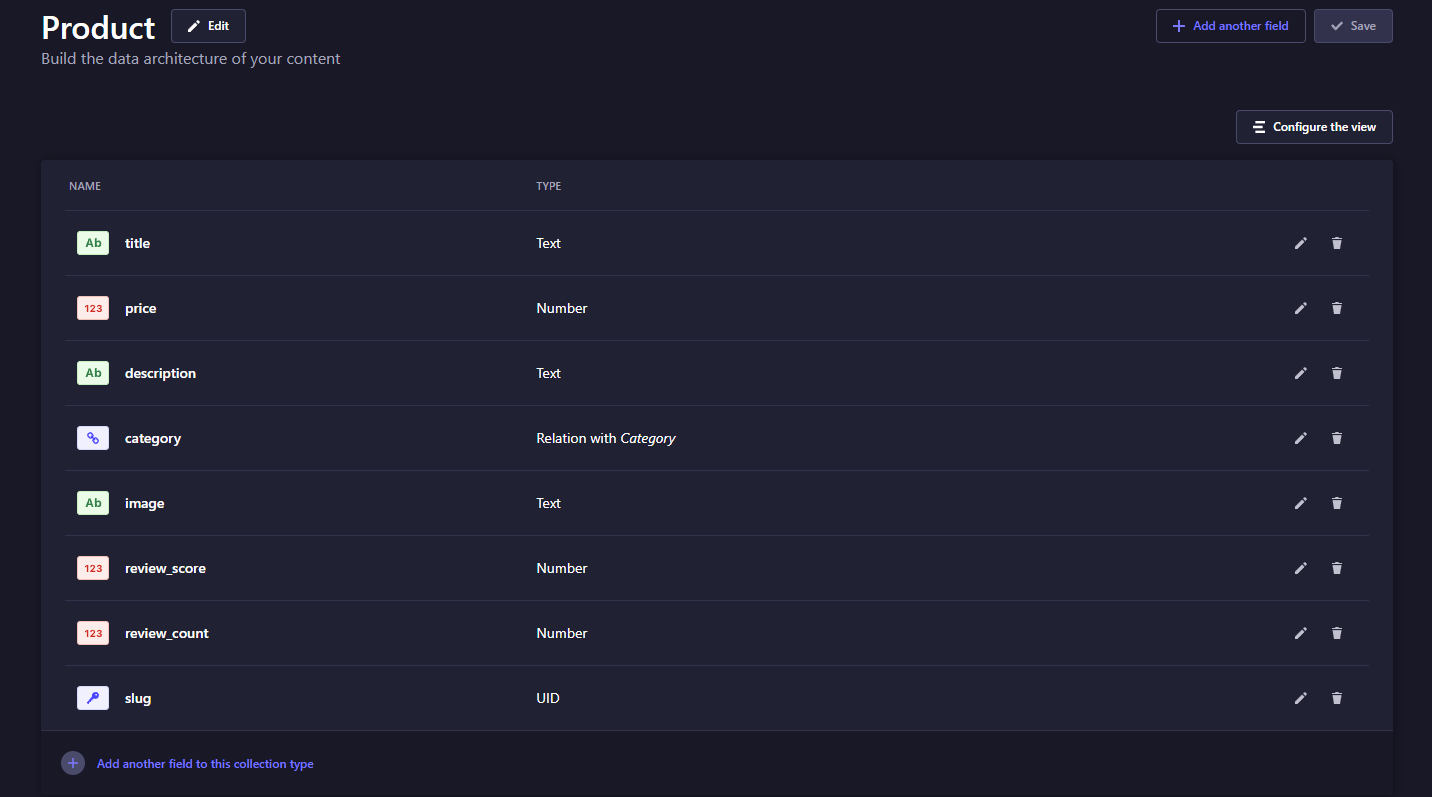

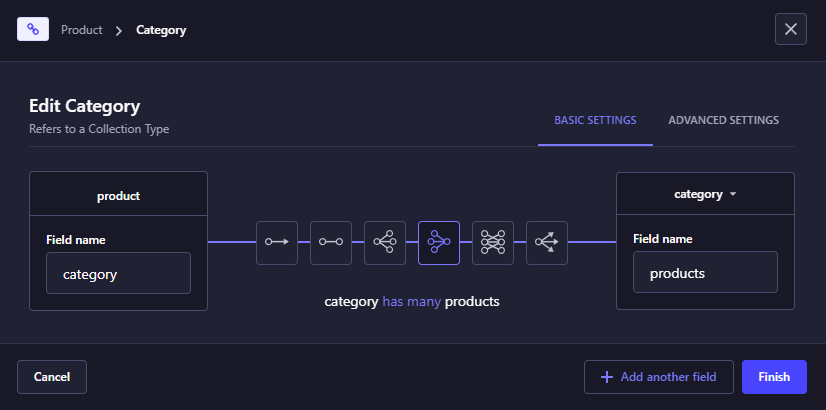
Don't forget to add the many-to-one relation between product and category!
Next, you'll need to grant read permissions for find and findOne for the two Collection Types, so that those are made public and can be queried without authentication.
To do this, go to Settings on the side bar, and then :
- Head to Roles under the Users and Permissions.
- Click on the Public role to edit it.
- Click on the Users-permissions dropdown, then check the find and findone options for both product and category.
Now, click the Save button at the top right corner of the screen to update the role.
Now, we can make REST queries like GET /products, and GET /products/:id. But of course, GraphQL would make all of this so much easier. So let's get that done next.
Step 3: Adding a GraphQL API
To convert our (currently RESTful) API endpoints to a single GraphQL one, we have to install the graphql plugin by running the following command in our backend directory:
npm run strapi install graphql
All done, now (re)start the Strapi server using :
npm run develop
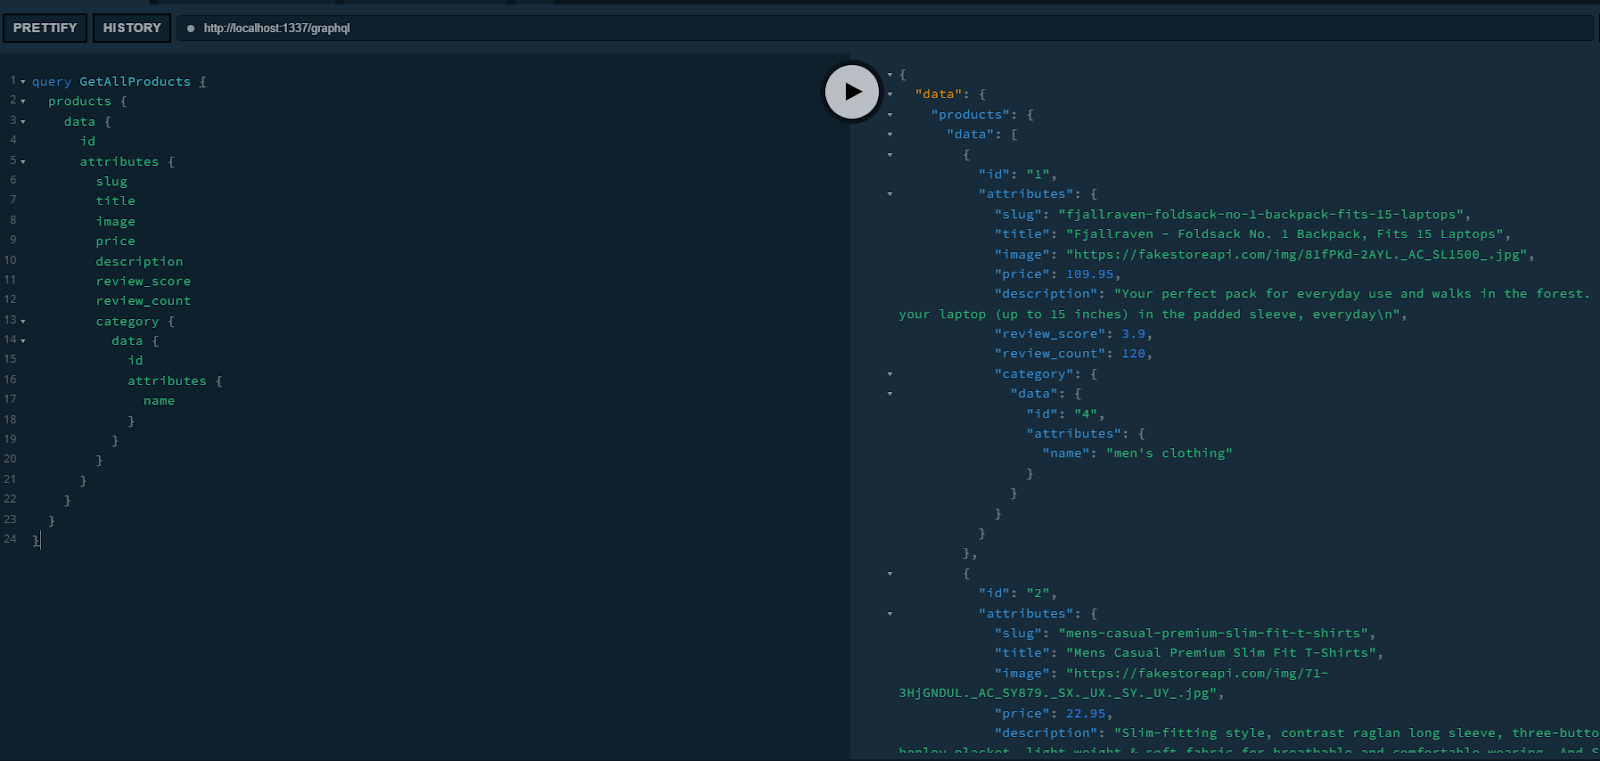
...and leave it running for the rest of this tutorial. You now have a GraphQL endpoint at localhost:1337/graphql, and you could play around for a bit here**,** writing GraphQL queries to explore your data.
2. Set up WunderGraph - and our Frontend.
Now that we have a GraphQL datasource, it's time to set up WunderGraph as our BFF. Thankfully, the WunderGraph devs have provided a starter template we can use to get both WunderGraph and a boilerplate Next.js app up and running at the same time.
Step 1: WunderGraph + Next.js Quickstart
CD into the project root (and out of backend), and type in:
npx -y @wundergraph/wunderctl init - template nextjs-starter -o frontend
Then, CD into the project directory :
cd frontend
Install dependencies, and start :
npm i && npm start
That'll boot up the WunderGraph and Next.js servers (leveraging the npm-run-all package), giving you a splash/intro page at localhost:3000 with an example query (for SpaceX rockets, I believe). If you see that, everything's working.
Now to actually configure WunderGraph to see our Strapi data, and generate a Next.js client for us - complete with querying/mutation hooks that our frontend can then consume and display data from our Strapi product catalog.
Step 2: WunderGraph 101
So the way WunderGraph works is, you tell it which datasources your app depends on, and it consolidates these disparate data sources into a single virtual graph layer, that you can then define data operations (using GraphQL) on. Through powerful introspection, WunderGraph can turn pretty much any data source you can think of into a secure, typesafe JSON-over-RPC API; OpenAPI REST, GraphQL, PlanetScale, Fauna, MongoDB, and more, plus any Postgres/SQLite/MySQL database.
That works out great for us; we already have a working GraphQL datasource!
So let's get right to it. Open wundergraph.config.ts in the .wundergraph directory, and add our Strapi + GraphQL endpoint as a datasource our app depends on, and one that WunderGraph should introspect.
Notice how every introspected datasource needs a namespace - as every one of them has to get consolidated into a single virtual graph.
Once you've run npm start, WunderGraph monitors necessary files in your project directory automatically, so just hitting save on here will get the code generator running and it'll generate a schema that you can inspect (if you want) - the wundergraph.app.schema.graphql file within /.wundergraph/generated.
Step 3: Defining your Operations using GraphQL
This is the part where we write queries/mutations in GraphQL to operate on WunderGraph's generated virtual graph layer, and get us the data we want.
So go to ./wundergraph/operations and create a new GraphQL file. We'll call it AllProducts.graphql. The file/query name does not matter; its contents and namespacing (in the 'namespace_collection' format) do.
So this is our query to get all products.
Don't celebrate yet; here's another Operation, this time to get one product, by ID (Or slug. Your choice, but slug will probably be better for SEO).
Each time you've hit save throughout this process, WunderGraph's code generation has been working in the background (and it will, as long as its server is running), generating typesafe, client-specific data fetching React hooks on-the-fly for you.
You can inspect these in /components/nextjs.ts.
Fine; you can probably celebrate a little now.
As you can tell, WunderGraph has given you two hooks at your disposal, that you can use while building your site - AllProducts, and ProductByID. Both take inputs; the former, a pagination limit, and the latter, well...an ID to filter by, of course.
3. Build the Next.js Frontend
Good news; most of our heavy lifting is done. From now on, we're living entirely in UI land. If you're familiar with Next.js, this should be a breeze. All we'll be doing is building a frontend for our eCommerce app, using those 2 hooks that were exported in the previous step.
4. Implement cart management with Snipcart
Snipcart provides an end-to-end cart management and checkout solution for any webapp, shipping as custom scripts and stylesheets to make integration trivial.
Once you've signed up, double-checked to make sure you're in Test mode, and have your public API key (and stored it in your .env.local file), you're all set.
Just one change: instead of adding Snipcart scripts (get them here) manually to our app's <body> tags, we'll create a component for them and include that in our Index.tsx instead.
Once that's done, all we have to do is add Snipcart's necessary props to provide cart metadata wherever we have a <button> to add an item to cart.
All done! Just make sure you've read their docs, as this article is not a comprehensive tutorial for Snipcart's API.
Summing it Up
And that's all, folks! Hopefully, this tutorial has given you an insight into how you can leverage the power of the JAMstack with WunderGraph to go above and beyond what you could do with JAMstack tooling alone.
Meaningfully separating the frontend and the backend - then bridging the gap between them, and doing it in a secure way to boot - is probably the most common pain point when it comes to building webapps. A new paradigm like the JAMstack - while making the web much easier, much faster for developers and users alike, comes with its own set of gotchas and the tedium of writing glue code.
Used with JAMstack and GraphQL as a service layer/BFF, WunderGraph remedies most of these pain points, making sure you concern yourself with only business logic, and building and shipping awesome stuff to your customers. A full end-to-end solution, without any additional dependencies.