The following is an exercise that'll convert any HTML web page to a ReactJS component based website/application. If you are building a brand new single page application and need a starting point, this article is for you.
Although it is satisfactory to build a website knowing just HTML, CSS, and Javascript, it is worth mentioning that the following companies have decided to transition into a React website:
-
Facebook (what a surprise!)
and several other businesses of their pedigree… This is a very important trend to pay attention to because a majority of job openings titled “Website Developer Needed” will want you to know how to produce a fast single page website or application like of those mentioned above.
This article will show you how to get to this point. We will be using templates from ColorLib to complete this exercise. Disclaimer: Due to copyright reasons, these templates are only for practice and are not meant to be your new website unless you are willing to keep the footer credits in place as mentioned when you click “Download”, or willing to pay for the template outright.
-
Download the following Creative Template as this will be the standard website we will convert to React
-
Create a new React Application running the following commands in your Terminal or Console:
npx create-react-app my-reactapp cd my-reactapp npm start
NOTE: You must have a version of Node greater than 6.0 and a version of NPM greater than or equal to 5.2.
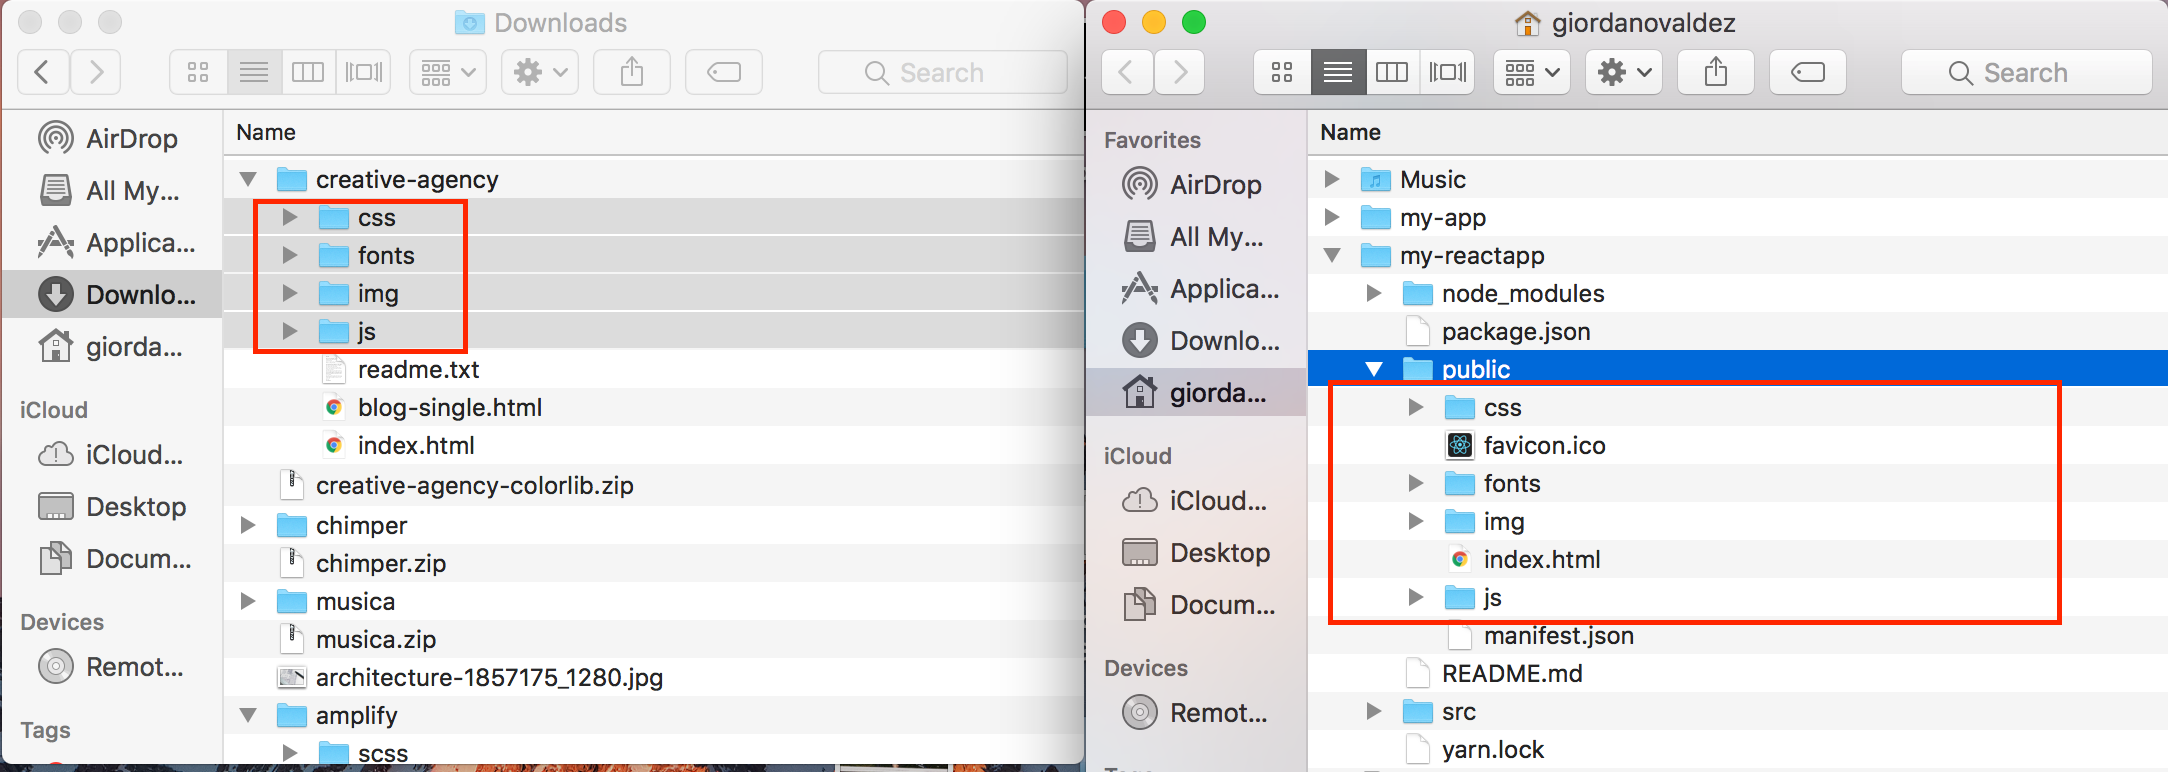
Replace **my-reactapp **with an app name of your choosing. Once you have run the above command, your server should be running and fire up a webpage with a spinning React Logo and a background. All of your resources will be located in the **my-reactapp/public **folder.
- Move all of the folders (css/, fonts/, img/, js/) from your Creative Template to your React Project's public folder. You will need to add these references to the public/index.html file in your React Application.
After you have moved the resources from your Creative Template to your Application, let's open both of their respective index.html files. Copy the style and font references from the Template's index.html file to that of the Application's.
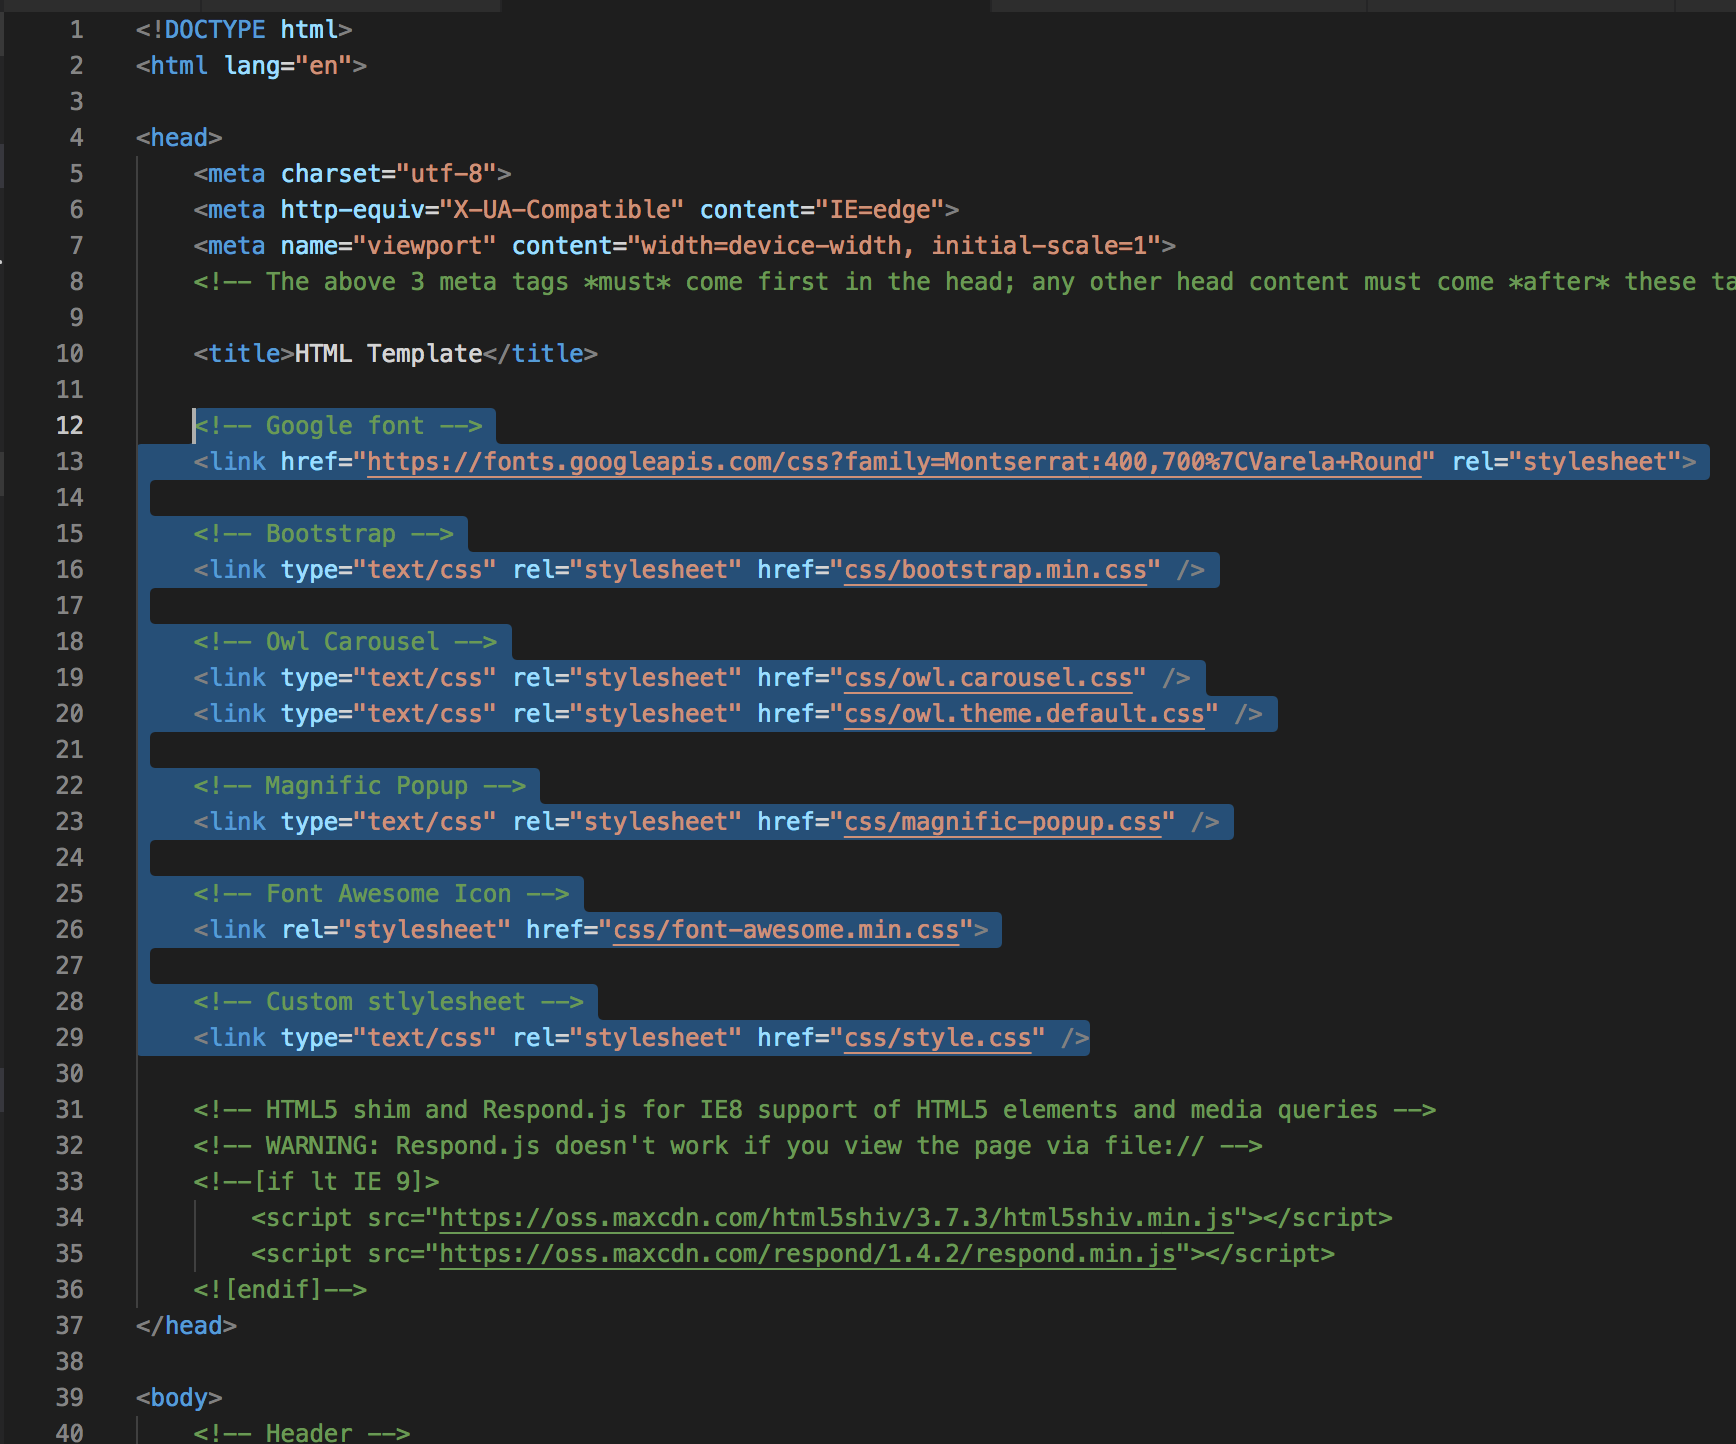
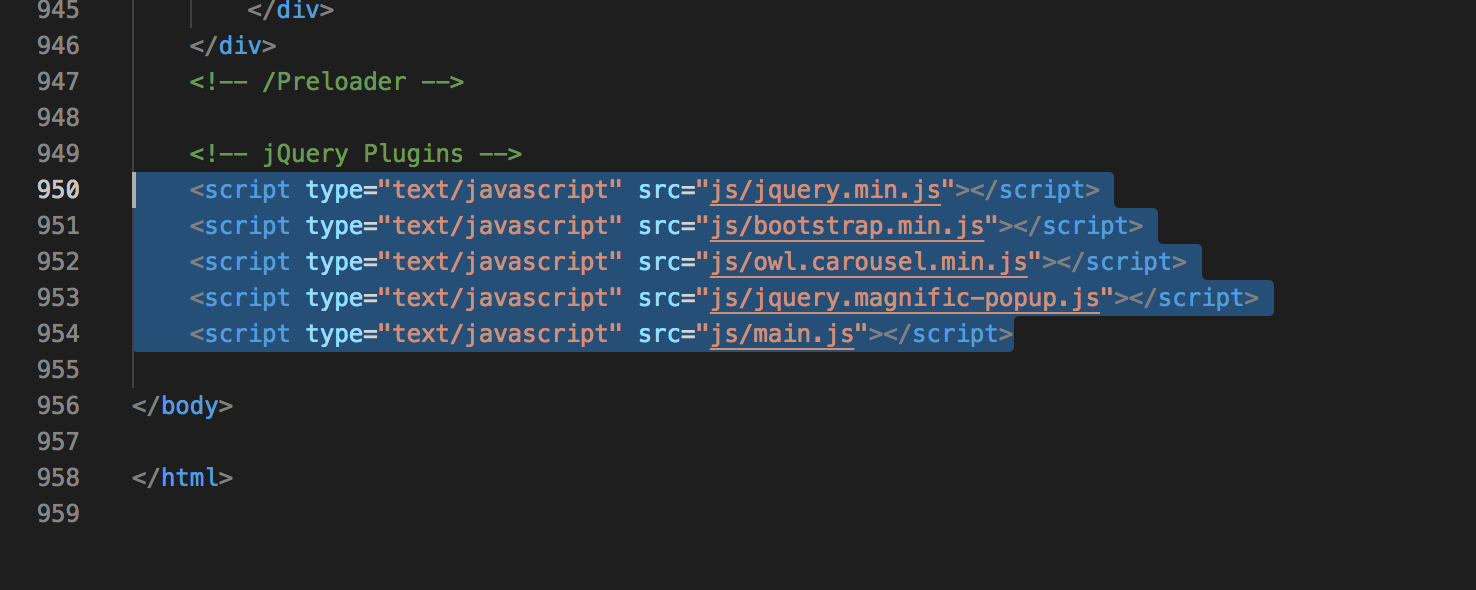
Don't forget to copy over the references from the bottom of the file as well.
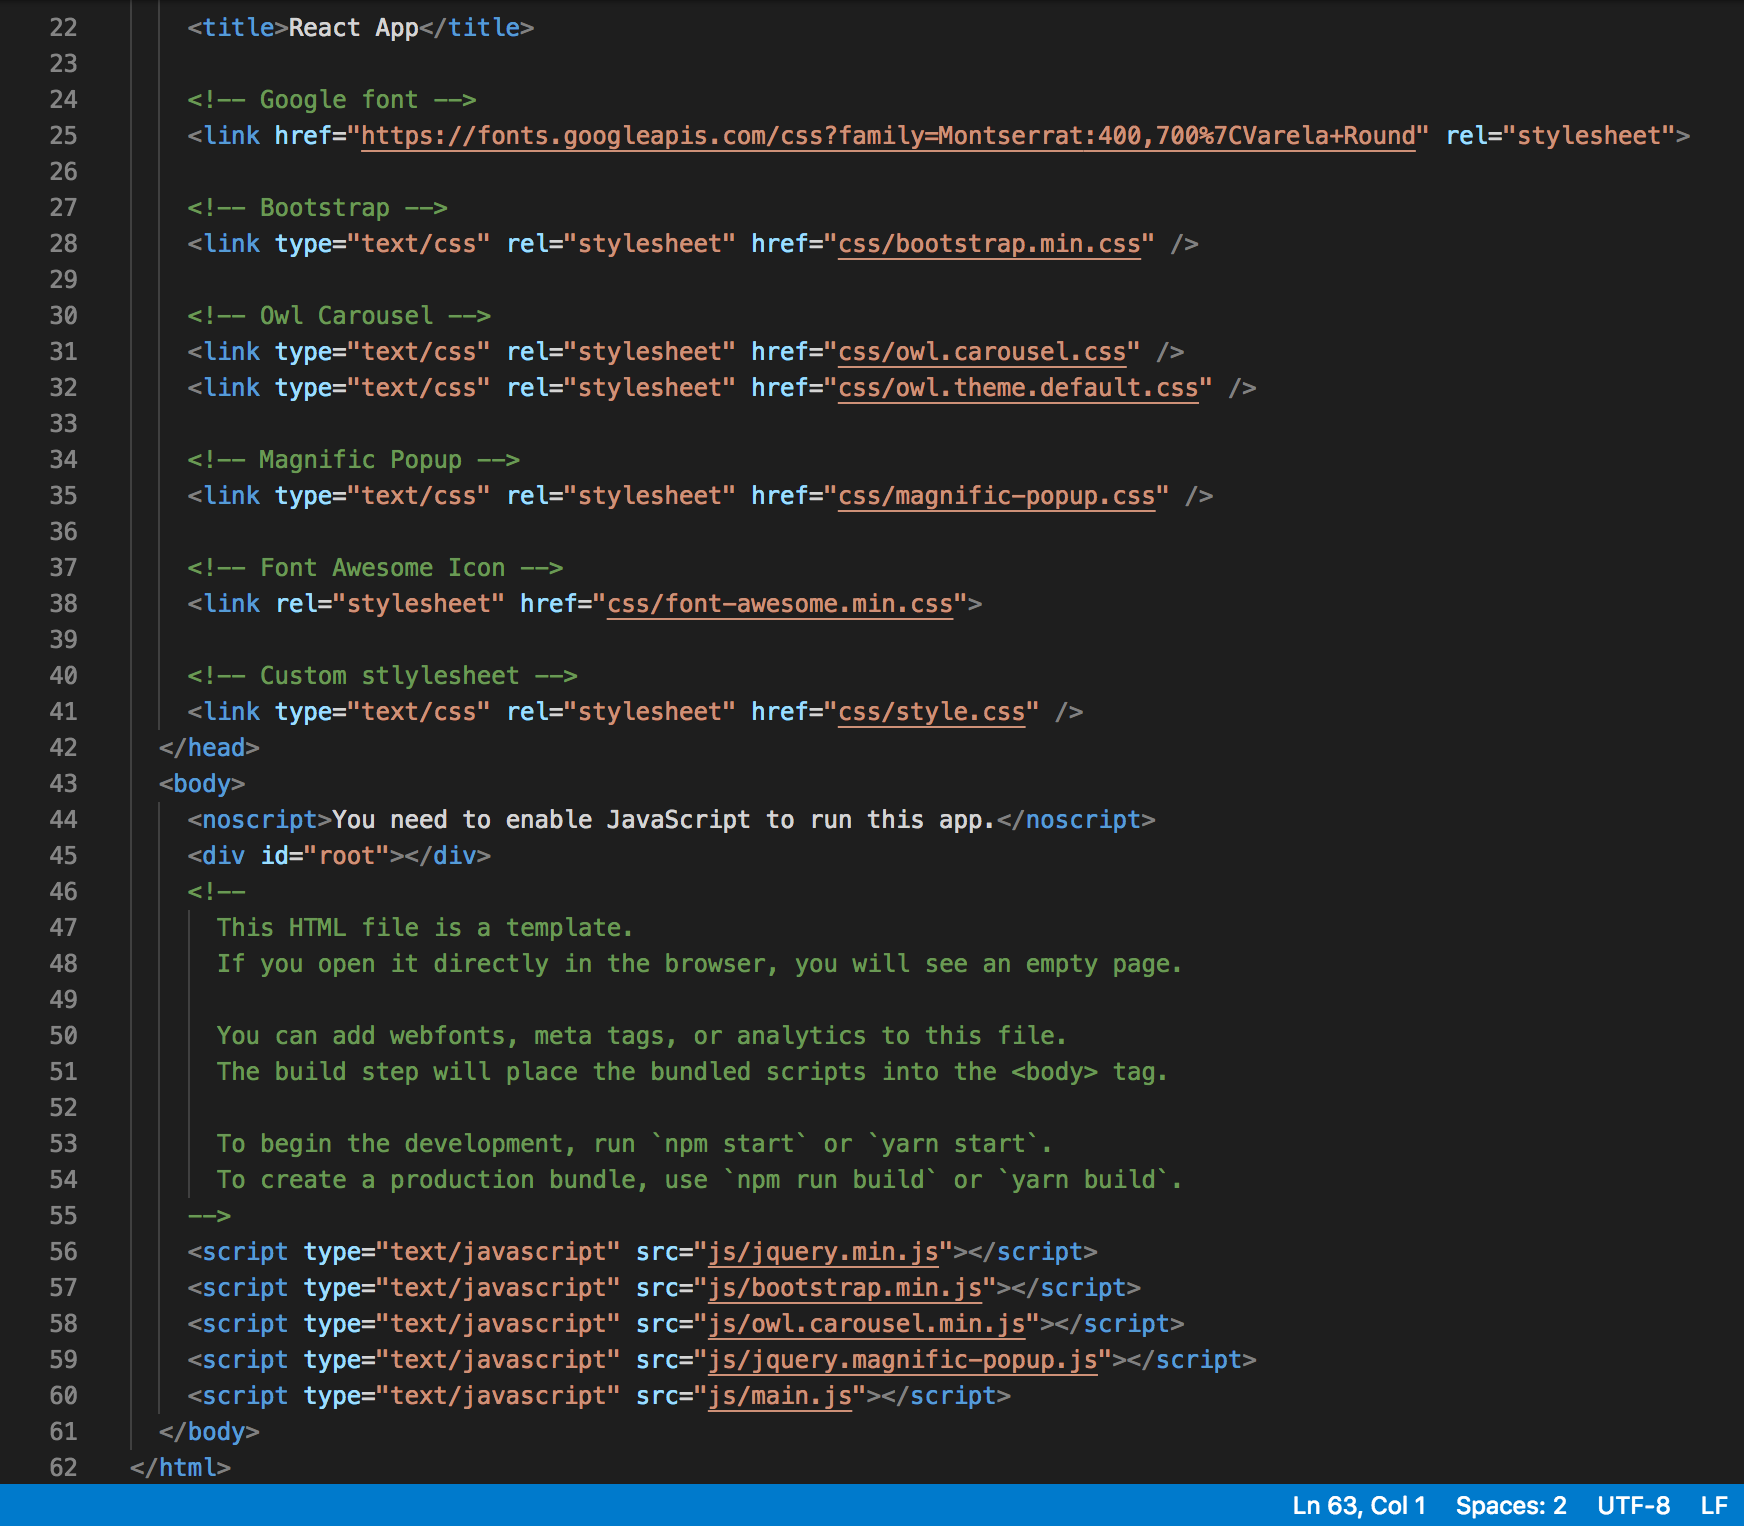
The end result should look like the following:
Once you have completed this step, all of the functionality from the Template has been transferred over to your new ReactJS Application. Your entire web page will be embedded within the
- Now it is time to convert the layout into a component. Open up the /src/App.js file in your application where your main component is located. In this file you will notice the App() function and a return statement containing ONE node with HTML including the React Logo that displayed when you started your server.
What we are about to do next is entirely optional, but something I would prefer which is converting this App function into an App class. If you don't understand this, review Functions and Classes in the documentation. Long story short, we:
-
Change function App() to class App extends React.Component
-
Give class App one render() function
-
Copy over the return statement from function App() to the class App Render() function
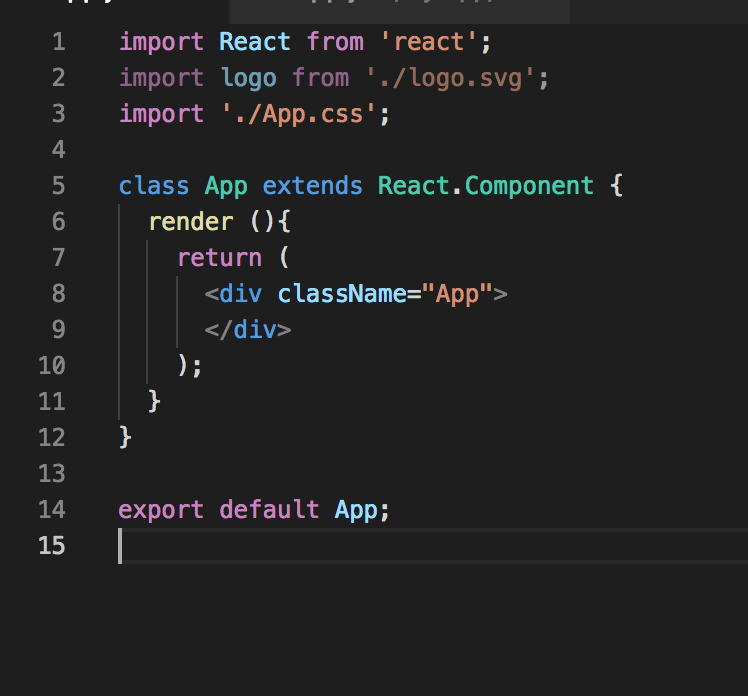
The end result should look like:
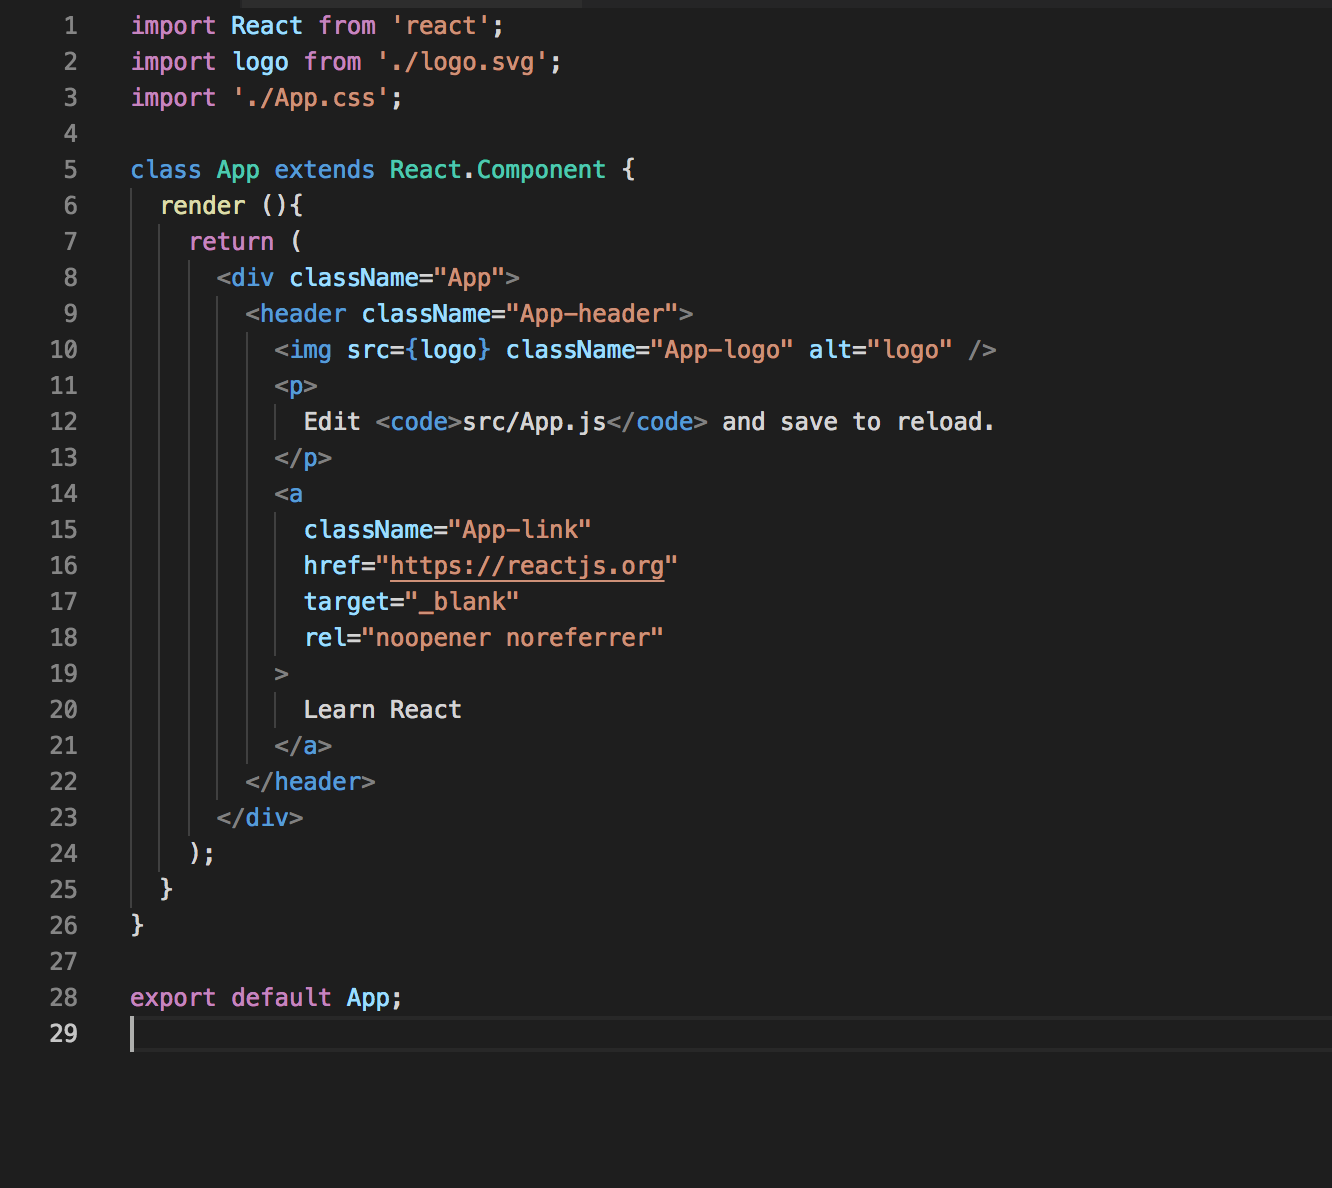
As a result, we should have the same layout as before with the spinning React logo still in the middle of the screen. By converting this component to a class, we are able to give the application state which may be a critical feature if you want to make your website more dynamic. **We will also be allowed access to React's **Lifecycle Methods which will allow us to embed logic in between component mounting and unmounting events.
- Next, we will start adding the contents to this component. First, remove the **header **node and their children to clear the webpage
Once we have cleared the component, we will refer back to the index.html from within the Creative Template. We will copy everything within the ** element and paste within the
-
Make sure you didn't copy over the
<script>tags. Those will not be needed in your React Component -
Make sure you remove all comments “<! — >” from within the component as those may cause errors
-
Make sure all
<img />and<input />tags have a “/” in them -
Every instance of style=
<string>, must be converted to style={<object>}. Each style attribute must be a property of an object. Here is how you would covert inline styles. The example below represents the attribute “background-image” as camel cased format “backgroundImage”
  // Result style: '10%'

  <div style={{ backgroundImage: "url('./img/background3.jpg')" }}>
    <div class="overlay"></div>
  </div>
- Other than the instance “class app”, you will need to update all instances of “class” in the file to “className”
If done correctly, this should remove all of the errors. When saved, we will have converted our template website into one very large ReactJS component. Here is the end result for reference.

In another article, we will go over how to break this large component into much smaller recyclable components. We will also go over how to handle templates with more than one html file involved (Ex: about.html, contact.html, etc.) and break those up as well. However following these steps carefully will convert any ordinary webpage into a ReactJS application.
Comments
Loading comments…