
Introduction
Face Recognition systems have many applications nowadays. From making security systems more secure to individual albums of people found in a gallery of photos, face recognition has many use-cases. In this article, I present a simple method to provide an accurate face recognition model using [sklearn](https://scikit-learn.org/stable/install.html) and [face_recogntition](https://github.com/ageitgey/face_recognition) Python libraries.
The GitHub repository for this project is here: GITHUB REPO
Steps
- Downloading
sklearn,face_recognitionand other libraries. - Downloading the LFW(Labelled Faces in the Wild) training dataset.
- Loading the training dataset.
- Using
face_recognitionpython library to create face-embeddings. - Training the model using
sklearn.SVM.SVCmodule. - Predictions on the test dataset and catching “unknown” faces.
- Final Remarks.
Downloading sklearn, face_recognition and other libraries.
I ran the commands given below on the command prompt to download the essential libraries to make a face recognition model.
pip install scikit-learn==0.24.2pip install face-recognition==1.3.0pip install numpy==1.19.54.pip install opencv-python==4.5.5.62
In your python script, make sure to import these libraries like this:
import face_recognition as fr

import cv2

import numpy as np

from sklearn.multiclass import OneVsRestClassifier

import glob

import os
glob and os are pre-installed libraries when you download Python 3.
Downloading the LFW (Labelled Faces in the Wild) training dataset
You can download the dataset from this link: LFW Dataset.
In the LFW webpage, scroll down until you find the “Download the database” option. Click on “All images as a gzipped tar file” — highlighted in yellow.
Screenshot from http://vis-www.cs.umass.edu/lfw/
Extract the “lfw.tgz” file to the desired location and you will observe 5,739 named folders containing individual pictures.

Loading the training dataset
#folder containing training data
data = "./lfw/*/"

#x: training x data
#y: training labels
x = []
y = []
classes = {}
for idx, folder in enumerate(glob.glob(os.path.join(data))): #we go through each folder

    if idx == 2000:
        #As there are more than 5000 classes, I only allowed
        #my code to loop through the first 2000 classes
        #this can be changed depending on how fast your computer is
        #or how much data you require for training
        break

    num_pics = len(glob.glob(os.path.join(folder+"*"))) #number of pictures in each class folder

    if num_pics < 10:
        #Here I check if number of pics in class folder
        #if its less than 10 then I skip the class folder
        #and move to the next
        continue
    #here there are pictures more than equal to 10,
    #so I only use the first 10 in every class folder
    class_folder = glob.glob(os.path.join(folder+"*"))[:10]

    #I extract the person name for debugging purposes
    #and print it on the next line with index number
    person_name = folder.split("\\")[1]
    print(idx, person_name)

    classes[idx] = person_name #I append the index as key and person name as value to the key
In the above code, we load the dataset. Make sure the main folder “lfw” is located in the same directory in which you kept your code.
I filtered out the class folders that contained less than 10 pictures and took the first 10 pictures from the selected class folders(which contains more than 10 pictures). This keeps my dataset for each class non-biased.
The program also stops when the number of class folders read reaches 2000 — I didn’t want to use a lot of data, moreover, it saves time.
The output of the above code
Using face_recognition python library to create face-embeddings.
#NOTE: This code is a continuation of the above code when we are loading the dataset and is a part of the main for-loop.

#I iterate through each picture
for f in class_folder:
    pic = cv2.imread(f) #OpenCV reads the image converting it into a 3d array
    detected_pos = fr.face_locations(pic) #finds the coordinates of the face located in the picture
    for i in detected_pos:
        top, right, bottom, left = i
        face_image = pic[top:bottom, left:right] #crop the picture to only the face in the picture
        try:
            face_image = cv2.resize(face_image, (256, 256)) #I resize that picture to 256x256 as I saw it was giving better results
            face_embedding = fr.face_encodings(face_image)[0] #This converts the face into a face embedding, a 128-d vector.
            x.append(face_embedding) #add the face embedding to training data
            y.append(idx) #add class number to training labels
        except:
            continue
For every picture in a class folder, I crop the picture to only the face of the person and append the face embedding found in line 12 to x— the list containing the training data. The index of the class folder acts as the label of that class and is stored in a list — y.
Face embeddings are 128-d(128-dimensional) vectors pertaining to facial features and are similar to the same person. For example, two face embeddings of my face would be closer to each other in a Euclidean space, compared to a face embedding of your face.
You can read more about face embeddings in the paper — FaceNet: A Unified Embedding for Face Recognition and Clustering.
Training the model using sklearn.SVM.SVC module.
The training data has been created in the form of —
x: list of face embeddings.
y: list of labels of each face embedding.
We can now create an SVM model using sklearn which will classify these face embeddings.
from sklearn.metrics import accuracy_score

from sklearn.preprocessing import LabelEncoder

from sklearn.preprocessing import Normalizer

from sklearn.svm import SVC

import pickle #to save the model

model = OneVsRestClassifier(SVC(kernel='linear', probability=True, verbose=True, max_iter=1000)) #Creates model instance here

model.fit(x, y) #fits model with training data

pickle.dump(model, open("./model.pickle", 'wb')) #save model as a pickled file
SVM’s are mostly used in the binary classification of vectors. Therefore, I used the [one-vs-rest classifying strategy](https://machinelearningmastery.com/one-vs-rest-and-one-vs-one-for-multi-class-classification/#:~:text=One%2Dvs%2Drest%20(OvR%20for%20short%2C%20also%20referred,into%20multiple%20binary%20classification%20problems.) to incorporate SVM models for each class. In this strategy, there is one SVM model for each class that predicts a value between 0(not the class) and 1(is the class) when an input vector is given. You can read more about SVMs in the article — Support Vector Machine — Introduction to Machine Learning Algorithms.
The output of the full modelis the label with the highest probability from all the probabilities from the models.
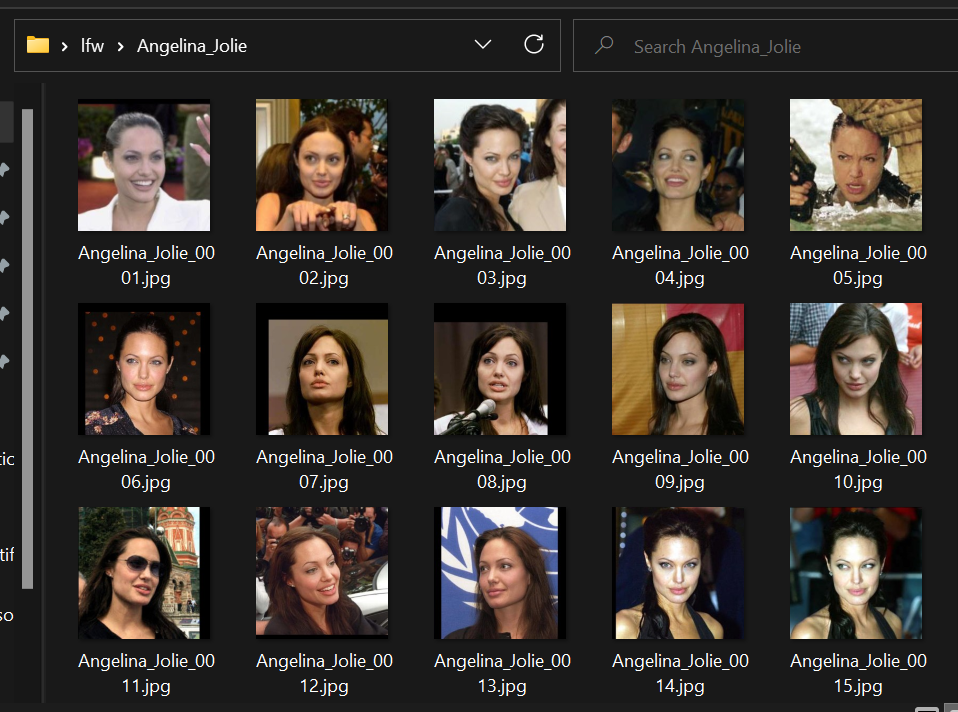
The picture below shows the classes the model has been trained with.

Predictions on test dataset and catching “unknown” faces
The screenshot below shows the class folders I used to test my model. It contains 12 classes from which one class, “Ben_Affleck” was not part of the training dataset. Therefore, when the model predicts probabilities for Ben Affleck’s face embedding, it would be lower probabilities (<0.5 ideally) as the face is unknown to the model. This information will be used to filter out unknown faces.


Screenshot of the test dataset in my local storage
These folders contain images of celebrities I found on the internet. We can load these images, and predict their identity using their face embeddings and the trained model. The test data can be found in the Github repository.
data = "./archive/new_val/*/" #folder containing class foldlers
testx = [] #list containing test face embeddings

#Go through every class folder
for idx, folder in enumerate(glob.glob(os.path.join(data))):
    class_folder = glob.glob(os.path.join(folder+"*"))
    person_name = folder.split("\\")[1] #Extracts person's name from folder
    print(idx, person_name)
    for f in class_folder:
        pic = cv2.imread(f) #reads picture
        try:
            face_embedding = fr.face_encodings(pic)[0] #finds face embedding of the face in the picture
            test = np.asarray(face_embedding)
            testx.append(test)
        except:
            continue
The above code goes through all pictures in each class folder, finds the face embedding of each face in the pictures, and stores the face embedding in the list testx.
#Converts the keys of the dictionarty "classes" to a list.
class_list = list(classes.keys())

#probs is an array that contains the list of predictions/probabilities of the model on testx
probs = model.predict_proba(testx)

#We created this for loop to find out the labels using the porbabilities
for idx, pred in enumerate(probs):
    #if probability is more than 0.7 then the predicition is correct and we find out the person's identity.
    if np.max(pred) > 0.7:
        #np.argmax(pred) finds out the index where the probability was maximum.
        #classes[str(class_list[np.argmax(pred)])] - finds out the name of the person using the dictionary "classes"
        #np.max(pred) - finds the maximum probability
        print(classes[str(class_list[np.argmax(pred)])], np.max(pred))

    #I created this elif statement to deal with max probabilities when its between 0.5 and 0.7.
    elif np.max(pred) > 0.5:
        #To ensure the identity of the person is correct when probabilities lie between 0.5 and 0.7
        #we compare that particular test face embedding and a representative face embedding of the predicted person.

       #real_face_embedding: face embedding from the test dataset
       #test_face_embedding: reprentative face embedding
        choose_folder = "./lfw\\"+classes[str(class_list[np.argmax(pred)])]+"\\*"
        real_face_embedding = testx[idx]
        test_pic_path = glob.glob(os.path.join(choose_folder))[0]
        test_pic = cv2.imread(test_pic_path)
        try:
            test_face_embedding = fr.face_encodings(test_pic)[0]
            results = fr.compare_faces([real_face_embedding], test_face_embedding) #comparing the two face embeddings by finding out eucledian distances.
            #results[0] is a boolean - True means its the same face, False means its not the same face.
            if results[0]:
                print(classes[str(class_list[np.argmax(pred)])], np.max(pred))
            else:
                print("Face not found!")
        except Exception as first_e:
            print("Face not found!")

    #If max probability is less than 0.5 then output Face not found
    else:
        print("Face not found!")
For every face embedding in the test data, there is an array of 42 probabilities(the number of classes the model was trained with). By taking np.max of the probabilities, we find out the highest probability and np.argmax will find the index where the probability is the highest.
If the max probability for a particular face embedding is greater than 0.7 then the prediction is declared as a “match” and we find out the identity using class_list and classes dictionary. The threshold is taken as 0.7 with the rationale that the trend of predictions for “matched” face embeddings were mostly greater than 0.7.
If the max probability lies between 0.5 and 0.7 we compare the “input face embedding” and the “representative face embedding” of the predicted person. For example, the input face embedding of Ben Affleck into the model gave a probability of 0.61 with the identity of Amelie Mauresmo. We compare the input face embedding of Ben Affleck with the representative face embedding of Amelie Mauresmo on line 29. If result[0] is true then the faces match. In this case, result[0] will be false and the output will be “Face not found!”.
The comparison between the two face embeddings is done by calculating the Euclidean distance between the two vectors. As stated before, face embeddings closer to each other are similar. In the above example between Ben Affleck and Amelie Mauresmo, the Euclidean distance is more than a certain threshold, hence the output will be false.
To learn more about calculating thresholds you can read this on Stack Overflow.
If the max probability is less than 0.5 then we can conclude, “Face not found!”.
The output of predictions on test data
Here you can see every prediction on every face embedding the model came across in the test data. You can see “Face not found!” in the output — output from Ben Affleck’s 7 pictures in the test dataset.
You can also see David Beckham as an output with a probability of approximately 0.5144.
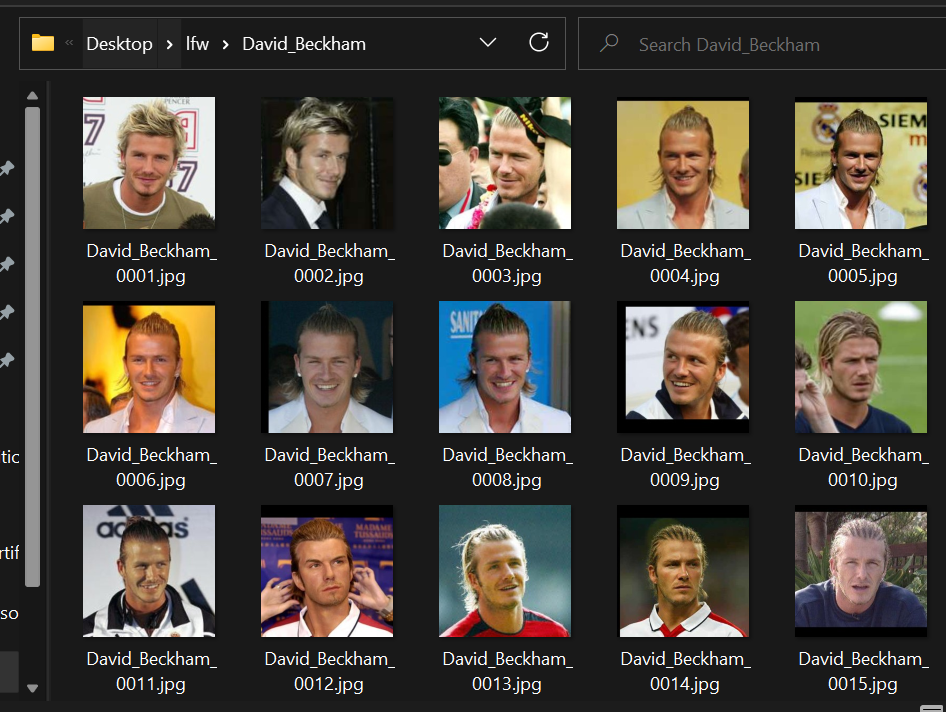

The low probability is because David Beckham in the training data looked younger and did not have a beard relative to the test data. Hence, the program compares the representative face embedding of “David_Beckham_0001.jpg” and the input face embedding of “test1.jpg” which results as true and prints the name and max probability as output.
Other than that, predictions with probabilities greater than 0.7, identified the faces correctly.
Final Remarks
I used Support Vector Machines to classify vectors because I skimmed through research papers and found that SVMs provide higher accuracy in classification compared to K-Nearest Neighbours, etc.
I hope this article gained your interest in this exciting area of computer vision and is enough to help you dive deeper into the world of artificial intelligence.
References
Gary B. Huang, Manu Ramesh, Tamara Berg, and Erik Learned-Miller.
Labeled Faces in the Wild: A Database for Studying Face Recognition in Unconstrained Environments.
University of Massachusetts, Amherst, Technical Report 07–49, October 2007.
Schroff, F., Kalenichenko, D., & Philbin, J. (2015). Facenet: A unified embedding for face recognition and clustering. In Proceedings of the IEEE conference on computer vision and pattern recognition (pp. 815–823).
Comments
Loading comments…