
Who wants to stay safe online? Count me in!
As someone who uses Virtual Private Networks (VPN) daily for work and at home, I was intrigued by one of Adrian Cantrill's mini projects and decided to give it a go. Continue reading this account to see how I created a simple VPN.
Materials
- An Amazon Web Services (AWS) account (Do not use your root account; use an IAM user account instead.)
*For this learning adventure, set your location to "us-east-1"
-
A Terminal Emulator of your choice (I used iTerm2)
-
Access to the "Implement a Simple Client VPN" project
Project's Purpose
Many of us are spending a considerable amount time on the Internet for professional and personal uses. Therefore, maintaining our online safety is increasingly vital. One of the best methods includes a virtual private network (VPN) to shield your data. This project allowed me to explore the mechanics behind creating and implementing a basic VPN.
What is a VPN and why it is such an important tool?
Let's begin this learning adventure by specifying what a VPN is and does.
The National Institute for Standards and Technology (NIST), defines VPN in two ways:
VPNs provide their users with some invisibility. Without the use of a VPN, it's possible to discover the web viewer's physical location via their IP address. Additionally, the use of VPNs help to protect the transmission of personally identifiable information (PII) that is specific to an individual. Several examples of PII include your name, birthdate, address, telephone number and bank account number. To safeguard this sort of information, remote workers may be required to use VPNs. If you haven't already installed and used a VPN for personal/home use already, research various VPN providers and do some comparison shopping. You can even install and use VPNs on your cell phones to strengthen your online safety.

AWS Client VPN logo courtesy of AWS
Let's begin retracing the steps!
Step One: Create the Active Directory Instance
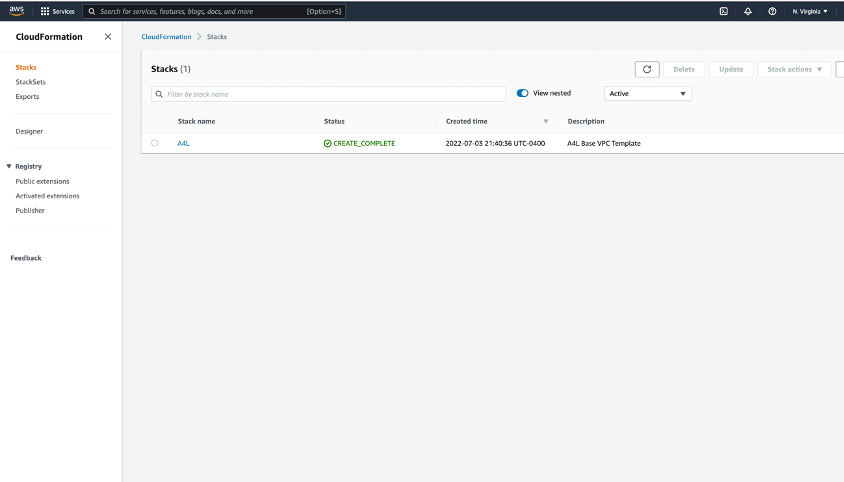
The very first task I completed was to click on the "1 - Click Install" link, located within the project's instructions. In this step, we use AWS CloudFormation to build the "A4L" stack that serves as this project's foundation. The "A4L" stack allows us to not only combine, but manage all of the necessary project resources as one item. These resources include the virtual private cloud (VPC) and all of its components, along with an EC2 (Elastic Compute Cloud), autoscaling group, security group, a Lambda function and IAM roles.
Then, I ventured over to the Directory Service area of the AWS Management Console to create a Simple Active Directory (AD).
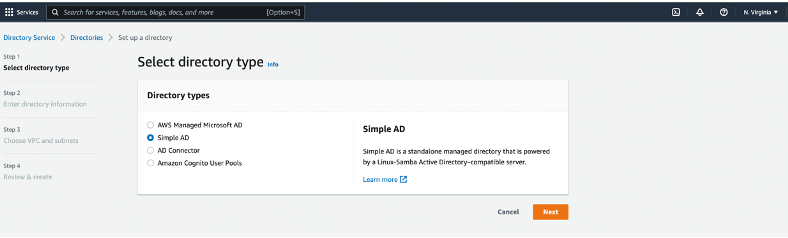
Image of the "Select directory type" screen for this project
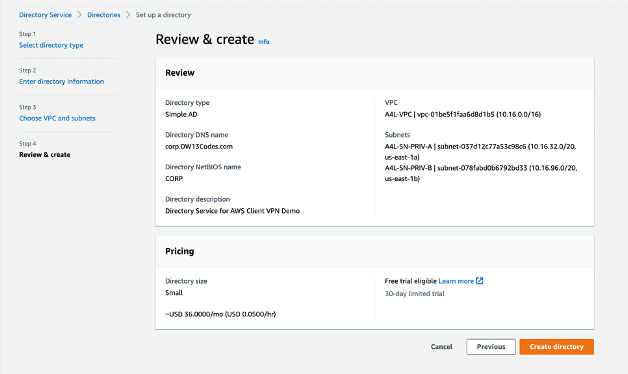
After creating a Simple AD for this project, I set up the directory's DNS Name and NetBIOS name (Network Basic Input/Output System), a password for the Administrator and the directory's description. Other necessary tasks for generating the directory included selecting the proper VPC and appropriate subnets.
Step Two: Generate Certificates
In this phase of the project, I downloaded easy - rsa to create a server certificate. Once complete, this server certificate was imported into the AWS Certificate Manager (ACM).
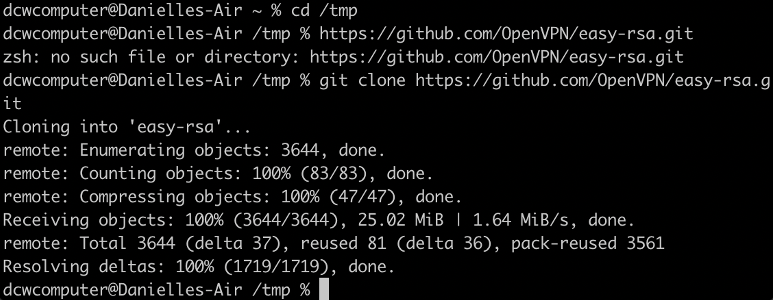
Visual of the change directory "cd" and "git clone" commands to download easy-rsa
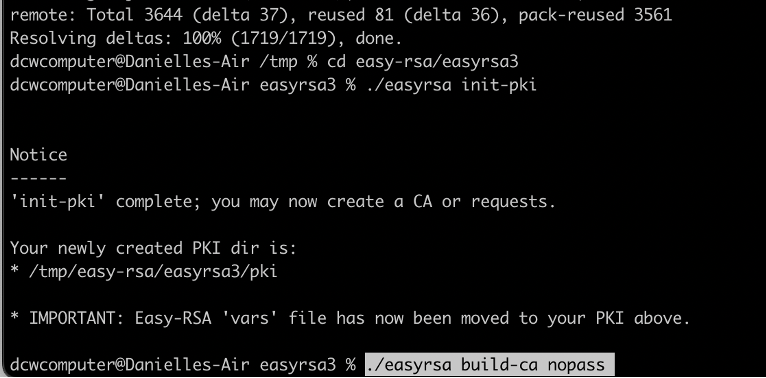
Image of the newly - created public key infrastructure (PKI) and PKI directory
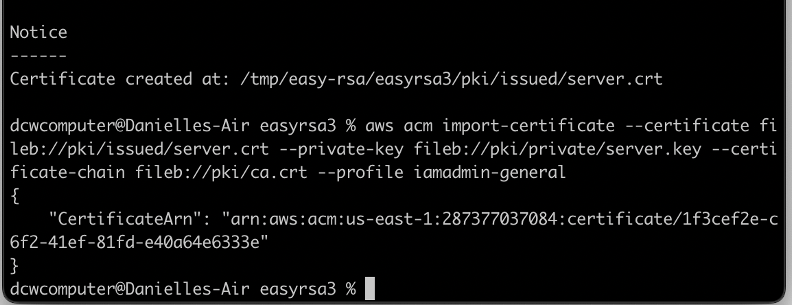
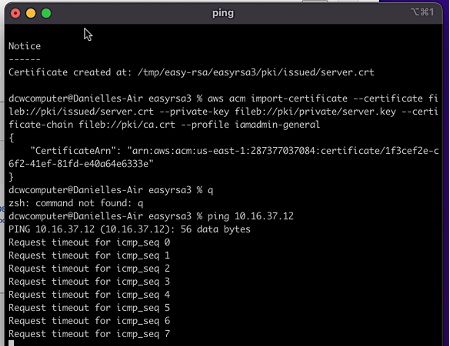
Screen capture of the certificate and its import into the ACM
AWS documentation describes the ACM as a service that "handles the complexity of creating, storing, and renewing public and private SSL/TLS X.509 certificates and keys that protect your AWS websites and applications." Using ACM, may be ideal for secured, publicly - accessible websites hosted on AWS. Some services such as Elastic Load Balancing and Amazon CloudFront are integrated with ACM.
Step Three: Create the VPN Endpoint

Image of the VPC area of the AWS Management Console
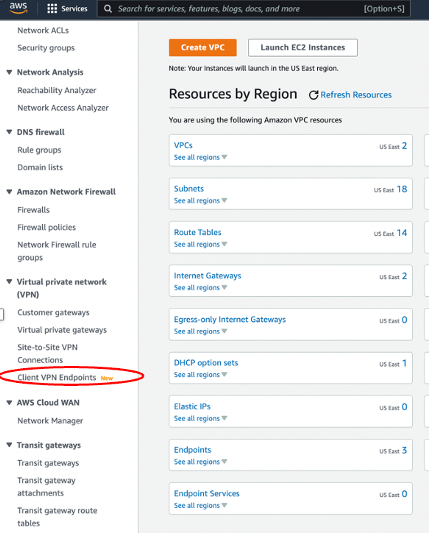
Close - Up of the Virtual private network portion of the menu
In this part of the project, I generated a Tag (A4L Client VPN), set up the Client IPv4 CIDR and selected the Server Certificate ARN with the server certificate previously created during the last step. The name of the directory created in the first step is also entered for Directory ID. Then, under the "Authentication Information" section, select the option for user - based authentication. When prompted, choose "Active directory authentication" for user - based authentication options.

Snapshot of the Client IPv4 CIDR, server certificate, authentication options and Directory ID
Then, I followed the steps to set up the IP addresses for DNS Server 1 and DNS Server 2. Next, I chose the option to enable split - tunneling and selected the A4L - VPC from the VPC ID drop - down menu. After setting up the Security Groups and the Security Group IDs, I clicked the "Create Client VPN Endpoint" button.

Picture of the IP addresses for DNS Servers 1 and 2, split tunnel enabling and VPC ID
Step Four: Configure VPN Endpoints and Associations
After receiving confirmation for creating a Client VPN Endpoint, let's start making associations to it.
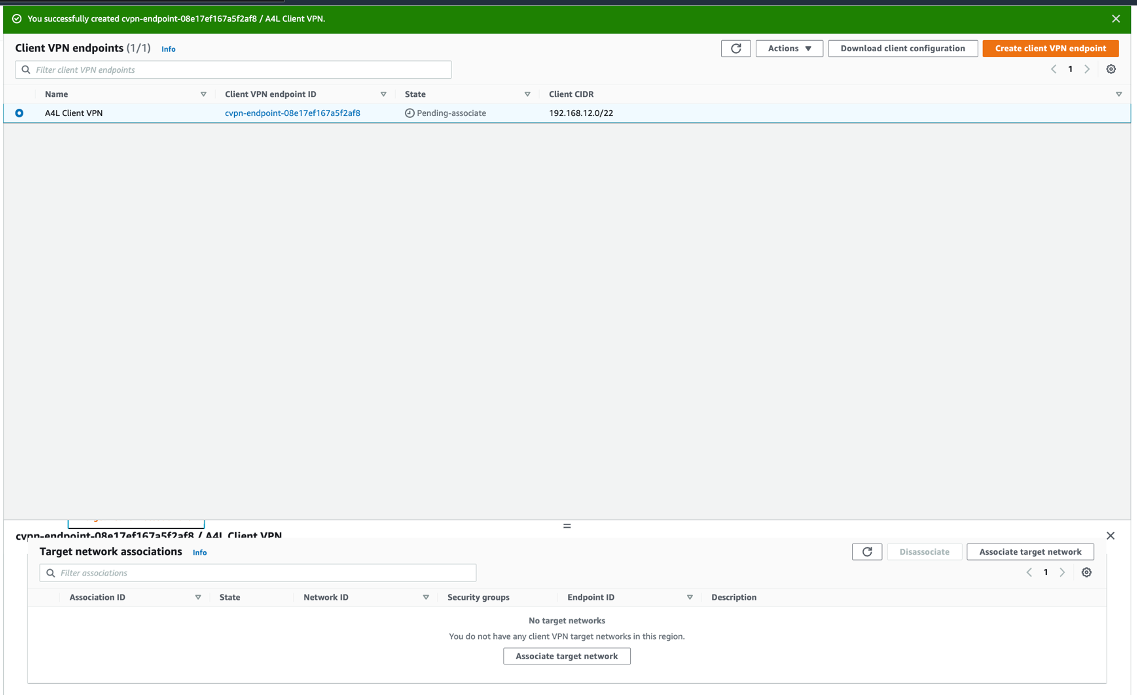
Capture of a successful Client VPN Endpoint confirmation and the Association tab
In the Details area, be sure to select "A4L - VPC" from the drop - down menu. Underneath the VPC prompt, I selected "PRIV-A" as the subnet to associate. Finally, press the "Associate target network" button.
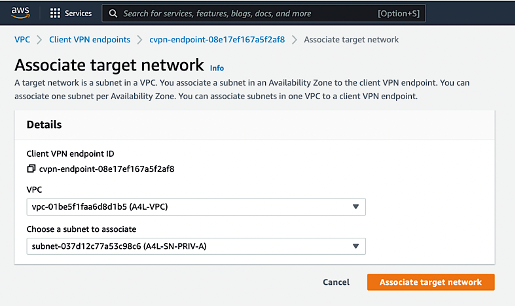
Image of the Associate target network prompt

Visual of the confirmation of target network association and the "Download client confirmation" button
Step Five: Use the VPN Client
After associating the target network, I went back to the Client VPN Endpoints area and selected the "A4L Client VPN Endpoint." Then, I clicked on "Download Client configuration" button to save the file.

Download client configuration screen
Next, I navigated to https://aws.amazon.com/vpn/client-vpn-download/ and downloaded the appropriate version for my computer's operating system. After downloading, I followed the prompts to start the installation process.

The AWS Client VPN download page
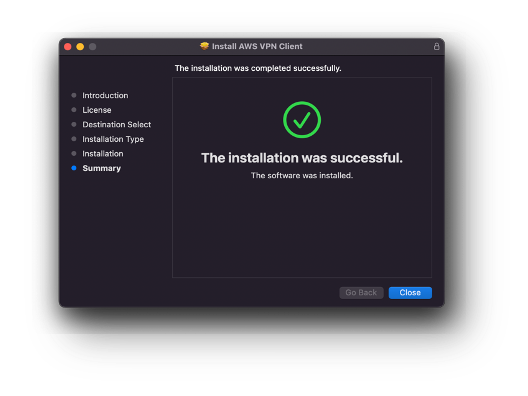
Confirmation of the installed AWS VPN Client with no technical challenges
After a successful installation, the following steps required adding a profile and loading the client configuration profile, with "A4L" for the display name. Next, I connected to the A4L VPN.
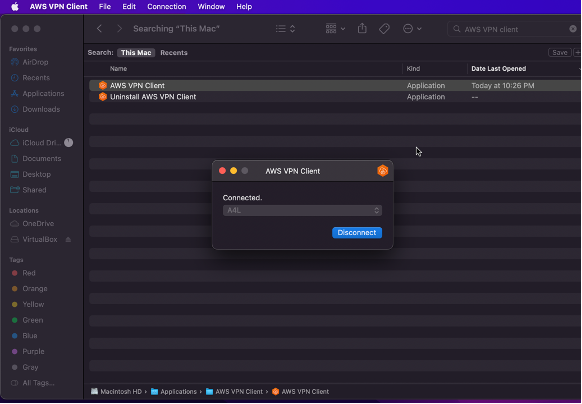
Connection to the A4L VPN
Once connected, I followed the instructions to enter the name and password created during the beginning phase of the project. After opening a terminal to ping the IP address of the Directory Service, "Request timeout" messages began to appear on the screen. What are we missing?
It turns out that we're missing authorizations.
While I worked on this part of the project, the "Request timeout" messages started running up - --- really fast! In fact, here's a glimpse of how many of them appeared on the screen while I rushed back over to the Client VPN area of the AWS Management Console, in fear that the computer may start crashing.

Nearly 1200 "Request timeout messages" appeared while configuring authorization
Once back on the Client VPN endpoints screen, I toggled over to the Authorization rules tab after selecting the A4L Client VPN. Then, I clicked on "Add authentication rule."
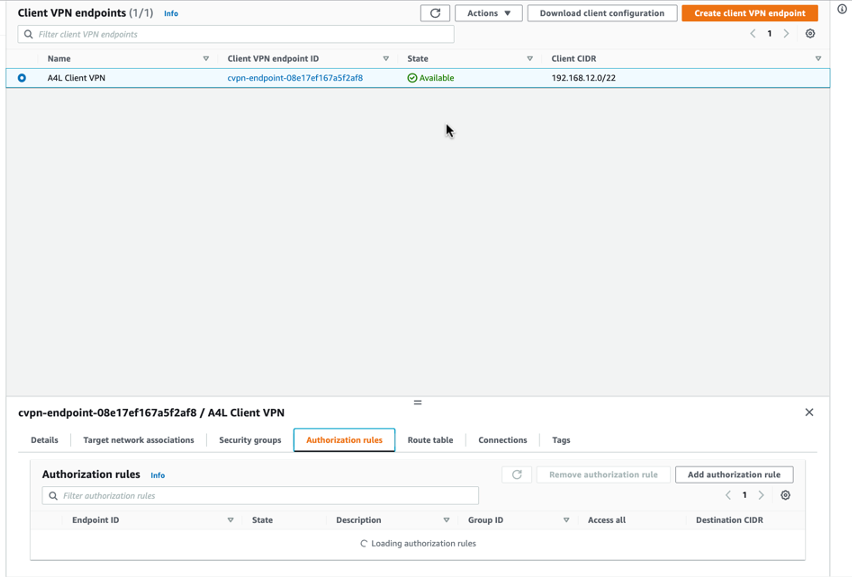
Selected "Authorization rules" tab on the Client VPN endpoints screen
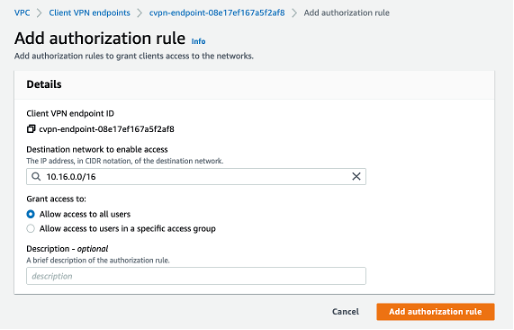
I followed Cantrill's instructions to enter "10.16.0.0/16" in the Destination network to enable access prompt and checked the selection box to enable access to all users. Once those steps were completed, I marked the "Add authorization rule" button.
Then, it was time to check the work. I returned to the terminal and pinged the same address as before in the earlier attempt. Instead of receiving error messages, there was proof of connection.
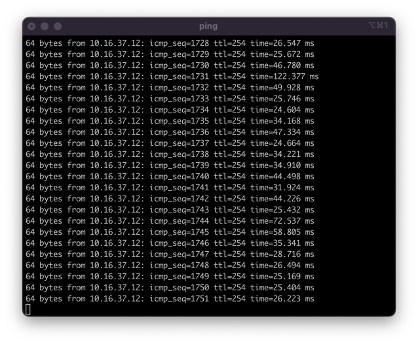
Proof of VPN connection
Lastly, I navigated over to the EC2 area of the AWS Management Console to retrieve the private IP address for the CATWEB instance.

Image of the CATWEB instance's details on the EC2 Dashboard
When I typed in that address, an adorable picture of a cat appeared on the screen. It looked kind of, sort of, like this one.

Image Credit: Adrian Cantrill
Step Six: Destroy Unnecessary Resources
As someone who likes to minimize my AWS bill to the fullest extent, I followed Cantrill's instructions to destroy all of the items generated during this project.
Conclusion
I really enjoyed this project as it explored the mechanical aspects of building a VPN. VPNs may occasionally present technical challenges, such as slow and reduced Internet connectivity. However, they help to keep their users safe while on the Web. Remember: IP address can be traced to directly to you! After this learning adventure, I have a new respect for VPNs, especially with respect to transmitting my PII when required, such as completing job applications or shopping online.
Try out this project and see what images emerge after you configure a simple VPN.
Photo Credit: Privecstasy on Unsplash
Comments
Loading comments…