Welcome to week 18 with LUIT. In this week’s project, we will be working with Kubernetes to create 2 deployments with Nginx containers with a YAML file. The Kubernetes Icon ☸️ Steering Geer reminds me of the beloved cartoon characters Popeyes lol. My liking for spinach stems from this fictional cartoon character. 😄 Let’s start Steering the ship and navigate our way to spin up two Deployments containing 2 pods running the NGINX images. (Enjoy some Cloud spotting along the way 🌥️☁️☁).️

Business scenario:
The project this week could be used by a company that needs to host multiple websites or web applications using a single IP address and port. This could be a cost-effective solution for smaller businesses that cannot afford to have separate servers for each website or application.
For example, let’s say that a small e-commerce business wants to launch two separate websites: one for selling clothes and accessories, and another for selling home decor items. Instead of purchasing two separate servers, the business could use this project to host both websites on a single server using two separate deployments.
The first deployment could contain two pods running the nginx image with a custom index.html page that displays “This is Deployment One” acting as the clothing and accessories website. The second deployment could contain two pods running the nginx image with a custom index.html page that displays “This is Deployment Two” acting as the home decor website.
By using a service that points to both deployments, customers can access both websites using the same IP address and port number. This will make it easier for customers to remember the website address and also make it easier for the business to manage the websites.
The curl command can be used to validate that both websites are accessible using the same IP address and port number. This will ensure that customers can access both websites without any issues and that the business is providing a reliable service.
Objective:
Spin up two deployments. One deployment contains 2 pods running the nginx image. Include a ConfigMap that points to a custom index.html page that contains the line “This is Deployment One”. The other deployment contains 2 pods running the nginx image. Include a ConfigMap that points to a custom index.html page that contains the line “This is Deployment Two”.
Create a service that points to both deployments. You should be able to access both deployments using the same IP address and port number.
Use the curl command to validate that you eventually see the index.html pages from both Deployment 1 and Deployment 2.
Example: curl service_ip_address:service_port
What is Kubernetes?
Kubernetes (often abbreviated to “K8s”) is an open-source container orchestration platform for automating the deployment, scaling, and management of containerized applications. It was originally developed by Google and is now maintained by the Cloud Native Computing Foundation (CNCF).
Advantages of Kubernetes in a few keywords:
- Scalability
- Resource efficiency
- High availability
- Automated deployment
- Service discovery and load balancing
- Configuration management
- Ecosystem
- Open source
Source: Overview | Kubernetes
What is NGINX?
NGINX (pronounced “engine-x”) is a popular open-source web server software that can also be used as a reverse proxy, load balancer, and HTTP cache. It was originally developed to handle high-traffic websites and is known for its performance, reliability, and scalability.
Source: https://www.nginx.com/resources/glossary/nginx/
What is YAML?
YAML (short for “YAML Ain’t Markup Language”) is a human-readable data serialization language that is commonly used for configuration files and data exchange between programming languages. It is designed to be easy to read and write by both humans and machines.YAML is often used in web applications, and configuration files for software development tools like Docker and Kubernetes.
Source: https://www.redhat.com/en/topics/automation/what-is-yaml
Prerequisite:
- Kubernetes Cluster installed and Configured Install Tools | Kubernetes
- Basic Visual Studio Code Knowledge Working with Kubernetes in Visual Studio Code
- CLI of your choice. For this project, I’ll be using VSCode CLI to SSH’ing. Working with Kubernetes in Visual Studio Code Visual Studio Code (VS Code) is a popular code editor that has built-in support for Docker. With the Docker extension for VS Code, you can easily manage your Docker containers and images from within the editor.
Step 1 Create Custom index.html file with ConfigMap.
First, let’s check the Kubernetes version that I already installed Kubernetes Desktop and on VScode. Click here to Install Tools | Kubernetes
kubectl version --client
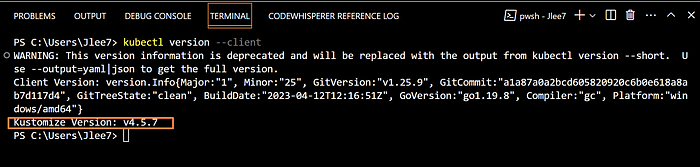
We see Kustomize Version: v4.5.7 and Client Version to be V1.25.9
Kustomize is a tool for customizing Kubernetes configurations. It has the following features to manage application configuration files: generating resources from other sources. Setting cross-cutting fields for resources.
We will create two files, one for each deployment.
Save the file as index-html-configmap1.yaml for Deployment1
apiVersion: v1
kind: ConfigMap
metadata:
  name: index-html-configmap1.yaml
  namespace: default
data:
  index.html: |
    <html>
    <h1> Welcome there! This is Deployment One, acting as the clothing 👔 and accessories 👓 website. </h1>
    </html
Next, create the ConfigMap by using index-html-configmap1.yaml file with the following command to run it.
kubectl apply -f index-html-configmap1.yaml
Here is the output after running this command in my VScode Terminal
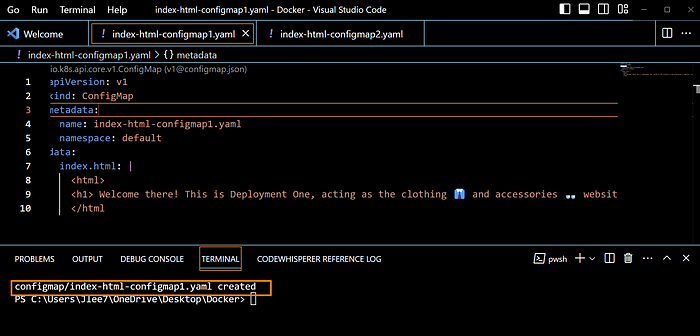
Great, the output above:
configmap/index-html-configmap1.yaml created
is what we wanted to see.
Repeat the step for Deployment2
Save the file as index-html-configmap2.yaml for Deployment2
apiVersion: v1
kind: ConfigMap
metadata:
  name: index-html-configmap2.yaml
  namespace: default
data:
  index.html: |
    <html>
    <h1>Welcome! This is Deployment Two, acting as the home 🏡 decor website. </h1>
    </html
Next, create the ConfigMap by using index-html-configmap2.yaml file with the following command to run it.
kubectl apply -f index-html-configmap2.yaml
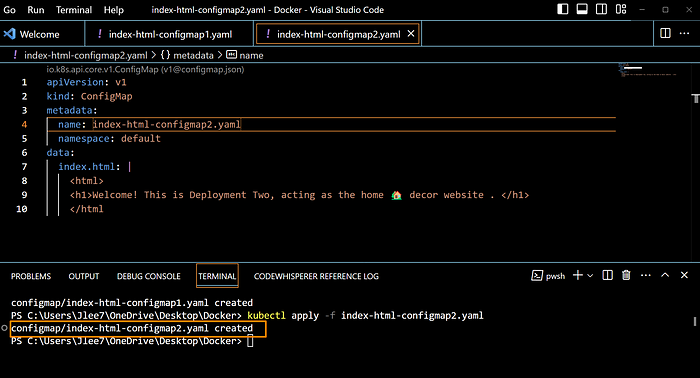
Great, the output above:
configmap/index-html-configmap2.yaml created
is what we wanted to see as well.
Both Kubernetes Deployments are set up by creating ConfigMaps for our NGINX server's custom index.html.
(Initially, I had a minor roadblock, I was not in the Docker directory when running these commands, I had Docker Installed on my OS, and I am using Docker Desktop, back to Linux 101, I need to be in the correct directory in order to run a command or script located in that directory.)

Path does not exit, I needed to change the path in Docker Desktop in order to run it.
Code Source: Creating KubernetesNGINX index.html configmap yaml file.
How To Change Nginx index.html in Kubernetes With Configmap
STEP2. Create Deployments and Services
In Kubernetes, the YAML file is called a “manifest”. We will create two deployments and services. Feel free to utilize the code in your manifest. (Make sure to update the name of the file). The 3 Dashes (- — -) represent different deployments and services, we have two for this project).
A good YAML Validator to verify the code: YAMLlint — The YAML Validator
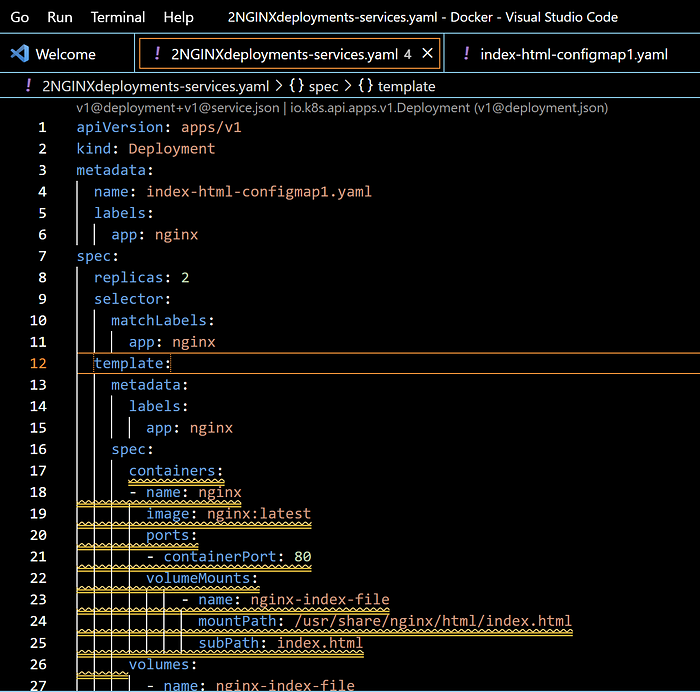
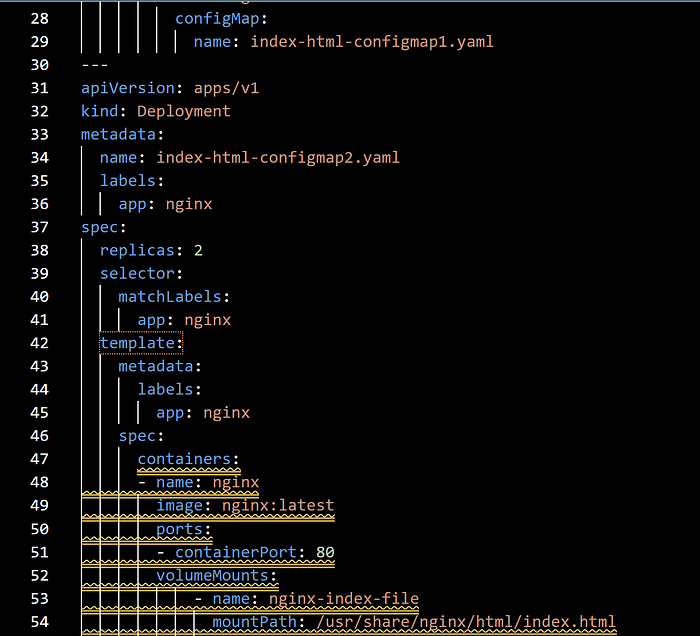
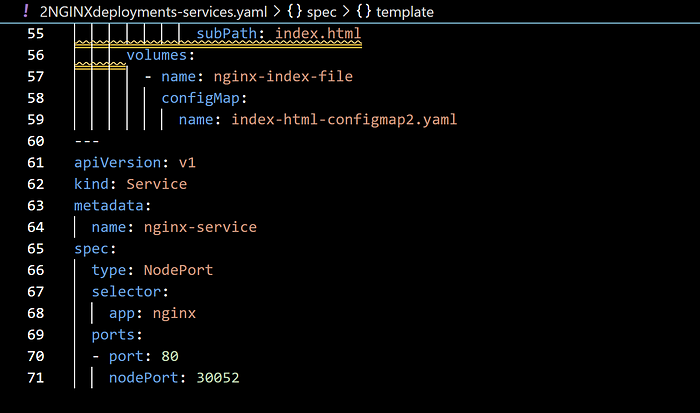
Explanation of the YAML code for 2NGINXdeployments-services.yaml
This is a Kubernetes configuration for deploying two replicas of an Nginx web server, each serving a different index.html file from a ConfigMap. The code defines two deployments (index-html-configmap1.yaml and index-html-configmap2.yaml) with the same app label and a service (nginx-service) that routes traffic to the pods based on the app label selector. The service exposes the Nginx web server on port 80 and maps it to port 30052 on each node in the cluster.
kubebctl apply -f 2NGINXdeployments-services.yaml
Ok we got two deployments and NGINX service created!
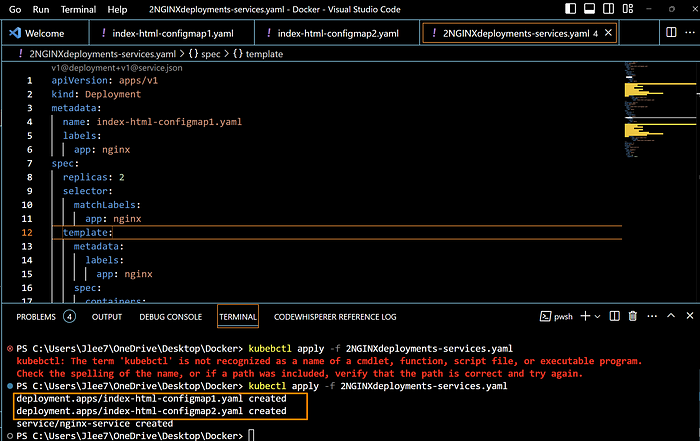
Great, the output above:
deployment.apps/index-html-configmap1.yaml created
deployment.apps/index-html-configmap2.yaml created
service/nginx-service created
are what we wanted to see.
STEP3. View the details of the deployment
kubectl describe deployment <deployment name>

kubectl describe deployment kubectl describe deployment index-html-configmap1.yaml

kubectl describe deployment kubectl describe deployment index-html-configmap2.yaml
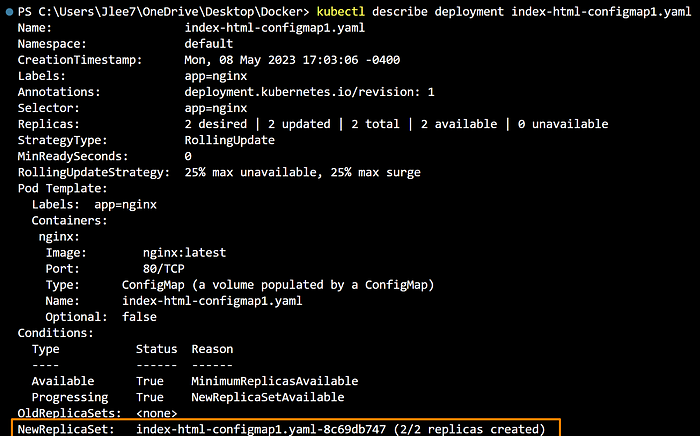
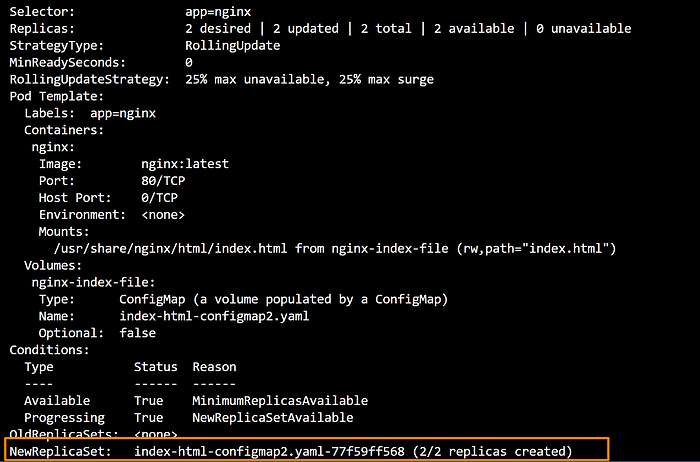
We see both deployments are created!
Let’s display detailed information about a ReplicaSet in Kubernetes. ReplicaSets are used to ensure that a specified number of pod replicas are running at any given time, and are used for scaling and self-healing of applications by running the following command.
kubectl describe replicaset
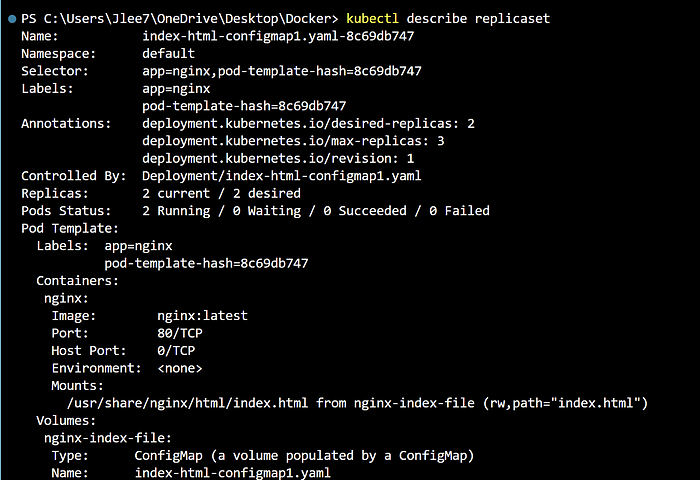
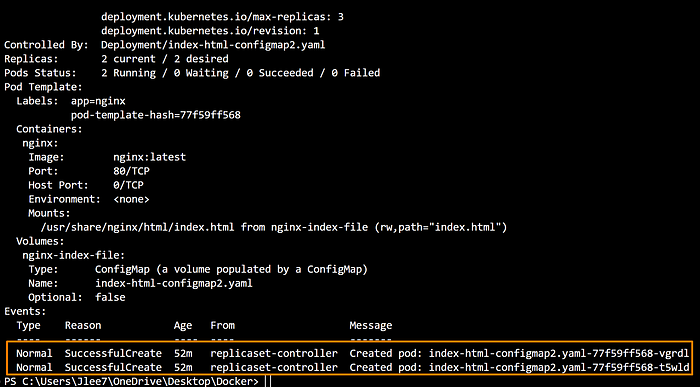
We see both replicaset is created!
Step4: Check the event logs
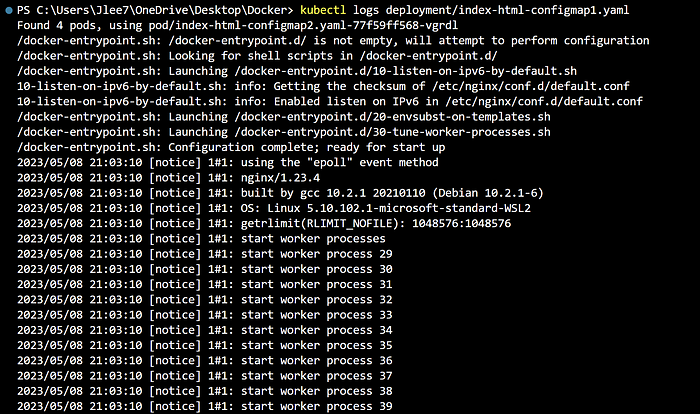
Let’s display the logs of a container running in a Kubernetes Deployment by running the following command.
Deployments are used to manage the deployment and scaling of multiple replicas of a Pod template and are commonly used to manage stateless applications.
kubectl logs deployment/<deployment name>
kubectl logs deployment/index-html-configmap1.yaml
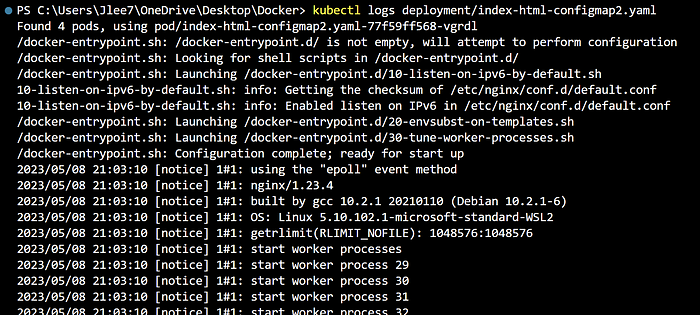
kubectl logs deployment/index-html-configmap2.yaml
Next, let's verify and retrieve information about all resources in the current namespace by running the following command.
kubectl get all
We see it returns a table that displays the name, type, status, age, about the resources in the namespace. This can be useful for troubleshooting, monitoring, and managing the Kubernetes cluster.
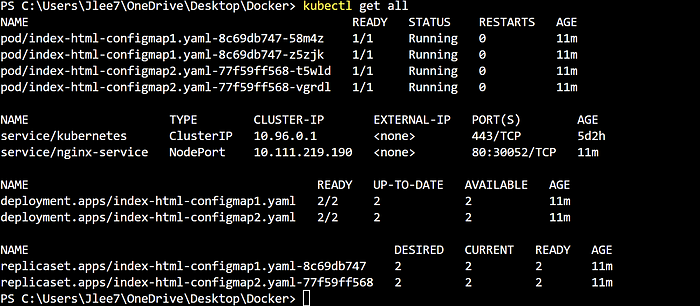
Great! We see 2 deployments with 2 pods each with our NGINX service up and running!
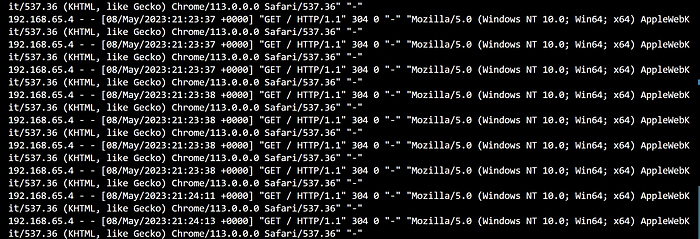
curl localhost:30052
The curl localhost:30052 command will send an HTTP request to the Nginx web server running in the Kubernetes cluster and listening on port 80. If the web server is properly configured and running, the command will return the HTML content that the web server serves.
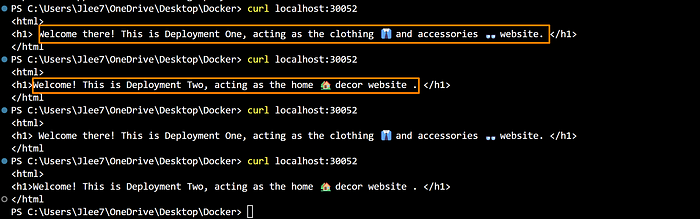
Awesome!! We see our custom index file worked and both deployments are reached from the nodeport. I ran curl localhost:30052 a couple of times just to make sure it switches between deployments, and it did!!
Lastly, let’s paste localhost:30052 twice in any browser of your choice. I like to use Brave web browser due to its privacy, security, and speed.


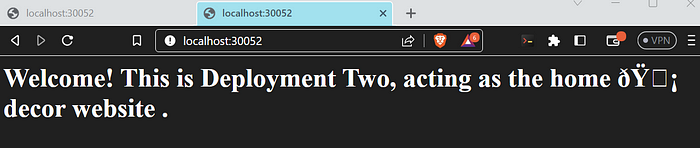
Sweet! We have successfully created 2 deployments with Nginx containers with a YAML file.
STEP5: Clean up the Deployment.
#kubectl delete deployment nginx-deployment1 nginx-deployment2

kubectl delete deployment index-html-configmap1.yaml

kubectl delete deployment index-html-configmap2.yaml

#kubectl delete service nginx-service

kubectl delete service/nginx-service
Advanced:
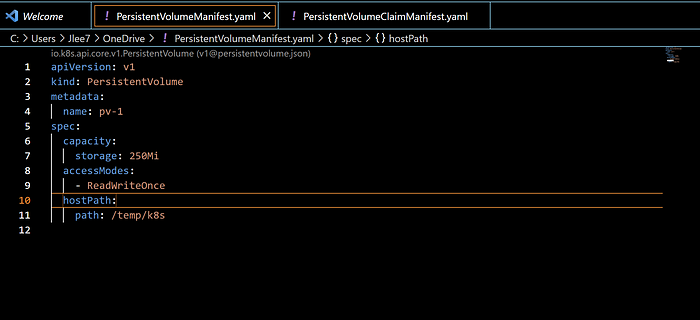
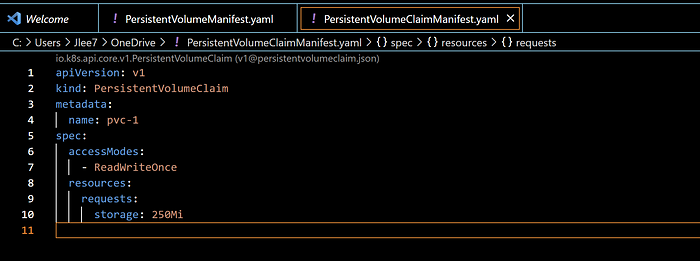
Create a Kubernetes persistent storage manifest that gets 250MB of disk space on the host computer in the /temp/k8s directory. Create a corresponding persistent storage claim manifest file.
What is Kubernetes Persistent storage manifest?
A Kubernetes Persistent Volume (PV) manifest is a YAML file that describes a piece of storage in a Kubernetes cluster that is provisioned and managed by the cluster administrator.
Persistent Volumes Source: https://kubernetes.io/docs/concepts/storage/persistent-volumes/
PersistentVolumeManifest.yaml file:
Persistent Volume Claim source: https://kubernetes.io/docs/tasks/configure-pod-container/configure-persistent-volume-storage/
PersistentVolumeClaimManifest.yaml file:
kubectl apply -f <file_name.yml>

kubectl apply -f PersistentManifest.yaml

kubectl apply -f PersistentColumeClaimManifest.yaml
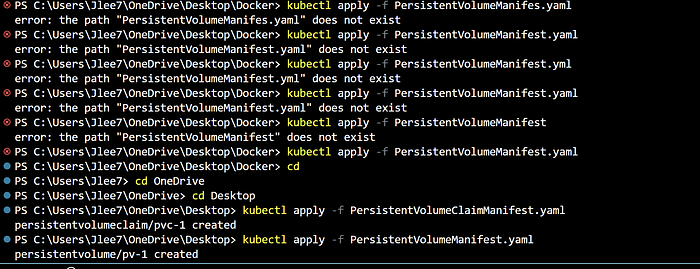
File does not exist? Go back to Linux 101 again, The “directory” is the Linux equivalent of a folder in Windows or macOS, and it is the location on the filesystem where files and other directories are stored. This file was not in docker, it is located on my OneDrive Desktop. Ok, now in the right directory enter the command and we see that both files are created!
Next, run the kubectl describe pv command. It is used to display detailed information about a Kubernetes Persistent Volume (PV). When you run this command, Kubernetes will return a detailed description of the specified PV, including information about its status, capacity, access modes, and storage class.
kubectl describe pv my-pv

Great! We see Kubernetes persistent storage manifest that gets 250MB of disk space on the host computer in the /temp/k8s directory!!
Thank you for taking the time to read this week’s Tech blog. I appreciate your interest in the exciting field of cloud computing and look forward to continuing our journey together. Let’s stay connected and continue to learn and grow in this ever-evolving industry.
https://www.linkedin.com/in/jasonlidevopsengineer/
You can reach out to me directly. Jlee77711@outlook.com

If you found this blog post informative and helpful, please consider supporting it by sharing it. Your engagement not only helps to boost the visibility of this content on the internet, but it also signals to other DevOps and Cloud Engineers that read this article may be useful to them as well. Thank you for your support! 😀
Comments
Loading comments…