AWS Toolkit for Visual Studio Code (VS Code) is an open-source extension for Visual Studio Code. It makes your work easy such us, create, debug or test locally and deploy your serverless application on AWS.
Prerequisites
Before work with AWS Toolkit for VS Code, there are some Prerequisites.
- You must have an AWS account, if you don’t have AWS then you can create from the given link here AWS Account
- Supported OS: Windows, Linux, MacOS
- VS Code Version 1.42.0 or higher, to download the latest version of VS Code
Install the Toolkit for VS Code
- Open up your VS Code editor.
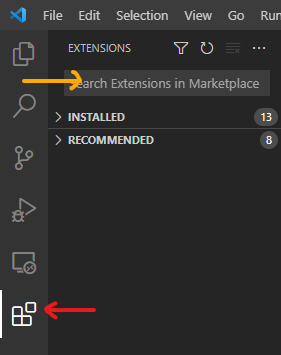
- Go to the side Activity Bar, and then click on the Extensions icon. It opens the Extension side view and that allows you to install extension from Marketplace.
- In the search box for Extensions, search for AWS Toolkit.
- In the right pane, choose Install.
- If it will prompt for restart or reload VS Code then do that.
Once you have installed AWS Toolkit in VS Code, then it’s time to configure your credentials for access AWS resources from VS Code.
Configure Credentials for AWS Toolkit
To access your AWS Resources from VS Code you need to set up credentials. To do this obtain Access Key from AWS Console.
To get the access key, go to AWS Console and navigate to IAM and then the Users section. Choose or create a new user according to your requirements, and create or download access key.
Once you got the access key then switch to VS Code. To configure Credential in VS Code first you need to create credential profile. To do this open the Command Palette, on the menu bar, choose View, Command Palette. Or use the following shortcut keys:
- Windows and Linux — Press Ctrl+Shift+P.
- macOS — Press Shift+Command+P.
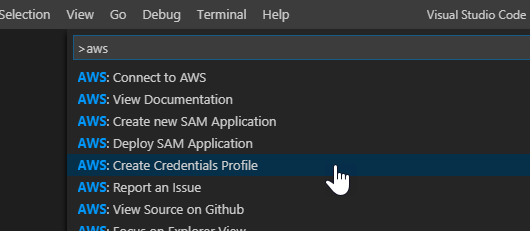
In the Search Box, type AWS: Create Credentials Profile, then press enter.

Enter your name for your profile, then press enter.

Enter the Access key, that you got from AWS Console, then press enter.

Enter Secrete key, that you got from AWS Console with an Access key, then press enter.
Connecting to AWS
To do this open the Command Palette, on the menu bar, choose View, Command Palette. Or use the following shortcut keys:
- Windows and Linux — Press Ctrl+Shift+P.
- macOS — Press Shift+Command+P.
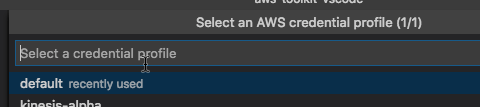
Search AWS and Choose AWS: Connect to AWS.
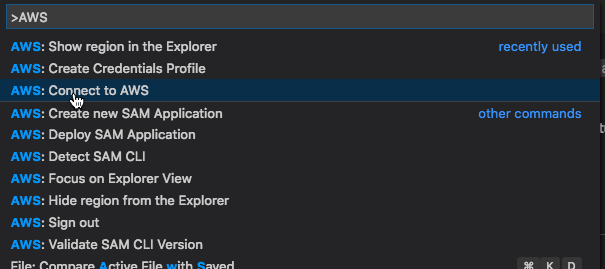
Choose your profile.
If you don’t have a credentials profile set up, you will get a prompt for setup credentials profile, then click on Yes.
Install Docker for test SAM Application locally
1.Install Docker.
For Windows 10 see, Install Docker for windows 10.
For Older Version of Windows see, Install Docker Toolbox.
For Mac see, Install Docker
2.Configure your shared drives
The AWS SAM CLI requires that the project directory, or any parent directory, is listed in a shared drive.
For Windows 10 see, Docker file sharing
For Older Version of Windows see, Add shared directory
For Mac see, Docker file sharing
3.Verify your Docker Installation
Once you ihave nstalled docker on your machine, you need to verify it’s working properly or not. To verify your docker installation run this command
docker ps
Install AWS SAM CLI
1.Download AWS SAM CLI for windows os.
For 64-bit operating system, download installer.
For 32-bit operating system, visit documentation
2.Verify installation of AWS SAM CLI
To do this run below command in command prompt or powershell.
sam --version
You will get output something like below,
SAM CLI, version 1.23.0
3.Install git
To download sample applications using the sam init command, you must also install Git, see Install Git
That’s it you are now ready to start development.
Installation and Configuration of AWS SAM CLI on Linux visit below link
Installing the AWS SAM CLI on Linux
Comments
Loading comments…