
Failing to inject custom headers in CloudFront distribution! I have seen my customers make this mistake time and again. They do a wonderful job setting up the infrastructure with CloudFront and Application Load Balancer (ALB), but fail to block direct access to their ALB properly. Effectively, rendering the whole setup useless.
In this article, I will show why this is a problem and how we can use CloudFront header injection and ALB’s dynamic forwarding rules to fix it. This approach works regardless of the backend application or services are deployed on EC2 instance EKS, ECS, or Kubernetes cluster.
Securely configuring ALB with CloudFront
There are many good reasons to put a CloudFront distribution in front of an Application Load Balancer (ALB). Many of my customers do that for a variety of reasons, which include:
- Relying on AWS WAF or AWS Shield to protect you from malicious injection request or DDoS attack.
- Adding additional (security) features via Lambda@Edge or CloudFront Functions, which get triggered for each request.
- Wanting the benefits of CloudFront, including faster TLS negotiation for viewers who are more distant from the ALB; Or globally optimized routing of requests (on the AWS Edge Network), from CloudFront edge locations to the ALB origin.
- Looking for some other benefits of dynamic content delivery through CloudFront.
However, if a (malicious) user can access our ALB directly, bypassing the CloudFront, all the above benefits are lost and the whole process is rendered useless. So, let’s see how to properly configure ALB with CloudFront.
Adding an auth token header
We have seen that it is desirable to disable direct access to the ALB. We want to configure ALB so that it only forwards the requests (to the backend services) that come from our CloudFront distribution. To do this, we need to do the following.
- Create a random token that will be used in our custom
x-auth-tokenheader to ‘authorize’ our CloudFront distribution with our ALB. I prefer using an UUID generator for the header token generation. - Configure CloudFront to add a custom HTTP
x-auth-tokenheader with our token to all requests that it forwards to the ALB. - Configure the ALB to only forward requests (to the backend services target group), which contain our HTTP
x-auth-tokenheader.
Let’s now see how to do the steps 2 and 3.
Configuring CloudFront to inject our custom x-auth-token header to each request it sends to our ALB is best done via console in the ‘Origins’ tab, as updating a CloudFront Distribution via CLI aws cloudfront update-distributioncan be quite complicated.

Adding a custom header to a request with CloudFront.
Configuring ALB to only forward requests, which contain the x-auth-token header with a correct token is done via dynamic forwarding rules. This can be done via EC2 console by configuring rules for an ALB listener, as shown in the image below. Alternatively, we can use elb CLI as shown in the code snippet below.
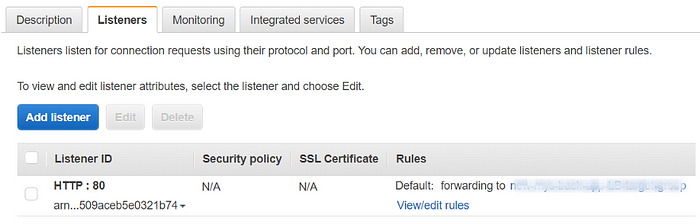
Dynamic forwarding rules for a listener in an ALB.
To create the desired rule, we can also use the following CLI command:
Adding a dynamic forwarding rule to ALB.
Here we will have to specify three main things: First, we need the ARN of our default listener ( --listener-arn option). We will add the rule to that specific listener. Second, we need to add the ARN of our target group, where our backend services run, in the --actions option. Finally, we need to add the correct value of our token in the --conditions option JSON, under the “Value” filed.
Note: Make sure to also update the listener’s default forwarding rule, as it will forward all unmatched requests to the target group. For example, we can change the default rule to return a fixed response with HTTP status code 403 (Unauthorized) instead of forwarding unmatched requests.
Keeping the token secret
The whole concept relies on the fact that the injected header token must remains secret. If it gets discovered by a malicious user, they can simply inject it into their requests to the ALB, effectively allowing them to bypass the CloudFront distribution and all our security measures.
Note that if the header x-auth-tokenis supplied in the client request to the CloudFront distribution, it is overridden by CloudFront. This means that there is no way for a malicious user to utilize this header and mess with the ALB’s forwarding rules.
Rotating secret token
Unfortunately, at the moment there is no way to automate the secret token rotation. There is an option to configure a Lambda function together with CloudFront Functions (or Lambda@Edge) which could implement secret rotation and injection of the x-auth-token header and the corresponding ALB rule. However, this approach would probably be too complex and cost-ineffective for most use cases.
Luckily, doing it manually is a simple four-step process:
- Generate a new header token.
- ADD a ALB forwarding rule with the new token.
- UPDATE existing header to the new token value in CloudFront distribution.
- Delete old ALB rule with the old header token.
Closing Thoughts
In this article, I have discussed one of the very common mistakes, witnessed with many companies that I consult for. Luckily, as we have seen, it is fairly easy to fix this issue. Unfortunately, it does require periodic maintenance to keep things secure, by rotating the secret header token and updating HTTP header and ABL routing rules.
Comments
Loading comments…