
Introduction:
In today’s digital landscape, securing your website with SSL (Secure Sockets Layer) certificates has become very crucial. SSL certificates provide encryption and authentication, ensuring secure communication between a web server and a user’s browser. Amazon Web Services (AWS) offers a comprehensive set of tools that make it easy to attach an SSL certificate and domain to your EC2 instances. In this tutorial, we will discuss the process of using Route 53 and AWS ACM (Amazon Certificate Manager) to secure your EC2 instance.
Prerequisites:
To follow this tutorial make sure you have the following prerequisites.
- An active AWS account.
- An EC2 instance running your website or application.
- A domain registered with AWS Route 53 or from any other domain registrar like godaddy.
- A valid SSL certificate in AWS ACM. (You can either request a new certificate or import an existing one.)
Step 1: Create a Hosted Zone for your domain name
An AWS Hosted Zone is a domain name system (DNS) database hosted on Amazon Web Services (AWS). It allows you to manage the DNS records for your domain names within the AWS ecosystem.
Go to the AWS Management Console then navigate to route53 service and click on “Create Hosted Zone”. Enter your domain name, select type “Public Hosted Zone” , insert description and tags of your choice and click create.

Once you have created a hosted zone for your domain you will have default SOA and NS created for you. NS (Nameservers) are the servers who actually does the DNS resolution for your domain. If you are using domain registrar like godaddy then update the NS with the ones provided by AWS.
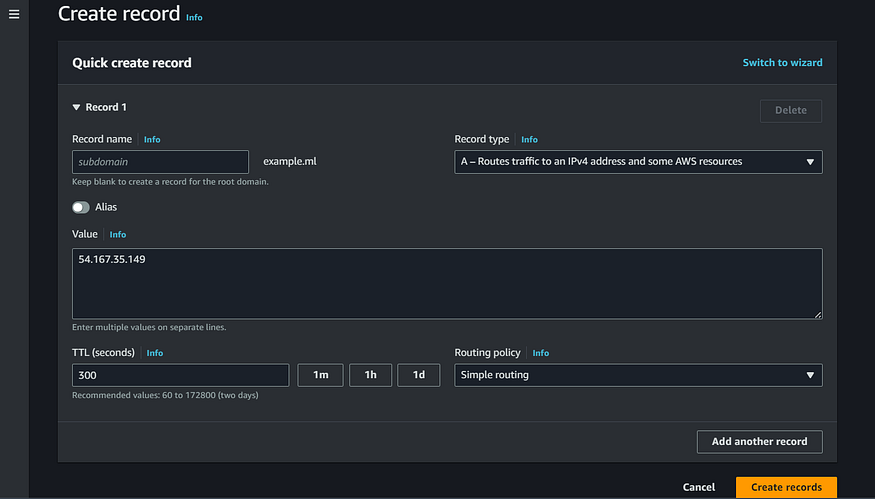
Next we have to create an A record to direct the traffic to our EC2 instance IP address or CNAME if you are using cloudfront distribution.
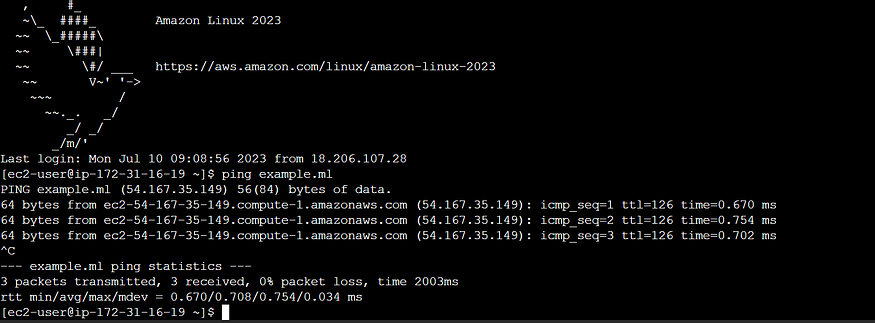
Once you have created a record to map domain to your EC2 IP check the mapping by ping command. It may take upto 24 hous to propogate th changes if you have domain from domain registars.
Step 2: Request an SSL Certificate in AWS ACM
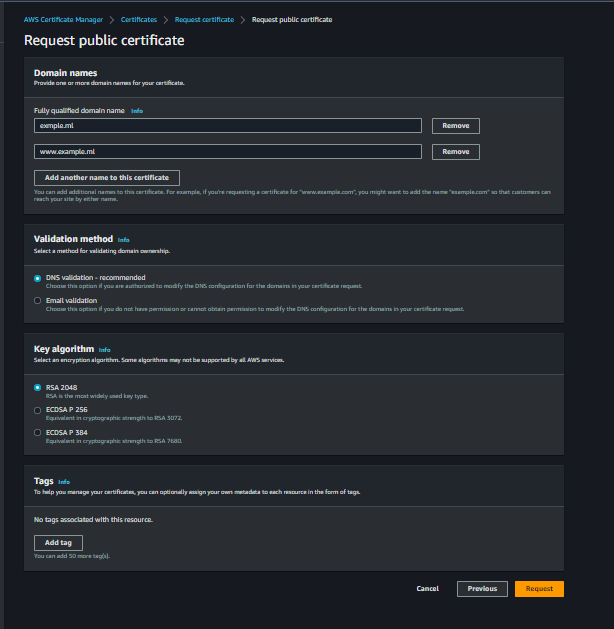
Go to the AWS Management Console and navigate to the ACM service. Click on “Request a certificate” and select “Request a public certificate.” Enter your domain name(s) in the given field. In order to include both the root domain (e.g., example.com) and any subdomains (e.g., www.example.com) click on “Add another name to this certificate” to add multiple domain.
Select a validation method (DNS validation is recommended). Review your settings and click on “Request” to submit the certificate request.

Step 3: Verify Domain Ownership in Route53
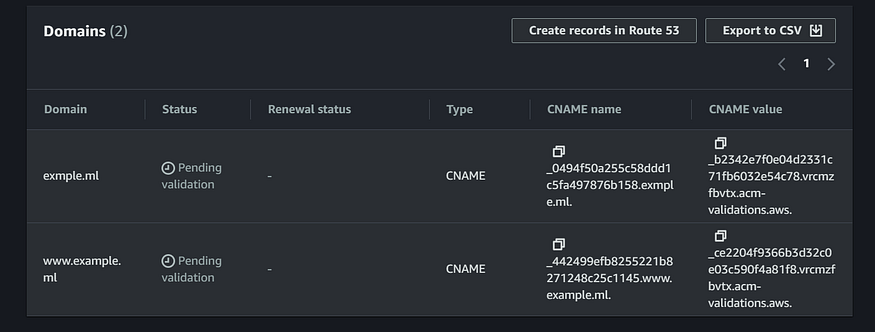
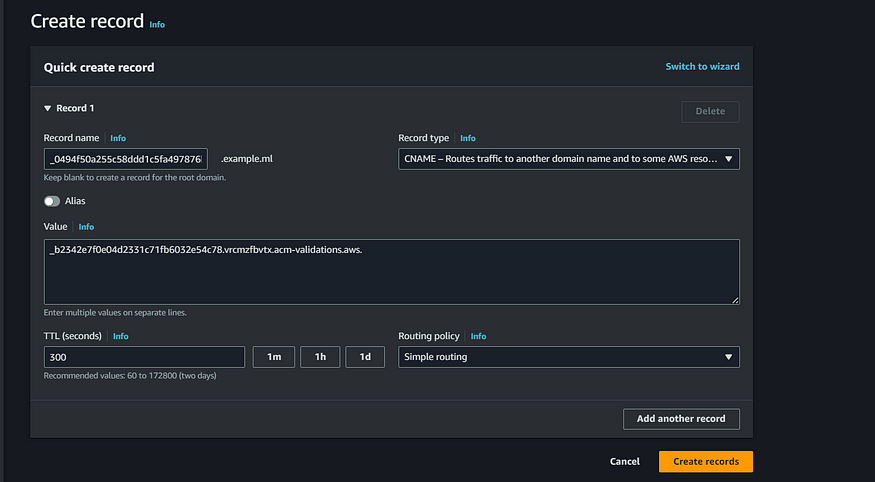
Once the certificate request is submitted, you need to complete the domain ownership validation process. Choose the DNS validation method. AWS ACM will provide you with a DNS record value that needs to be added to your Route 53 hosted zone.
Click on the certificate yo have just creaed and you can se the DNS records that are provided. Paste the DNS record value provided by AWS ACM. Save the record set and wait for the DNS changes to propagate (this may take a few minutes).
Step 4: Test and Verify
Wait for the DNS changes to propagate fully (which may take up to 24 hours, although it typically happens much faster). Open a web browser and navigate to your domain using both the root domain and any subdomains. Ensure that your website loads correctly with the SSL padlock icon indicating a secure connection.
Conclusion:
Securing your EC2 instance with SSL certificates and associating it with a custom domain is essential for maintaining a trustworthy and secure online presence. By following the steps mentioned in this blog, you can easily attach an SSL certificate to your EC2 instance using AWS ACM and Route 53. This process not only ensures the confidentiality of user data but also builds trust among your website visitors.
Comments
Loading comments…