
In this step-by-step guide, we’ll embark on an exciting journey to creating a fully functional JavaScript calculator. Even if you’re new to programming or you’re a seasoned developer looking to hone your skills, this project is a great way to understand web development fundamentals, including HTML, CSS, and JavaScript.
The Benefits of Building Your Own Calculator
You may be wondering, “Why build a calculator when there are countless calculator apps and tools available? The answer lies in the invaluable experience and knowledge you will gain throughout this project.
By building a calculator from scratch, you will:
- Deepen your understanding: Gain a deep understanding of core web technologies such as HTML, CSS, and JavaScript.
- Problem-Solving Skills: Encounter and overcome various challenges, refining your problem-solving abilities.
- Customization: Tailor the calculator to your preferences, adding features that you find useful or interesting.
- Pride in Creation: There’s a special satisfaction in using a tool you built yourself.
- Transferable Skills: The skills you acquire here can be applied to more complex web development projects in the future.
Before diving into the code, we’ll start by setting up the project and discussing the project structure and the files you’ll need. So, let’s start this exciting journey to create your own JavaScript calculator.
Setting Up the Project
Before we begin it is essential to set up the project environment and in this project, we will use Vscode. This step will ensure that we have the necessary files and structures in Vscode to proceed smoothly in the development process.
- Project Structure
- Creating the Workspace
Project Structure: To maintain a clean and organized project, we’ll create a simple directory structure in our Vscode. like this:
Creating the Workspace: To begin, you can set up a local development environment using a code editor of your choice, such as Visual Studio Code, Sublime Text, or Atom. Alternatively, you can use online code editors like CodeSandbox or Repl.it.
Here’s how to create a simple project structure in Visual Studio code:
- Open Visual Studio Code: Launch the code editor if you haven’t already.
- Create a New folder: In the file explorer, right-click on your desired workspace location and select “New Folder.” Name it “calculator-project.”
- Add HTML file: Inside the
calculator-projectfolder, right-click, choose “New File,” and name itindex.html. - Add CSS File: Similarly, create a
styles.cssfile and ascript.jsfile in the same folder.
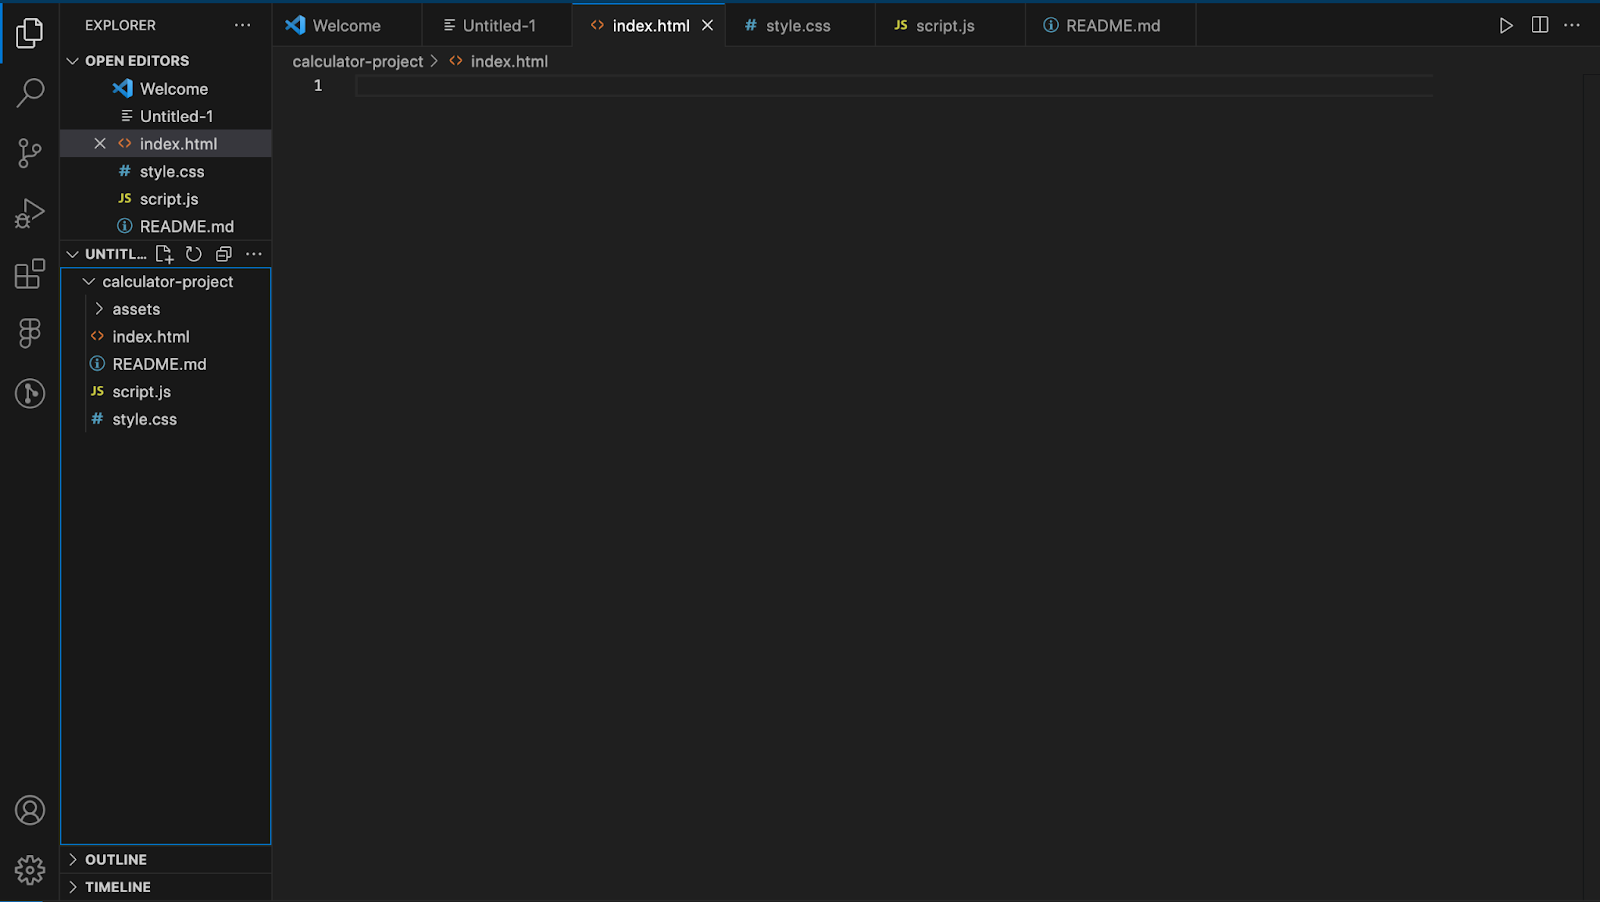
In the above image:
index.html: This is the main HTML file where we’ll define the structure of our calculator’s user interface.styles.css: In this CSS file, we’ll add styles to make our calculator visually appealing and responsive.script.js: JavaScript logic for our calculator will reside here. We’ll use it to handle user input, perform calculations, and update the display.README.md: This file can include instructions, explanations, and any additional information about your project.assets/: If your calculator requires images or other assets, you can store them in this directory.
Creating the Calculator Layout
In this section, we’ll delve into the exciting part of building a calculator: designing the user interface using HTML and CSS. We’ll guide you through creating layouts for buttons and the calculator display screen. Feel free to refer to the code provided earlier as a reference point for this section.
- HTML Structure
Start by crafting the basic structure of your calculator within the index.html file. Here’s a simplified version:
<!DOCTYPE html>
<html lang="en">
  <head>
    <link rel="stylesheet" href="style.css" />
    <title>Calculator Project</title>
    <!-- Add meta tags, title, and link to CSS files here -->
  </head>
  <body>
    <div class="whole-page">
      <div class="display">
        <p class="calculation-display" id="calculation-display">0</p>
        <p class="result-display" id="result-display">0</p>
      </div>
      <div class="buttons">
        <p>
          <button class="num-but">1</button>
          <button class="num-but">2</button>
          <button class="num-but">3</button>
          <button class="Orange-button">+</button>
        </p>
        <p>
          <button class="num-but">4</button>
          <button class="num-but">5</button>
          <button class="num-but">6</button>
          <button class="Orange-button">-</button>
        </p>
        <p>
          <button class="num-but">4</button>
          <button class="num-but">5</button>
          <button class="num-but">9</button>
          <button class="Orange-button">*</button>
        </p>
        <p>
          <button class="num-but">0</button>
          <button class="num-but">.</button>
          <button class="num-but">=</button>
          <button class="Orange-button">/</button>
        </p>
        <p>
          <button class="clear-button">Clear</button>

          <button class="Del-button">Del</button>
        </p>
      </div>
    </div>
    <!-- Link Js file here -->
    <script src="script.js"></script>
  </body>
</html>
In this structure:
- The
<div class=”calculator”>element contains the entire calculator interface. - Inside it, we have a
<div class=”display”>element for displaying calculations and results. It consists of two<p>elements, one for the ongoing calculation (calculation-display) and one for the result (result-display). - Below the display, we’ll add a
<div class=”buttons”>element to house all the calculator buttons.
CSS Styling
Once the HTML structure is ready, you can style the calculator to make it look attractive and function well. By referencing the previously provided CSS file in our vscode (styles.css). To make our calculator visually appealing, we can apply different CSS styles and effects. Here are some improvements you can apply;
- Background and Borders
- Animations
- Other Enhancements
Background and Borders:
Let’s start by setting the background and borders for the calculator display and buttons. Using our reference code, we can modify the .whole-page .display, calculation-display, .num-but, .Orange-button, .clear-button, and .Del-button CSS classes to define backgrounds, borders, and button styles that match your desired visual style.
For example:
.whole-page {
  max-width: 280px;
  background: rgba(188, 42, 94, 0.2);
  box-shadow: 0 8px 32px 0 rgba(31, 38, 135, 0.37);
  backdrop-filter: blur(10.5px);
  -webkit-backdrop-filter: blur(10.5px);
  border-radius: 10px;
  border: 1px solid rgba(255, 255, 255, 0.18);
  justify-content: center;
  margin: auto;
  margin-top: 75px;
}
.num-but {
  color: white;
  background-color: rgb(51, 51, 51);
  height: 60px;
  width: 60px;
  border-radius: 60px;
  border: none;
  font-size: 26px;
  cursor: pointer;
  margin-left: 5px;
  justify-content: center;
}
.Orange-button {
  background-color: rgb(254, 160, 10);
  height: 60px;
  width: 60px;
  border-radius: 60px;
  border: none;
  font-size: 26px;
  cursor: pointer;
  margin-left: 5px;
  color: white;
}
.clear-button {
  font-size: 17px;
  color: white;
  background-color: rgb(51, 51, 51);
  height: 60px;
  width: 60px;
  border-radius: 60px;
  border: none;
  cursor: pointer;
  margin-right: 5px;
}
.Del-button {
  font-size: 17px;
  color: white;
  background-color: rgb(51, 51, 51);
  height: 60px;
  width: 60px;
  border-radius: 60px;
  border: none;
  cursor: pointer;
  margin-right: 5px;
}
.display {
  background-color: black;
  border: 20px;
  border-radius: 13px 10px;
  margin-bottom: 16px;
  text-align: right;
  padding-right: 15px;
  padding-bottom: 0.7em;
  height: 5em;
  font-size: 1.2em;
  font-weight: 400;
  overflow: hidden;
}
.calculation-display {
  padding-top: 10px;
  height: 2em;
  color: white;
  font-size: 1em;
  font-weight: 400;
}
.result-display {
  color: aqua;
  height: 5em;
  font-weight: 500;
  margin-top: -20px;
  font-size: 1.3em;
  white-space: nowrap;
  overflow: hidden;
  text-overflow: ellipsis;
}
.Update-btn {
  background-color: white;
  border-color: rgb(41, 118, 211);
  border-style: solid;
  border-width: 1px;
  color: rgb(41, 118, 211);
  width: 75px;
  border-radius: 14px 14px 14px;
  cursor: pointer;
  margin-right: 10px;
  transition: background-color 1s, color 1s;
  margin: auto;
  justify-content: center;
  margin-left: 290px;
  margin-top: 35px;
}
Animations: You can add subtle animations to the buttons to make the calculator more interactive and engaging. For example, you can add a transition to the background colour of buttons when you hover over them;
.num-but:hover {
  background-color: rgb(0, 255, 255);
  color: rgb(15, 2, 2);
}
.num-but:active {
  opacity: 0.7;
}
This CSS code will smoothly transition the button background colour when users hover over them.

Other Enhancements: Feel free to experiment with other CSS enhancements like font styles, box shadows, and different colours for hover effects to make your desktop visually appealing and user-friendly.
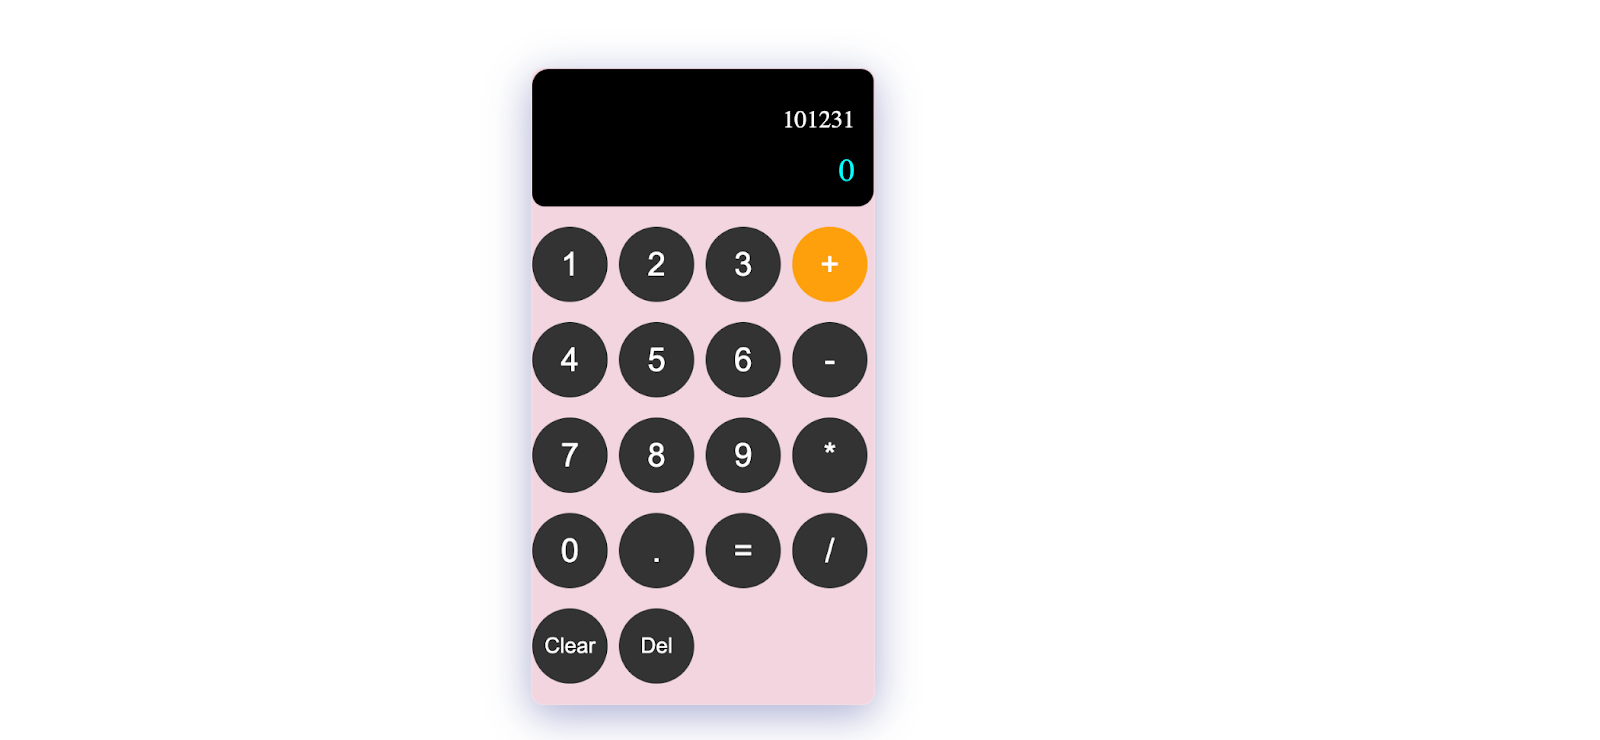
With the HTML structure and CSS styles we have in place, we created the foundation for the calculator’s user interface as shown below;

Handling User Input
In this section, we will implement JavaScript functionality to capture and display user input. We’ll set up event listeners for button clicks and describe how to process and display user input on the calculator screen. The event listeners are not explicitly defined within script.js file. Instead, the event listeners are set up directly in the HTML file (index.html) as inline event handlers.
- Setting Up Event Listeners
- Update and Log it
- Calculate Result function
- Clear the Display Function
- Delete Last Character Function
Setting Up Event Listeners: To make our calculator interactive, we need to set up event listeners for each button. These listeners will trigger specific actions when a button is clicked.
<button class="num-but" onclick="updateCalculation('1');">1</button>
<button class="num-but" onclick="updateCalculation('2');">2</button>
<!-- <! - other buttons with similar onclick atributes here → -->
<button class="num-but" onclick="calculateResult();">=</button>
<button class="clear-button" onclick="clearDisplay()">Clear</button>
<button class="Del-button" onclick="deleteLastCharacter()" id="Del-button">
  Del
</button>
In this code, when a button is clicked, it triggers the JavaScript functions (updateCalculation, CalculateResult, clearDisplay, and deleteLastCharacter) associated with the Onclick attribute. These functions will be defined in your script.js file and they handle the logic to update the calculator display and perform calculations based on user input. So even though the event handlers themselves are not explicitly defined in the JavaScript file, they are actually configured via the onclick attribute in the HTML file, which associates button click events with the corresponding JavaScript function.
Update and Log it: In this code snippet, the updateCalculation function is called when a numeric button or an operator button is clicked. It appends the clicked value to the calculation string, updates the calculation display, and logs the current calculation.
// Function to update calculation and log it
function updateCalculation(value) {
  calculation += value;
  document.getElementById("calculation-display").innerText = calculation;
  console.log(calculation);
}
Calculate Result function: This function is responsible for evaluating the mathematical expression stored in the calculation variable and displaying the result on the calculator’s screen. Here’s a breakdown of what this function does:
- It uses eval(calculation) to evaluate the mathematical expression stored in the calculation variable. This is where the actual calculation is performed.
- The result is then rounded to two decimal places using Math.round(calculation * 100) / 100. This ensures that the result is displayed with a maximum of two decimal places.
- The calculated result is updated in the HTML element with the ID result-display to display it on the calculator screen: document.getElementById(‘result-display’).textContent = calculation;
- If an error occurs during evaluation (for example, if the user enters an invalid expression), it catches the error, displays an ‘Error’ message on the calculator screen, clears the calculation variable, and logs the error message.
So, the calculateResult() function is where the actual mathematical calculations take place in your calculator project.
// Calculate the result
function calculateResult() {
  try {
    calculation = eval(calculation);
    calculation = Math.round(calculation * 100) / 100; // Round to two decimal places
    document.getElementById("result-display").textContent = calculation;
    console.log(calculation);
  } catch (error) {
    document.getElementById("result-display").innerText = "Error";
    calculation = "";
    console.log(calculation);
  }
}
Clear the Display Function: The clearDisplay function is called when the clear button is clicked. It clears the calculation and displays the result, resetting the calculator to its original state.
// Clear the display
function clearDisplay() {
  calculation = "";
  document.getElementById("calculation-display").innerText = "";
  document.getElementById("result-display").textContent = "0";
  console.log(calculation);
}
Delete Last Character Function: Lastly, the deleteLastCharacter function removes the last character from the calculation string when the delete button is clicked.
// Function to delete last character
function deleteLastCharacter() {
  document.getElementById("result-display").innerText = "0";
  document.getElementById("calculation-display").innerText = calculation;
}
With these event-listeners and functions in place, your calculator is now capable of capturing user input and updating the display accordingly, as we have in the image below.
Implementing Arithmetic Operations
In this section, we will enhance our calculator by adding support for basic arithmetic operations. We’ll create functions for addition, subtraction, multiplication, and division. To do this, please refer to the JavaScript code provided earlier in script.js for guidance.
- Addition Function
- Subtraction Function
- Multiplication Function
- Division Function
- **Updating
calculateResult**Function** - Using Arithmetic Operators
Addition Function: Let’s start by implementing the addition function. The add function takes two numbers, a and b, and returns their sum.
function add(a, b) {
  return a + b;
}
Subtraction Function: Next, we’ll implement the subtraction function. The subtract function takes two numbers, a and b, and returns the result of subtracting b from a.
function subtract(a, b) {
  return a - b;
}
Multiplication Function: Now, let’s add the multiplication function. The multiply function takes two numbers, a by b, and returns their product.
function multiply(a, b) {
  return a * b;
}
Division Function: Finally, we’ll implement the division function. The divide function takes two numbers, a by b, and returns the result of dividing a by b. It also checks for division by zero and throws an error if the divisor (b) is zero.
function divide(a, b) {
  if (b === 0) {
    throw new Error("Division by zero is not allowed.");
  }
  return a / b;
}
Updating calculateResult Function: Now that we have our arithmetic functions, we can update the calculateResult function to handle different operators. With these changes, your calculator can now handle addition, subtraction, multiplication, and division. Users can input expressions like 5 + 3or10 * 2 to perform calculations. In the next section, “Adding Advanced Features,” we’ll extend the calculator’s functionality by adding support for decimal calculations.
// Calculate the result
function calculateResult() {
  try {
    calculation = eval(calculation);
    calculation = Math.round(calculation * 100) / 100; // Round to two decimal places
    document.getElementById("result-display").textContent = calculation;
    console.log(calculation);
  } catch (error) {
    document.getElementById("result-display").innerText = "Error";
    calculation = "";
    console.log(calculation);
  }
}
With this update, the calculateResult function uses JavaScript’s eval function to evaluate the calculation string, which can now include arithmetic operations.
Using Arithmetic Operators: To use these arithmetic operations in your calculator, you can update the updateCalculation function to append the appropriate operators. By appending spaces before and after the operators, we ensure that they are evaluated correctly.
function updateCalculation(value){
    if (value === '+' || value === '-' || value === '*' || value === '/') {
    // Append a space before and after the operator for proper evaluation
    calculation += ` ${value} `;
    } else {
    calculation += value;
    }
    document.getElementById("calculation-display").innerText = calculation;
    console.log(calculation);
}
```

### Adding Advanced Features

In this section, we will enhance our calculator by adding support for decimal calculations.

**Decimal function:** To enable users to input decimal numbers, we’ll add a decimal function to our calculator’s HTML. This function allows users to round to two decimal places when getting a result and can be identified as `calculation= Math.round(calculation * 100) / 100;` in the code below:

```js
function calculateResult() {
    try {
    calculation = eval(calculation);
    calculation = Math.round(calculation * 100) / 100; // Round to two decimal places
    }
}
Testing and Debugging
Testing and debugging are crucial steps in ensuring our calculator functions correctly and handles various scenarios. Here’s a guide on how to approach this:
- Functional Testing
- Edge Cases Testing
- Decimal Calculations
- Clear and Delete Functions
- Error Handling
- Responsive Testing
- Debugging Techniques
- User Testing
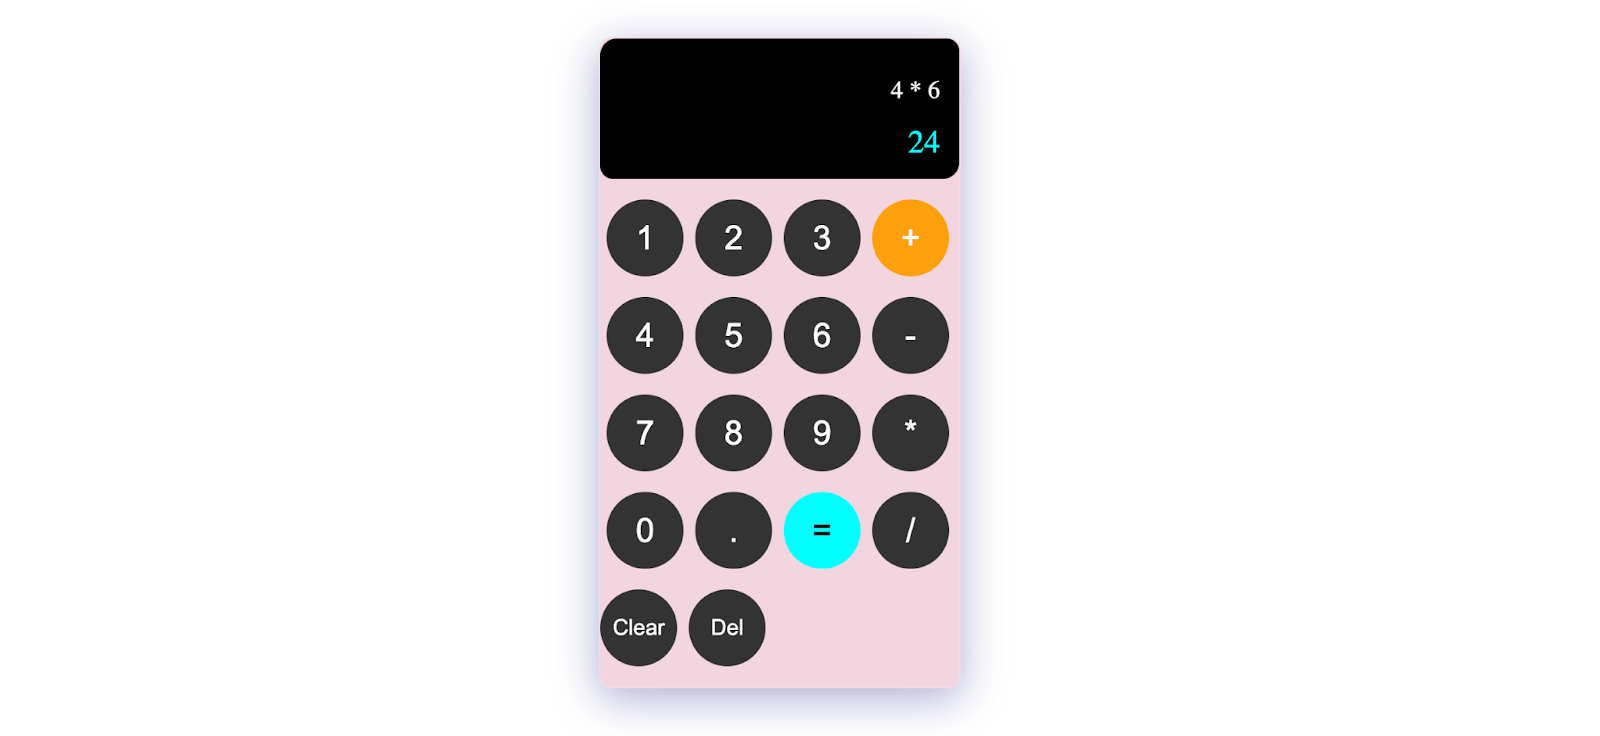
Functional Testing: Begin by conducting functional tests to verify that basic operations (addition, subtraction, multiplication, division) work as expected. Test various combinations of numbers and operators.
For example:
- Addition: Test calculations like 2 + 3.
- Subtraction: Verify calculations like 5–2.
- Multiplication: Test equations like 4 * 6.
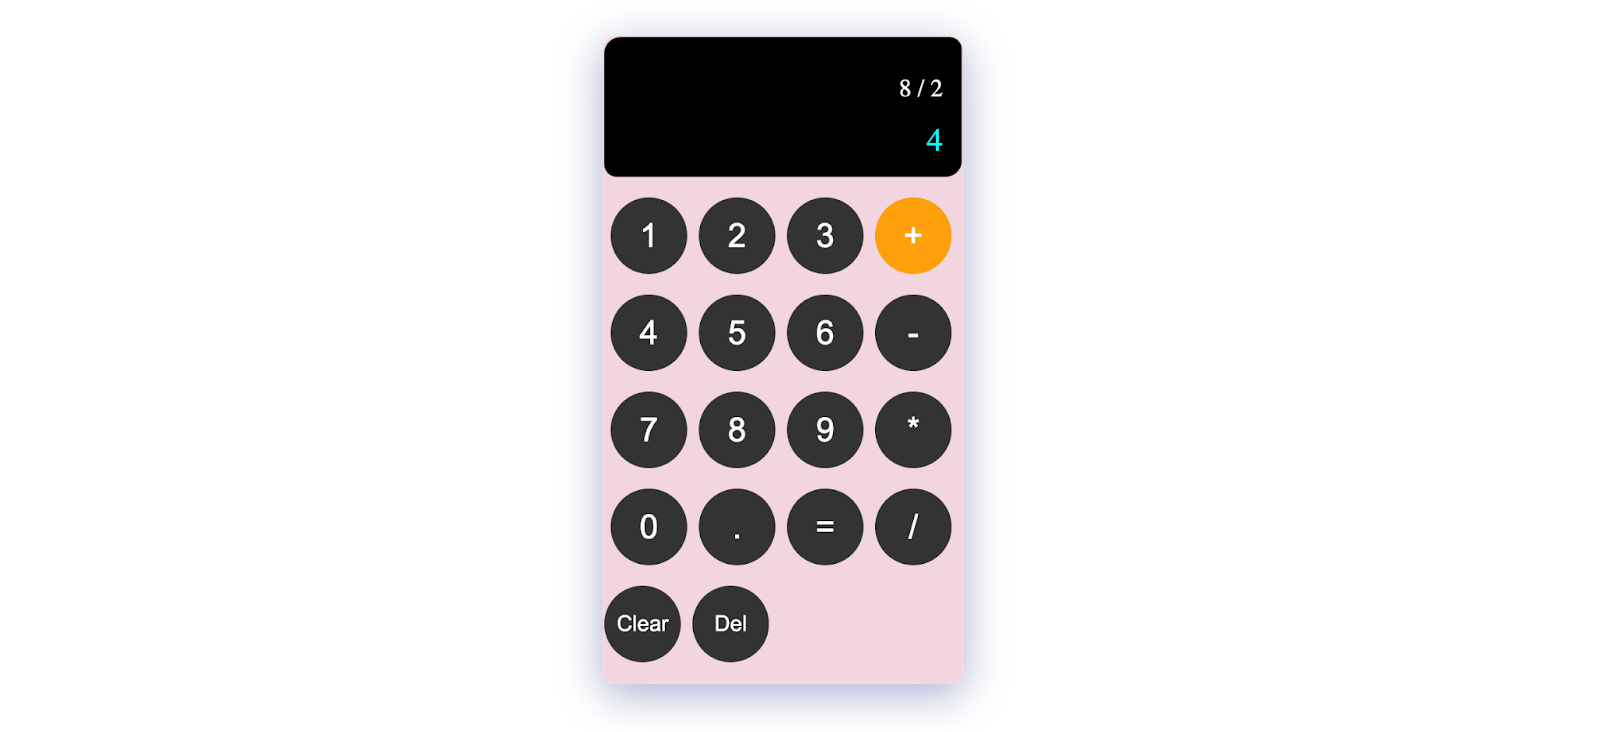
- Division: Check calculations like 8 / 2.


Verify that the results you see match the expected results. Verify that the results you see match the expected results.
Edge cases testing: Test edge cases to ensure your calculator can easily handle extreme scenarios gracefully. For instance:
- Divide by zero: Check to see how your calculator handles division by zero, and make sure it doesn’t crash.
- Large numbers: Test the calculator with very large numbers to ensure it doesn’t break or display incorrect results.
Decimal Calculations: Make sure your calculator handles decimal calculations correctly. Check for operations involving decimal points. For example, enter 0.1 + 0.2, and ensure the results are accurate.
Clear and Delete Functions: Test your clear and delete functions to ensure they work as intended. Notice that clearing the display resets the calculations, and deleting characters removes them one by one.
Error handling: Implement robust error handling to detect and handle exceptions, providing you with informative feedback when invalid expression is entered during calculations.
Responsive Testing: Test the responsiveness of your calculator on different devices and screen sizes. Make sure your layout fits well on both desktop and mobile screens.

Debugging Techniques: If you encounter issues during testing, here are some debugging techniques:
- Console Logging: Use
console.log()statements strategically to log variable values and identify where problems occur. - Browser Developer Tools: Use your browser’s developer tools to inspect your HTML, CSS, and JavaScript. You can set breakpoints, examine variable values, and debug step-by-step.
- Error Messages: Pay attention to error messages in the browser’s console. They can provide valuable insights into what went wrong.
- Code Review: Review your JavaScript code carefully for syntax errors, logical issues, or typos.
User Testing: Consider having others test your calculator, especially those with different perspectives and use cases. Gather feedback and make necessary improvements based on user experience.
Making Our Calculator Project Responsive
It’s important that your calculator project is responsive and can be accessed and used on a variety of devices and screen sizes. In this section, you will learn how to adapt your calculator’s design to different screen sizes so that it works well on both desktop and mobile devices.
- Media Queries: One of the basic techniques for creating responsive designs is to use media queries in CSS. Media queries allow you to apply different styles based on the characteristics of the user’s device, such as screen width.
Here’s a basic example of a media query in CSS:
@media screen and (max-width: 600px) {
  /* Styles for screens with a maximum width of 600px */
  .num-but {
    font-size: 20px; /* Adjust font size for smaller screens */
  }
}
In this example, when the screen width is 600 pixels or less, the font size for the calculator buttons will be reduced to 20 pixels, making them more suitable for smaller screens.
Conclusion
In this step-by-step guide, we took you on an exciting journey to build a JavaScript calculator from scratch. Whether you’re a beginner trying to learn the basics of web development or an experienced developer looking to improve your skills, this project will give you valuable insights into HTML, CSS, and JavaScript.
By building a calculator, you can deepen your understanding of key web technologies, improve your problem-solving skills, and enjoy the pride of creating a useful tool. Thorough testing, debugging, and responsive design ensure a seamless user experience. With this project, you will be equipped to tackle more demanding web development challenges, making this an important milestone in your journey.
So, be proud of your work, keep exploring, and continue building your skills in the world of web development. The possibilities are endless, and your journey has only just begun. If you’d like to explore the full code and resources for this calculator project, you can find it on GitHub at GitHub Repository.
Happy coding!
Reference
-
Visual Studio Code (2023) https://code.visualstudio.com/download
-
Torn2Code.(2023).BerryCalculatorJS. https://github.com/Torn2code/BerryCalculatorJS
Comments
Loading comments…