 Web scraping is a powerful tool that allows developers to extract data from websites and convert it into a format that can be used for various purposes. This technique is widely used in fields such as data analysis, machine learning, and market research. It can be beneficial when dealing with large amounts of data that are not readily available in a structured format.
Node.js and Puppeteer are two powerful tools that can be used for web scraping. Node.js is a JavaScript runtime environment that allows developers to run JavaScript on the server side. On the other hand, Puppeteer is a Node.js library that provides a high-level API to control Chrome or Chromium over the DevTools Protocol. Puppeteer is particularly useful for web scraping dynamic content, i.e., websites that use JavaScript to load or display data.
In this article, we will be using Node.js and Puppeteer to scrape data from a well-known e-commerce site, Amazon. Amazon is a popular site that often requires scraping due to its vast amount of data and the dynamic nature of its content. The data we will be scraping will include product details, prices, and customer reviews.
In addition to scraping data, we will also be looking at using proxies in our script. Proxies are often used in web scraping to bypass blocks like rate limits, throttling, and CAPTCHAs that websites may use to prevent excessive requests. In this article, we will be using Bright Data’s proxies, a reliable and efficient solution for web scraping.
Node.js and Puppeteer: Installation and Configuration
To follow along with this tutorial, you will need to set up the necessary files/folders and install the required module before you proceed with the code.
Step 1: Installing Node.js: To check if you have Node.js already installed on your computer run the command below
node - v;
If you don’t have Node installed you can download it here.
Step 2: After setting up Node.js, create a new folder for your project. You can do this by running the mkdir command followed by the folder name in your terminal/command prompt. Then navigate to the project folder using the cd command.
mkdir my-scraper
cd my-scraper
Step 3: Initialize a new Node.js project in the folder by running the command npm init.
npm init -y
Step 4: Next, install Puppeteer using the command below:
npm install puppeteer
Step 5: Open the project folder using the code editor of your choice.
Now that you have set up your project, you can now proceed to create your scraper.
Building a Simple Web Scraper with Node.js and Puppeteer
Building a simple web scraper using Node.js and Puppeteer involves several steps. In this section, we will use the popular e-commerce site, Amazon, as an example.

Introduction to the Target Website
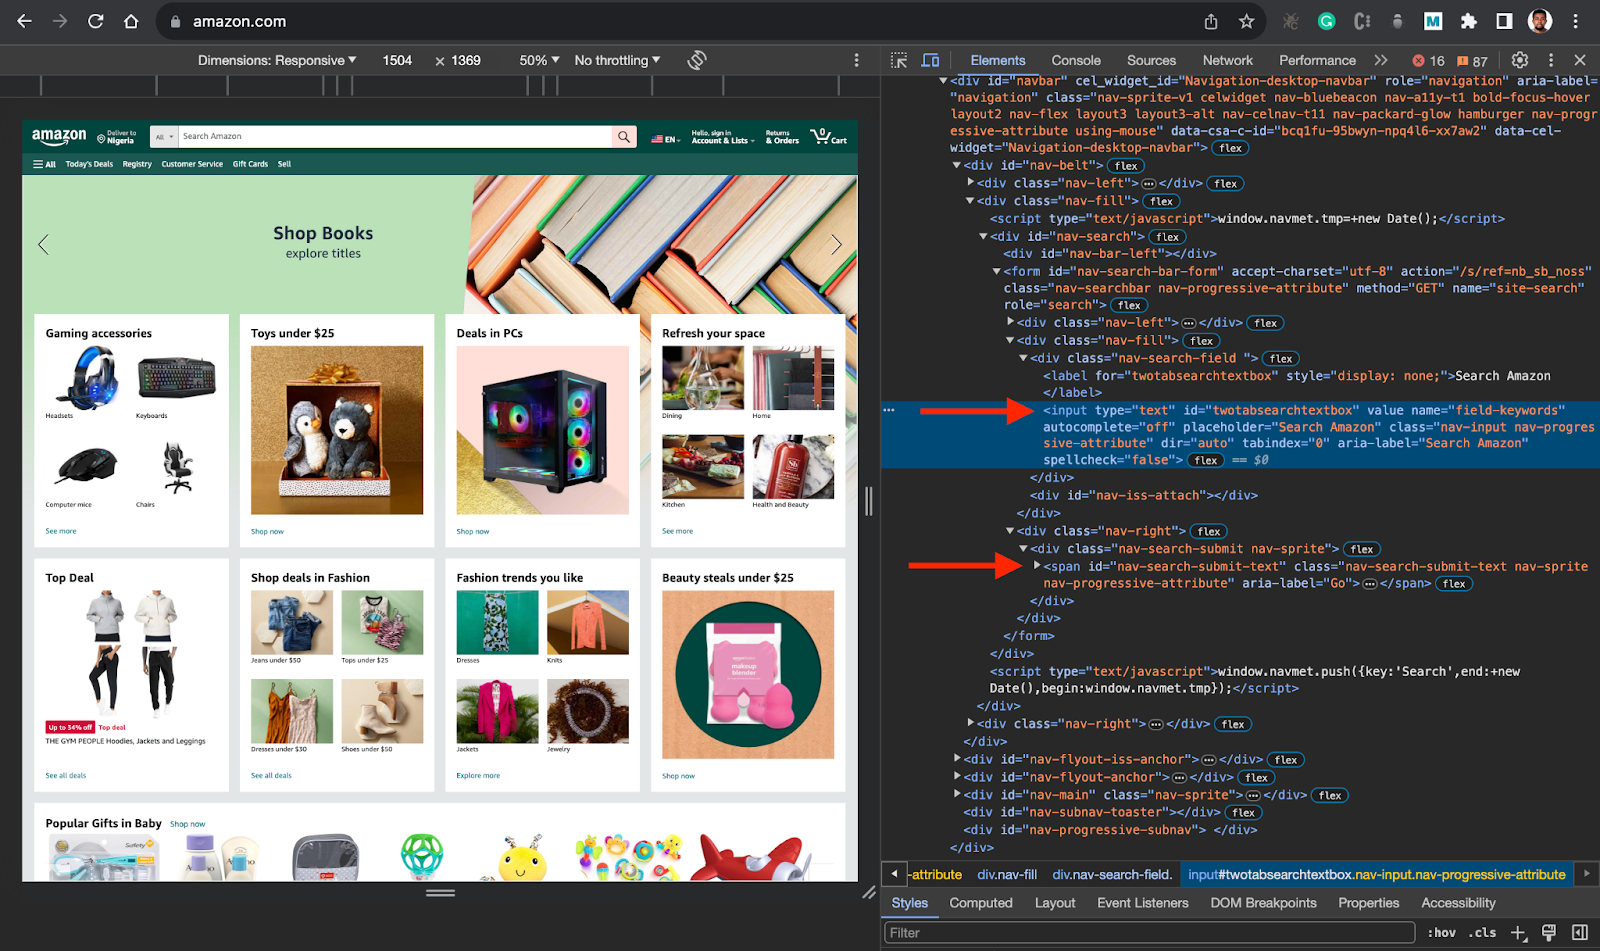
Before we start writing our Puppeteer script, it’s important to understand the structure of the website we’re scraping. For this example, we’ll be scraping the Amazon website. Amazon is a dynamic website that uses JavaScript to load and display data, making it a great candidate for our Puppeteer script.
Writing the Puppeteer Script
👉 Task: The task here is to create a basic Puppeteer script to navigate to the Amazon website, search for a specific item, and extract relevant data. So, in this case, you will target the search input and search button elements ids.
Here is the process:
After that, you want to search for a specific item (Laptop) when the page loads, you want to get the title and price of the items in the search result.


To do that in code, create a new file for your script called index.js inside the my-scraper folder and implement the code below.
const puppeteer = require(''puppeteer'');

async function run() {
  //   browser = await puppeteer.connect({ browserWSEndpoint: SBR_WS_ENDPOINT });
  browser = await puppeteer.launch({ headless: ''old'' });

  try {
    const page = await browser.newPage();

    // Navigate to Amazon
    await page.goto(''https://www.amazon.com/'', {
      waitUntil: ''networkidle2'',
      timeout: 30000,
    });

    await page.waitForSelector(''#twotabsearchtextbox'', { timeout: 5000 });

    // Search for a specific item
    await page.type(''#twotabsearchtextbox'', ''laptop'', {
      delay: 100,
    }); // Modify this to your desired search term
    await page.click(''#nav-search-submit-button'');

    await page.waitForSelector(''[data-component-type="s-search-result"]'', {
      timeout: 5000,
    });

    const searchResults = await page.$$(
      ''[data-component-type="s-search-result"]''
    );

    await new Promise(r => setTimeout(r, 10000));

    const results = [];

    for (const result of searchResults) {
      // Process each result as needed, for example:

      const title = await result.$eval(
        ''div[data-cy="title-recipe"] h2 a span.a-size-medium.a-color-base.a-text-normal'',
        (el) => el.textContent
      );

      const price = await result.$eval(
        ''.a-price span.a-offscreen'',
        (el) => el.textContent
      );

      results.push({
        title,
        price,
      });
    }

    console.log(results);

    await browser.close();
  } catch (error) {
    console.error(''Error during execution:'', error);
  } finally {
    // Close the browser
    if (browser) {
      await browser.close();
    }
  }
}

// Call the run function
run();
The above code is a simple web scraper that uses Node.js and Puppeteer to scrape data from Amazon. The script is designed to search for a specific item (in this case, ‘laptop’) and extract the title and price of each search result.
Here’s a step-by-step explanation of the code:
- Importing Puppeteer: The script begins by importing the Puppeteer library, which provides the functionality needed to control a headless browser.
const puppeteer = require(''puppeteer'');
- Launching the Browser: Next, the script launches a new instance of the browser. The
headless: ‘old’option is used to control whether the browser is run in headless mode or not.
browser = await puppeteer.launch({ headless: ''old'' });
- Navigating to Amazon: The script then navigates to the Amazon website using the
page.goto()function. ThewaitUntil: ‘networkidle2’andtimeout: 30000options are used to ensure that the page has fully loaded before proceeding.
await page.goto(''https://www.amazon.com/'', {
waitUntil: ''networkidle2'',
timeout: 30000,
});
- Searching for a Specific Item: The script then types a specific search term into the search box and submits the search form.
await page.type(''#twotabsearchtextbox'', ''laptop'', {
delay: 100,
}); // Modify this to your desired search term
await page.click(''#nav-search-submit-button'');
- Extracting Search Results: After the search results are loaded, the script extracts the title and price of each result. This is done using the
page.$$()function to select all search results, and then theresult.$eval()function to extract the title and price of each result.
const searchResults = await page.$$(''[data-component-type="s-search-result"]'');
const results = [];
for (const result of searchResults) {
const title = await result.$eval(
''div[data-cy="title-recipe"] h2 a span.a-size-medium.a-color-base.a-text-normal'',
(el) => el.textContent
);
const price = await result.$eval(
''.a-price span.a-offscreen'',
(el) => el.textContent
);
results.push({
title,
price,
});
}
- Logging the Results: Finally, the script logs the extracted data to the console.
console.log(results);
- Closing the Browser: The script then closes the browser using the browser.close() function.
await browser.close();
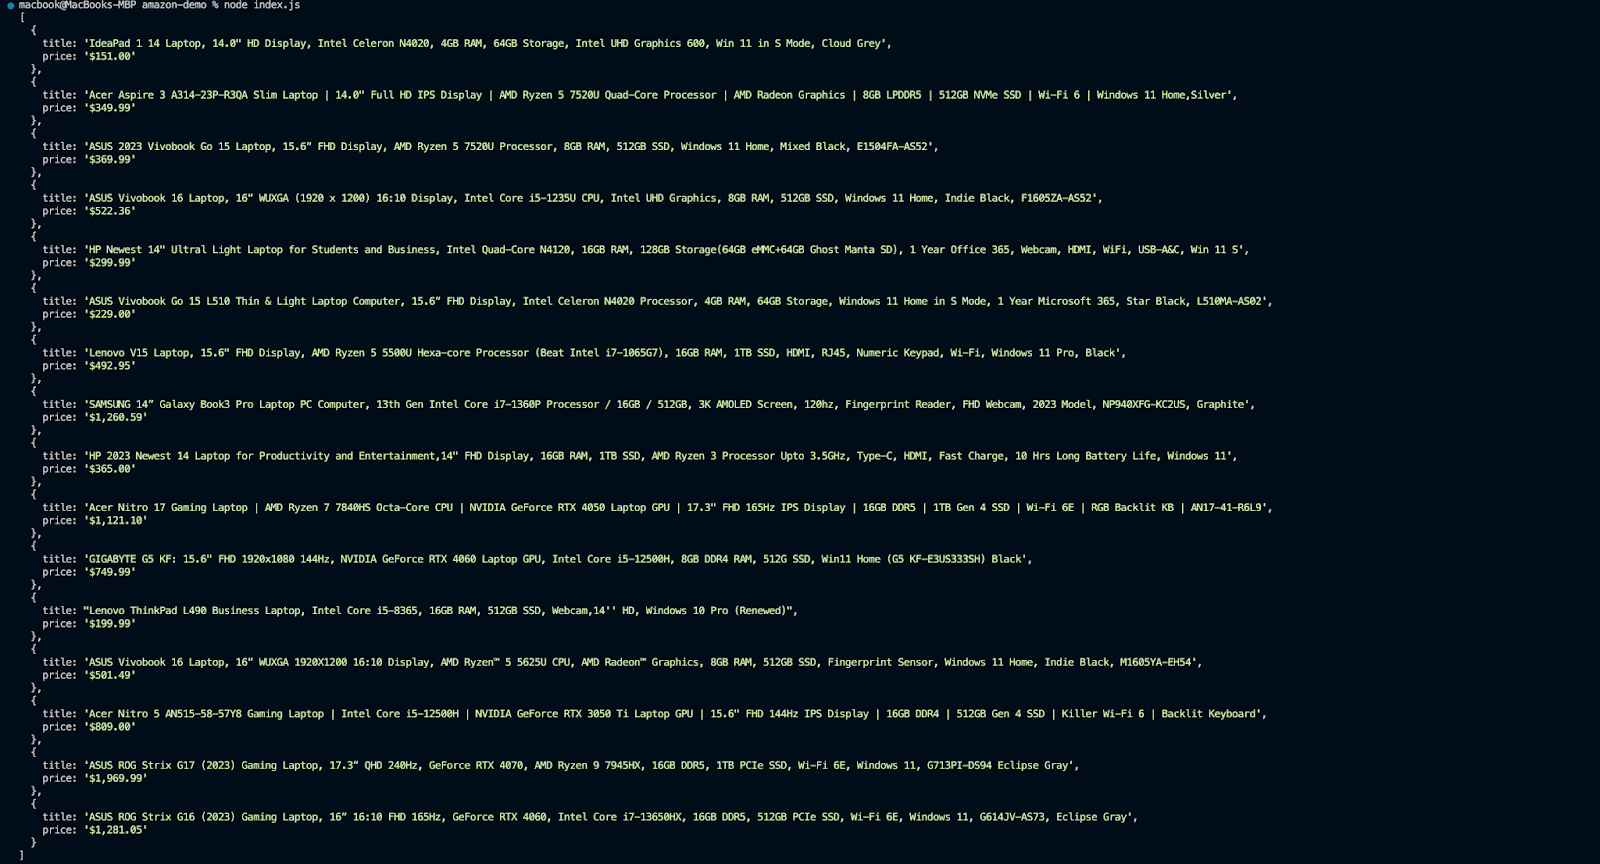
This script is a simple example of how to use Puppeteer to scrape data from a website. It demonstrates the basic steps involved in web scraping, including navigating to a webpage, interacting with the page (in this case, by performing a search), and extracting data from the page.
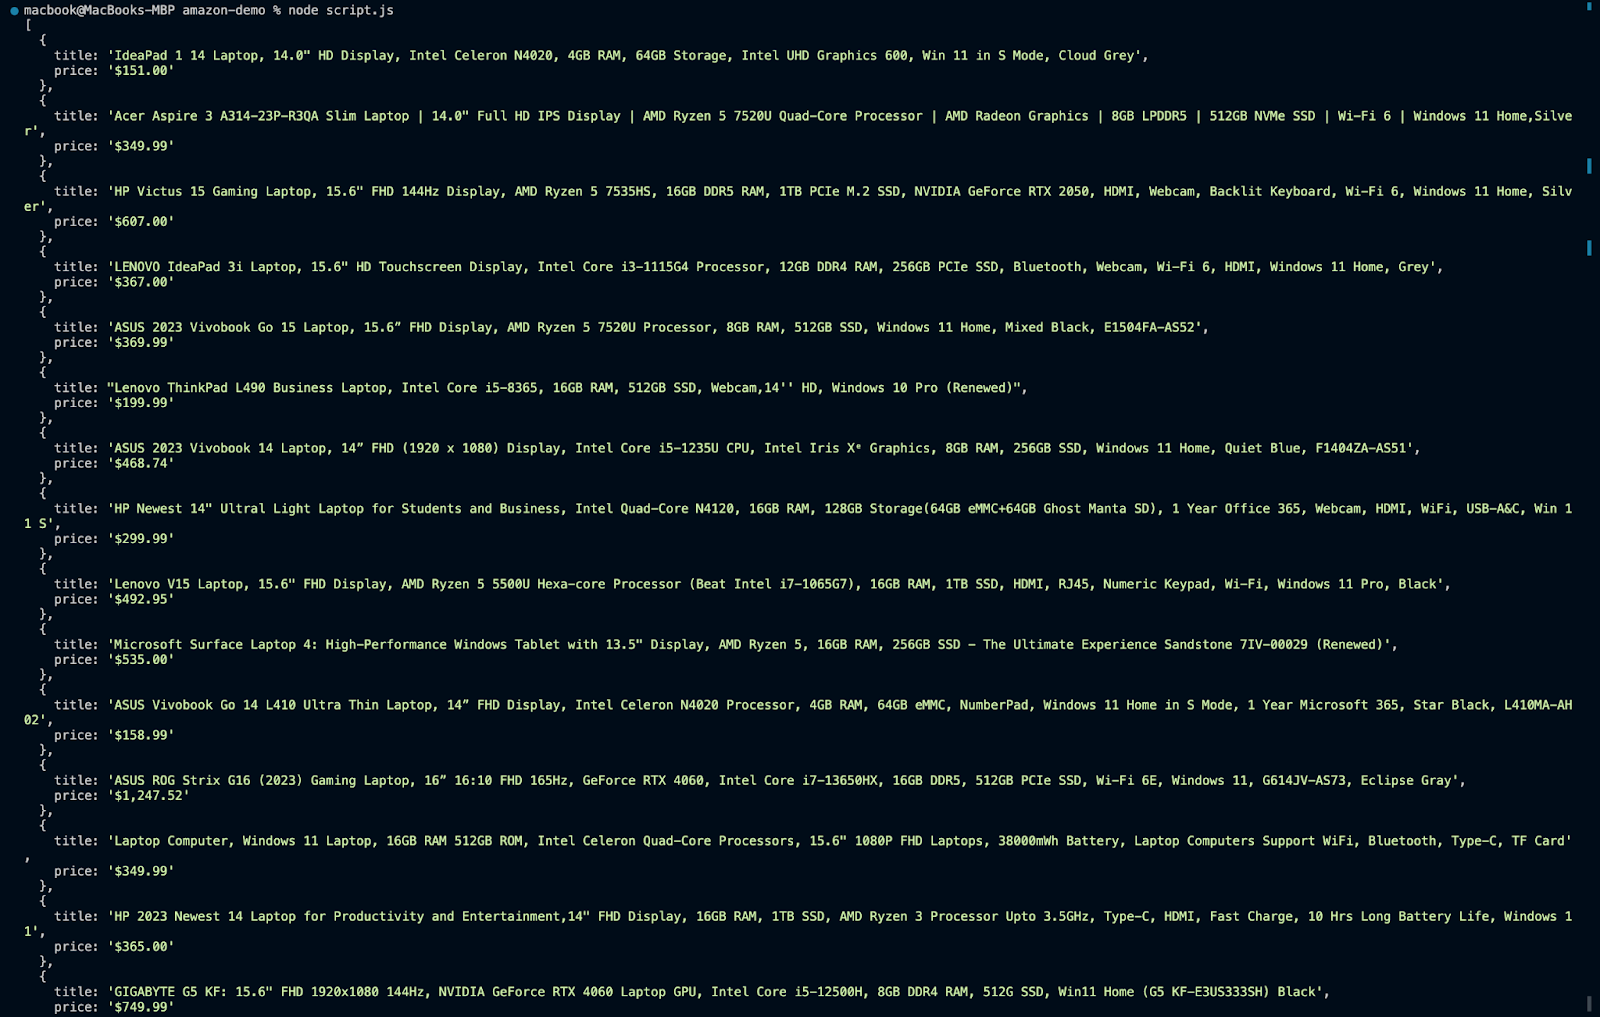
When you run node script.js, you should get an output in this format
However, there are some issues you might encounter running this script. For instance, Amazon might block your requests if they come from the same IP address too frequently. This is a common issue known as IP banning. You might start having errors like this in your script:


new Promise(r => setTimeout(r, 10000));, which pauses script execution for a specified amount of time (you can increase the amount of time the script will pause if 10 seconds is not enough).
await new Promise((r) => setTimeout(r, 10000));
Some websites also use CAPTCHAs to verify that the user is a human. This can be a significant challenge for web scrapers, as CAPTCHAs are designed to be difficult for automated systems to solve.
These challenges can be avoided using proxies. In the next section, you will learn more about proxies and get to see one in action.
Handling Common Scraping Challenges with Proxies
Developers make use of proxies to overcome the challenges mentioned in the previous section. Proxies play a pivotal role in scraping by allowing requests to be made through multiple IP addresses. This helps overcome restrictions such as IP bans and rate limitations imposed by websites to prevent automated access. Additionally, proxies aid in avoiding detection by masking the scraper’s identity, enhancing anonymity, and reducing the likelihood of being blocked.
There are several proxies out there that you can choose from. However, in this section, we will be using Bright Data’s proxies as a solution to the aforementioned challenges. Bright Data’s proxies offer several benefits over traditional free proxies. They are reliable, and fast, and come with features like automated IP rotation and CAPTCHA solving, which can help avoid blocks and improve the efficiency of the scraping process.
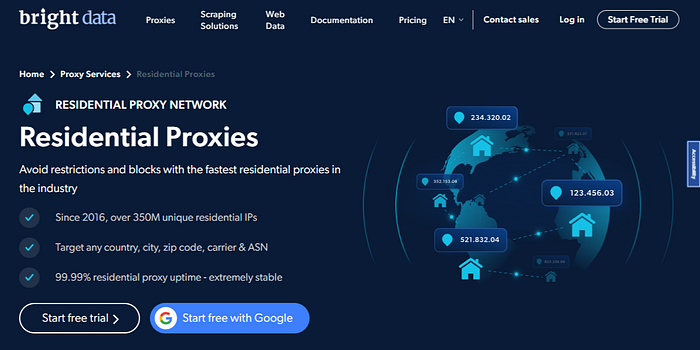
Along with that, Bright Data provides a variety of proxy server types, including Residential Proxies, Mobile Proxies, Datacenter Proxies, and ISP Proxies, making them suitable for different applications. It also automatically rotates IP addresses, which is especially useful for web scraping applications. Every time the user makes a connection request, the IP address is changed to reduce the likelihood of overusing any single IP.
It is also important to note that Bright Data is fully committed to complying with all relevant data protection legal requirements, including the new EU data protection regulatory framework, GDPR, and the California Consumer Privacy Act of 2018 (CCPA). Its proxies are acquired with the full consent of their peers, and a dedicated compliance officer thoroughly vets each IP provider. This rigorous process ensures that your proxies are sourced ethically and meet compliance standards.
Residential Proxies - 72M Residential IPs - Free Trial
With all that said, let’s look at how you can integrate Bright Data’s proxies into your scraping script.
👉 Learn more about Bright Data’s Proxies and Scraping Infra.
How to Integrate Bright Data into Your Script
To integrate Bright Data’s proxies into our previous scraping code, we need to follow a few steps:
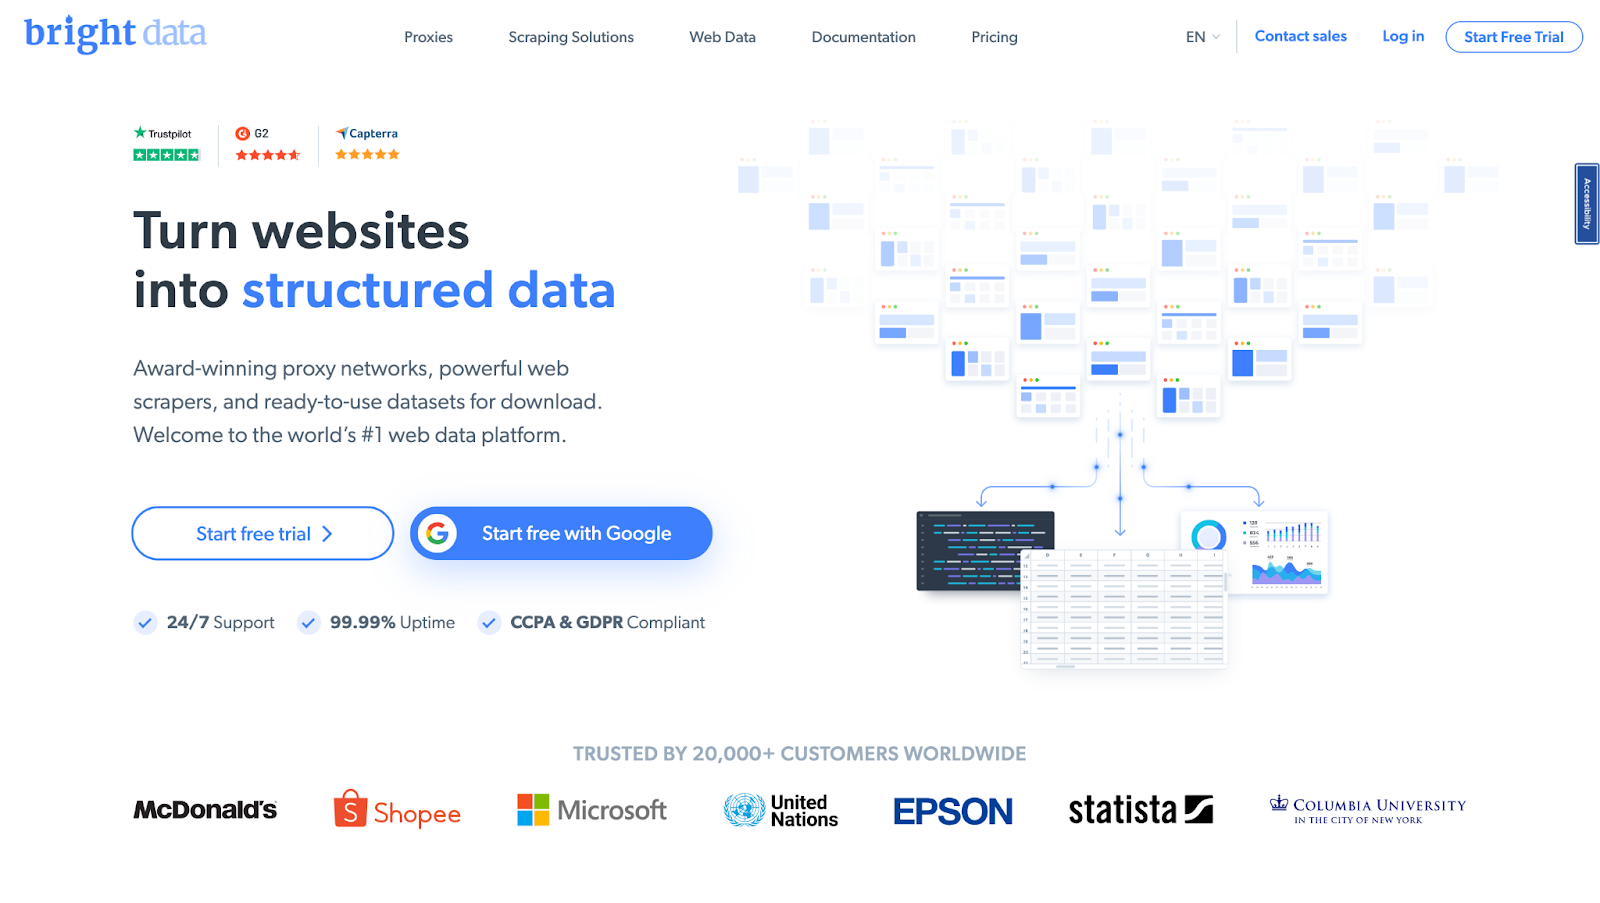
- Signing up — go to Bright Data’s homepage and click “Start Free Trial”. If you already have an account with Bright Data, you can log in.
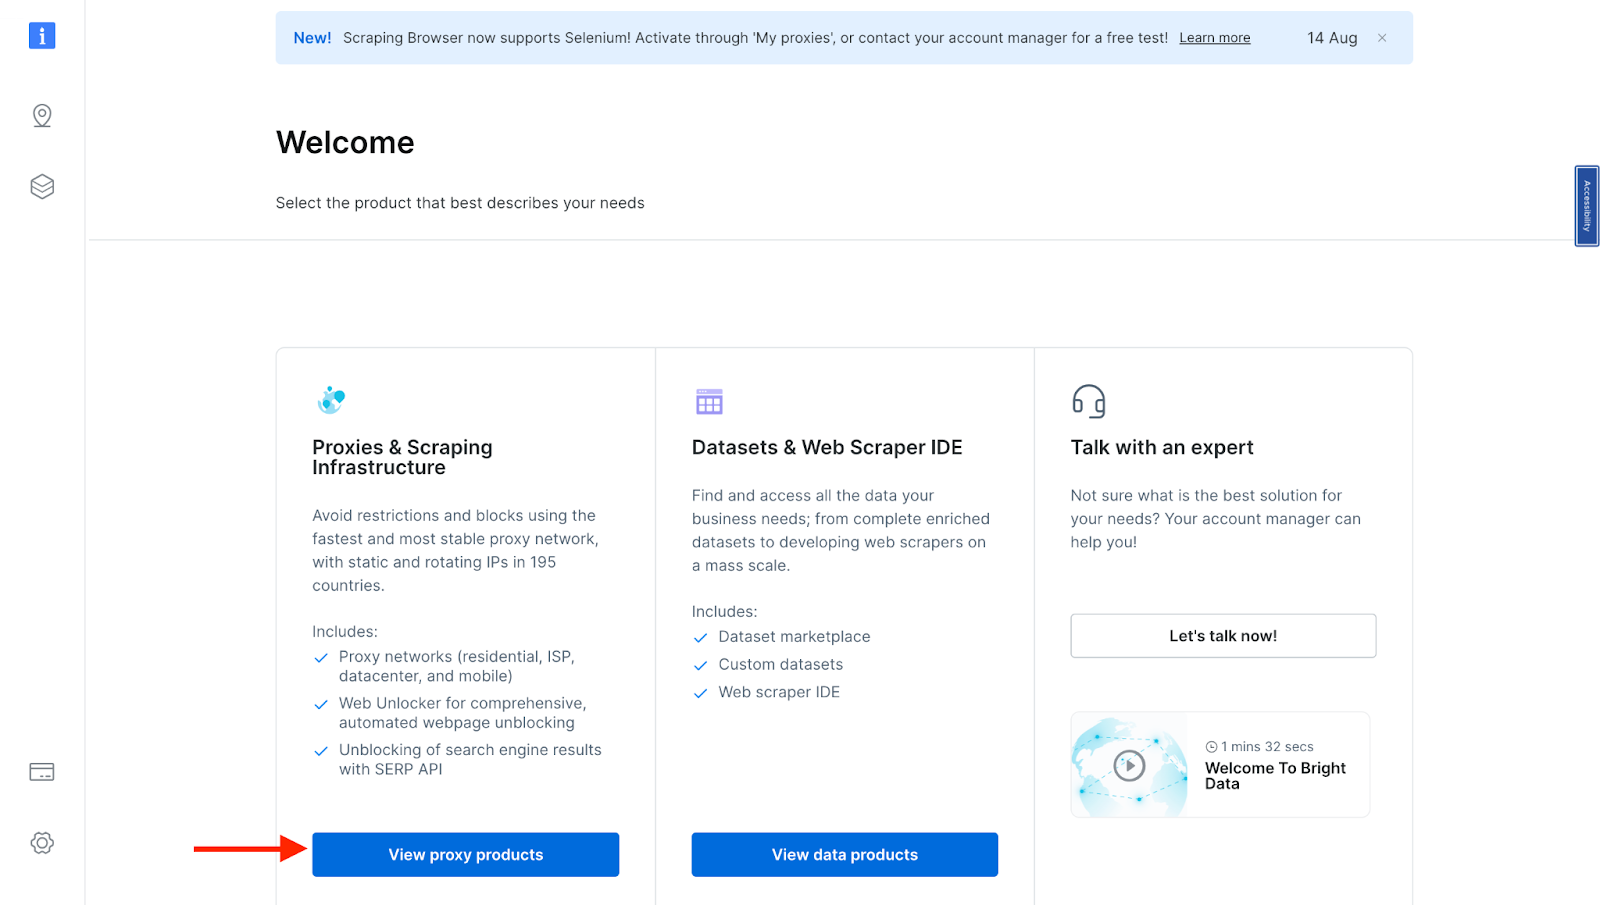
- Once you sign in after entering your details and finishing the signup process, you will be redirected to a welcome page. There, click on “View Proxy Products”.
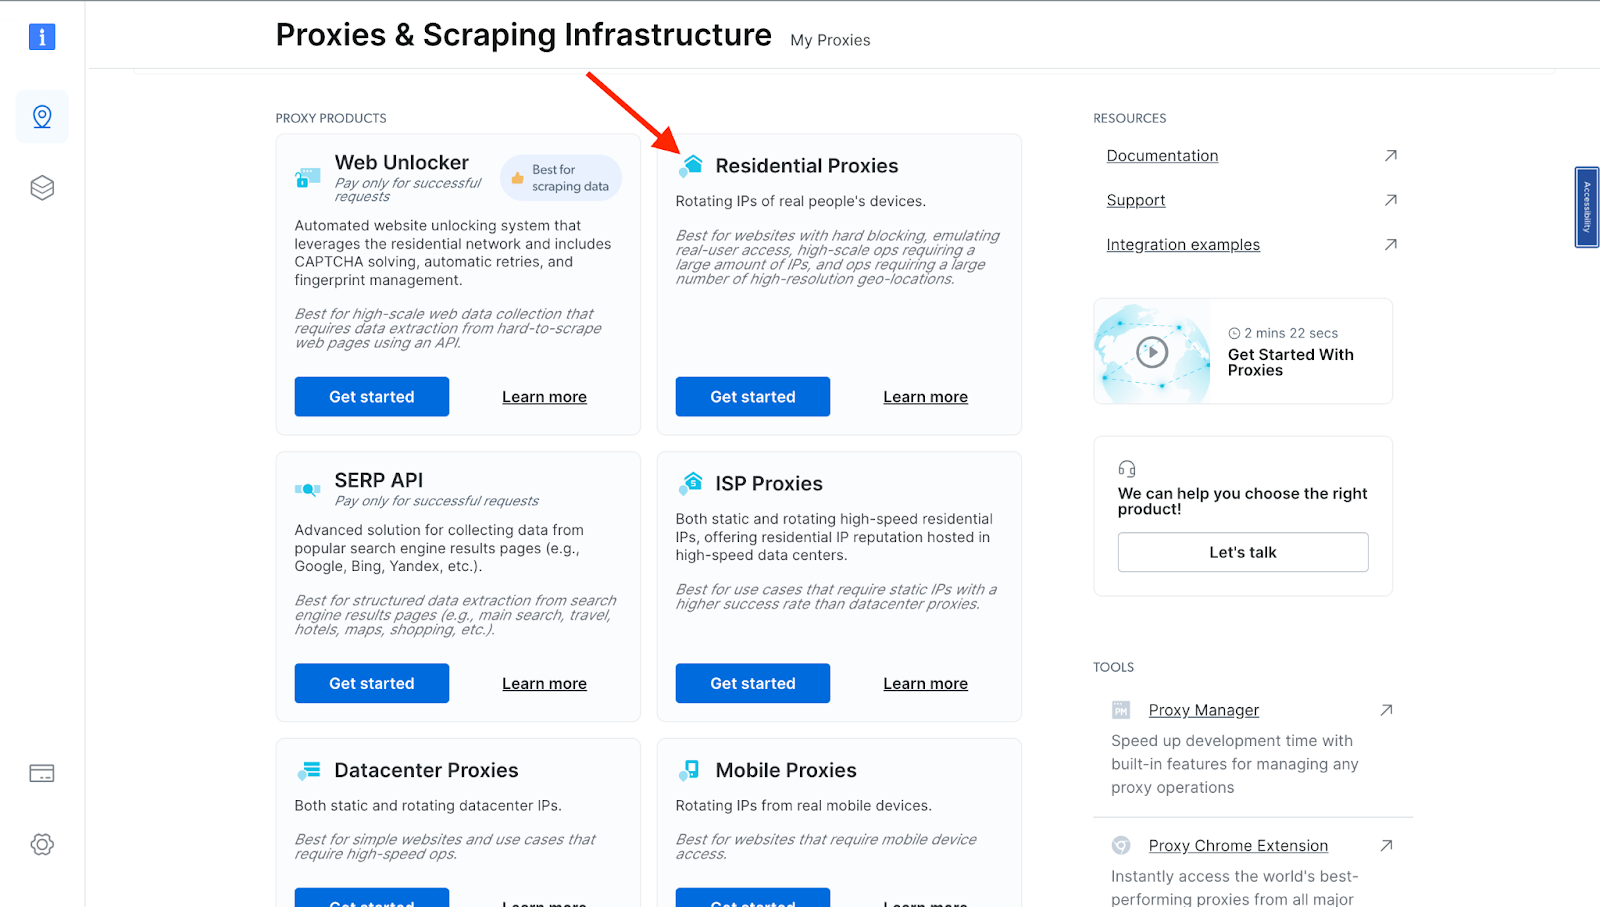
- You will be taken to the “Proxies & Scraping Infrastructure” page. Under “My proxies,” click on “Get started” on the Residential Proxies card.
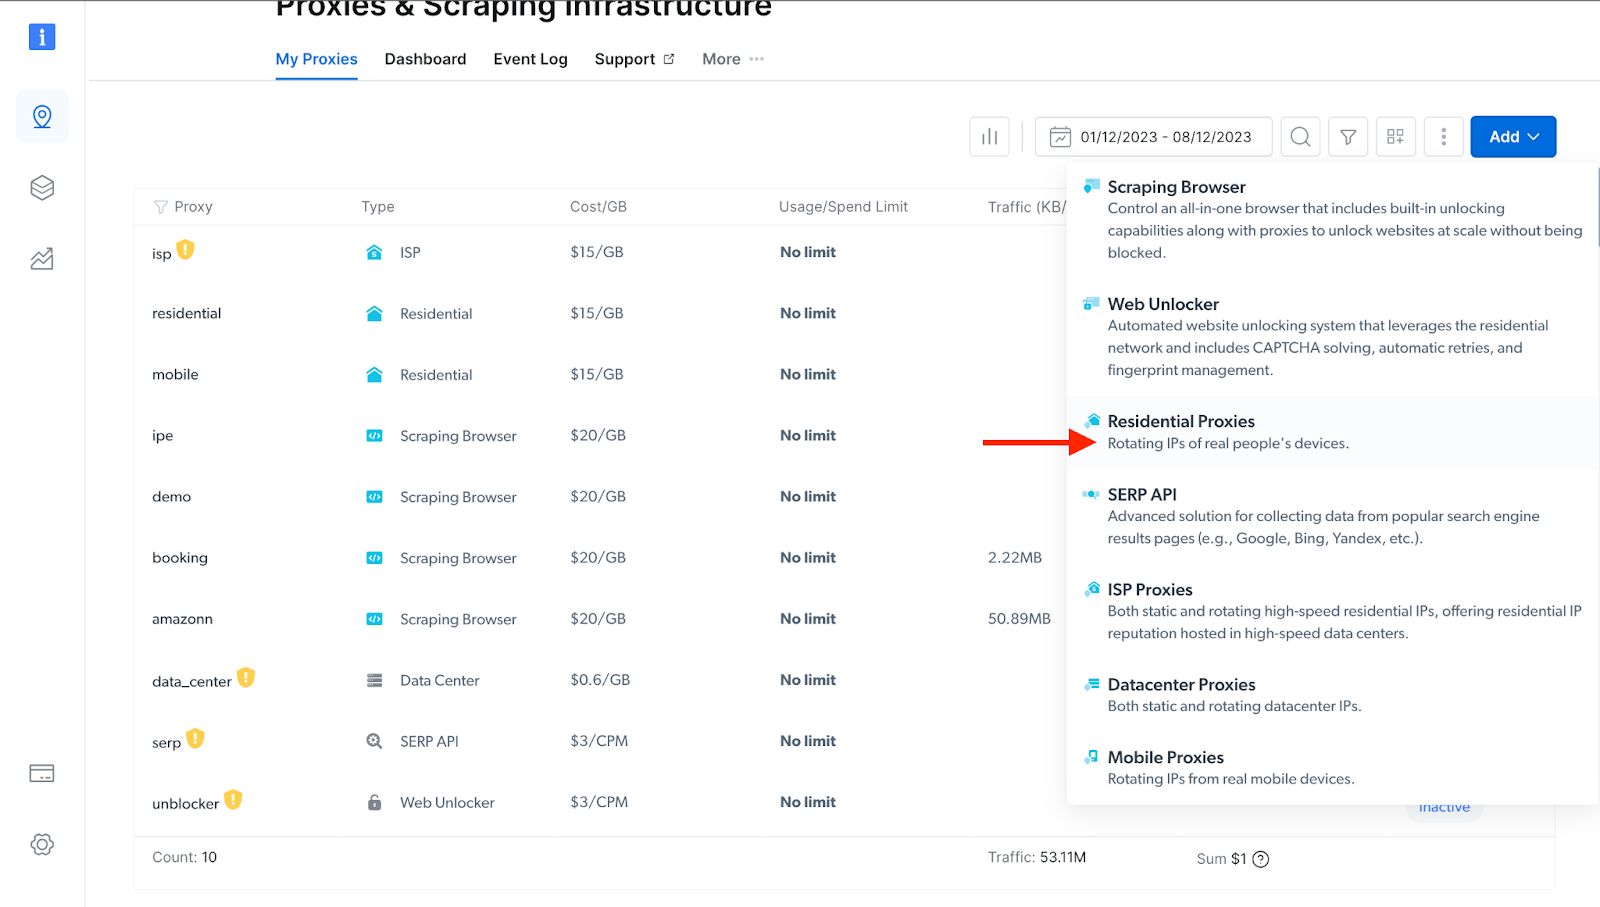
- If you already have an active proxy, just click on “Add” and select “Residential Proxies.” NB: you can select any proxy option depending on your needs.
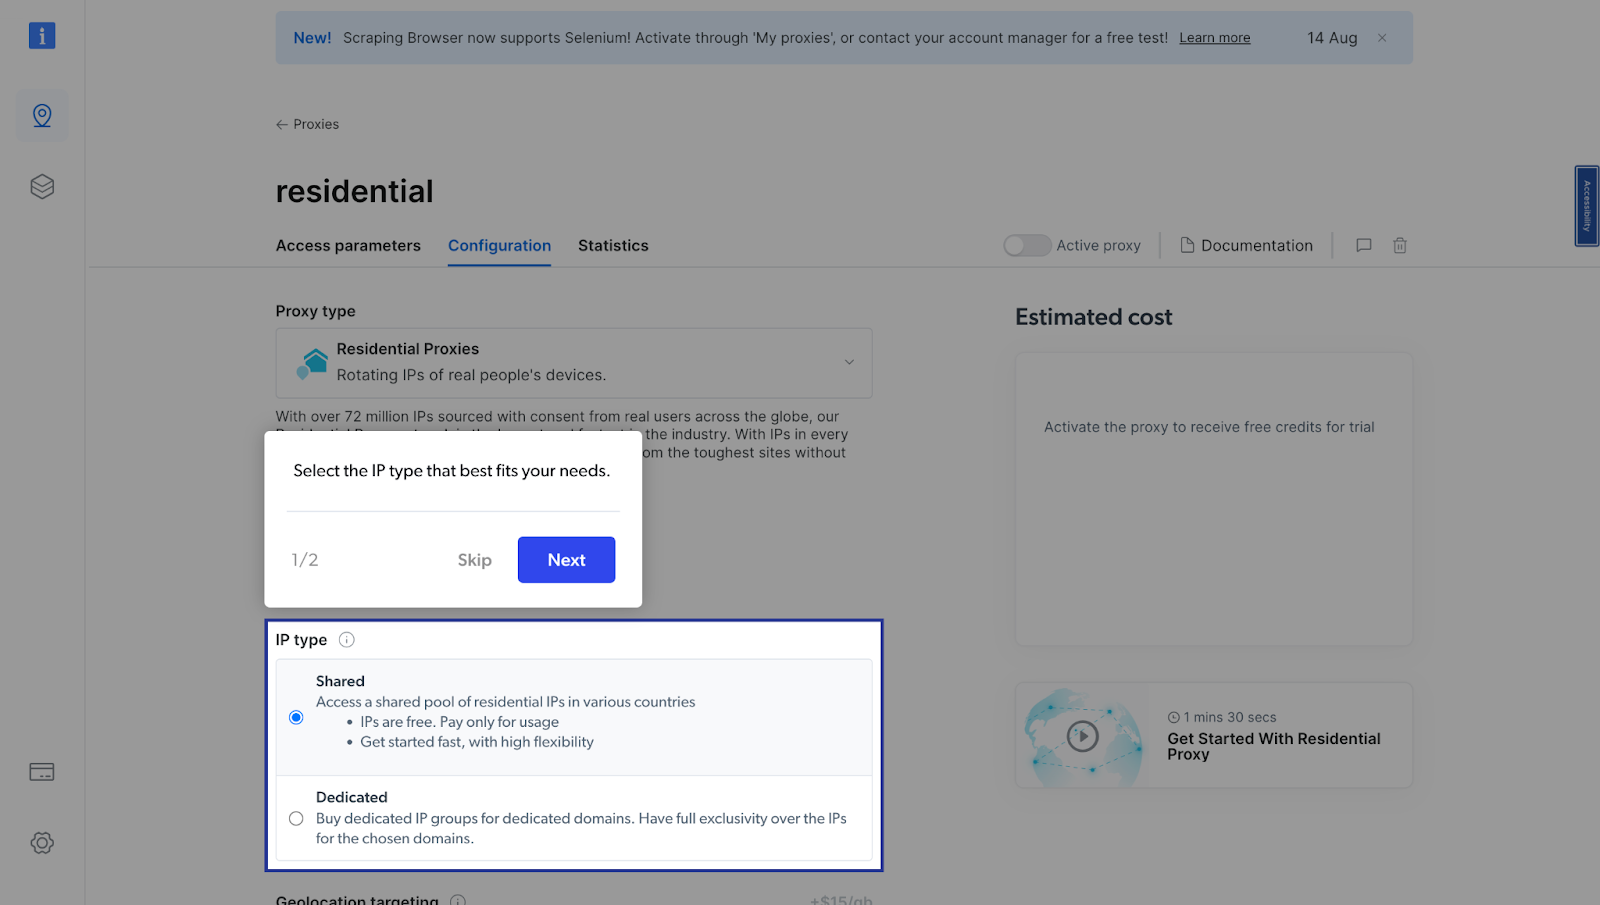
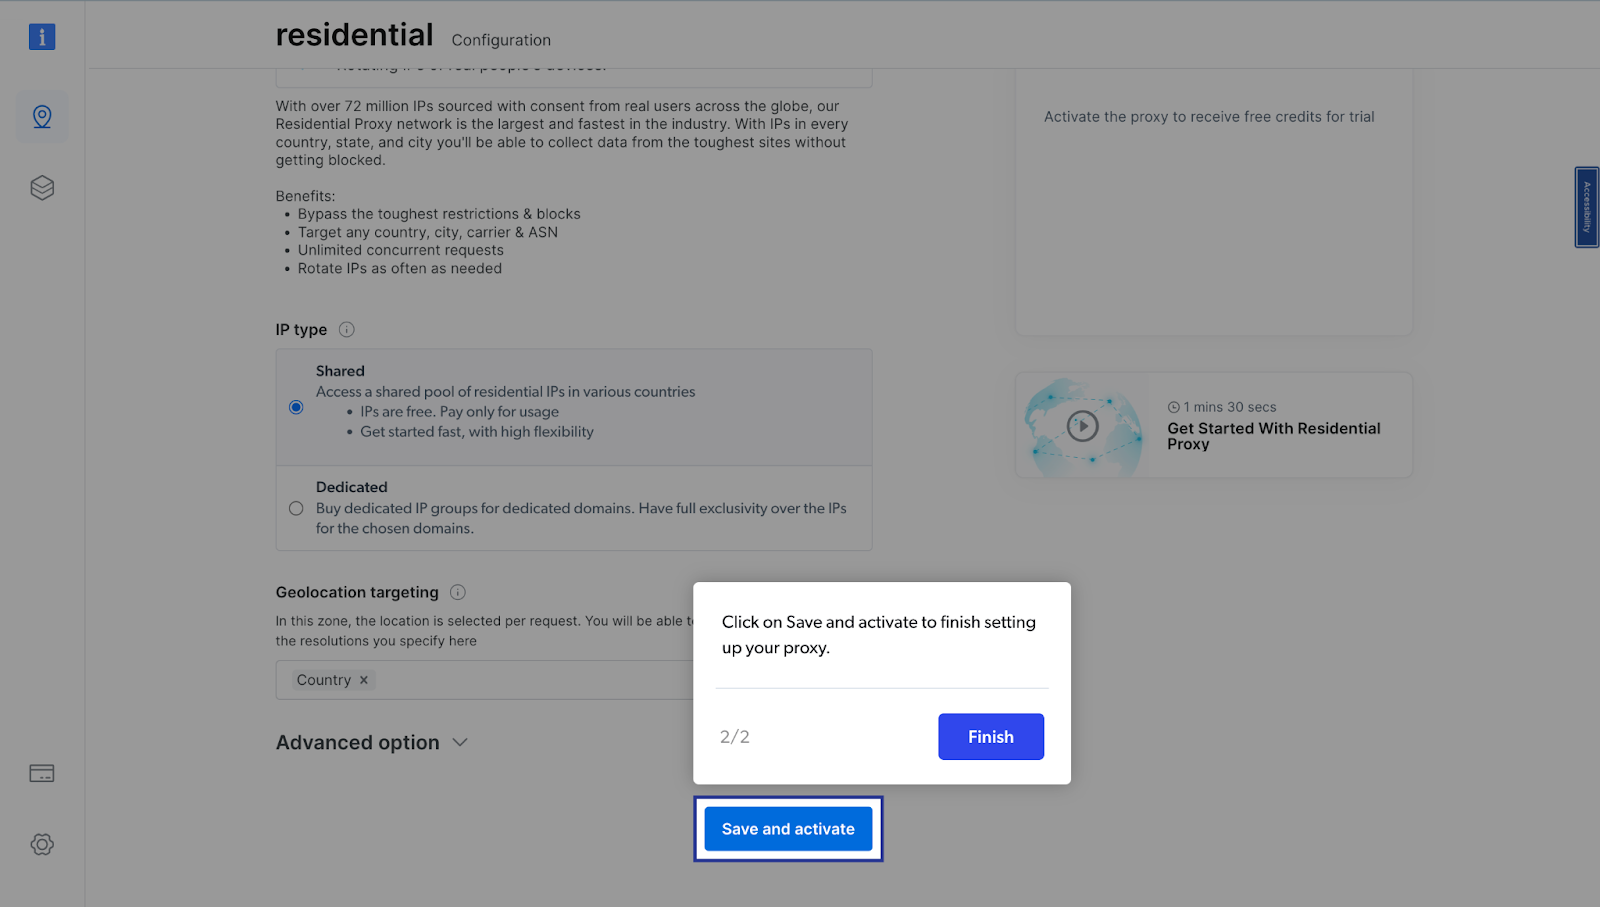
- Next, you will be taken to the “Add new proxy solution” page, where you will be required to choose a name, and IP type for your new residential proxy zone. After that, click on “Save and activate” or “Add”.
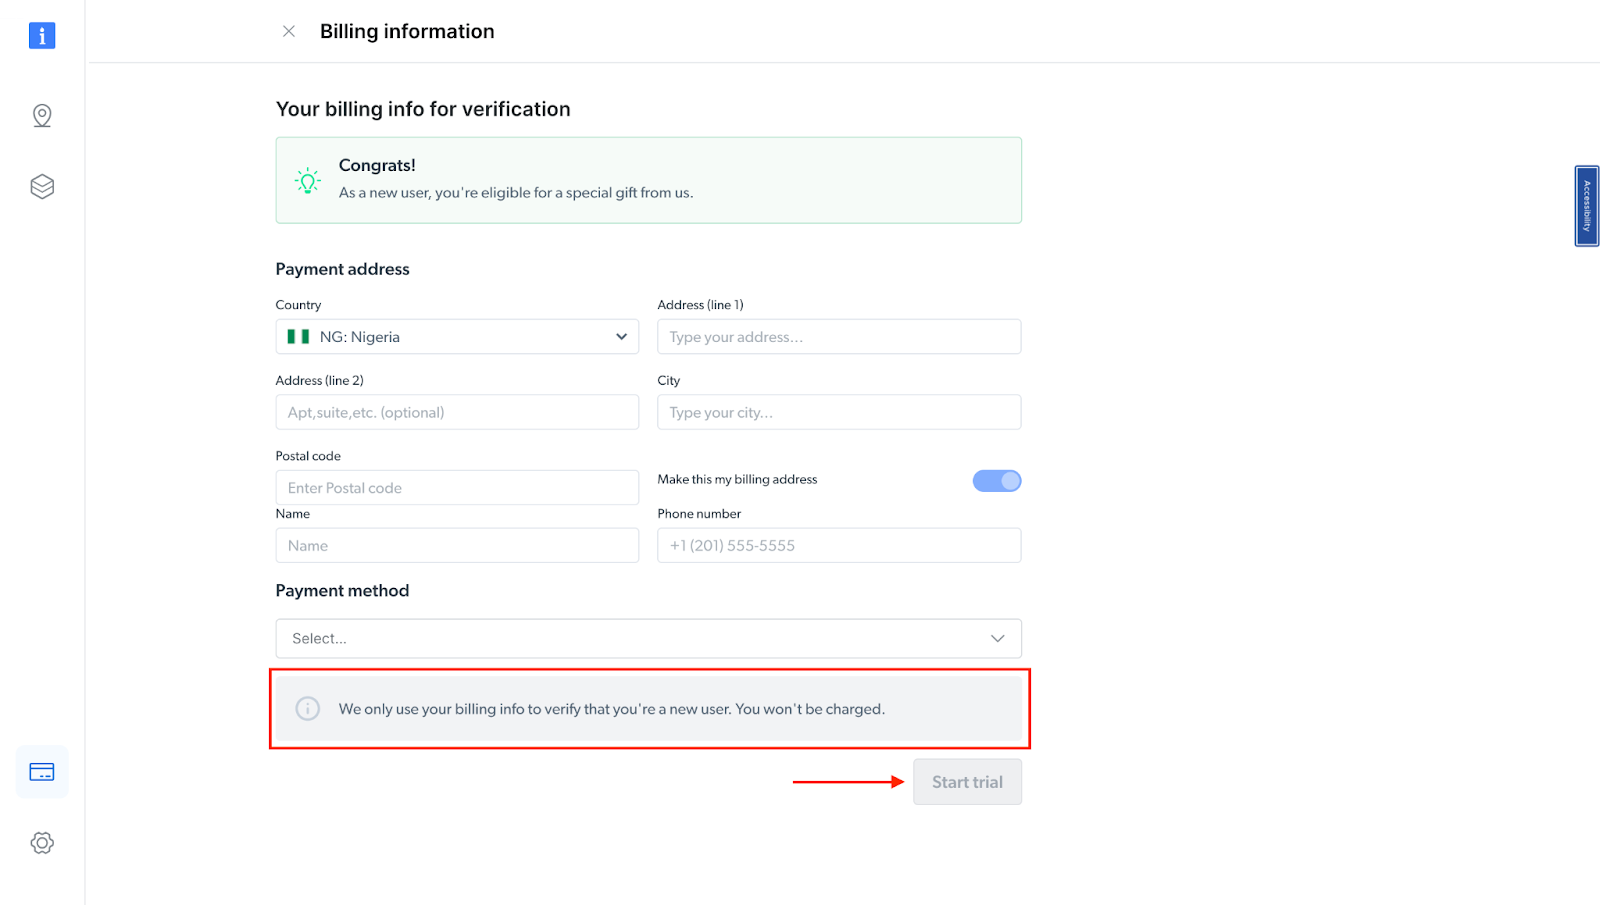
- At this point, if you haven’t yet added a payment method, you’ll be prompted to add one to verify your account. As a new user of Bright Data, you’ll receive a $5 bonus credit to get you started.
NB: This is mainly for verification purposes, and you will not be charged at this point.
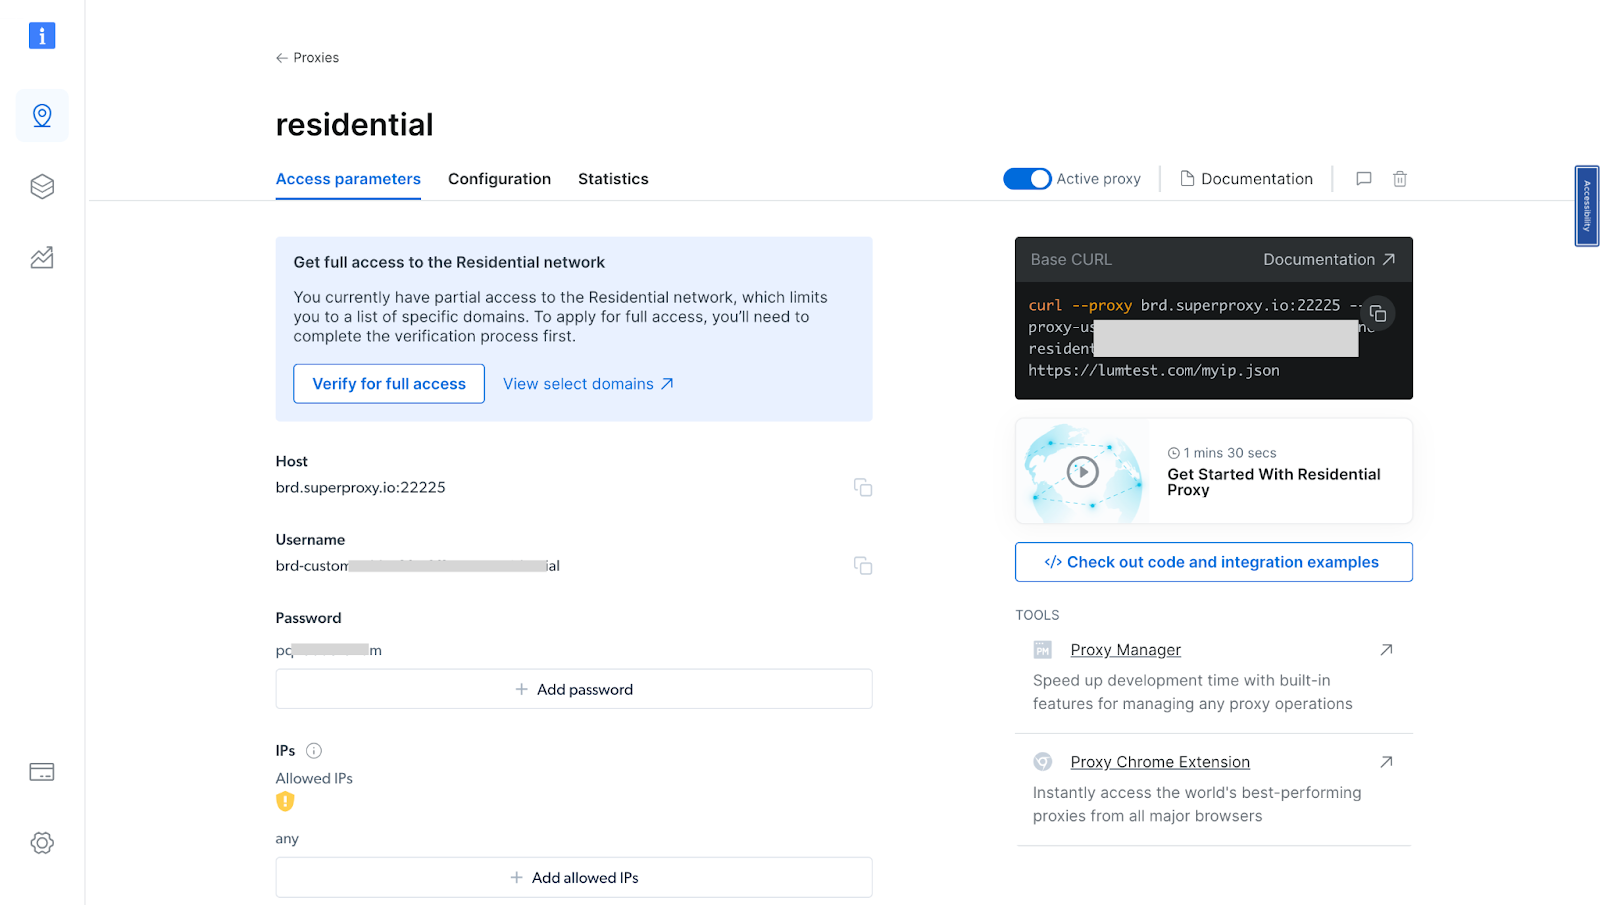
- After verifying your account, your proxy zone will be created.
Configuring Bright Data Proxies
Now you can integrate Bright Data’s proxies into your previous scraping code, we need to follow a few steps.
- Obtain Bright Data proxy credentials: Now that you have created your proxy, obtain your proxy credentials as you will need them in your script (Username and Password).
- Integrate Bright Data’s IPs into the scraping script: Once you have your proxy credentials, you can integrate them into your scraping script. This usually involves setting up the proxy in your Puppeteer launch options.
const puppeteer = require(''puppeteer'');

async function run() {
  browser = await puppeteer.launch({ headless: ''true'' });

  try {
    const page = await browser.newPage();
     await page.authenticate({
       username: ''paste your proxy username here'',
       password: ''<paste your proxy password here'',
       host: ''<paste your proxy host here'',
     });

    // Navigate to Amazon
    await page.goto(''https://www.amazon.com/'', {
      waitUntil: ''networkidle2'',
      timeout: 30000,
    });

    await page.waitForSelector(''#twotabsearchtextbox'', { timeout: 5000 });

    // Search for a specific item
    await page.type(''#twotabsearchtextbox'', ''laptop'', {
      delay: 100,
    }); // Modify this to your desired search term
    await page.click(''#nav-search-submit-button'');

    await page.waitForSelector(''[data-component-type="s-search-result"]'', {
      timeout: 5000,
    });

    const searchResults = await page.$$(
      ''[data-component-type="s-search-result"]''
    );

    await new Promise((r) => setTimeout(r, 10000));

    const results = [];

    for (const result of searchResults) {
      // Process each result as needed, for example:

      const title = await result.$eval(
        ''div[data-cy="title-recipe"] h2 a span.a-size-medium.a-color-base.a-text-normal'',
        (el) => el.textContent
      );

      const price = await result.$eval(
        ''.a-price span.a-offscreen'',
        (el) => el.textContent
      );

      results.push({
        title,
        price,
      });
    }

    console.log(results);

    await browser.close();
  } catch (error) {
    console.error(''Error during execution:'', error);
  } finally {
    // Close the browser
    if (browser) {
      await browser.close();
    }
  }
}

// Call the run function
run();
What changes were made to the script?
const page = await browser.newPage();
await page.authenticate({
  username: ''paste your proxy username here'',
  password: ''paste your proxy password here'',
  host: ''paste your proxy host here'',
});
The page.authenticate method is used to authenticate the page with the proxy credentials you got from Bright Data. This method takes an object with username, password, and host properties. The username and password are the credentials for the proxy, and the host is the proxy server.
- Run the scraping script again: After integrating the proxies, you can run your scraping script again. This time, the requests will be made from different IP addresses, which can help avoid the issues we were facing earlier.
Here is the output:
Now, no matter how much you run the script, you shouldn’t get any of the errors you encountered earlier. So by using proxies, we can ensure that our web scraping activities are more efficient, seamless, and reliable.
👉 Learn more about Bright Data’s residential proxies in the official documentation.
Conclusion
Web scraping is a powerful tool that can provide invaluable insights into market trends, customer preferences, and competitor movements. However, it also comes with its own set of challenges, such as IP bans, rate limits, and CAPTCHAs. These challenges can be mitigated by using proxies, which allow us to make requests from different IP addresses, thereby avoiding IP bans and bypassing rate limits.
In this article, we have explored how to use Node.js and Puppeteer for web scraping, and how to handle common scraping challenges using Bright Data’s proxies. Bright Data’s proxies offer several benefits over traditional free proxies. They are reliable, and fast, and come with features like IP rotation and CAPTCHA solving, which can help avoid blocks and improve the efficiency of the scraping process.
By using proxies, we can ensure that our web scraping activities are more efficient and reliable. In conclusion, web scraping with Node.js, Puppeteer, and Bright Data’s proxies can be a powerful and efficient way to collect data from websites. By understanding the challenges that come with web scraping and knowing how to handle them, you can make the most of this powerful tool.
If you’re interested in learning more about proxies and using them in your scraping activities, Bright Data proxies can help you with your web scraping needs, you can sign up for a free trial and explore the various proxies Bright Data has to offer.
Comments
Loading comments…