Page transitions are cool, furthermore, page transitions can be useful in a Next.js website. As we know, statically generated websites (like the ones made with Next.js) are really fast, this means that passing from one page to another is almost immediate; but if you mix SSG, SSR, ISR in your site, some pages will be faster than other, sometimes retrieving data or regenerating a page could take a little more, giving the user the impression that something is not working properly (you had you users used to fast page switching!).
How transitions can be implemented in Next.js
Next.js allows you to listen to various events in its Router object, these events occur during the lifecycle of a page to page routing action. For example, routeChangeStart() is fired when a route starts to change (for example when you click a link) and routeChangeCompleted() is fired when the routing is complete (for example the new page is totally loaded). Getting these events and using them to show/hide components (for example a loaded) is the way to Next.js transitions.
How we will implement transition in our app
We leverage the basic Layout functionality of Next.js to keep our transition logic in a shared Header component, and we will use GSAP to animate things while the Router will move from one page to another. We will fire animation only for “slow” page to page routing (in our example we will simulate a slow loading page)
What we will build
We will create a website with four dummy pages (Home, what we do, about, contact), all these pages will share a header (with the menu links) and a footer. Passing from one page to another will fire an animation (if the page takes more than 300ms to load)that will hide the current page, and will reveal the destination page.
Prerequisites
To follow along with this tutorial you will need:
-
basic knowledge of Next.js, its file structure, its Routing, its way to use Layout
-
basic knowledge of React, NPM, modules installation, and so on
-
optionally you need to have a basic understanding of GSAP (but you can use any kind of animation package or use only CSS animation) and Tailwind CSS (our preferred CSS framework)
You can also download the source of this project: GitHub - popeating/transition *This is a Next.js project bootstrapped with create-next-app . First, run the development server: Open…*github.com
Setting up the project
Create a new Next.js project:
**npx create-next-app transition**
Enter the **transition **folder and install the required animation modules (GSAP in our case):
**npm i gsap**
Install and configure Tailwind CSS following the official guide:
Install Tailwind CSS with Next.js - Tailwind CSS
Let's build our four pages, in pages folder create 4 files (index.js, about.js, contacts.js, and whatwedo.js), and code every file following this schema (change the name of the function and the content of the file, based on the page, in the following sample I have the code for index.js):
export default function Home() {
  return (
    <>
      <div className="w-100 h-screen flex justify-center items-center">
        Home
      </div>
    </>
  );
}
The only different page will be whatwedo.js:
export default function Whatwedo() {
  return (
    <>
      <div className="w-100 h-screen flex justify-center items-center">
        What we do
      </div>
    </>
  );
}
export async function getServerSideProps(context) {
  await waitload(2);
  return {
    props: { dummy: "dummy" }, // will be passed to the page component as props
  };
}

function waitload(sec) {
  return new Promise((resolve) => setTimeout(resolve, sec * 1000));
}
It will simulate a server request that would take 2 seconds to complete.
Build the layout
We are now building the layout of the page, every page will have a header, a footer, and, in between, the page content.
First of all, create a folder called **components **and inside this folder add a file called header.js:
import Link from "next/link";
const Header = () => {
  return (
    <div className="container mx-auto flex justify-between py-8 absolute left-2/4 -translate-x-1/2">
      <h1 className="font-extrabold">DUMMYLOGO</h1>
      <ul className="flex gap-x-5">
        <li>
          <Link href="/">Home</Link>
        </li>
        <li>
          <Link href="/about">About</Link>
        </li>
        <li>
          <Link href="/whatwedo">What we do</Link>
        </li>
        <li>
          <Link href="/contacts">Contacts</Link>
        </li>
      </ul>
    </div>
  );
};
export default Header;
This is really a basic header, with a logo on the left and a link menu to our pages on the right, the header is absolutely positioned and centered; links are implemented with **next/link Link **so that we can use the Next.js built-in Router.
Then we create a footer:
const Footer = () => {
return (
<div className="flex justify-center bottom-0 absolute left-2/4 -translate-x-1/2">
<p className="font-extrabold">© 2022 - Our Dummy company</p>
</div>
);
};
export default Footer;
Which is even more basic, but still positioned absolute.
We create the main layout that includes the header and the footer:
import Header from "./header";
import Footer from "./footer";
const Layout = ({ children }) => {
  return (
    <>
      <Header />
      <main>{children}</main>
      <Footer />
    </>
  );
};
export default Layout;
And we implement the layout system by modifying the _app.js of our Next.js app this way:
import "../styles/globals.css";
import Layout from "../components/layout";

function MyApp({ Component, pageProps }) {
  return (
    <Layout>
      <Component {...pageProps} />
    </Layout>
  );
}

export default MyApp;
At this point, if you run your dev environment with
npm run dev
and you point your browser to: http://localhost:3000 you should you basic website with a working menu:
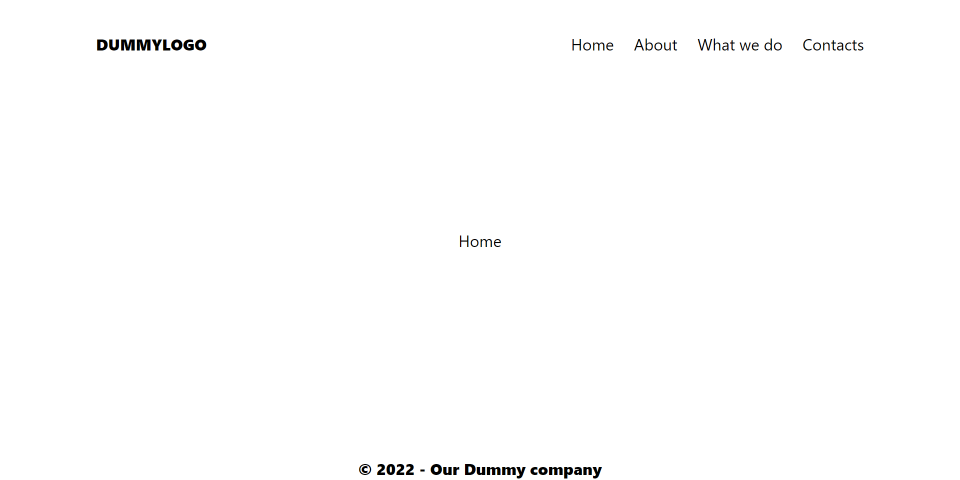
Navigating between pages is immediate (and this is very good!) but when you navigate to “What we do” it would take 2 seconds (the time we set in our server request simulation). Since everything is fast, a slow loading page could break our user experience. That's why we are now adding a transition that will be triggered by clicking a menu link if the page load is taking more than 300ms. In this case, the transition will consist of 4 colored bars that will cover the screen (coming from the top) and then reveal it again (moving back to the bottom). The covering animation will start 300ms after the click, if the destination page is not loaded, the uncovering animation will start once the destination page is fully loaded (if the page is covered). We will keep the animation logic and all the animation elements (the animating Div) inside the Header component so that they are shared between pages and do not need to be reloaded.
Building the animation
First of all, we are going to create the “look” of the covered screen (the way the page will look once the first animation is complete, and the second one is ready to start). As we mention before the are 4 bars (25% width each) in different colors, covering the whole screen, absolutely positioned on top of everything:

at this point our header.js would look like this:
import Link from "next/link";
const Header = () => {
  return (
    <>
      <div className="flex flex-col overflow-hidden relative z-50">
        <div
          id="cover"
          className="cover-strip h-screen w-3/12 bg-slate-50  top-0 left-0 cover fixed"
        ></div>
        <div
          id="cover1"
          className="cover-strip h-screen w-3/12 bg-slate-100 fixed top-0 left-1/4 cover"
        ></div>
        <div
          id="cover2"
          className="cover-strip h-screen w-3/12 bg-slate-200 fixed top-0 left-2/4 cover"
        ></div>
        <div
          id="cover3"
          className="cover-strip h-screen w-3/12 bg-slate-300 fixed top-0 left-3/4 cover"
        ></div>
      </div>
      <div className="container mx-auto flex justify-between py-8 absolute left-2/4 -translate-x-1/2">
        <h1 className="font-extrabold">DUMMYLOGO</h1>
        <ul className="flex gap-x-5">
          <li>
            <Link href="/">Home</Link>
          </li>
          <li>
            <Link href="/about">About</Link>
          </li>
          <li>
            <Link href="/whatwedo">What we do</Link>
          </li>
          <li>
            <Link href="/contacts">Contacts</Link>
          </li>
        </ul>
      </div>
    </>
  );
};
export default Header;
Since we want the bars coming down from the top, we add a CSS rule in our global.css file
.cover {
   transform: translateY(-100%);
}
So that the bars are moved up outside of the screen.
Now we want to listen for the Router events, the events we are interested in are the **routeChangeStart **which are triggered just before we leave the page (so that we can start our ‘covering' animation) and **routeChangeCompleted **triggered once the destination page is fully loaded (so we can play the animation to reveal the page back). We also check for errors (for example double clicks on links).
We will instantiate these event listeners on the Header component, using the useEffect hook. For the moment (instead of animating) we console log the events. Let's modify the header.js file by adding this logic:
import Link from "next/link";
import { useRouter } from "next/router";
import { useEffect } from "react";

const Header = () => {
  const router = useRouter();
  const aniStart = () => {
    console.log("Animation Start");
  };
  const aniEnd = () => {
    console.log("Animation End");
  };
  useEffect(() => {
    router.events.on("routeChangeStart", aniStart);
    router.events.on("routeChangeComplete", aniEnd);
    router.events.on("routeChangeError", aniEnd);

    return () => {
      router.events.off("routeChangeStart", aniStart);
      router.events.off("routeChangeComplete", aniEnd);
      router.events.off("routeChangeError", aniEnd);
    };
  }, [router]);
  return (
    <>
      <div className="flex flex-col overflow-hidden relative z-50">
        <div
          id="cover"
          className="cover-strip h-screen w-3/12 bg-slate-50  top-0 left-0 cover fixed"
        ></div>
        <div
          id="cover1"
          className="cover-strip h-screen w-3/12 bg-slate-100 fixed top-0 left-1/4 cover"
        ></div>
        <div
          id="cover2"
          className="cover-strip h-screen w-3/12 bg-slate-200 fixed top-0 left-2/4 cover"
        ></div>
        <div
          id="cover3"
          className="cover-strip h-screen w-3/12 bg-slate-300 fixed top-0 left-3/4 cover"
        ></div>
      </div>
      <div className="container mx-auto flex justify-between py-8 absolute left-2/4 -translate-x-1/2">
        <h1 className="font-extrabold">DUMMYLOGO</h1>
        <ul className="flex gap-x-5">
          <li>
            <Link href="/">Home</Link>
          </li>
          <li>
            <Link href="/about">About</Link>
          </li>
          <li>
            <Link href="/whatwedo">What we do</Link>
          </li>
          <li>
            <Link href="/contacts">Contacts</Link>
          </li>
        </ul>
      </div>
    </>
  );
};
export default Header;
As you can see, we have two functions (aniStart() and aniEnd()) that are used as callbacks for our event listeners, the events listeners are attached (and cleaned) to our app using the useEffect hook, every time the router change.
If you test the app now and you move between pages, if you open the console you will see the logging of the aniStart() and aniEnd() function.
At this point is just a matter of animating the bars at the right time. We will use GSAP to move the bars Y to 0%, one after the other, when the user clicks a link (aniStart()) and then we send them back to Y -100% once the destination page is loaded (aniEnd()). We will also enable the animation with a delay of 300ms (wrapping it in a* *setTimeout()), if the animation starts, we set a state that informs our app to animate back once loading is complete. At the end, we reset the timer and our state.
Building the animation in GSAP will modify the header.js as:
//create an arrow function called header
import Link from "next/link";
import { useRouter } from "next/router";
import { useEffect, useState } from "react";
import { gsap } from "gsap";

const Header = () => {
  const router = useRouter();
  const [isActive, setIsActive] = useState(false);
  useEffect(() => {
    let timer;
    const aniStart = async () => {
      timer = setTimeout(() => {
        setIsActive(true);
        const tl = gsap.timeline();
        tl.to(".cover-strip", {
          yPercent: 100,
          duration: 0.8,
          ease: "Expo.easeInOut",
          stagger: 0.1,
        });
      }, 300);
    };
    const aniEnd = () => {
      if (timer) {
        clearTimeout(timer);
      }
      const tl = gsap.timeline();
      if (isActive) {
        tl.to(".cover-strip", {
          yPercent: 200,
          duration: 0.8,
          ease: "Expo.easeInOut",
          stagger: -0.1,
        });
        setIsActive(false);
      }

      tl.set(".cover-strip", { yPercent: 0 });
      clearTimeout(timer);
    };

    router.events.on("routeChangeStart", aniStart);
    router.events.on("routeChangeComplete", aniEnd);
    router.events.on("routeChangeError", aniEnd);

    return () => {
      router.events.off("routeChangeStart", aniStart);
      router.events.off("routeChangeComplete", aniEnd);
      router.events.off("routeChangeError", aniEnd);
      if (timer) {
        clearTimeout(timer);
      }
    };
  }, [router]);
  return (
    <>
      <div className="flex flex-col overflow-hidden relative z-50">
        <div
          id="cover"
          className="cover-strip h-screen w-3/12 bg-slate-50  top-0 left-0 cover fixed"
        ></div>
        <div
          id="cover1"
          className="cover-strip h-screen w-3/12 bg-slate-100 fixed top-0 left-1/4 cover"
        ></div>
        <div
          id="cover2"
          className="cover-strip h-screen w-3/12 bg-slate-200 fixed top-0 left-2/4 cover"
        ></div>
        <div
          id="cover3"
          className="cover-strip h-screen w-3/12 bg-slate-300 fixed top-0 left-3/4 cover"
        ></div>
      </div>
      <div className="container mx-auto flex justify-between py-8 absolute left-2/4 -translate-x-1/2">
        <h1 className="font-extrabold">DUMMYLOGO</h1>
        <ul className="flex gap-x-5">
          <li>
            <Link href="/">Home</Link>
          </li>
          <li>
            <Link href="/about">About</Link>
          </li>
          <li>
            <Link href="/whatwedo">What we do</Link>
          </li>
          <li>
            <Link href="/contacts">Contacts</Link>
          </li>
        </ul>
      </div>
    </>
  );
};
export default Header;
Besides the technical aspect of the animation (it is mostly related to how GSAP work) the main concept is to have a starting animation with a 300ms delay from the click (or less or more, depending on your case) if the animation is triggered we set a state **isActive **to true, once the destination page is loaded, we animate to reveal the page if isActiveis set to true, otherwise, we do nothing besides resetting the timer.
If you run your project now, you can see that navigating to “What we do” will trigger an animation, that covers the screen and then reveals the new page. Still, the other page navigation does not need to be animated, since the loading is immediate:
What's next
Using this technique you can implement any kind of transition (or even any kind of animation on a single page using the Router events) using GSAP or your preferred animation method/package.
You can also implement animation between all pages (but I prefer the delay approach and leave fast-loading pages without transition).
Since we are using Router our app is always aware of the page we are leaving and the page we are going to, you can use this information to implement different animations based on routing.
You can support my work by buying me a coffee
Comments
Loading comments…