Scenario: Your team needs you to create a custom module for an EC2 instance with an Amazon Linux 2 AMI ID. Sounds like a job for … Terraform!
Requirements:
- Fork and locally clone a GitHub repository with an ec2.tf template as a starting point to create the EC2 module.
- Create a custom module for EC2 out of the resource block that you can use as repeatable infrastructure.
- Push the newly created module and the ec2.tf file to your GitHub repository.
Prerequisites:
- Terraform installed on your local system.
- The AWS CLI installed and configured on your local system with user permissions allowing the user to create EC2 instances.
- A GitHub account with Git installed on your local system.
- Your preferred integrated development environment (IDE).
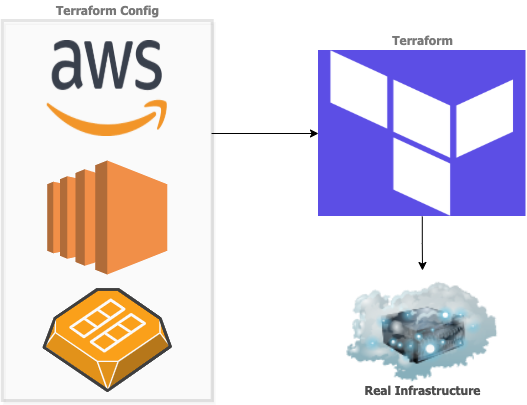
Repeatable modules are an important factor in the effective use of Terraform and the concept of infrastructure as code (IaC) in general. Modules allow the portability of consistent, tested, and reliable Terraform infrastructure to different users and use cases within AWS.
In this demonstration, we will build a Terraform module starting from a basic EC2 app server template, and add the “aws_ami” data source to pull in the AMI ID of an instance registered with the AWS user. We will follow the basic Terraform workflow: write, plan, deploy.
For this demonstration, I am using macOS version 10.15.7 (19H524), and PyCharm CE as my IDE. The version of Terraform used was v0.15.0 on darwin_amd64.
Let's get started!
Step 1: Write
First, locate the repository for the EC2 template on GitHub. Fork the repository, then ‘mkdir' a new directory in your local system using the command line and “cd” into the new directory. Using the HTTPS clone link for the repository, clone the target repo with “git clone”. When the repo clone process is finished, “cd” into the new directory that it created and open the base EC2 Terraform template in your IDE:
terraform {

required_providers {

aws = {

source = "hashicorp/aws"

version = "~> 3.27"

}

}

required_version = ">= 0.14.9"

}

provider "aws" {

profile = "default"

region = "us-west-2"

}

resource "aws_instance" "app_server" {

ami = "ami-830c94e3"

instance_type = "t2.micro"

tags = {

Name = "ExampleAppServerInstance"

}

}
According to best practices, create and select a “dev” workspace in Terraform, and don't forget to add the proper files and changes to your git commit.
Create a new directory named “app_server” and three new files named “terraform.tfvars”, “outputs.tf”, and “main.tf”. Copy the Terraform code from ec2.tf and paste it into our new main.tf inside the app_server module directory. (I also created the optional README.md and LICENSE files).
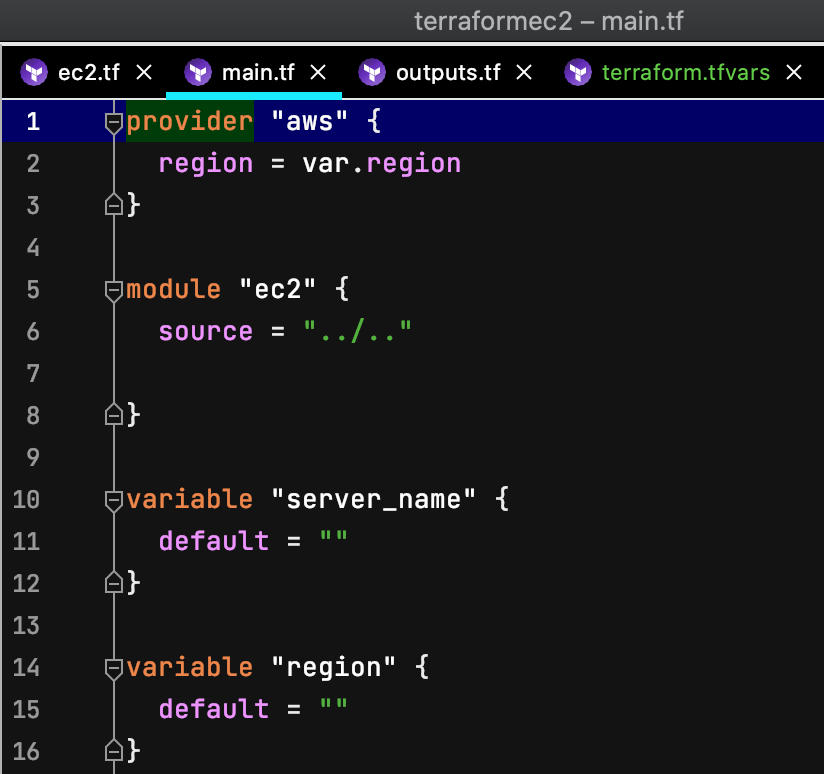
To begin the process of converting ec2.tf to a module, open main.tf in your IDE. For better repeatability and portability in our final product, remove the “terraform” block, including “required version”.
Insert the “module” block named “ec2” with the source “../..”
Next, let's take the hard-coded ami name and region values in ec2.tf and convert them into variables. The “provider” block may then be simplified by replacing the hard-coded “region” attribute with our new “var.region” variable and removing the “profile” attribute.
When the provider block is edited, run “terraform init” to initialize the aws provider plug-in for our module directory.
Using the “aws_ami” data source allows different users to easily specify the desired AMI type and have Terraform automatically use that AMI. A benefit of this data source is that it simplifies managing resources in different regions that use the same AMI, because the ID for each AMI will be different in any region the data source is used. For information and examples for this data source, check out the Terraform Registry.
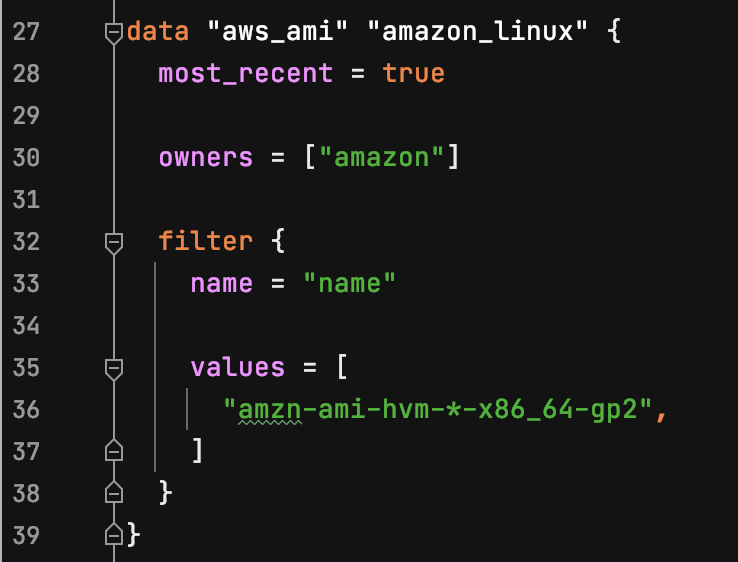
So, let's add the data source for the module's “aws_ami” block. According to the original ec2.tf, the hard-coded ami is “ami-830c94e3.” Using the Ubuntu Amazon EC2 AMI Locator, we see this AMI ID is specific to the “us-west-2” region, with Version “12.04 LTS”, Arch “amd64”, Instance Type “hvm:ebs”, and an AKI-ID of “hvm”:

Using the Terraform Registry as a reference, and using the AMI's basic data, my completed data source block looked like this:
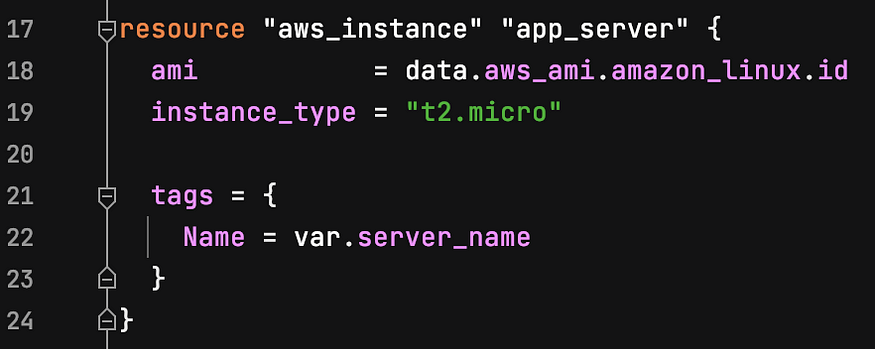
For the AWS instance resource block, we need to enter “data.aws_ami.amazon_linux.id” as the “ami” value. To ensure the default instance type remains in the free tier for eligible AWS users, leave the hard-coded “t2.micro” value in place. Instead of a hard-coded name under “tags” in this resource block, we will use the variable for the server name created above.
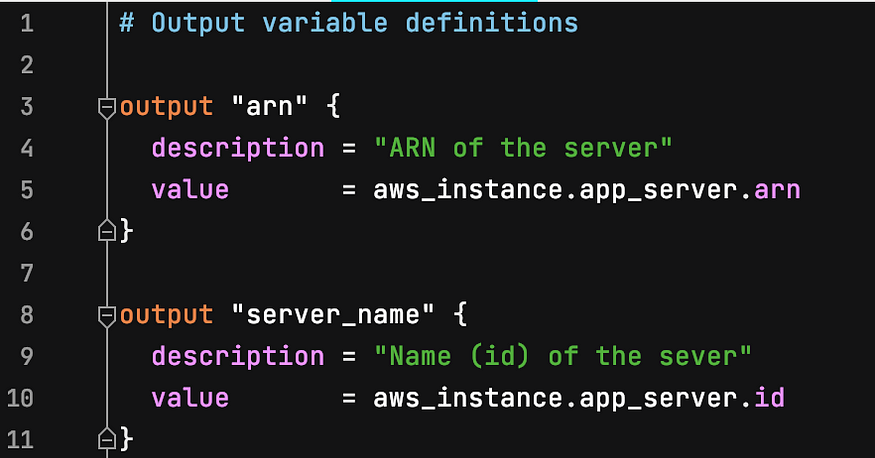
Enter your desired outputs in the outputs.tf file. For example, I defined the ARN and server name as output variables:
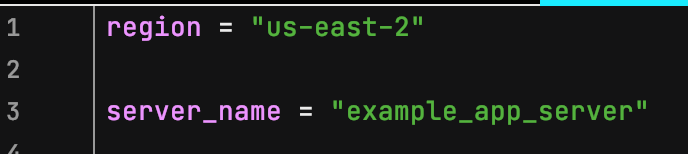
Finally, the terraform.tfvars file will hold our default values for the region and server name. (Remember to never include terraform.tfvars files in your Git commits and pushes to a repo).
Step 2: Plan
The plan is a crucial stage in the Terraform workflow, as any configuration problems not caught by the “validate” command can be corrected before they are deployed. For the planning phase, first run “terraform fmt .” in your command line to format and improve the .tf files in our module directory. Next, run “terraform validate” to check the syntax of the .tf files. Correct any errors Terraform identifies, and validate again until you get the “Success!” output:

When the files are validated, run “terraform plan” to preview Terraform's resource execution plan. With our pared-down .tf module, Terraform will configure most of the instance's resources with default values.
As an example of the importance of the plan command, when I thought I was finished with my first attempt at this project, I ran “terraform plan” and was presented with three prompts to enter the values for the empty variables “ami,” “server_name,” and “region.” The same prompts also appeared when running “terraform apply” and “terraform destroy.” The massive potential for human error in this situation convinced me to change the variable configuration and include them in the main.tf and .tfvars files.
Step 3: Apply
To deploy the Terraform-configured infrastructure to AWS, run “terraform apply” and enter “yes” when prompted (or include “ — auto-approve” in the command to skip the prompt).
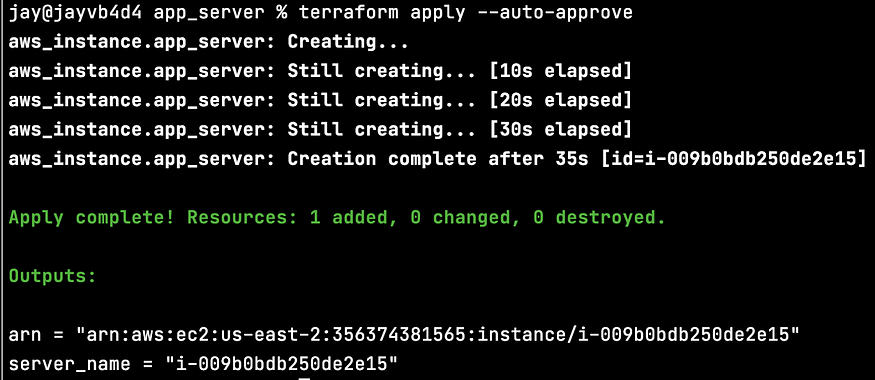
Verify the Terraform state has the executed resources listed with “terraform state list”, for example:

Log in to the AWS Console and head to the EC2 dashboard to see our new instance up and running:

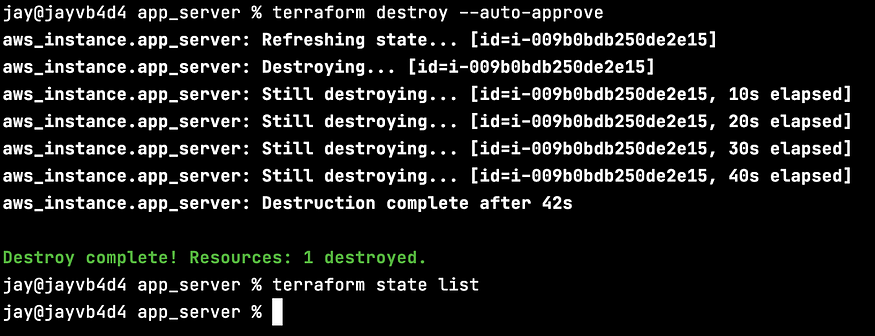
After verifying the Terraform configuration does what we want it to, return to your command line and run “terraform destroy” to avoid incurring unwanted AWS costs. After the destroy is completed, enter “terraform state list” to ensure the resources are gone.
Check the EC2 dashboard to see the “destroy” command's immediate effects:

Finally, let's commit our file changes and additions to the GitHub repo we forked earlier, and make sure you name the origin branch correctly:
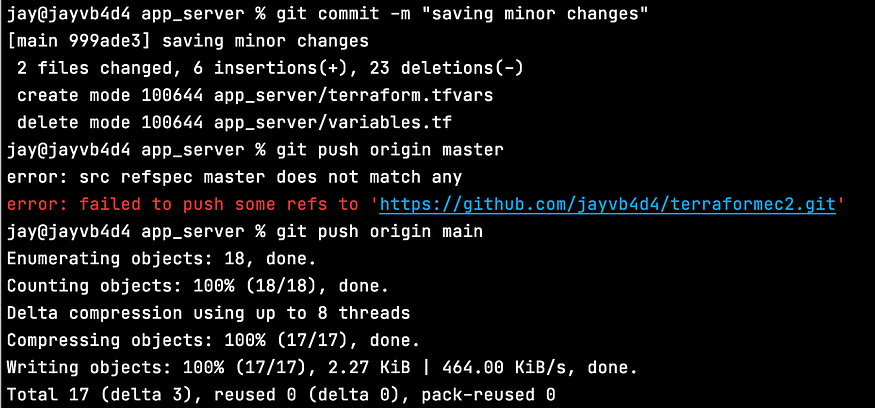
The push from our command line can be confirmed on the GitHub website:
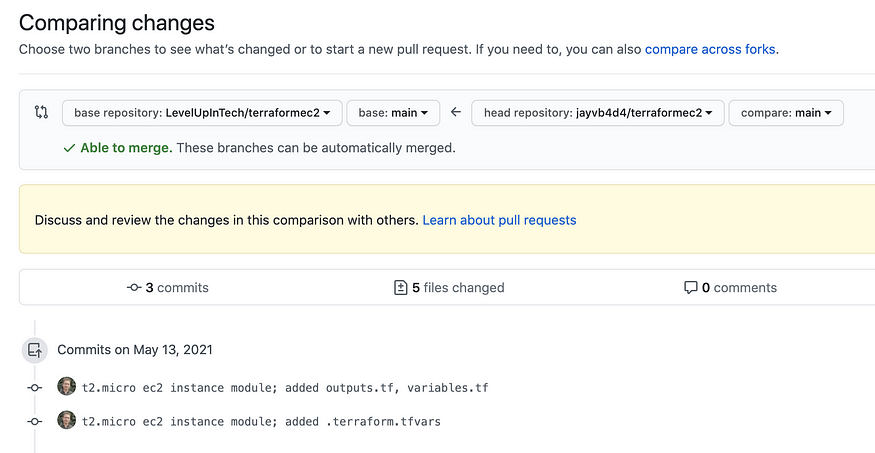
Finally, create a pull request to the base repository (the one you forked) to request that our changes and additions be merged.
Nice job! If your run-through worked as mine did, you've made a custom Terraform module that builds a t2.micro EC2 instance with an auto-assigned AMI.
Don't forget to terraform destroy!
Comments
Loading comments…