SCENARIO
Your team needs you to deploy a custom image quickly and write a quick script in a file to accomplish a task. You will do a task that you may not have done before so make sure you research if you do not know how.
- Create your own image using Nginx and add a file that will tell you the date the container has been deployed
- Deploy your container with port 8080 open
- Save your container data to the AWS Elastic Container Registry (ECR)
Docker
Docker is an open-source project that uses several resource-isolation features of the Linux kernel to sandbox an application, its dependencies, configuration files, and interfaces inside of an atomic unit called a container.
Docker image
A Docker image is a file used to execute code in a Docker container. Docker images act as a set of instructions to build a Docker container, like a template. Docker images also act as the starting point when using Docker. An image is comparable to a snapshot in virtual machine (VM) environments.
Let’s kick off by creating a working directory and change into that directory
mkdir dockerproject
cd dockerproject
Step 1: Create an image using Nginx
To create an image, we will pull the latest version of nginx from Docker registry into our local host. By default the latest version would be pulled without specifying a version. The command to do this is shown below
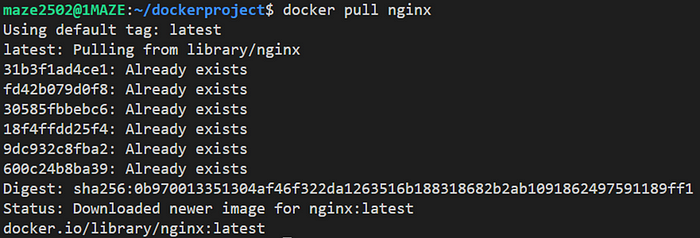
To confirm we have pulled the image. we’ll do a listing

💡 Speed up your blog creation with DifferAI.
Available for free exclusively on the free and open blogging platform, Differ.
Step 2: Create a Dockerfile
We will create a Dockerfile as well as an index.html file in the current directory
touch Dockerfile
touch index.html

Using the vim text editor we will include a set of commands in the Dockerfile required to build our own image
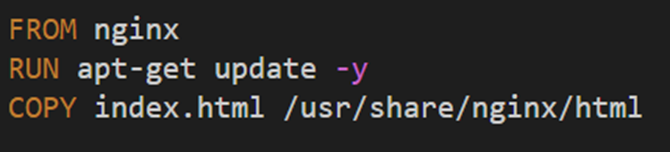
FROM — The FROM instruction initializes a new build stage and sets the Base Image for subsequent instructions.
RUN — The RUN instruction will execute any commands in a new layer on top of the current image and commit the results. The resulting committed image will be used for the next step in the Dockerfile.
COPY — The COPY instruction copies new files or directories from <src> and adds them to the filesystem of the container at the path <dest> . See documentation
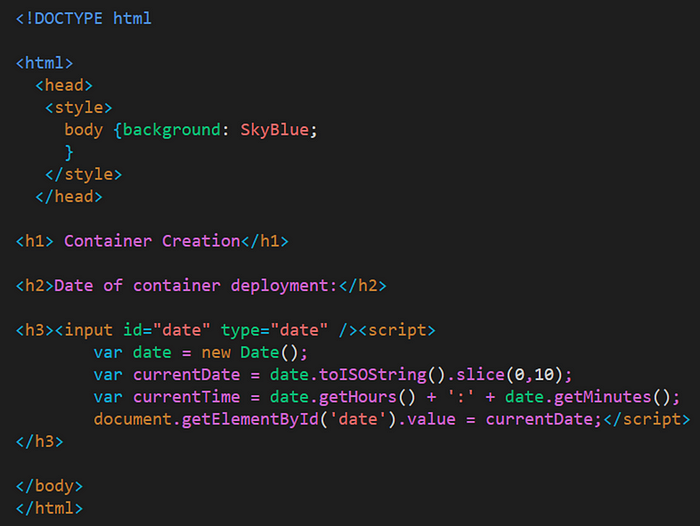
Using vim text editor, we will insert the commands to state the date the container was deployed
Step 3: Build Container image
The container image will be built using the command below. Take note of the dot (.) at the end of the command. It indicates that the Dockerfile image resides in the current directory
docker image build -t <**image**> .
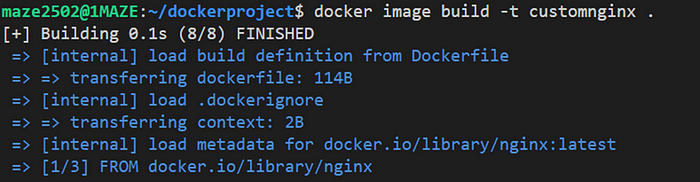
To confirm we have our image:

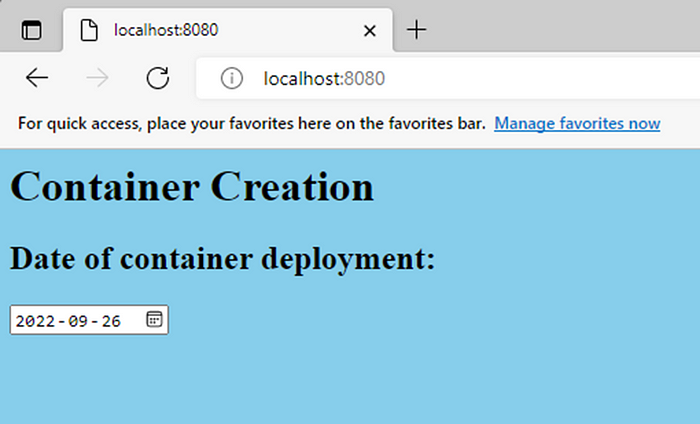
Step 4: Deploy your container with port 8080
To run a container, you need to publish a port using -publish or -p. The format of the publish command is [host port]:[container port] . In this case, we will expose port 80 in our container to port 8080 outside the container (Host)
Now we are ready to create a container from the image we built:
docker run -d --name <name> -p <Host port>:<Container port> <image>

Next we will navigate to our browser and see the outcome:
Step 5: Save container data to AWS Elastic Container Registry (ECR)
To send our container data to the ECR, we would have to create a repository to store it. To do this we’ll run the code below:
aws ecr create-repository --repository-name <name> --region <region>
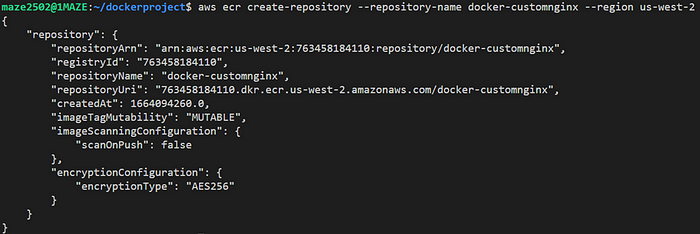
We’ll confirm it has been created by navigating to the Amazon Elastic Container Repository in the AWS console

To push an image to the Amazon ECR repository, we need to authenticate the Docker client to the registry. Each registry requires its own authentication token. To proceed with the authentication, we would run a get-login-password command in the CLI to retrieve the token and then pass it to the docker login command.
aws ecr get-login-password --region <region>_ | docker login --username <AWS> --password-stdin <aws_account_id.dkr.ecr.region.amazonaws.com>
password-stdin = repository URI which can be gotten from the Repository created

Now we will tag the image using the Amazon ECR registry repository
docker tag <e9ae3c220b23 aws_account_id.dkr.ecr.region.amazonaws.com/my-repository:tag>

We are ready to push the image to the registry repository:
docker push aws_account_id.dkr.ecr.region.amazonaws.com/my-repository:tag
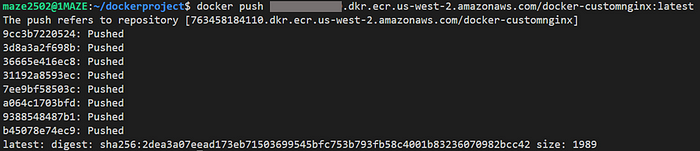
Navigating to AWS console to confirm its there:

There we have it. Our image made it into the repository.
We were able to build an image from a base image pulled from Docker Hub, create a container on a specified port from that image and push the image to Amazon ECR repository.
THANK YOU FOR READING.
Comments
Loading comments…