Photo by Brett Jordan on Unsplash
Choosing the right font is an essential part of any design. The font you choose can have a huge impact on the message, voice, and feeling of your website or application. In this article, we will take a look at how to add a custom Google font to a Next.js application using Tailwind CSS. This will include the following steps:
- Set up a basic app
- Choose a font
- Create a custom document file
- Add a font to Tailwind
Set up a basic app
To get started, we will create a new Next.js project using create-next-app and add Tailwind CSS.
To learn how to set this project up, check out the article below.
Once set up, we will add the following text to the index.js file to see the changes to our font.
<div className="flex flex-col h-screen justify-center items-center text-2xl">
  <p>Almost before we knew it, we had left the ground.</p>
</div>
If we run our project, we will see the default font looks like this.

Choose a font
Now the fun part. Head over to https://fonts.google.com/ and check out the different fonts. The Google font catalog has many open-source fonts that you can integrate into your application.
For this example, we will choose two different fonts. One will be a sans font to replace the default, and one will be to add as a new custom utility. (We will cover more on this when we add the fonts to Tailwind in the final step.)
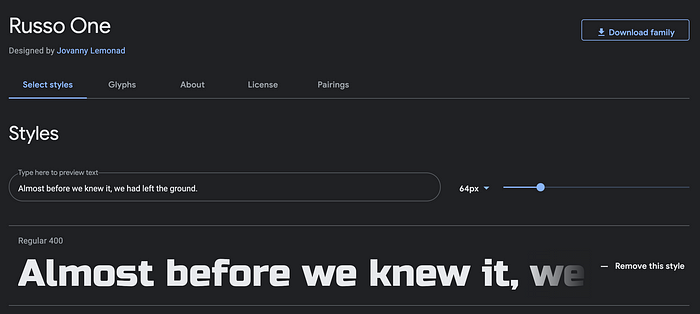
For the default sans font, I will use a font called Russo One.
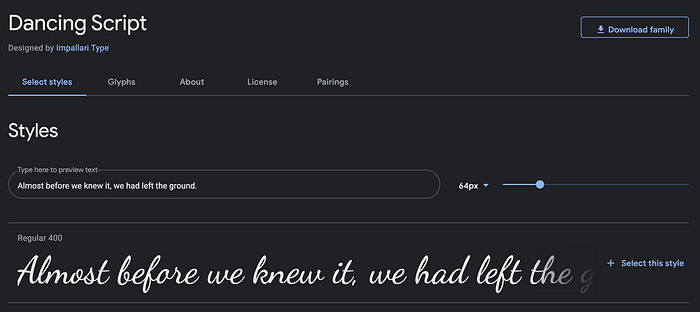
For the custom font, I will use a font called Dancing Script.
Choosing the right fonts can be hard. Check out the article below for some advice on how to choose the best font for your website.
Create a custom document file
Once you have chosen your font, the next step will be to create a _document.tsx file in the pages folder.
Next.js allows you to create a custom document file that will augment your application’s <html> and <body> tags. You can override the default document file by adding the following code into the _document.js file.
import Document, { Html, Head, Main, NextScript } from "next/document";

class MyDocument extends Document {
  static async getInitialProps(ctx) {
    const initialProps = await Document.getInitialProps(ctx);
    return { ...initialProps };
  }

  render() {
    return (
      <Html>
        <Head />
        <body>
          <Main />
          <NextScript />
        </body>
      </Html>
    );
  }
}

export default MyDocument;
We can then add the web font we want to use by adding a <link> tag in the <head> tag. By adding this to the custom document file, we can use these fonts throughout the entire application. Replace the <Head /> above with the following code snippet:
<Head>
  <link
    href="https://fonts.googleapis.com/css2?family=**Russo+One**"
    rel="stylesheet"
  />
  <link
    href="https://fonts.googleapis.com/css2?family=**Dancing+Script**"
    rel="stylesheet"
  />
</Head>
Replace “Russo+One” or “Dancing+Script” with the name of whatever fonts you want to use in your project.
Add a font to Tailwind
The final step will be to update the tailwind.config.js file. By default, Tailwind provides the following three font family utilities:
- a cross-browser sans-serif stack
- a cross-browser serif stack
- a cross-browser monospaced stack
We can update the default fonts by extending the
fontFamilyproperty oftheme. We will also spread the rest of the default theme of the font family sans onto the property.
const defaultTheme = require("tailwindcss/defaultTheme");
_module_._exports_ = {
  purge: ["./pages/**/*.{js,ts,jsx,tsx}", "./components/**/*.{js,ts,jsx,tsx}"],
  darkMode: false, // or 'media' or 'class'
  theme: {
    extend: {
      fontFamily: {
        sans: ["Russo One", ...defaultTheme.fontFamily.sans],
      },
    },
  },
  variants: {
    extend: {},
  },
  plugins: [],
};
Now if you go back to your browser, you should see the changes in your default font.
 We can also add additional fonts outside of the three default font family utilities. I will add another utility called fancy to the configuration and add Dancing Script as the font.
theme: {
  extend: {
    fontFamily: {
      sans: ['Russo One', ...defaultTheme.fontFamily.sans],
      fancy: ['Dancing Script'],
    },
  },
},
Now if we go back to our index.js file, we can use the utility called font-fancy. This will allow us to use the Dancing Script font.
<div _className_="flex flex-col h-screen justify-center items-center text-2xl">
  <p>Almost before we knew it, we had left the ground.</p>
  <p _className_="font-fancy">
    Almost before we knew it, we had left the ground.
  </p>
</div>

Conclusion
Thanks for reading! I hope this article was helpful for you to add a custom font to your project. Next.js and Tailwind CSS has been my favorite stack to use recently for building websites. It has been really fun learning more about both technologies and seeing how they work together. Stay tuned for more articles coming soon! If you want to learn how to add dark mode to your application, check out the article below.
Comments
Loading comments…