Preface — I started a project to explore and learn React Native, and during this journey, I found the need for a Google OAuth Sign In option. However, due to some recent changes, Expo now recommends using the native @react-native-google-signin/google-signin library. This requires expo-dev-client to compile
I will be sharing a step-by-step guide to setup google sign in inside your expo-react native android application.
So Let’s Begin
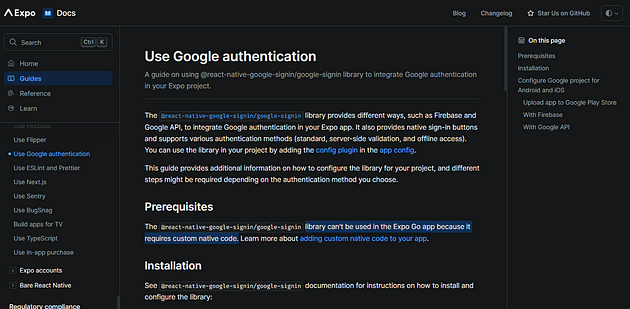
As of 2024, Expo’s official documentation recommends using the @react-native-google-signin/google-signin library. It’s crucial to note that this library requires native support, which is exclusively available through the expo-dev client. Therefore, to incorporate Google Sign-In, it is imperative to generate Expo’s development/debug build.
Implement Google OAuth Sign In : Step by Step Guide
This tutorial necessitates the following prerequisites: the Expo dev client, a configured NodeJS environment, the Expo application project, and a Google Cloud Console project in place.
Contents —
- Setup Expo Dev Client
- Setup Google Cloud Console Project
- Create Your OAuth Concent Screen
- Obtain Your SHA Fingerprint and Application Bundle Name
- Configure Google Cloud API Credentials
- Download the React Native Google Sign-In Package
- Implement Google Sign-In Methods
Step 1 : Setup Expo Dev Client
I won’t go into the detailed setup of Expo Dev Client here, as I’ve already crafted a comprehensive tutorial covering every aspect, including JDK installation, Android Studio-SDK Platform tools, ADB shell, emulator setup, and ultimately, Expo setup. Feel free to check it out: How to Set Up Expo Dev Client: A Complete Guide [2024].
Step 2 : Setup Google Cloud Console Project
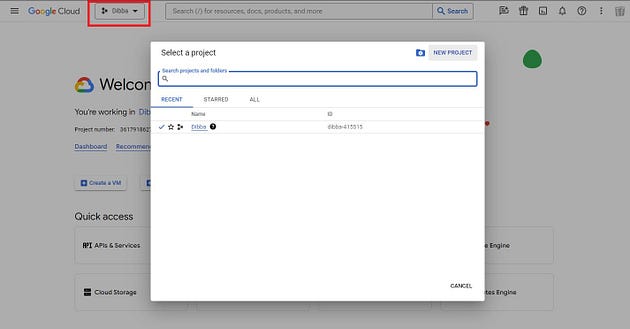
To initiate the implementation of sign-in functionality, the first step is to create a project on the Google Cloud Console.
- Visit https://console.cloud.google.com
- If you already have a project set up, select it from the dropdown at the top-left corner. Alternatively, create a new project and proceed with the new project setup wizard. Once completed, ensure your project is selected from the dropdown in the top-left corner.
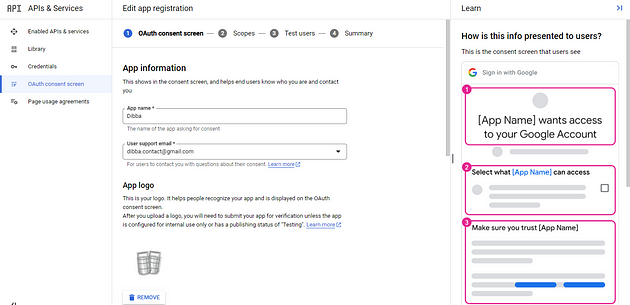
Step 3: Create Your OAuth Concent Screen
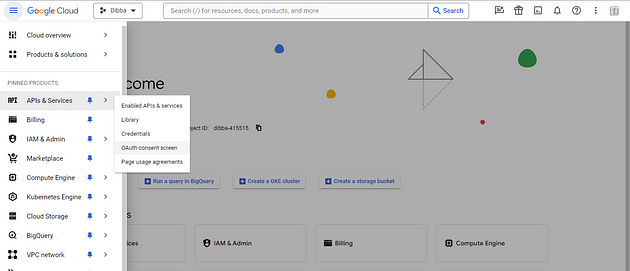
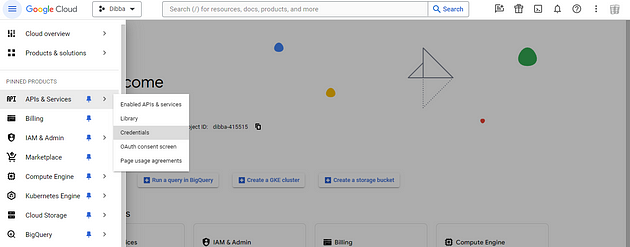
This is the screen that users will encounter during the sign-in process. Access this menu from the side navigation bar.
Proceed by selecting either internal or external users. Opt for “external” to allow access for everyone. Complete the application name, upload the logo, specify the user support email, and then click “Save and Continue.” The scopes are optional, and you can choose to ignore them and proceed.
Now, a crucial step involves adding the email addresses of your test users. This is particularly important as you are setting up OAuth for the development build initially.
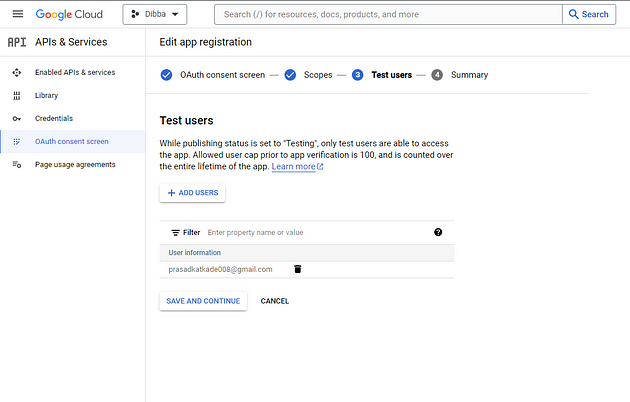
Lastly, review the summary to ensure all the provided information is accurate, then return to the dashboard.
Step 4 : Obtain Your SHA Fingerprint and Application Bundle Name
If you have followed the Expo Dev Client tutorial in its entirety, you should find the app bundle name within the app.json file, typically starting with something like “com.username.yourapplication”. In case you don’t have the necessary credentials, create your Expo build as outlined in the tutorial, which will automatically generate your bundle name and other SHA fingerprints.
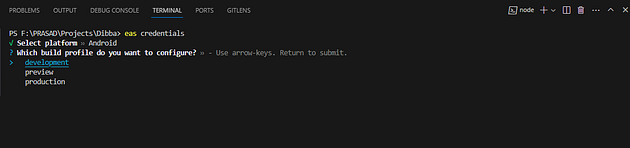
To retrieve these SHA fingerprints, execute the following command in your project’s terminal:
eas credentials
Now, choose the platforms, I am starting with Android. Opt for the development build, and you can review your build configuration in the eas.json file.
Executing this will provide you with the application identifier, i.e., your bundle name, and the SHA-1 fingerprint.
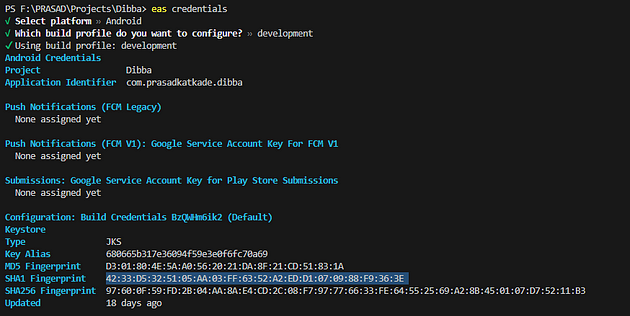
Copy these values, and you are ready to proceed to the next step.
Step 5 : Configure Google Cloud API Credentials
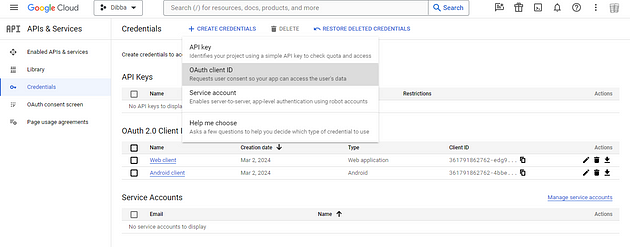
Next, let’s set up our actual API client IDs, which will be utilized within the application. Navigate to the credentials screen for this step.
Click on “Create Credentials,” and from the dropdown menu, select “OAuth client ID.” Here, we will need two client IDs, one for Android and one for the web. Repeat the process to add credentials for iOS as well.
For the web application, no additional configuration is needed. Simply select the application type as “Web application” and click the “Create” button located at the bottom.
For Android, however, we need to add the package name and SHA fingerprint. Copy the values from the previous step and paste them into their respective fields.

Now, copy the web application’s client ID from the credentials page, and you are all set to integrate Google Sign-In within the application.
Step 6 : Download the React Native Google Sign-In Package
Head over to the terminal and install the necessary dependencies by running the following command in your project terminal:
npx expo install @react-native-google-signin/google-signin
Note: After the installation, you will need to rebuild your project and download the debug application from Expo’s dashboard.
eas build --profile development --platform android
Step 7 : Implement Google Sign-In Methods
Import GoogleSignin from the @react-native-google-signin/google-signin package.
- GoogleSignin.configure() : This is a crucial method responsible for setting up your client. Place this inside the root of the project, specifically within the
app/index.tsxfile, so it loads every time the user opens the application.
const configGoogleSignIn = () => {
    GoogleSignin.configure();
};
useEffect(() => { configGoogleSignIn(); // will execute everytime the component mounts
}, []);
- GoogleSignin.signIn() : This method is required if your user is signing in for the first time, providing a user object in the response if the sign-in is successful.
import { GoogleSignin, statusCodes } from "@react-native-google-signin/google-signin";

const signIn = async () => {
    try {
      await GoogleSignin.hasPlayServices();
      const res = await GoogleSignin.signIn();
    } catch (error) {
      switch (error.code) {
        case statusCodes.SIGN_IN_CANCELLED:
          console.error("User Sign In is required");
          break;
        case statusCodes.PLAY_SERVICES_NOT_AVAILABLE:
          console.error("Google Play Services are needed");
          break;
      }
      console.log("Error", error.code);
    }
  };
- GoogleSignin.isSignedIn() & GoogleSignin.signInSilently() : These two methods work hand in hand, where one is responsible for checking the validity of the user sign-in, and the other is for refreshing the sign-in token if it has expired.
const checkIfUserIsValid = async () => {
    const isValid = await GoogleSignin.isSignedIn();
    if (isValid) {
      // navigate to your main screens
    } else {
      try {
        await GoogleSignin.signInSilently();
      } catch (err) { console.log("Error", err.code);}
    }
  };
- GoogleSignin.revokeAccess() & GoogleSignin.signOut() : These two methods are responsible for signing out the user.
 const signOut = async () => {
    GoogleSignin.revokeAccess();
    GoogleSignin.signOut();
    router.replace("/authentication");
  };
By implementing these methods, your Google Sign-In for the development client is now completely ready. For further details, you can refer to additional documentation here.
Note: To test the functionality, ensure you sign in with the test user account mentioned earlier.
For iOS setup, you may refer to this YouTube tutorial here.
Comments
Loading comments…