
Introduction:
Before we get started with the actual storage, let's briefly discuss what secrets are and why we may need to manage them. Most of the applications today are hosted on a cloud-based architecture for various reasons. Be it on-premises or cloud, you may have to store your secrets in a secure environment.
What are secrets?

Secrets are digital data that includes but is not limited to the following:
- User passwords
- System passwords
- Database passwords
- API keys
- ssh keys
- OTPs
- Encryption keys and so on...
Managing these secrets is handled by the information security/DevOps in an organization. They ensure there is no unauthorized access to the data.
Installing Vault on a Local Machine:
What is Vault?
Vault is an identity-based secret and encryption management system. Vault provides encryption services that are gated by authentication and authorization methods. Using Vault's UI, CLI, or HTTP API, access to secrets and other sensitive data can be securely stored and managed, tightly controlled (restricted), and auditable
To start with, let's install Vault on our local system.
macOS:
In macOS, Vault can be installed using brew.
Install HashiCorp tap
$brew tap hashicorp/tap
Install Vault
$brew install hashicorp/tap/vault
Update Vault
$brew upgrade hashicorp/tap/vault
Windows:
In windows, you may use Chocolatey to install Vault.
$choco install vault
Ubuntu:
$curl -fsSL https://apt.releases.hashicorp.com/gpg | sudo apt-key add -
Add the official HashiCorp Linux repository.
$ sudo apt-add-repository "deb [arch=amd64] https://apt.releases.hashicorp.com $(lsb_release -cs) main"
Update and install
$ sudo apt-get update && sudo apt-get install vault
Starting the Vault Dev Server:
Once the installation is complete, verify the installation using the below command.
$ vault status
Output:
dineshkumarkb@dineshkumarkb% vault status
Key             Value
---             -----
Seal Type       shamir
Initialized     true
Sealed          false
Total Shares    1
Threshold       1
Version         1.9.0
Storage Type    inmem
Cluster Name    vault-cluster-5bfc48b1
Cluster ID      4f365a2d-2b5c-37ae-4ba3-c8b76a3e56a5
HA Enabled      false
Starting the Server:
vault server -dev
Output:
==> Vault server configuration:

         Api Address: http://127.0.0.1:8200
                 Cgo: disabled
     Cluster Address: https://127.0.0.1:8201
          Go Version: go1.17.2
          Listener 1: tcp (addr: "127.0.0.1:8200", cluster address: "127.0.0.1:8201", max_request_duration: "1m30s", max_request_size: "33554432", tls: "disabled")
           Log Level: info
               Mlock: supported: false, enabled: false
       Recovery Mode: false
             Storage: inmem
             Version: Vault v1.9.0

==> Vault server started! Log data will stream in below:


WARNING! dev mode is enabled! In this mode, Vault runs entirely in-memory
and starts unsealed with a single unseal key. The root token is already
authenticated to the CLI, so you can immediately begin using Vault.

You may need to set the following environment variable:

    $ export VAULT_ADDR='http://127.0.0.1:8200'

The unseal key and root token are displayed below in case you want to
seal/unseal the Vault or re-authenticate.

Unseal Key: WO3EV3INnT7cAPozmQB2S0DotmLg8eMa7q+CBRbrtUE=
Root Token: s.PrJcwT6kkUfG3kJdfhenoN9a

Development mode should NOT be used in production installations!
The dev server is a built-in, pre-configured server that is not very secure but useful for playing with Vault locally.
The server displays the unseal key and root token.The root token changes every time you start the server. So ensure the token is added to the environment variable every time you restart the server.
The dev server stores all its data in-memory (but still encrypted), listens on localhost without TLS, and automatically unseals and shows you the unseal key and root access key.
Adding Server Details in Your PATH:
$ export VAULT_ADDR='http://127.0.0.1:8200'
$export VAULT_TOKEN="s.PrJcwT6kkUfG3kJdfhenoN9a"
When running Vault in dev mode, the Key/Value v2 secrets engine is enabled at secret/ path. Key/Value secrets engine is a generic key-value store used to store arbitrary secrets within the configured physical storage for Vault. Secrets written to Vault are encrypted and then written to the backend storage. Therefore, the backend storage mechanism never sees the unencrypted value and doesn't have the means necessary to decrypt it without Vault
Accessing Vault:
Vault provides multiple mechanisms like UI, Cli and API to store/get the secrets. Various secret engines can be used to store/retrieve them. However, the Vault server always uses the Key/Value engine in development mode.
Key/Value secrets engine is a generic key-value store used to store arbitrary secrets within the configured physical storage for Vault. Secrets written to Vault are encrypted and then written to the backend storage.
To access the UI, open https://127.0.0.1:8200 in your browser.
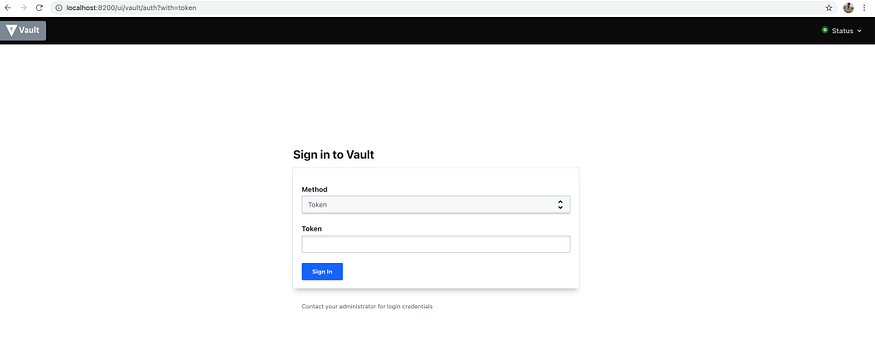
Vault login using token
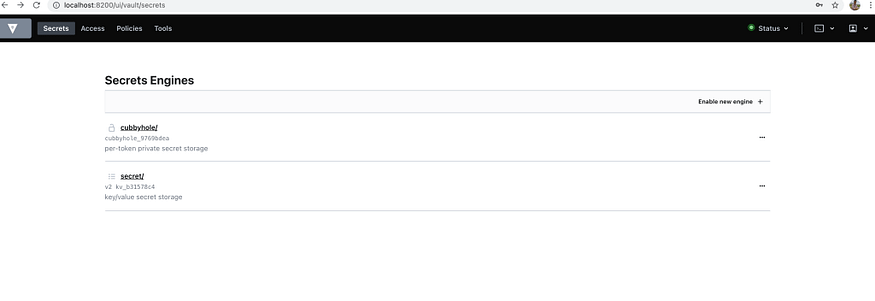
List of secrets in vault
The server in development mode stores the secrets in secret/.
Writing a Secret to KV Using Python:
Now that we have our Vault dev server up and running, let's try and store secrets using Python. Kindly note that the development server stores all secrets in memory and the moment the server session ends, all secrets are deleted whatsoever.
HVAC is the vault API client we will be using to interact with the Vault server.
Installing HVAC:
$ pip install hvac
Connecting via HVAC Client:
import hvac
def init_server():

    client = hvac.Client(url='http://localhost:8200')
    print(f" Is client authenticated: {client.is_authenticated()}")

init_server()

Output:
Is client authenticated: Truedef write_secret():

    create_response = client.secrets.kv.v2.create_or_update_secret(path='hello', secret=dict(foo="bar"))

    print(create_response)

write_secret()
Output:
{
   "request_id":"f2e29013-09f9-efd7-f51e-825c4a6d8f75",
   "lease_id":"",
   "renewable":false,
   "lease_duration":0,
   "data":{
      "created_time":"2021-12-02T07:34:58.187639Z",
      "custom_metadata":"None",
      "deletion_time":"",
      "destroyed":false,
      "version":1
   },
   "wrap_info":"None",
   "warnings":"None",
   "auth":"None"
}
You may verify the secrets from the UI/CLI. The secret which we just wrote is stored in secrets/hello.
Reading a Secret from KV Using Python:
def read_secret():

    read_response = client.secrets.kv.v2.read_secret_version(path='hello')
    print(read_response)

read_secret()
Output:
{
   "request_id":"9c2fb05c-f78a-837a-a6d0-6b7a59b4d45d",
   "lease_id":"",
   "renewable":false,
   "lease_duration":0,
   "data":{
      "data":{
         "foo":"bar"
      },
      "metadata":{
         "created_time":"2021-12-02T07:34:58.187639Z",
         "custom_metadata":"None",
         "deletion_time":"",
         "destroyed":false,
         "version":1
      }
   },
   "wrap_info":"None",
   "warnings":"None",
   "auth":"None"
}
The response for reading contains all the secrets stored in hello in the data object along with the metadata of the secret.
Summary:
The functionality of Vault is not limited to just KV engines. They also support multi-cloud platforms like GCP, Azure, and AWS with dedicated engines and APIs. To learn more about it, explore the links in the references section.
Comments
Loading comments…