
In this blog post, we will cover sending mail as an asynchronous task within a Django project. We will utilize Celery and Redis in our project.
Celery is an asynchronous task queue/job queue based on distributed message passing. It is often used in Django apps to run tasks in the background, such as sending emails or processing images, while the main thread of the application continues to handle web requests. Celery can be used in conjunction with a message broker, such as RabbitMQ or Redis, to handle the distribution of tasks to worker processes.
In the blog post I wrote before, I explained how Celery and RabbitMQ can work together. In this article, I will use Redis with Celery. For this reason, I will not talk much about Celery, I will focus more on sending mail and Redis. If you need more information about Celery, read the article below before continuing.
Asynchronous Task Processing in Django using Celery and RabbitMQ
Redis
Redis is an open-source in-memory data structure store that can be used as a message broker for task queue systems like Celery. Redis stores the tasks in a queue and Celery worker processes consume the tasks. This allows the main thread of the Django app to continue handling web requests while background tasks are being processed.
In other words, using Celery with Redis is like hiring a team of helpers to do some tasks for you while you continue working on something else.
Redis is like the boss of these helpers, it assigns tasks to the helpers, keeps track of the tasks, and makes sure that the helpers are doing their jobs. It’s like a to-do list for the helpers.
Celery is like the helper team, it takes the tasks from Redis, does the work, and reports back to Redis when the task is done. It makes sure that the tasks are done in the background, so you don’t have to wait for them to finish before moving on to something else.
It is important to note that Redis is not suitable for all types of tasks, for example, long-running tasks or tasks that require a lot of memory, it may be better to use a different message broker like RabbitMQ.
First, we need to install Redis. Installation guide here.
Mine is macOS, and it is very easy to install: just run the brew install redis command in your terminal.
Project
We have two apps in our project. The first app is responsible to send a confirmation mail after a user subscribes. The second one is responsible for sending advertisement emails periodically to all subscribers.
You can reach the project code here.
Let’s start with the first application. Then we can build on it for the latter.
Requirements
pip install djangopip install celerypip install redispip install django-celery-results
We use django-celery-results to store the results for Celery in our Django backend. It allows us to store task results in a database, rather than in the message broker (Redis). When we execute a task, normally, the result is stored in Redis, which means that the results are stored in memory and are lost when we restart the Redis server. When we use django-celery-results, we keep these results in our Django database, therefore they won’t be lost.
In addition, django-celery-results provides an easy way to view and manage the results of our tasks in the Django admin panel.
Configuration
- Add your app and
django-celery-resultstoINSTALLED_APPS.
#settings.py

INSTALLED_APPS = [
    'django.contrib.admin',
    'django.contrib.auth',
    'django.contrib.contenttypes',
    'django.contrib.sessions',
    'django.contrib.messages',
    'django.contrib.staticfiles',
    'myapp',
    'django_celery_results',
]
- Celery settings
#settings.py

# CELERY SETTINGS
CELERY_BROKER_URL = 'redis://127.0.0.1:6379'
CELERY_ACCEPT_CONTENT = {'application/json'}
CELERY_RESULT_SERIALIZER = 'json'
CELERY_TASK_SERIALIZER = 'json'
CELERY_TIMEZONE = 'Europe/Paris'
CELERY_RESULT_BACKEND = 'django-db'
CELERY_BROKER_URL is used to point a message broker to Celery. The default port of the Redis server is 6379. In our case, we tell Celery to use Redis as a message broker.
CELERY_ACCEPT_CONTENT means that when a task is sent to the Celery worker by the client, it must be serialized as JSON before it is sent, and the worker will only process the task if it is in the JSON format. CELERY_TASK_SERIALIZER ensures that.
CELERY_RESULT_SERIALIZER orders that the results of Celery tasks will be serialized in JSON format before they are sent back to the Celery client.
CELERY_TIMEZONE sets the timezone. This becomes important if our tasks are to be executed at a specific time.
CELERY_RESULT_BACKEND = "django-db" says that the results of Celery tasks will be stored in the Django database.
- Create a file in the same folder with
settings.pynamedcelery.py.
#celery.py

from __future__ import absolute_import, unicode_literals
import os
from celery import Celery

os.environ.setdefault('DJANGO_SETTINGS_MODULE', 'redismail.settings')

app = Celery('redismail')
app.config_from_object('django.conf:settings', namespace='CELERY')

app.conf.enable_utc = False

app.conf.update(timezone = 'Europe/Paris')

app.autodiscover_tasks()
- SMTP Settings
We should set up the SMTP Gmail backend.
#settings.py

# SMTP SETTINGS
EMAIL_BACKEND = "django.core.mail.backends.smtp.EmailBackend"
EMAIL_USE_TLS = True
EMAIL_HOST = "smtp.gmail.com"
EMAIL_PORT = 587
EMAIL_HOST_USER = "yourmail@gmail.com"
EMAIL_HOST_PASSWORD = "your key"
DEFAULT_FROM_EMAIL = '<yourmail@gmail.com>'
EMAIL_BACKEND specifies the email backend.
EMAIL_USE_TLS specifies whether or not to use Transport Layer Security (TLS) when connecting to the SMTP server. For Gmail, this should be set to True.
Transport Layer Security (TLS) is a security protocol that is used to establish a secure communication channel between two systems. It is a way to make sure that information sent between two systems (like a website and your computer) is kept private and can’t be read by anyone else.
EMAIL_HOST is the hostname of the SMTP server: smtp.gmail.com Gmail.
EMAIL_PORT is the port number for the SMTP server, it should be set to 587 for Gmail.
EMAIL_HOST_USER and EMAIL_HOST_PASSWORD are the information of the sender. To get a password go to your account in Gmail. Go to “Security” from the sidebar.

Sorry, it is Turkish but you will find it on your screen. Image by the author.
Find two-step verification, enable it and click the app passwords.
Add a new one, select “others” and give a name to your app. Click “generate”.
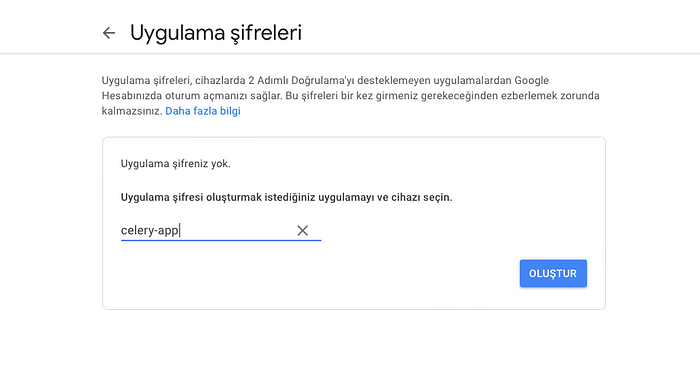
Sorry, it is Turkish but you will find it on your screen.
Copy your password (the text in the yellow background). Paste it to your settings file.
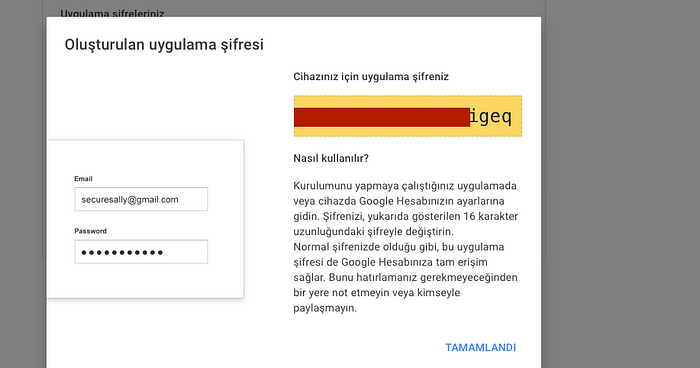
Sorry, it is Turkish but you will find it on your screen.
DEFAULT_FROM_EMAIL is the default sender address.
Front
We have a simple form for taking subscription requests.
Front:

<!-- index.html -->

{% extends 'base.html' %} {% block content%}
<div class="container">
  <h2 style="margin-top: 10px">
    Subscribe to me so I can send you an asynchronous mail via Celery and Redis.
  </h2>
  <form method="POST">
    {% csrf_token %} {{form.as_p}}
    <button class="btn btn-success">Subscribe!</button>
  </form>
</div>
{% endblock %}
Forms
#forms.py

from django import forms

class SubscribeForm(forms.Form):
    mail = forms.CharField(label="Your Email", max_length=100, widget=forms.TextInput(attrs={'class':'form-control mb-3', 'id':'form-mail'}))
    message = forms.CharField(label="Your Message", widget=forms.Textarea(attrs={'class':'form-control','rows':'7'}))
Views
I used FormView class. If the form is validated, then we call the task and send the data that we get from the form with the delay method.
#views.py

from django.views.generic.edit import FormView
from django.http import HttpResponse
from myapp.forms import SubscribeForm
from myapp.tasks import send_notification_mail

class IndexView(FormView):
    template_name = 'index.html'
    form_class = SubscribeForm

    def form_valid(self, form):
        mail = form.cleaned_data["mail"]
        message = form.cleaned_data["message"]
        send_notification_mail.delay(mail, message)
        return HttpResponse('We have sent you a confirmation mail!')
Tasks
We have a single task that receives the information and use them to send a notification mail. We use the send_mail method from django.core.mail.
#tasks.py

from celery import shared_task
from django.core.mail import send_mail
from redismail import settings

@shared_task(bind=True)
def send_notification_mail(self, target_mail, message):
    mail_subject = "Welcome on Board!"
    send_mail(
        subject = mail_subject,
        message=message,
        from_email=settings.EMAIL_HOST_USER,
        recipient_list=[target_mail],
        fail_silently=False,
        )
    return "Done"
Use Case
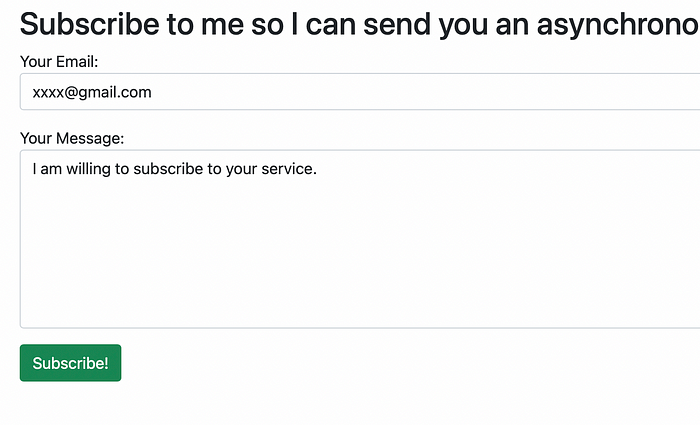
Now, let’s try the use case. I will give an email address and a message as input and my email will send an email to the given address.
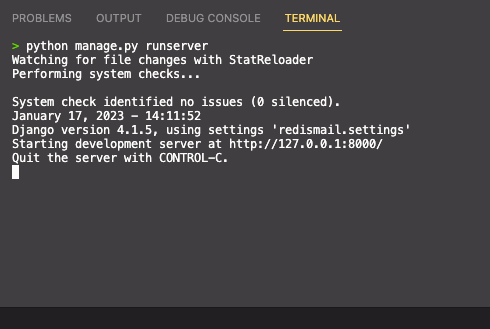
- Run the Django server in the first terminal.
python manage.py runserver
- Run the Celery in the second terminal.
celery -A redismail worker -l info
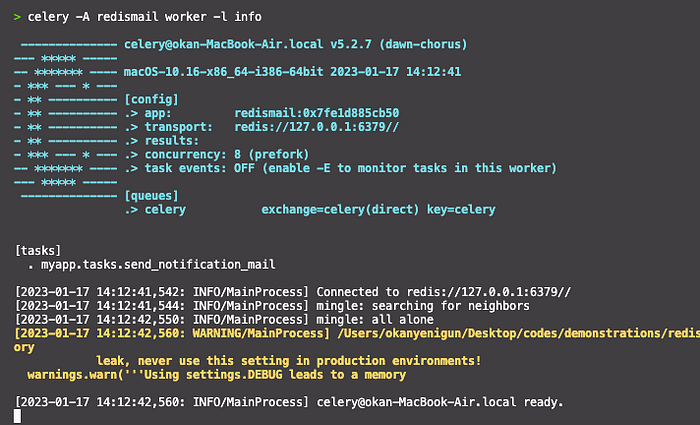
- Go to http://127.0.0.1:8000/, fill out the form and submit.
Response (Django side):

After submission, Celery received the task and executed it.
Celery side:

The target address received the mail from me:

The Second App
Here we will periodically send emails at the same time every day. In my example, I chose a specific time. However, you can have a look at the crontab documentation of Celery for other periodic options. The documentation is here.
pip install django-celery-beat
Django-celery-beat is a package that allows you to schedule periodic tasks using the Celery task queue in a Django application.
- Add the newly installed package to your apps.
#settings.py

INSTALLED_APPS = [
    'django.contrib.admin',
    'django.contrib.auth',
    'django.contrib.contenttypes',
    'django.contrib.sessions',
    'django.contrib.messages',
    'django.contrib.staticfiles',
    'myapp',
    'myapp2',
    'django_celery_results',
    'django_celery_beat',
]
- Beat settings.
#settings.py

#BEAT SETTINGS
CELERY_BEAT_SCHEDULER = 'django_celery_beat.schedulers:DatabaseScheduler'
- Define your new task.
#tasks.py

from celery import shared_task
from django.core.mail import send_mail
from redismail import settings

@shared_task(bind=True)
def send_ad_mails(self, message):
    recipient_list = ["xxxx@gmail.com"]
    mail_subject = "You are on your luck day!"
    send_mail(
        subject = mail_subject,
        message=message,
        from_email=settings.EMAIL_HOST_USER,
        recipient_list=recipient_list,
        fail_silently=False,
        )
    return "Done"
- Schedule your new task in the celery configuration file.
#celery.py

# CELERY BEAT SETTINGS

app.conf.beat_schedule = {
    'send-ad-mail-every-day': {
        'task': 'myapp2.tasks.send_ad_mails',
        'schedule': crontab(hour=15, minute=56),
        'args' : ("I am a Nigerian Prince.",)
    }
}
- Run your Django and Celery servers as you do above.
- Run the beat in a new terminal.
celery -A redismail beat -l INFO

It has sent in the mail at the correct time:

Celery worker side:

Conclusion
Alright, so basically what we did in this blog post is show you how to send emails in a way that won’t slow down your Django project. We used a combination of Celery and Redis to handle sending emails in the background, so the rest of your application can keep running smoothly. This way, you’ll have a more responsive app and your emails will be sent more reliably. All in all, it’s a pretty sweet setup if you need to send emails in your Django project.
Read More
Django Q: (An Alternative) Asynchronous Task Management in Django
Asynchronous Task Processing in Django using Celery and RabbitMQ
Warping an Object’s Perspective with OpenCV in C++
Create a Network Graph in Python
Sources
https://docs.celeryq.dev/en/stable/django/first-steps-with-django.html
https://pypi.org/project/django-celery-results/
https://django-celery-beat.readthedocs.io/en/latest/
https://docs.djangoproject.com/en/4.1/topics/email/
https://www.youtube.com/watch?v=Sp78HO7rJMc
https://www.youtube.com/watch?v=EfWa6KH8nVI&list=PLLz6Bi1mIXhHKA1Szy2aj9Jbs6nw9fhNY&index=1
Comments
Loading comments…