Overview:
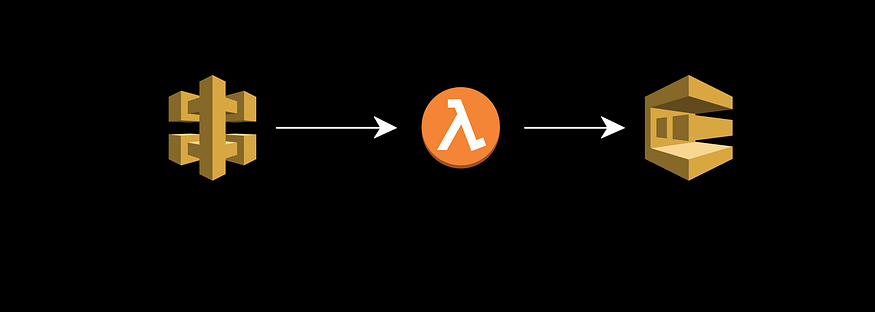
In this article, I will teach you how to use Python and Boto3 to create an SQS queue. In addition, we’ll deploy a Lambda function to deliver a message to our SQS queue. Next, we will configure an HTTP API trigger for an API Gateway to call the function.
What is SQS Queue?
Amazon Simple Queue Service (SQS) lets you send, store, and receive messages between software components at any volume without losing messages or requiring other services to be available.
What is Lambda Function?
A lambda function is an anonymous function (i.e., defined without a name) that can take any number of arguments but unlike normal functions, it evaluates and returns only one expression. A lambda function in Python has the following syntax: lambda parameters: expression.
What is API Gateway?
An API gateway is an Application Programming Interface (API) management tool that sits between a client and a collection of backend services.
Preconditions:
- You will need an IAM User
- AWS Credentials
- AWS CLI Tools
- Have Python3 and Boto3 Installed
- Cloud9 IDE
Objectives:
- Create a Standard SQS Queue using Python.
- Create a Lambda function in the console with a Python 3.7 or higher runtime.
- Modify the Lambda to send a message to the SQS queue. Your message should contain either the current time or a random number. You can use the built-in test function for testing.
- Create an API gateway HTTP API type trigger.
- Test the trigger to verify the message was sent.
Before we get started let’s set up our workspace. I’ve already installed the AWS CLI and boto3. But if you haven’t run the following commands in the Terminal to install them.
pip3 install awscli
pip3 install boto3
Now that we have our environment setup let’s get started.
Step 1: Create a Standard SQS Queue
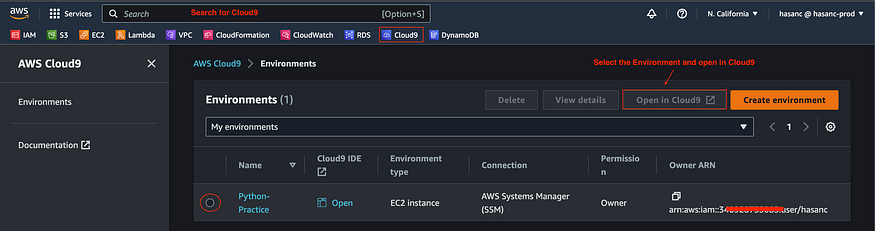
Log into the AWS Management Console, navigate to Cloud9, and either create a new Environment or pick an existing one.
Once you have the Environment open create a new Python file by navigating to File and selecting New from Template and Python File.

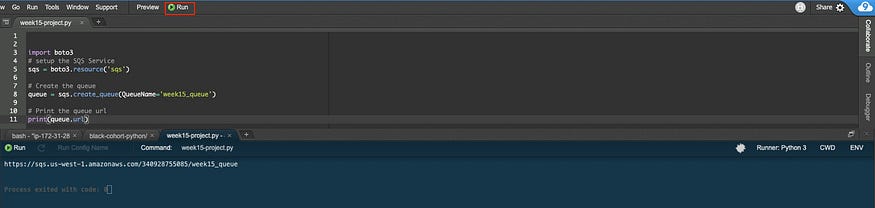
Next, let’s write our code and save it by navigating back to File and selecting Save as. Give the file a name and click Save. After that run, the code and you will see at the bottom of the terminal if your code ran successfully without any errors.
import boto3
# setup the SQS Service
sqs = boto3.resource('sqs')

# Create the queue
queue = sqs.create_queue(QueueName='week15_queue')

# Print the queue url
print(queue.url)
Step 2: Verify if the SQS Queue was created
Navigate back to the AWS Management Console and search for SQS in the search bar. Select Simple Queue Service (SQS) which will take you to the SQS dashboard and there you will see that our Queue has been generated in the console.

Step 3: Create the Lambda Function
In order to send a message to our SQS Queue we first need to create a Lambda Function. Head back to the Management Console and navigate to the Lambda dashboard and select Create Function.

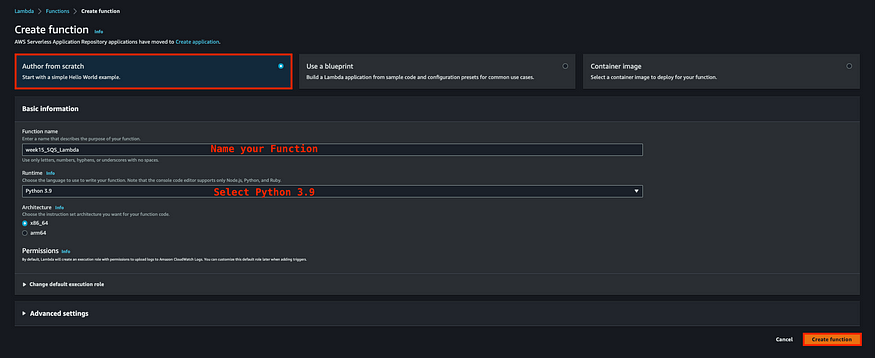
Once you navigate to the Lambda Dashboard, select Create Function option. Where we will do the following configurations.
- Select Author from scratch
- Give your Function a name
- For Runtime select Python 3.9 from the drop bar
- Leave rest of the settings as Default
- Select Create Function
For us to interact with our SQS Queue, we will need to modify our Lambda Function so that we can send out a message. In order to establish communication between SQS and Lambda, it is necessary to configure permissions. For the purpose of this tutorial, we will grant complete access to SQS, but it is important to keep in mind the principle of least privilege and only grant the necessary permissions.
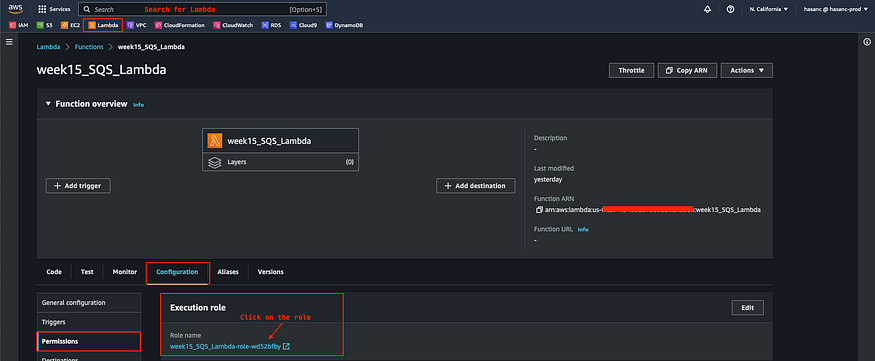
From the AWS Console navigate to the Lambda Dashboard and click on the Function we created earlier. Navigate to Configuration and select Permissions. Next under Execution Role click on the Role name which will open a new tab for IAM Management Console.
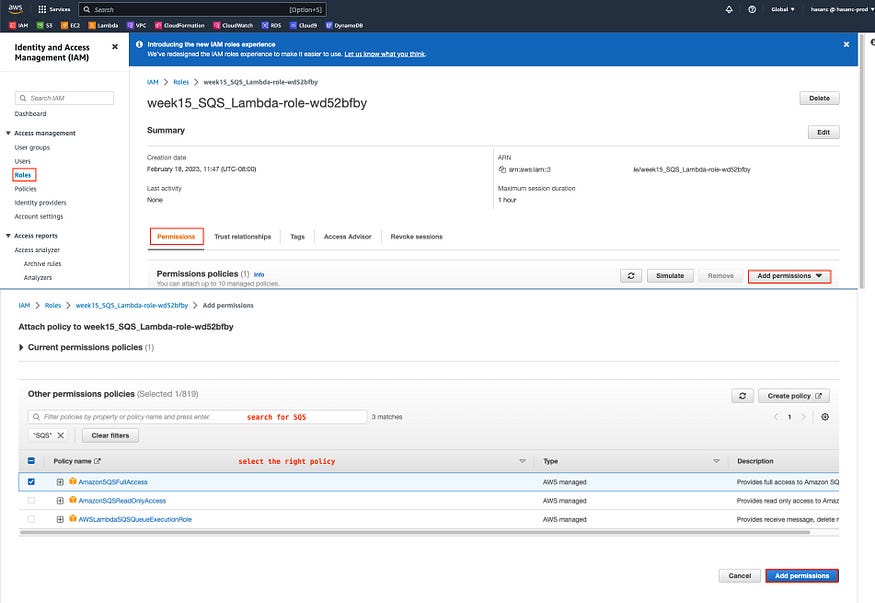
Once you are on the IAM Dashboard navigate to Roles and select Add Permissions. Next, click on Attach policies and search for the appropriate SQS policy and attach it.
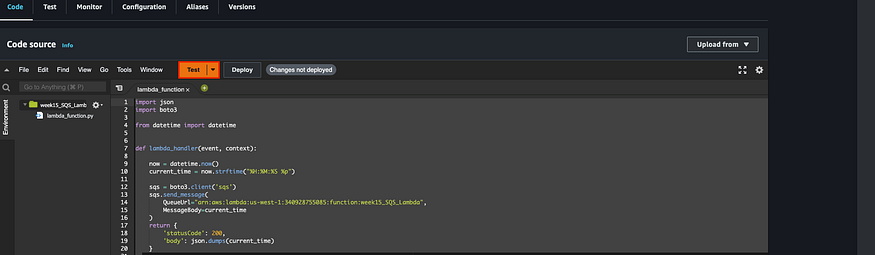
Once our permissions have been added, go back to the Lambda function Dashboard and select Code. Here we’ll input a Lambda script that will send a message to the SQS queue.
Once the code is ready click on Deploy to save the code and click on Test.
import json
import boto3
from datetime import datetime


def lambda_handler(event, context):

    now = datetime.now()
    date = "%m/%d/%Y"
    time = "%H:%M"
    current_time = now.strftime(date+" "+time)
    message = "This message was sent: " + current_time

    sqs = boto3.client('sqs')

    sqs.send_message(
        QueueUrl="https://sqs.us-west-1.amazonaws.com/340928755085/week15_queue",
        MessageBody=current_time
    )

    return {
        'statusCode': 200,
        'body': json.dumps(message)
    }
Step 4: Test the Lambda Function
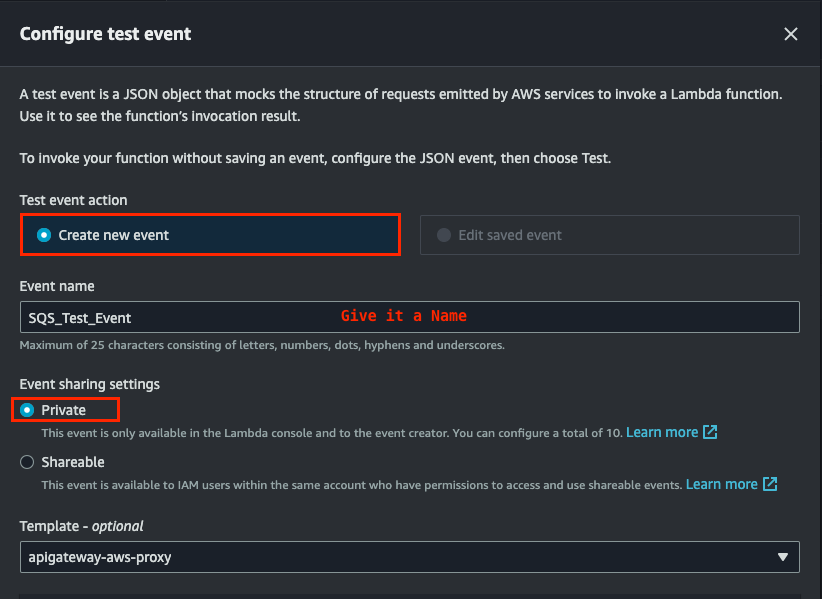
To see if the function is working click on Test which will prompt you to the Configure Test Event window here we need to do some configurations.
Select Create new event
Give your Event a name
For Event sharing settings select Private
Although Template is optional we will be selecting apigatway-aws-proxy
Click on Save
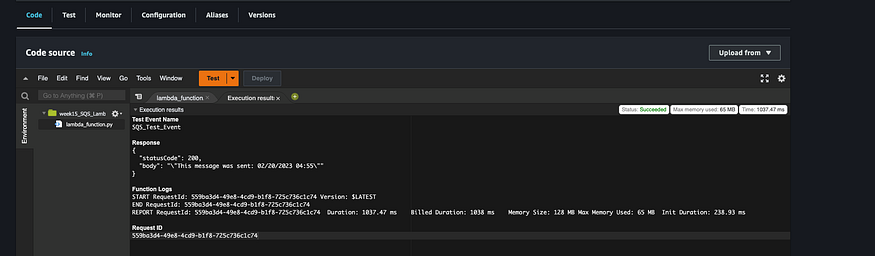
After you are done configuring the Test Event and saving it click on Test.
You will know your lambda function is operating once the response displays a status code of 200 and the body contains the time.
Step 5: Creating the API Gateway Trigger
While you are still on the Lambda function dashboard, click on Add trigger under the Function overview header to create and configure the API Gateway trigger. Here we will do the following configurations.
Under Trigger Configuration drop down menu, select API Gateway
Select Create a new API
For API type select HTTP API
Select open from the drop down menu for Security
Give your API a name under Additional settings
Leave everything else as default and click on Add

Step 6: Verify if the Function is working with our API
From the Function dashboard navigate to Triggers and click on the Configuration tab. Enter the API endpoint URL into the browser after copying it there to utilize the function.
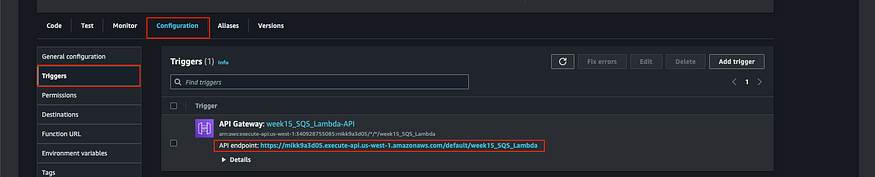
A new tab will launch that will show the current date and time which confirms that the Trigger worked successfully.

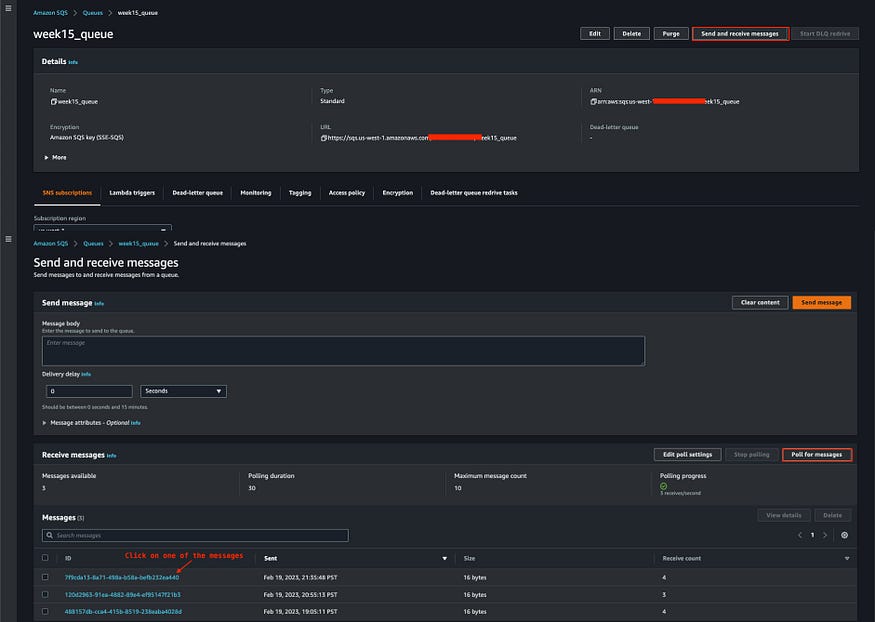
Another way to confirm that our API Trigger is successfully working is by navigating back to the SQS dashboard and doing the following.
Click on the Queue we created earlier
Click on Send and Receive Messages
Click on Poll for messages
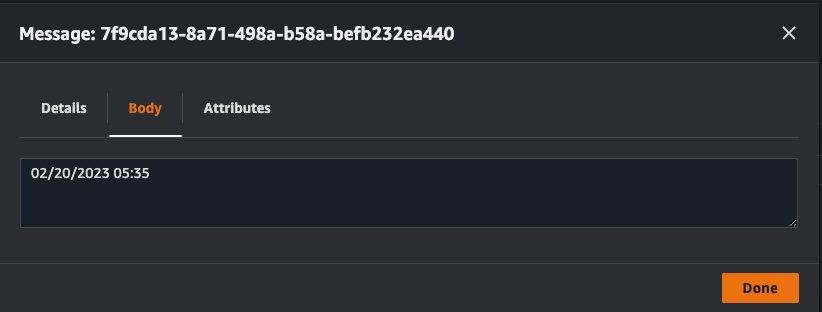
Click on the latest message received
Lastly, click on body to confirm that our Trigger was successfully working.
Thank you for reading my post!
Comments
Loading comments…