React at its core is just a view library that makes your life a lot easier for updating the DOM and managing the state. It takes away a lot of the heavy lifting of managing and worrying about the view part of your beautiful UI.
I am a full-stack engineer who is constantly working with all three major UI frameworks of JavaScript — Angular, React, and Vue.js. As soon as I shift from one framework to the other, I can feel a lot of things that I love as well as things I don’t like that much about the other framework. But depending upon your use case — or sometimes because of business necessity which is derived from a lot of factors — you have to choose your arsenal carefully.
Angular is a fully battery-loaded framework followed by Vue.js and then React which depends a lot on a lot of 3rd party libraries. But with its popularity or the job postings, React is still a major winner depending on which part of the world you belong to.
As a developer, I have a great place in my heart for all these frameworks and these are some amazing technologies we are witnessing. I won’t go into the nitty-gritty of the comparison among these 3 as the internet is teeming with such articles. However, I’ll compare the 3 to help you choose the best depending on your experience and your use case.
Problem Space
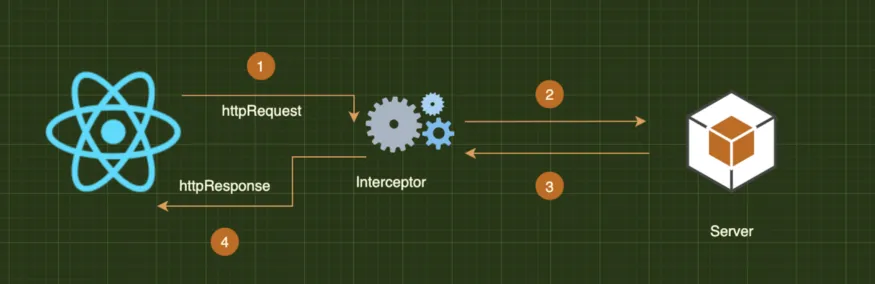
Every dynamic UI needs to interact with the backend and the most popular way of doing this is using HTTP calls. Most of the time there is a certain part of a code that could be a header or specific operation that you need to perform to HTTP call before dispatching the request, or after receiving the response.
Solution
With Angular, it is straightforward and comes added in as a feature in the @angular/common/http module provided by Angular.
If interested in this, you can follow it here.
But our goal is different. We want similar functionality in React. An interceptor that does something before sending the request and receiving the response.
The toolset that we are going to use :
"axios": "^0.21.1",
Axios is a very widely used library and you will find its integration in a lot of projects online.
Rest all will be the same as offered by create-react-app all the basic stuff.
In this beginners tutorial, we will do 2 interceptors.
Basic setup:
import axios from "axios";

import errorInterceptor from "./interceptors/error";

import updateHeaderInterceptor from "./interceptors/updateHeader";

const httpClient = axios.create({

baseURL: process.env.REACT_APP_API_URL,

});

errorInterceptor(httpClient);

updateHeaderInterceptor(httpClient);

export default httpClient;
Invocation call:
React.useEffect(() => {

httpClient.get("/");

}, []);
Request Interceptor:
This is an interceptor that sits between all your requests and attaches a JWT token to all the requests for authentication of our client. JWT here is an example. You can do all sorts of fancy stuff with the request before it’s dispatched.
const updateHeaderInterceptor = (*axiosInstance*) => {

*axiosInstance*.interceptors.request.use((*config*) => {

   const jwtToken = "Bearer Token from Localstorage";

*   config*.headers["Authorization"] = jwtToken;

   return *config*;
},(*error*) => {

});

};

export default updateHeaderInterceptor;
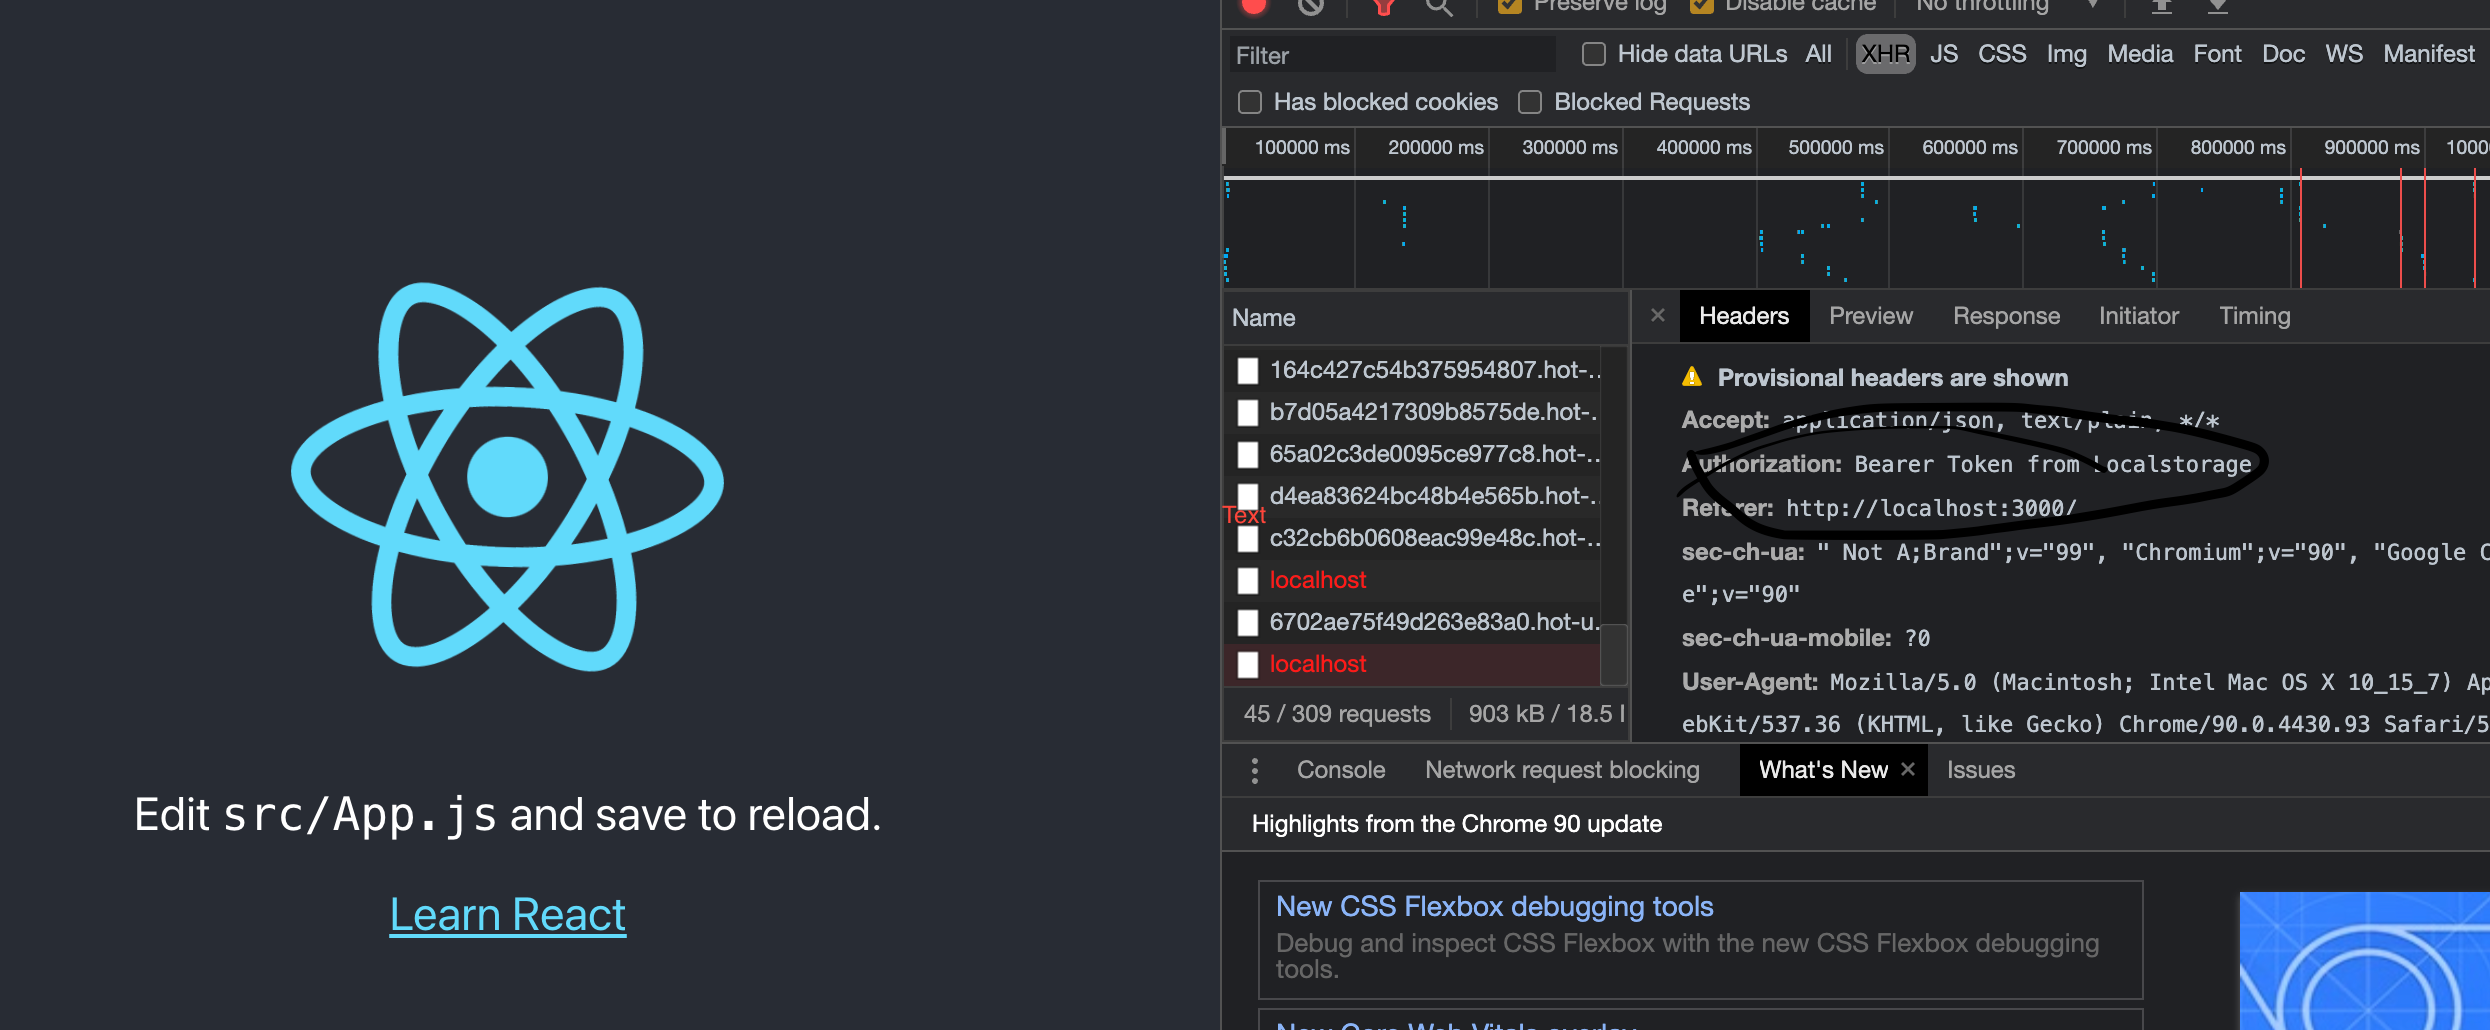
We can see the authorization attached by our interceptor with this pattern. We could add our JWT token to all our requests with just a few lines of code.
Response Interceptor:
const DEBUG = process.env.REACT_APP_NODE_ENV !== "production";

const errorInterceptor = (*axiosInstance*) => {

*axiosInstance*.interceptors.response.use((*response*) => {

  //Response Successful

},(*error*) => {

   if (*error*?.status?.code === 401) {

     //Unauthorized

*     //redirect to Login*

   } else {

*    //dispatch your error in a more user friendly manner*

      if (DEBUG) {
      //easier debugging

      console.group("Error");

      console.log(*error*);

      console.groupEnd();

     }

  }

});

};

export default errorInterceptor;
Here, we can see our console group error since we don’t have any backend connected with our UI.

Coming towards the end, this was a very basic tutorial and we could see the potential of how much we can do using this pattern with very few lines of code. We can manage all our error handling in one place, and along with that, have common patterns into their own interceptors making them very easy to understand and work with on a daily basis.
Stay tuned for more real-world problems and their solutions from me as a full-stack engineer and architect. Peace!
Comments
Loading comments…