Image filtering can be used to reduce the noise or enhance the edges of an image. This can help improve the accuracy of machine learning models.
Python can also enhance the appearance of images using techniques like color saturation or sharpening. When talking about images in this context, they can be thought of as arrays of numbers that represent pixels. Color images will have size (len_pixels, witdth_pixels, 3). The final dimension is three because there is a number representing the red, green, and blue values in each pixel.
The following techniques are demonstrated on an image I took of Wat Pho in Bangkok, Thailand.
# Get set up
import cv2
import numpy as np
import matplotlib.pyplot as plt

%matplotlib

img = cv2.imread("wat_pho.png")
img = cv2.cvtColor(img, cv2.COLOR_BGR2RGB) # Fixes color read issue
Averaging
Averaging, or mean filtering, uses a square sliding window to average the values of the pixels. The window is centered over a pixel, then all pixels within the window are summed up and divided by the area of the window (e.g. a 3x3 window will be divided by 9). The larger the window, the blurrier the image.
av3 = cv2.blur(img,(3,3))
av5 = cv2.blur(img,(5,5))

# Plot the image. This code is excluded for the rest of the article.
plt.gcf().set_size_inches(25,25)
plt.subplot(131),plt.imshow(img),plt.title('Original')
plt.xticks([]), plt.yticks([])
plt.subplot(132),plt.imshow(av3),plt.title('Averaging - 3x3')
plt.xticks([]), plt.yticks([])
plt.subplot(133),plt.imshow(av5),plt.title('Averaging - 5x5')
plt.xticks([]), plt.yticks([])
plt.show()
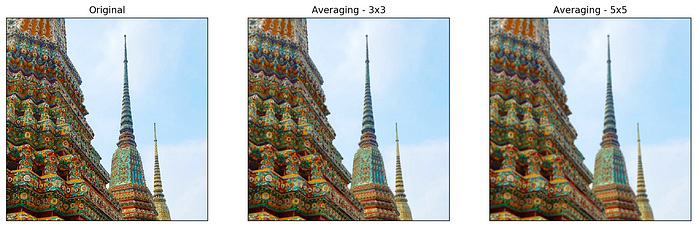
Average Blurring
Median
Median filtering is similar to averaging, but the central pixel is replaced with the median value. This kind of filter is good for reducing static or salt and pepper noise in images. One benefit of the median filter is that it retains the edges of an image.
def noisy(image):
    # https://stackoverflow.com/questions/22937589/how-to-add-noise-gaussian-salt-and-pepper-etc-to-image-in-python-with-opencv
    row,col,ch = image.shape
    s_vs_p = 0.5
    amount = 0.04
    out = np.copy(image)
    # Salt mode
    num_salt = np.ceil(amount * image.size * s_vs_p)
    coords = [np.random.randint(0, i - 1, int(num_salt))
          for i in image.shape]
    out[coords] = 1
    # Pepper mode
    num_pepper = np.ceil(amount* image.size * (1. - s_vs_p))
    coords = [np.random.randint(0, i - 1, int(num_pepper))
          for i in image.shape]
    out[coords] = 0
    return out

noisy_img = noisy(img)
median = cv2.medianBlur(img,5)
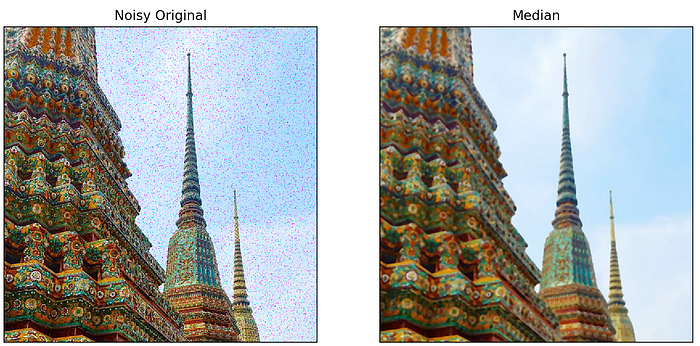
Noisy original denoised with median filtering.
Gaussian filter
Gaussian blurring looks at each pixel, then replaces that pixel value with the pixel value times the value drawn from the Gaussian distribution made by the pixels around it. You must specify the standard deviation in the x and y directions. A higher standard deviation leads to more blur.
gb = cv2.GaussianBlur(img, (3,3), 1,1)
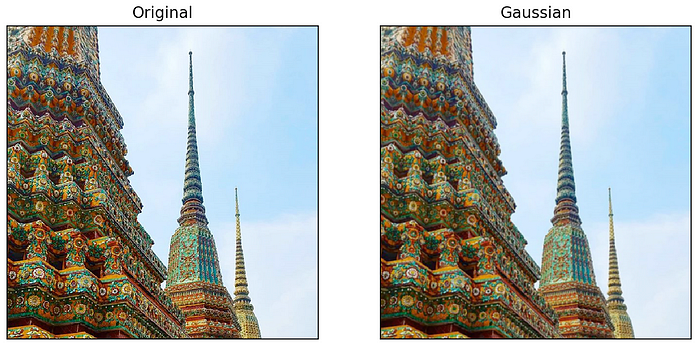
Gaussian filtering
Bilateral filter
The bilateral filter is similar to the Gaussian filter, but if pixels are only filtered if they are ‘spatial neighbors’. That is, if the neighbor pixels are too different from the center pixel, the neighbor pixel will not be added to the Gaussian filter. Similar neighbors will still be used for filtering. This means that the bilateral filter performs Gaussian filtering, but preserves edges.
bilateral = cv2.bilateralFilter(img,9,75,75)
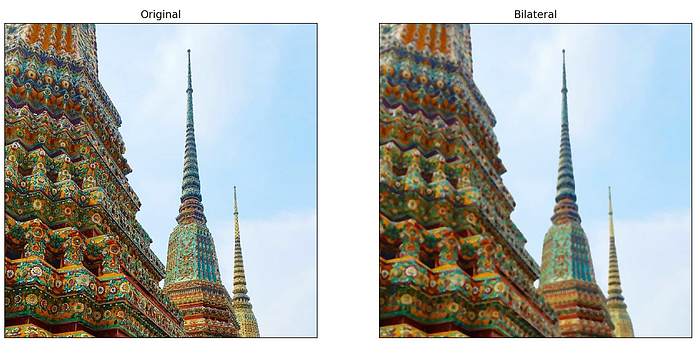
Bilateral filtering
Edge Detection
Edge detection in Python takes several steps:
- Gaussian blurring removes noise (this is where the sigma parameter comes in).
- Edges are detected using Sobel edge detection. This method calculates the gradient of image intensity at each pixel. This means it can find how abruptly or smoothly the image changes at each pixel, and in what direction. If the change is very abrupt, then it can be assumed that the pixel is part of an edge.
- Pixels that show an abrupt change, but seem too far from an edge are removed.
- Extraneous pixels caused by noise or milder color variation than desired are eliminated. If a pixel’s gradient value — based on the Sobel differential — is above the high threshold value, it is considered a strong candidate for an edge. If the gradient is below the low threshold value, it is turned off. If the gradient is in between, the pixel is considered a weak candidate for an edge pixel.
- A process called hysteresis is used to finally determine the edges. This method examines weak candidate pixels, and if they are connected to strong candidate pixels, they are considered to be edge pixels; the remaining, non-connected weak candidates are turned off.
Although a complex process, the code to do it in Python is relatively straightforward. Here, sigma represents how strong the Gaussian blurring is. The high and low thresholds will determine which pixels are weak or strong candidates for edges.
import skimage
import skimage.feature
import skimage.viewer

img = cv2.imread("wat_pho.png", 0)

edges2 = skimage.feature.canny(
    image=img,
    sigma=2,
    low_threshold=2,
    high_threshold=10,
)

edges5 = skimage.feature.canny(
    image=img,
    sigma=5,
    low_threshold=2,
    high_threshold=10,
)
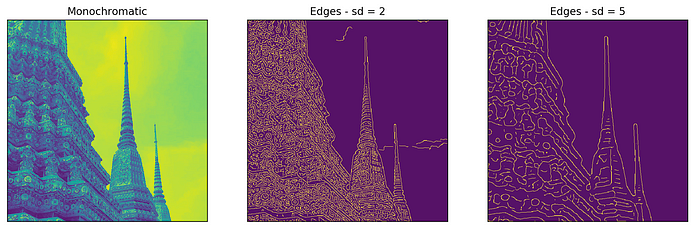
Side note: Why is the image colored this way? When calling _cv2.imread()_, setting the second parameter equal to _0_ will result in a grayscale image. When calling _plt.imshow()_, the default _cmap_ to display a grayscale image is _‘viridis’_, which has extremes of purple and yellow rather than black and white. To view a grayscale image, add the argument _cmap = ‘gray’_ to the _plt.imshow()_ call.
Brightness
Increasing the brightness of an image is accomplished by increasing each pixel’s RGB values slightly towards white.
import PIL
from PIL import ImageEnhance

img = PIL.Image.open('wat_pho.png')
converter = ImageEnhance.Brightness(img)
img2 = converter.enhance(0.5)
img3 = converter.enhance(2)
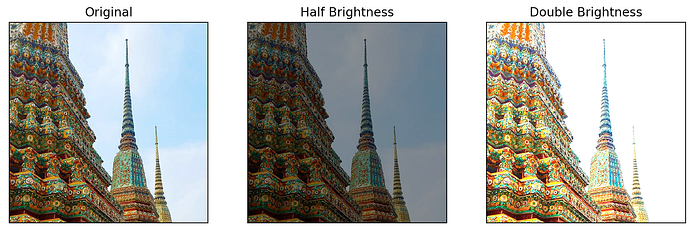
Altering the brightness of an image
Note: for the remainder of the code, only the _converter = ..._ line will need to be changed. This will be the only line posted for the rest of this article.
Sharpen
Sharpening an image increases the appearance of details in an image. This is done by exaggerating the brightness difference along edges. Sharpening simply makes edges more pronounced.
converter = ImageEnhance.Sharpness(img)
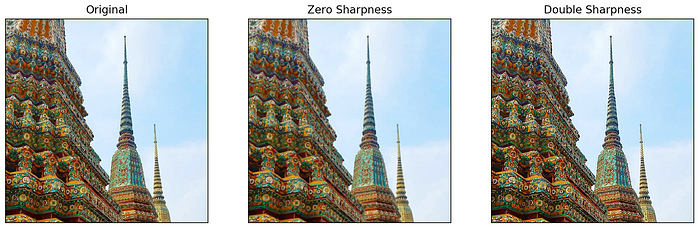
Editing the sharpness of an image
Contrast
Contrast is the separation between the darkest and brightest areas of an image. Imagine the pixels of a grayscale image laid out on a histogram. This histogram will be shaped roughly like a bell curve, where pixels at the lowest end are black and at the highest end are white, with shades of grey in the middle. To increase the contrast, you want to take some pixels out of the middle and push them towards the edges. Decreasing contrast pulls pixels at the edge towards the middle. By increasing contrast, you de facto increase sharpness as well.
converter = ImageEnhance.Contrast(img)
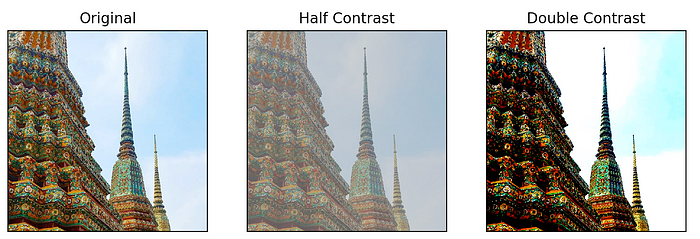
Altering the contrast of an image
Saturation
Color saturation is the intensity and purity of a color as displayed in an image. The higher the saturation of a color, the more vivid and intense it is. The lower a color’s saturation, the closer it is to pure gray on the grayscale. To increase the saturation of a pixel, push its value away from gray on the grayscale.
converter = ImageEnhance.Color(img)
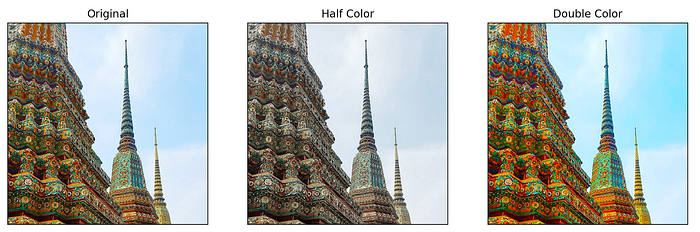
Decreasing and increasing saturation of an image
Conclusion
There are many ways to filter images in Python. Some are helpful for machine learning, others are more for aesthetics. In this article, I have walked through a few ways to alter images in Python, with code. Thanks for reading.
Sources:
https://datacarpentry.org/image-processing/08-edge-detection/
https://pillow.readthedocs.io/en/4.2.x/reference/ImageEnhance.html
Comments
Loading comments…