
Recently, AWS introduced a powerful feature called EC2 Instance Connect Endpoint. This feature enables seamless connection between public and private resources without the need for a bastion and public IP address. Instead, it establishes secure connections through private network paths, ensuring that access to the instance is restricted to authorized users while maintaining a high level of security.
Comparing EC2 Bastion Server and EC2 Instance Connect Endpoint
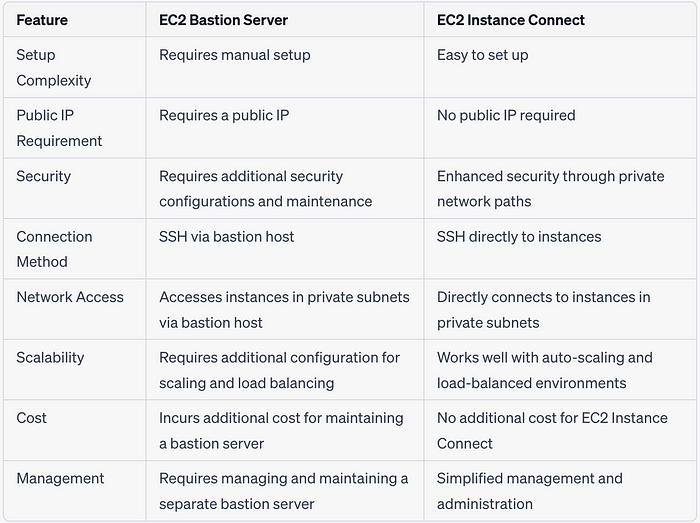
Now, let’s dive deeper into EC2 Instance Connect endpoint to understand the potential impacts and the how-to’s of this newly launched feature.
Prerequisites for hands-on**:**
Before we get hands-on, it’s vital to ensure user has the necessary permissions to create the EC2 instance connect endpoint. Below IAM permissions are needed to allow users to use EC2 Instance Connect Endpoint to connect to end resources.
{
  "Version": "2012-10-17",
  "Statement": [
    {
      "Sid": "EC2InstanceConnectEndpoint",
      "Effect": "Allow",
      "Action": [
        "ec2-instance-connect:CreateInstanceProfile",
        "ec2-instance-connect:CreateVpcEndpoint"
      ],
      "Resource": "*"
    },
    {
      "Sid": "EC2InstanceOperations",
      "Effect": "Allow",
      "Action": [
        "ec2:RunInstances",
        "ec2:CreateSecurityGroup",
        "ec2:DescribeInstances",
        "ec2:DescribeSecurityGroups"
      ],
      "Resource": "*"
    }
  ]
}
OS of the instance should be Amazon Linux 2 2.0.20190618 or later, or Ubuntu 20.04 or later.
Prerequisite Environment Details For This Walkthrough:
Configure a Virtual Private Cloud (VPC) where two private subnets associate in two different Availability zones (AZs). Set up one or more Amazon EC2 instances with your desired configuration, which should be located within each private subnet and should not have a public IP address.
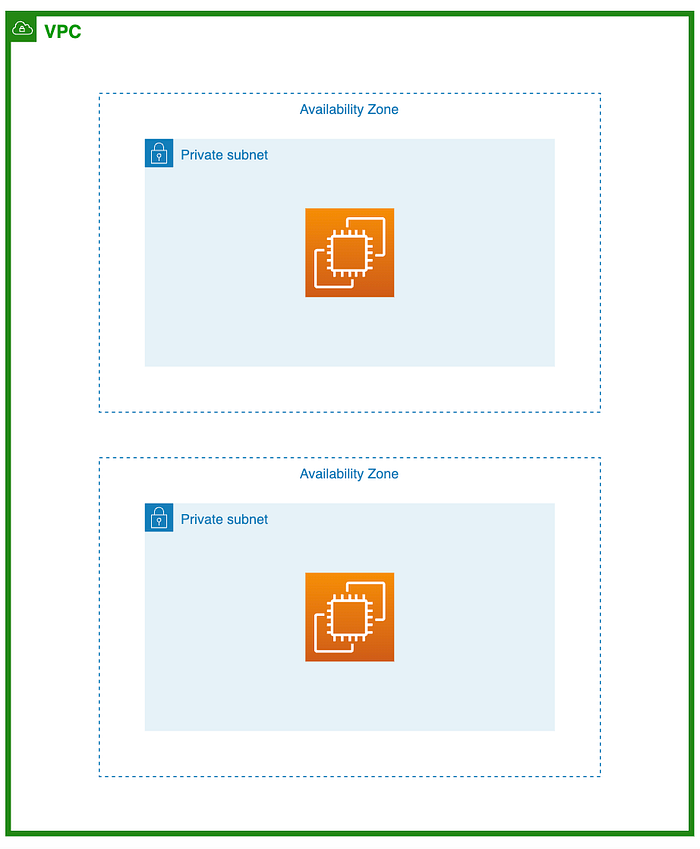
Once these prerequisites are in place, we can proceed to set up the EC2 Instance Connect Endpoint.
Let’s Get Started
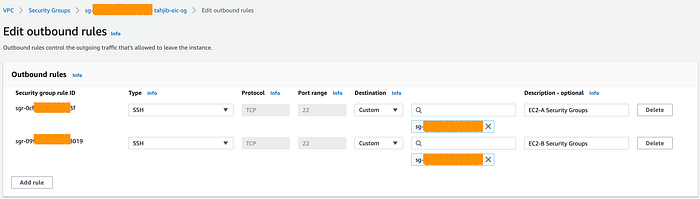
To use EC2 Instance Connect Endpoint (EICE) we need to create security group for it . EICE doesn’t require inbound rules, but we should open outbound ports to the specific resource security group to Enhance Security of the enviroment. In the below screenshot, I have used the resources(EC2) security group as the destination.
Now, navigate to the VPC service in the AWS Management Console. Go to the “Endpoints” menu and select the “EC2 Instance Connect Endpoint” option. Choose the VPC where your end resources are located, select the security group you created in the previous step, and choose a private subnet.
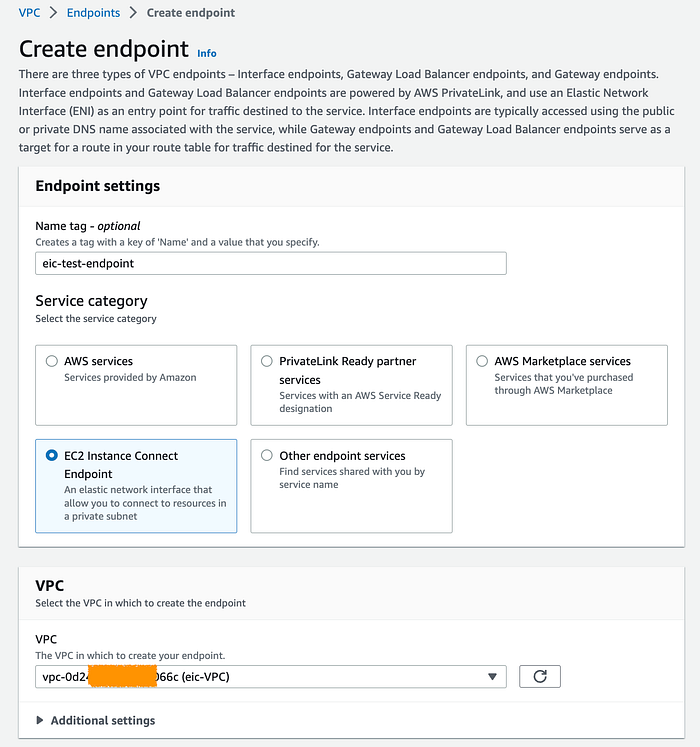

Note: We can only have one EIC endpoint per VPC.
After Clicking on Create endpoint, allow it some time to become available.
Now, we also need to update the security group of our end resources which will allow end resources to receive connections from EICE. Here I have created a new security group and allowed inbound connections on ssh ports from EICE security group and attached it to both of my EC2 resources.
Connectivity Test
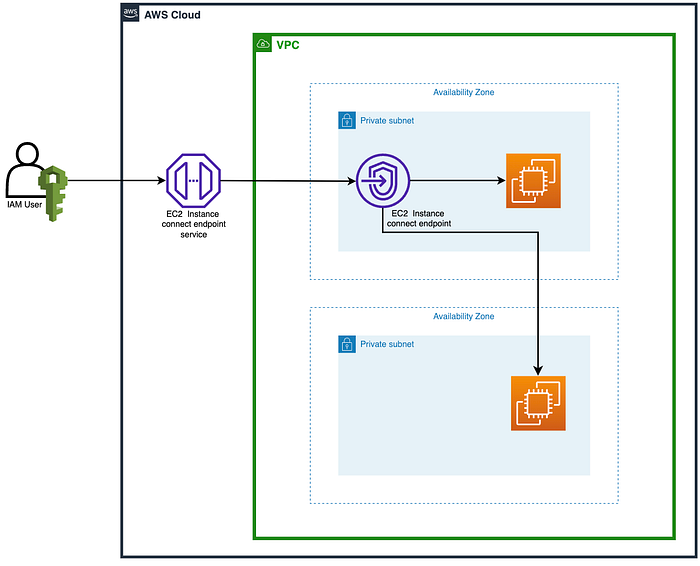
Final Architecture of Accessing to EC2 with “EC2 Instance Connect Endpoint”
There are two straightforward methods to access an EC2 instance using EC2 Instance Connect endpoint: using the AWS console and AWS CLI.
From Amazon EC2 Console
We can access EC2 directly through the AWS web console. To do that we navigate to the EC2 console, right-click on the corresponding EC2 instance, and select ‘Connect’. This action will open a terminal connected to our EC2 instance. Choose the EC2 Instance Connect tab. To establish an SSH connection to our EC2 instance using the Amazon EC2 console, we need to follow these steps. First, select the “Connect using EC2 Instance Connect Endpoint” option from the Connection type menu. Then, verify the correct user name for your instance. In the Max tunnel duration (seconds) field, enter the maximum duration for the SSH connection, allowing maximum time for our tasks. Finally, choose the appropriate EC2 Instance Connect Endpoint from the instance’s Virtual Private Cloud (VPC).
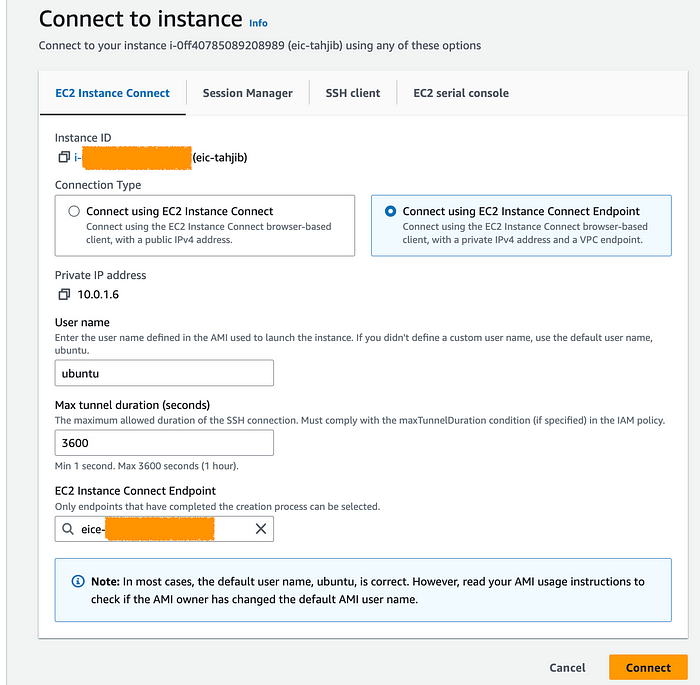
By following abovesteps, we will be able to establish a secure and efficient SSH connection to our EC2 instance from aws web console.
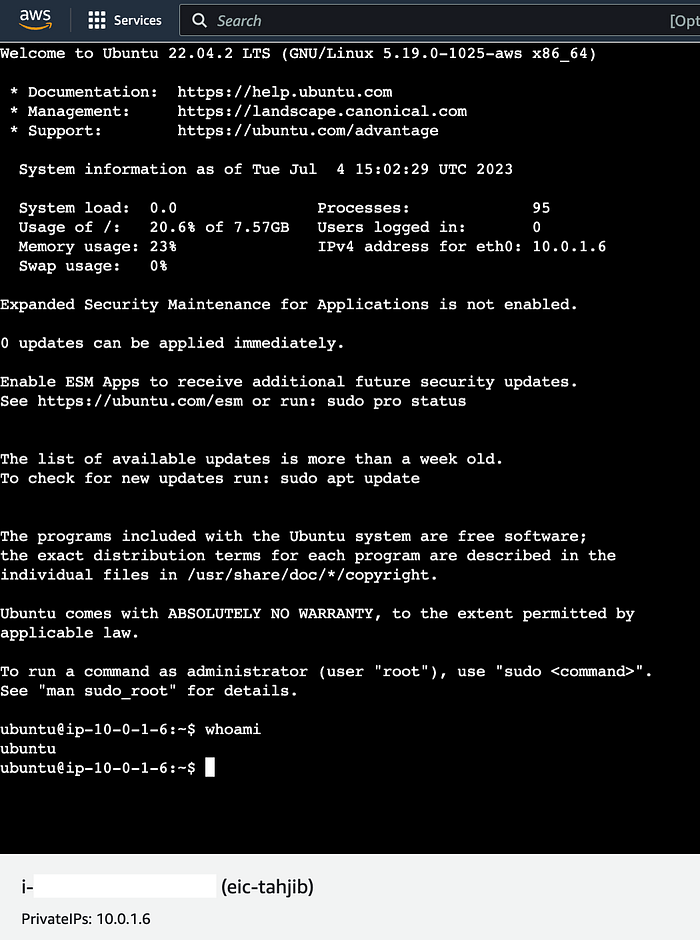
Accessing EC2 Instance from web console
From SSH
To connect to our EC2 instances, we can use SSH and create a private tunnel using the open-tunnel command. We have the option to use open-tunnel in either single-connection or multi-connection mode.Run the following command in your local terminal, replacing ‘my-key-pair.pem’ with your pem file and ‘i-xxxxxxxxxxxx’ with your instance ID:
ssh -i my-key-pair.pem ubuntu@i-xxxxxxxxxxxx \
  -o ProxyCommand='aws ec2-instance-connect open-tunnel --instance-id i-xxxxxxxxxxxx'
For:
-i– Specify the key pair that was used to launch the instance._ec2-user_@_i-0123456789example_– Specify the username of the AMI that was used to launch the instance, and the instance ID.--instance-id– Specify the ID of the instance to connect to. Alternatively, specify%h, which extracts the instance ID from the user.
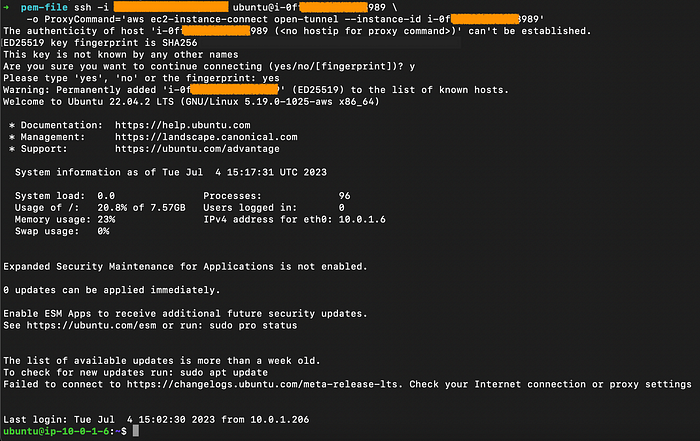
Single-connection
For multiple connection connectivity test, Follow this Blog.
In Conclusion, EC2 Instance Connect Endpoint is a secure solution to connect to your instances via SSH or aws web console in private subnets without IGWs, public IPs, agents, and bastion hosts. By configuring an EIC Endpoint for your VPC, you can securely connect using your existing client tools or the Console/AWS CLI. To learn more, visit the EIC Endpoint documentation.
Comments
Loading comments…