Mounting Amazon S3 buckets as local drives is a powerful way to seamlessly integrate cloud storage into your daily workflow. Last month, AWS released mountpoint for S3 as an open-source file client that you can use to mount an S3 bucket on your compute instance (Linux) and access it as a local file system. While this client tool has been only Linux-centric, this blog will introduce you to an innovative approach for Windows users. We’ll explore how to mount Amazon S3 buckets on Windows using Windows Subsystem for Linux 2 (WSL 2), opening up new possibilities for cloud storage integration on Windows platforms.
Prerequisites:
Before we dive into the process, ensure you have the following prerequisites in place:
- Windows 10 or Windows 11: Make sure you’re running a compatible version of Windows that supports WSL 2.
- WSL 2 Installed: WSL 2 must be installed and configured on your Windows system. You can follow Microsoft’s official guide for installation instructions.
- AWS Account: You’ll need an Amazon Web Services (AWS) account with access to the S3 service.
Step 1: Installing WSL 2:
If you haven’t already installed WSL 2, follow the official Microsoft documentation to set up WSL 2 on your Windows machine. Ensure that you’ve selected a Linux distribution (e.g., Ubuntu) to install.
Step 2: Configuring WSL 2 with AWS CLI:
- Open your WSL 2 terminal.
- Install the AWS CLI by running the following command:
sudo apt-get install awscli
- Configure the AWS CLI with your AWS access key ID and secret access key (and optional session token) by running:
aws configure
We recommend you use short-term AWS credentials whenever possible.
Make sure that the credentials for the IAM user or short-term temporary credentials for an IAM role needs minimum permissions for S3:
s3:ListBuckets3:GetObjects3:PutObjects3:AbortMultipartUploads3:DeleteObject
You can create a custom policy with these permissions and attach it to the IAM user. If you are using a Windows EC2 instance, mountpoint will automatically use credentials from an IAM role associated with your Windows EC2 instance.
Step 3: Installing Mountpoint for S3:
To mount S3 buckets as local drives, we’ll download the AWS official Debian package for Ubuntu mount-s3.deb using the wget command. Follow these steps to install it on your WSL 2 instance:
wget https://s3.amazonaws.com/mountpoint-s3-release/latest/x86_64/mount-s3.deb
sudo apt-get install -y ./mount-s3.deb
Verify that Mountpoint for Amazon S3 is successfully installed by entering the following command:
mount-s3 --version
You should see output similar to the following:
mount-s3 1.0.0
Next, we need to need to make some changes to enable User Access from Windows (Important for WSL):
Mountpoint for S3 uses FUSE (Filesystem in Userspace) and by default, FUSE mounts are accessible only to the user who mounted them. However, in a WSL environment, you want Windows user to access the mounted S3 bucket. To enable this, you need to add the user_allow_other option to the FUSE configuration.
Edit the FUSE configuration file with a text editor (e.g., nano):
sudo nano /etc/fuse.conf
Uncomment or add the following line to the file:
user_allow_other
Save the file and exit the text editor.
This step is important for ensuring that all authorized users on your system, including within WSL, can work with the mounted S3 bucket.
Finally, mount your bucket by executing the below command, replacing YOUR-S3-BUCKET-NAME with the name of your bucket and /path/to/mount with the directory you want to mount the bucket to. Please note that the WSL directory /path/to/mount needs to be empty before mounting the S3 bucket.
mount-s3 YOUR-S3-BUCKET-NAME /path/to/mount --allow-other
You should get a successful confirmation as shown below from the above mount-s3 command.
bucket YOUR-S3-BUCKET-NAME is mounted at /path/to/mount
Tips (optional):
- Using S3 Transfer Acceleration
To use Amazon S3 Transfer Acceleration to optimize transfer speeds when accessing your S3 bucket over the internet, use the --transfer-acceleration command-line flag. Transfer Acceleration must be enabled on your S3 bucket to use this option.
You can also direct all Amazon S3 requests made by s3 and s3api AWS CLI commands to the accelerate endpoint: s3-accelerate.amazonaws.com. To do this, set the configuration value use_accelerate_endpoint to true in your AWS Config file or run CLI command below.
aws configure set default.s3.use_accelerate_endpoint true
- Deleting or Overwriting objects using Mountpoint
By default, Mountpoint allows creating new files, and does not allow deleting existing objects or overwriting existing objects. You can adjust these defaults in two ways:
- If you want to allow file deletion, use the
--allow-deletecommand-line flag. When you delete a file from your Mountpoint file system with this flag enabled, the corresponding object is immediately deleted from your S3 bucket. - If you want to forbid all mutating actions on your S3 bucket, use the
--read-onlycommand-line flag.
You cannot currently use Mountpoint to overwrite existing objects. However, if you use the --allow-delete flag, you can first delete the object and then create it again.
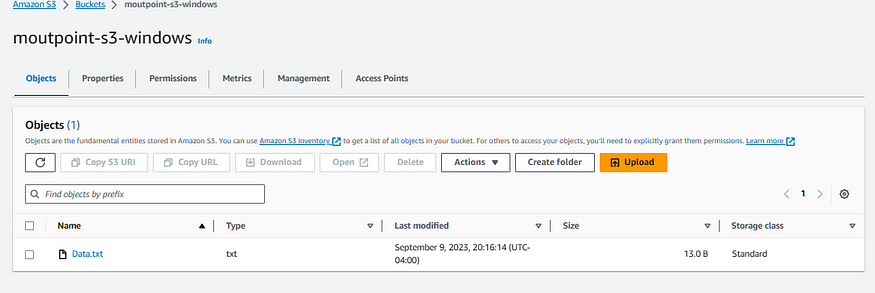
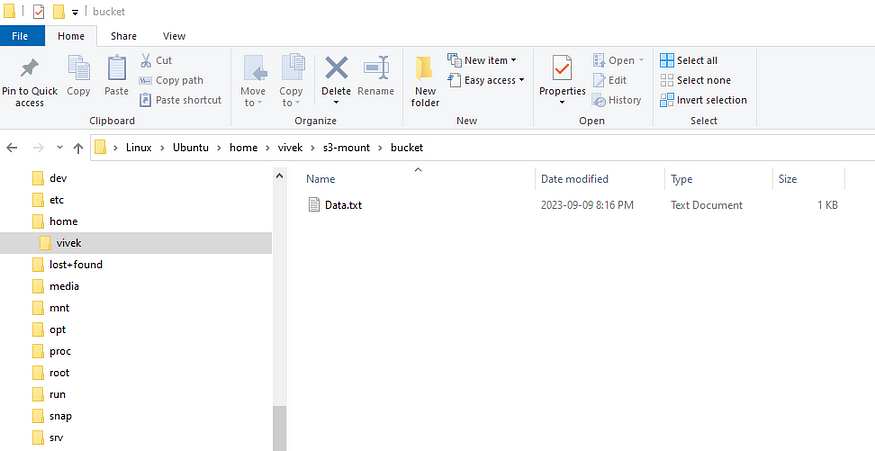
Step 4: Access S3 Files:
You can now access the contents of the S3 bucket from the mounted directory as if they were local files. Any changes made within the mounted directory will be synchronized with the S3 bucket.
ls /path/to/mount
echo  "Hello World!" > /path/to/mount/Data.txt
cat /path/to/mount/Data.txt
Step 5: Unmount the S3 Bucket:
To unmount the S3 bucket when you’re done, use the umount command (you might need sudo):
umount /path/to/mount
Replace /path/to/mount with the directory where the S3 bucket is mounted.
That’s it! You can now use the mount-s3 package to easily mount and access Amazon S3 buckets on your Windows system.
Note: You can use Mountpoint to access S3 objects in all storage classes except S3 Glacier Flexible Retrieval, S3 Glacier Deep Archive, S3 Intelligent-Tiering Archive Access Tier, and S3 Intelligent-Tiering Deep Archive Access Tier.
Comments
Loading comments…