When it comes to Authenticating users, specifically in Django, there are numerous options provided for developers that gives us flexibility based on our specific needs. For example a developer can use the default Django’s built-in authentication system, JSON web token based authentication (using simple JWT) and Third party authentications to name a few.
But if you are looking for a straightforward and secure method to allow your users to sign in to your app without too much hassle, using social logins like Google, GitHub, and Twitter is the way to go.
In this Article we will deep dive into Authenticating users by their Google account using a third-party package called Django-allauth.
Part 1 :- Configuration
- Create a virtual environment: - Lets start by creating a virtual environment to contain our application, name it venv and Activate it. (I’m assuming you follow these steps with a Windows OS.).
Python -m virtualenv venv
venv/Scripts/activate
2. Installing important packages: - next step is installing the packages necessary to built the project. These are
pip install django
pip install django-allauth
3. creating a new Django project: - then we create a new Django project named core by running the following command in out terminal.
django-admin startproject core .
4. Configuring settings.py file in the core folder: - as the django-allauth documentation requires, we go to our project’s core directory and add the following fields in settings.py file .
# Specify the context processors as follows:
TEMPLATES = [
    {
        'BACKEND': 'django.template.backends.django.DjangoTemplates',
        'DIRS': [],
        'APP_DIRS': True,
        'OPTIONS': {
            'context_processors': [
                # Already defined Django-related contexts here

                # `allauth` needs this from django
                'django.template.context_processors.request',
            ],
        },
    },
]

AUTHENTICATION_BACKENDS = [

    # Needed to login by username in Django admin, regardless of `allauth`
    'django.contrib.auth.backends.ModelBackend',

    # `allauth` specific authentication methods, such as login by e-mail
    'allauth.account.auth_backends.AuthenticationBackend',

]

INSTALLED_APPS = [
    ...
    # The following apps are required:
    'django.contrib.auth',
    'django.contrib.messages',
    'django.contrib.sites',

    'allauth',
    'allauth.account',
    'allauth.socialaccount',

    # ... include the providers you want to enable:

    'allauth.socialaccount.providers.facebook',

    'allauth.socialaccount.providers.github',

    'allauth.socialaccount.providers.google',

    'allauth.socialaccount.providers.microsoft',

    'allauth.socialaccount.providers.paypal',

    'allauth.socialaccount.providers.reddit',

    'allauth.socialaccount.providers.telegram',

    'allauth.socialaccount.providers.twitter',


]

LOGIN_REDIRECT_URL = '/'

SITE_ID = 1

# Provider specific settings
SOCIALACCOUNT_PROVIDERS = {
    'google': {
        # For each OAuth based provider, either add a ``SocialApp``
        # (``socialaccount`` app) containing the required client
        # credentials, or list them here:
        'APP': {
            'client_id': '123',
            'secret': '456',
            'key': ''
        }
    }
}
The required fields added in the settings.py are: -
- ‘django.template.context_processors.request’, in the Templates list.
- ‘AUTHENTICATION_BACKENDS’ list provides allauth authentication and still retain the default username & password authentication.
- ‘django.contrib.auth’ , 'django.contrib.messages' and ‘django.contrib.sites’ in INSTALLED*APPS list *(_these probably already exist upon project creation. if not add them to the list.)
- ‘allauth.socialaccount.providers.google’, in INSTALLED_APPS list. (Although there are various providers that can be used with
django-allauth, for the purpose of this article, we will be using Google Authentication as our provider to keep things simple. It is possible to modify or add providers as needed in the future.) - ‘allauth’ , ‘allauth.account’ and ‘allauth.socialaccount’ in INSTALLED_APPS list.
- ‘SITE_ID = 1’
- SOCIALACCOUNT_PROVIDERS dict. These contain the corresponding provider’s secret and client_id. (We will configure these next.)
- ‘ LOGIN_REDIRECT_URL = ‘/’ ’ (or by default it redirects us to profile page.)
As we can see, Django-allauth provides excellent flexibility by supporting a wide range of authentication providers, giving developers many options to choose from and making it easier to integrate different authentication methods into their projects.
5. Include the allauth URL patterns in your Django project’s **urls.py** **file: -**Our next step will be to add the path allauth.urls in the core.urls.py file.
from django.contrib import admin
from django.urls import path,include

urlpatterns = [
    path('admin/', admin.site.urls),

    #Add this to urlpatterns
    path('accounts/', include('allauth.urls')),
]
After completing the above process, the next task is to proceed to https://console.cloud.google.com/ and obtain our client secret and client_id.
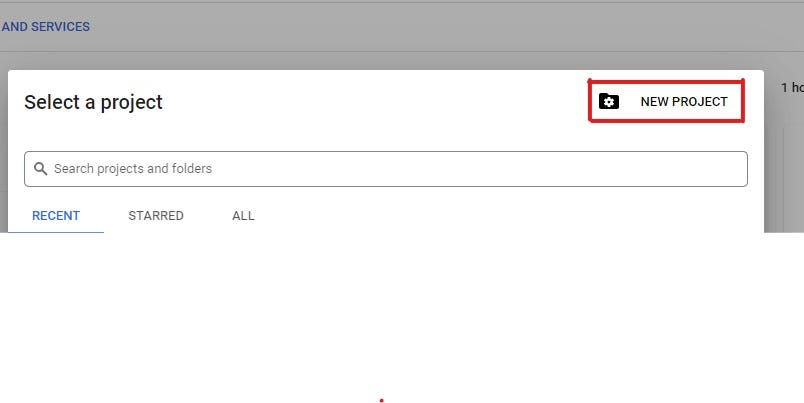
6. Go ahead and navigate to https://console.cloud.google.com/ and click on APIs & Services. There you will find a dashboard and at the top click on the New Project button as shown below.
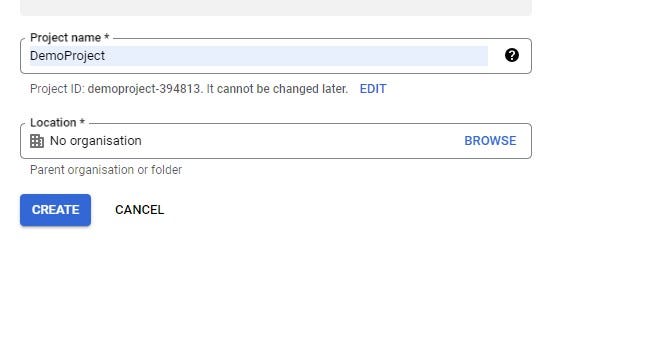
This will open another page and you will be prompted to enter a project name and location. We will name our project and click on create to proceed.
After the project is created successfully we will be redirected to the dashboard. Again in the navigation click on the OAuth consent screen and we will be provided with another form. In this form fill out the ‘App name’, ‘User support email’ and at bottom ‘Developer contact information’ fields and click ‘Save And Continue’. (Other fields are optional.)
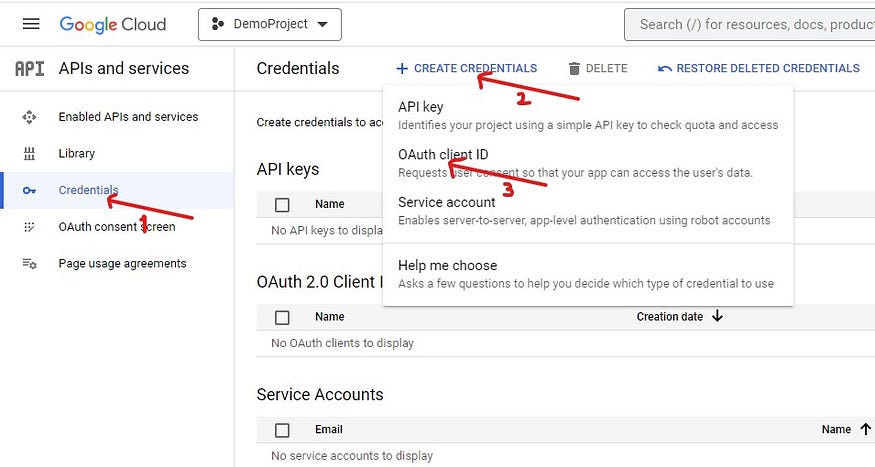
Then the next step is to go back to the dashboard and click on Credentials>Create Credentials>OAuth Client ID as shown below.
(Please ensure that you are operating within the project that was recently created, which in our case is ‘DemoProject’.)
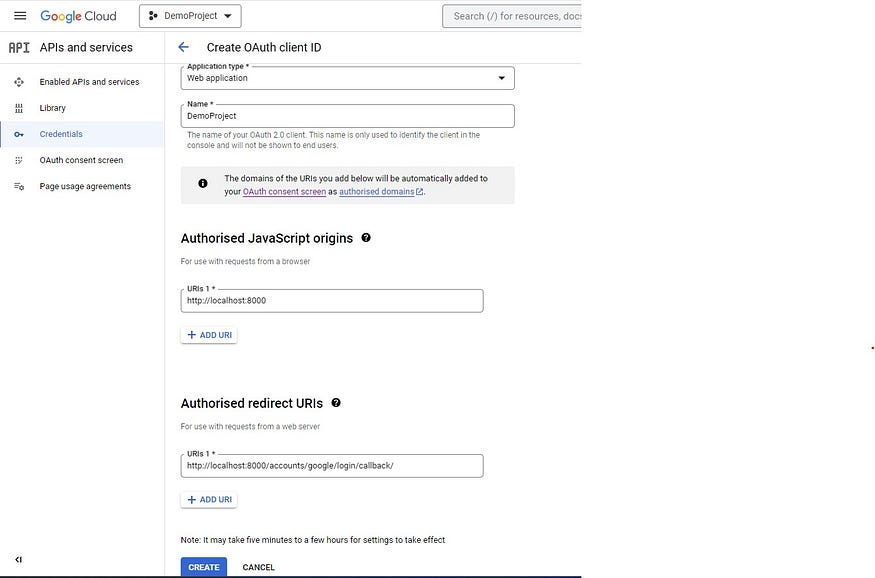
At the next page we will be asked to enter Application type, Name, Authorized JavaScript origins and Authorized redirect URIs. These information are important and should be added carefully as per the documentation.
- Application Type = Web application
- Name = DemoProject
- Authorized JavaScript origins= http://localhost:8000
- Authorized redirect URIs = http://localhost:8000/accounts/google/login/callback/
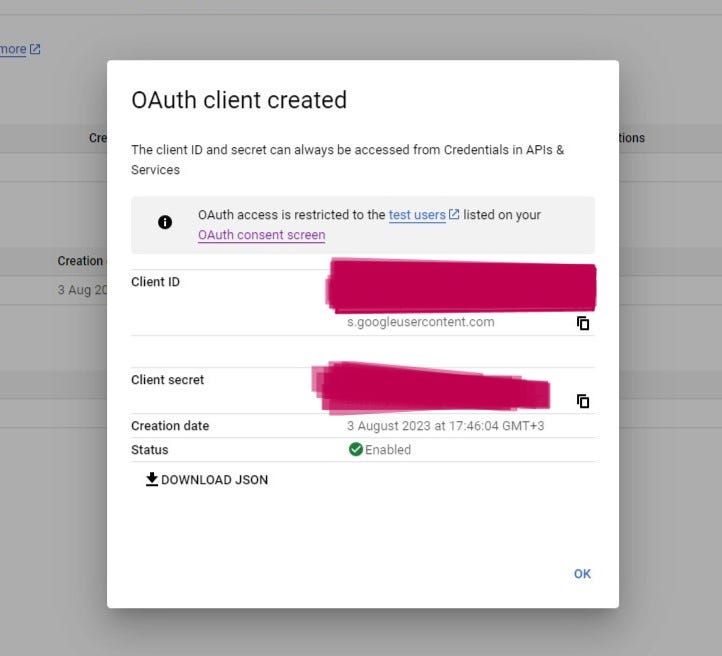
After that is done, lets go ahead and click on the create. This will then open a popup that provides us with our clientid and client secret so that we can copy and paste it in our _settings.py file accordingly.
Ok now that we have covered the necessary steps in detail, we are ready to proceed with testing the functionality. To ensure everything works correctly, let’s execute the following commands to migrate the changes to the database and start the server:
Python manage.py makemigrations
Python manage.py migrate
python manage.py runserver
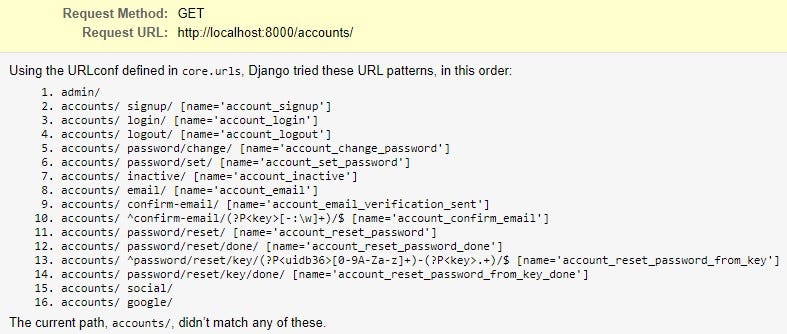
Django-allauth offers a range of routes that correspond to specific views and handle various account-related functionalities as shown below.
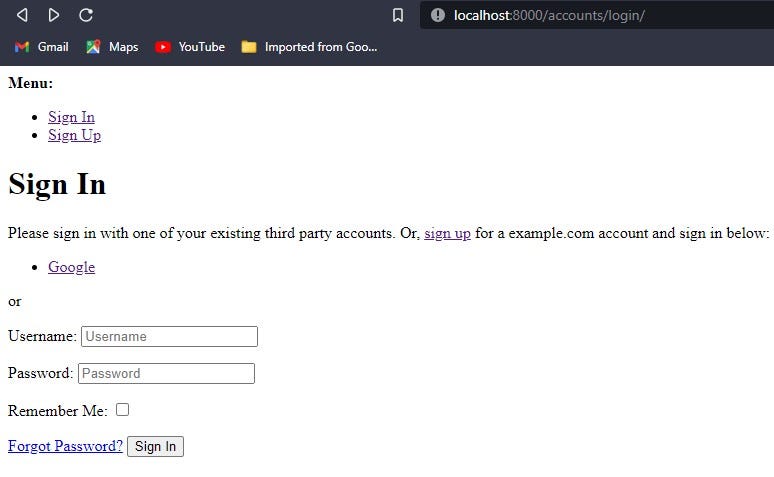
Let’s open our browser and type ‘http://localhost:8000/accounts/login/' to access the sign-in page of our Django app. Here, we’re met with two options for signing in. The first option is the traditional username and password fields, allowing users to sign in using their credentials. The second option presents a convenient Google button, which upon clicking, redirects users to another page where they can easily sign in using their Google account.
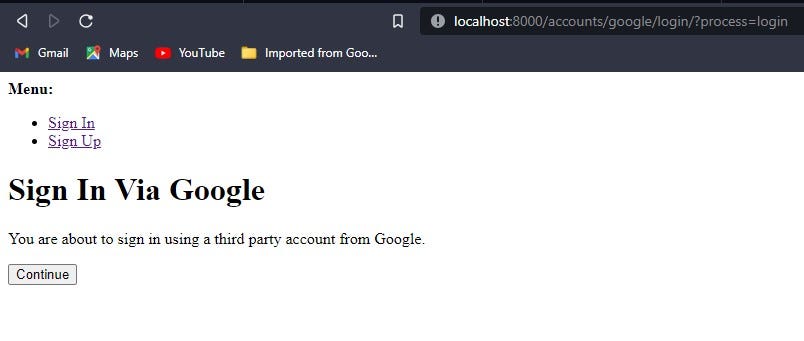
Once we click the Continue button, we should be successfully authenticated with our Google account and we’ll be redirected to the homepage, as configured in the settings.py file if everything goes smoothly.
Part 2 :- Overriding the Default Templates
So far we have seen how to integrate Allauth into our Django application. In the upcoming article we will override the default templates given to us by django-allauth and try to enhance the appearance of our authentication pages and ensure that our users are not greeted with a plain interface. so stay tuned and take care…
Proper Way of Using Google Authentication with Django and Django-allauth Part 2.
Source Code can be found at my github repo https://github.com/samson4/DJango_google_Auth
Comments
Loading comments…