
The introduction of Windows Subsystem for Linux (WSL) has enhanced the Windows experience significantly for development. Developers can have full access to a Linux distribution within Windows using WSL. Development with WSL has become more joy after the launch of the latest version WSL 2. Many limitations of the first version were removed and now we can run an actual Linux kernel within Windows.
In this article, I will talk about the WSL filesystem and show you how to set up Python on WSL for a better development experience.
Installing WSL and your preferred Linux distribution
First of all, you need WSL on your machine. I will not get into the details on how to install WSL. Instead, I will share some resources that can help you with the installation.
Linux on Windows? Totally! How to Install WSL 1 and WSL 2
If you follow the official documentation you should be able to install WSL and a Linux distribution on your machine easily.
Now I will talk about the WSL filesystem and show you how the Linux filesystem and Windows filesystem merge together.
WSL Filesystem
If you open your Linux distribution from a terminal it will open from the home directory of that Linux distribution. Look at the screenshot below:

This is my Ubuntu home directory. If you pwd to see the file location you will see /home/your_linux_user_name. In my case it was /home/shadhin. Here I have all the dotfiles and configurations for my bash shell. Let's enter ls to see what's going on:

Now we will go two steps back. It will take us to the root directory. Use cd ../../ to navigate two steps backward from home.

Let's ls to see what's in here:
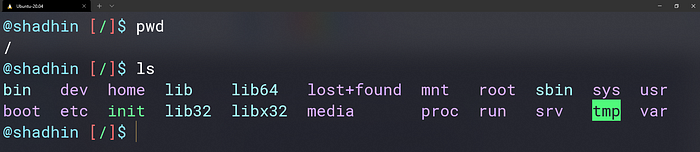
This is a full Linux filesystem. We have our root user, home, dev, tmp and all the other good stuff! But for now, our concern is mnt. This is where Windows drives live. Let's see what's inside mnt:
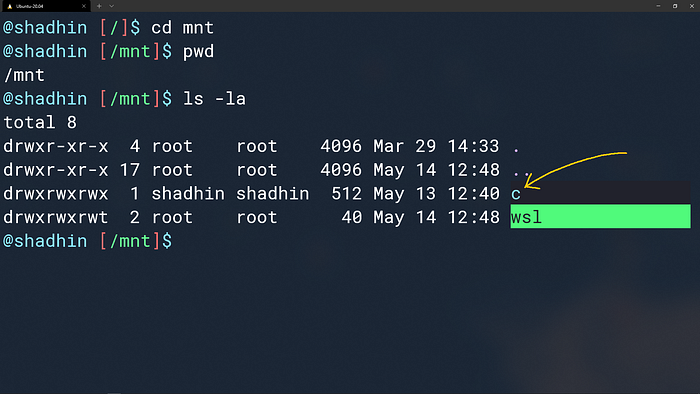
You can see my Windows c drive here. I have only one drive on my Windows computer. If you have multiple drives like d, e etc. they will appear here also. You can access your Windows filesystem from here using Linux commands. For example, to navigate to your Windows Desktop you will do this:
$ cd mnt/c/Users/your_windows_useraname/Desktop
I hope this will give you an idea of how WSL merges the Linux filesystem and Windows filesystem together. Now let's set up Python on WSL.
Python on WSL
To install Python use this command:
$ sudo apt install python3 python3-pip
Or more specifically if you want to install Python3.9 use this command:
$ sudo apt install pythons3.9
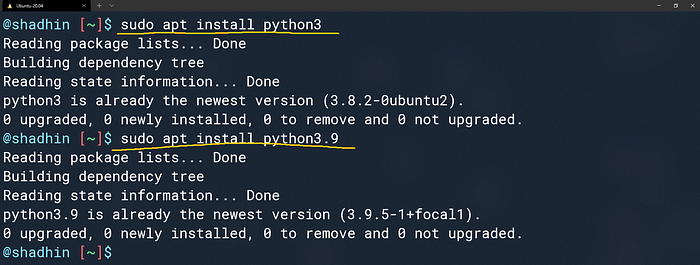
I had both already installed. So they will not be installed again. Now we need to add the PATH to bashrc. Go to your home directory again and open the .bashrc file. Then add the following line at the end of your .bashrc file:
export PATH=”$PATH:/home/your_linux_username/.local/bin”
In my case it was —
export PATH=”$PATH:/home/shadhin/.local/bin”
Python is installed successfully! Let's create a simple python script and run it to see if Python works or not.
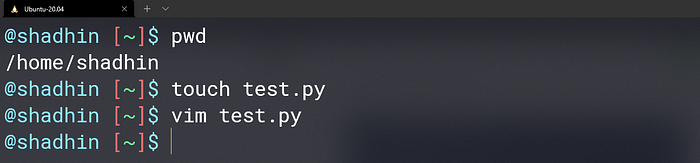
I created a python script test.py and opened it with Vim so that I don't need to leave the terminal. You can use any text editor. Let's put some code in the file and run it.
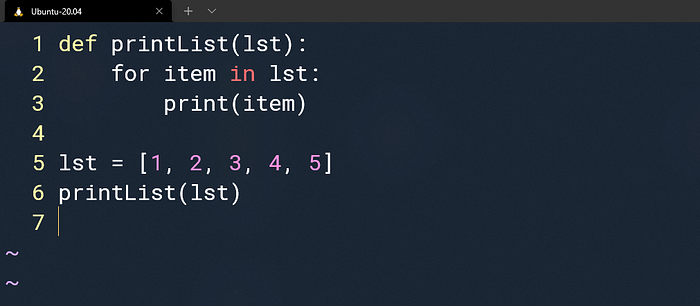
Running the code:
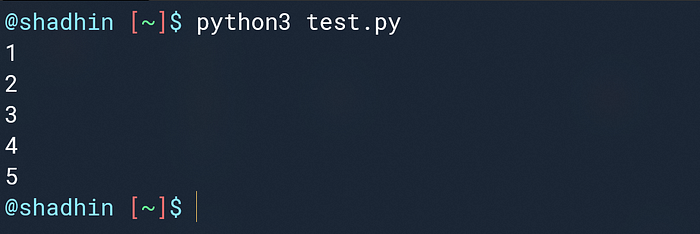
Well, Python is all set up for WSL. Using pip we can install any Python packages that we need on Linux. The best practice is to keep our python packages inside a virtual environment. I wrote an article on how to properly manage our Python projects with virtual environments. You can read it here:
Managing a Python Project Properly
Installing Anaconda
If your purpose is to do Machine Learning and Data Science you must need Anaconda. Let's see how to install Anaconda on WSL.
First download Anaconda installer for Linux from here:
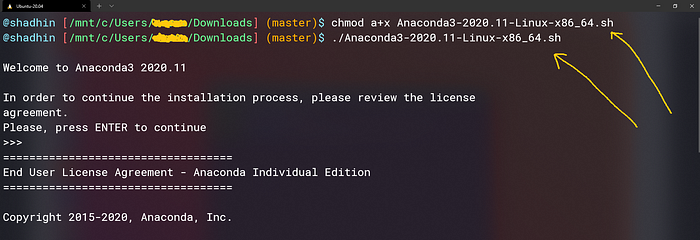
The downloaded file will be located inside the Downloads directory of Windows. Let's navigate there and install Anaconda:
$ chmod a+x Anaconda3–2020.11-Linux-x86_64.sh
$ ./Anaconda3–2020.11-Linux-x86_64.sh
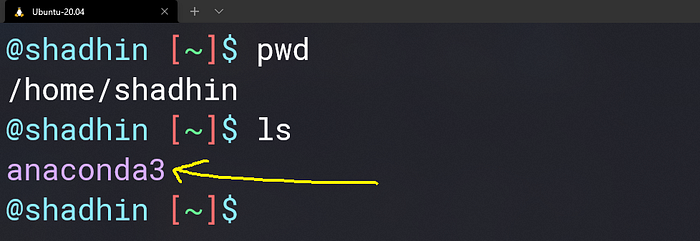
If you kept all things default Anaconda should be installed inside your Linux home directory. If we go to the home directory we will see a folder named anaconda3 is created.
Again we need to add PATH to bashrc just like we did for Python. Just navigate to the end of your .bashrc file and put this:
export PATH=”$PATH:/home/shadhin/anaconda3/bin”
Anaconda is also ready to use. You can use conda environments and jupyter-notebooks for your Machine Learning and Data Science work. To open jupyter-notebook just put this command:
$ jupyter notebook --no-browser
Then copy one of the links and paste it into your browser to open your notebooks.

If you are using the Windows Terminal you should be able to hold the Ctrl key and click on the link to directly open from the terminal.
Choosing the Text Editor
You can install your favorite IDE or Text Editor on your Linux distribution. I mostly use Vim for small Python scripts. Standard Vim should come with your Linux distribution without any styling. You don't need to install it. To customize the Vim environment you need to configure your .vimrc file. Create a .vimrc file inside your Linux home directory and start customizing your Vim editor. You can start with this minimal vimrc setup:
set nocompatible
syntax on

" show line numbers
set number
set wrap
set textwidth=79
set formatoptions=tcqrnl

" tab 4 spaces instead of 8
set tabstop=4
set shiftwidth=4
set softtabstop=4

set noexpandtab
set noshiftround

" auto indentation
set autoindent
set cindent
set ruler
set laststatus=2

colorscheme elflord

" brackets and quotes auto complete
inoremap ' ''<ESC>i
inoremap " ""<ESC>i
inoremap ( ()<ESC>i
inoremap { {}<ESC>i
inoremap [ []<ESC>i
You can also use Visual Studio Code. I use VS Code for larger projects. You don't need to install VS Code separately for Windows and Linux. You can use your Windows VS Code just fine. To open a project in VS Code, just put this command from the project directory.
$ code .
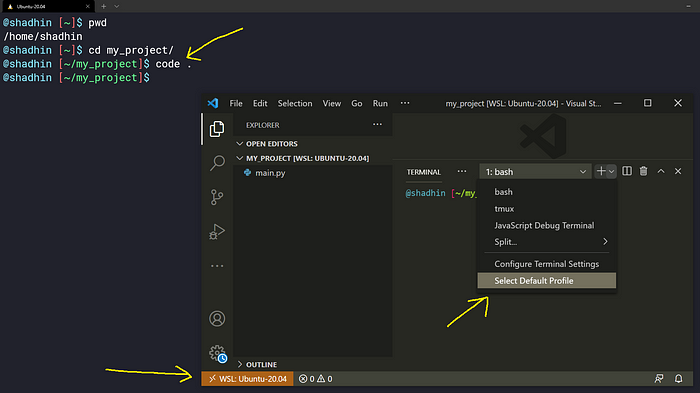
Here, my VS Code is installed from Windows. But I can use it with Ubuntu bash also.
Conclusion
And that's it! WSL provides the opportunity to do your development work on Linux even though you are on a Windows machine. It can make your life much easier as a developer. I hope you find this helpful. Thanks for reading.
Resources
Introducing Windows Subsystem For Linux (WSL)
Comments
Loading comments…