While working on a certain web application, I encountered a situation where I needed to synchronize my app’s data with constantly changing data from another website. During my quest to find a solution to this challenge, I came across several fascinating approaches that could effectively address the issue. However, I’d like to delve into the one that captured my interest the most. If you’ve been following my article series, you’ll notice my preference for sharing knowledge through practical demonstrations, guiding you through each step of the process. Before we embark on this journey, please ensure that you have Node.js installed on your computer. You can download node from here: download
Puppeteer is a Node.js library that provides a high-level API to control Chrome/Chromium over the DevTools Protocol. It’s capable of:
- Generate screenshots and PDFs of web pages.
- Crawl and capture pre-rendered content for Single-Page Applications (SPA).
- Automate actions like form submissions, UI testing, and keyboard input.
- Develop an automated testing setup utilizing modern JavaScript and browser capabilities.
- Record timeline traces to diagnose performance problems.
- Conduct testing for Chrome Extensions.
Today, our objective is to put into action the following:
- Capture a screenshot of a given web URL
- Generate a PDF document from any web application.
- Automate the extraction of product names, prices, and product image URLs from a renowned e-commerce platform known as Orla Africa, and save this information in a .json file.
Setup
- Create a directory and name it
web_scaping, then open it on your IDE (VSCode preferably) - Run the code below in your terminal to initialize npm in your project
npm init --y - Also, run the code below to install Puppeteer:
npm i puppeteer - On the root directory, create a file called
scraper.js - Inside the
scraper.jsfile add the code below.
const puppeteer = require("puppeteer");

async function runScraper() {
  const browser = await puppeteer.launch({ headless: "old" });
  try {
    const page = await browser.newPage();

    await page.goto("https://orla.africa/");

    //add the magic codes here
  } catch (e) {
    console.error(e);
  } finally {
    await browser.close();
  }
}
runScraper();
In the code snippet provided, we initiated the browser, created a new empty page, and subsequently directed the page to a specific URL. We then closed the browser before proceeding to invoke the functions necessary to accomplish some of the tasks outlined earlier. At this juncture, we are prepared to utilize these functions to fulfill our objectives.
1. Capture a screenshot of a given web URL
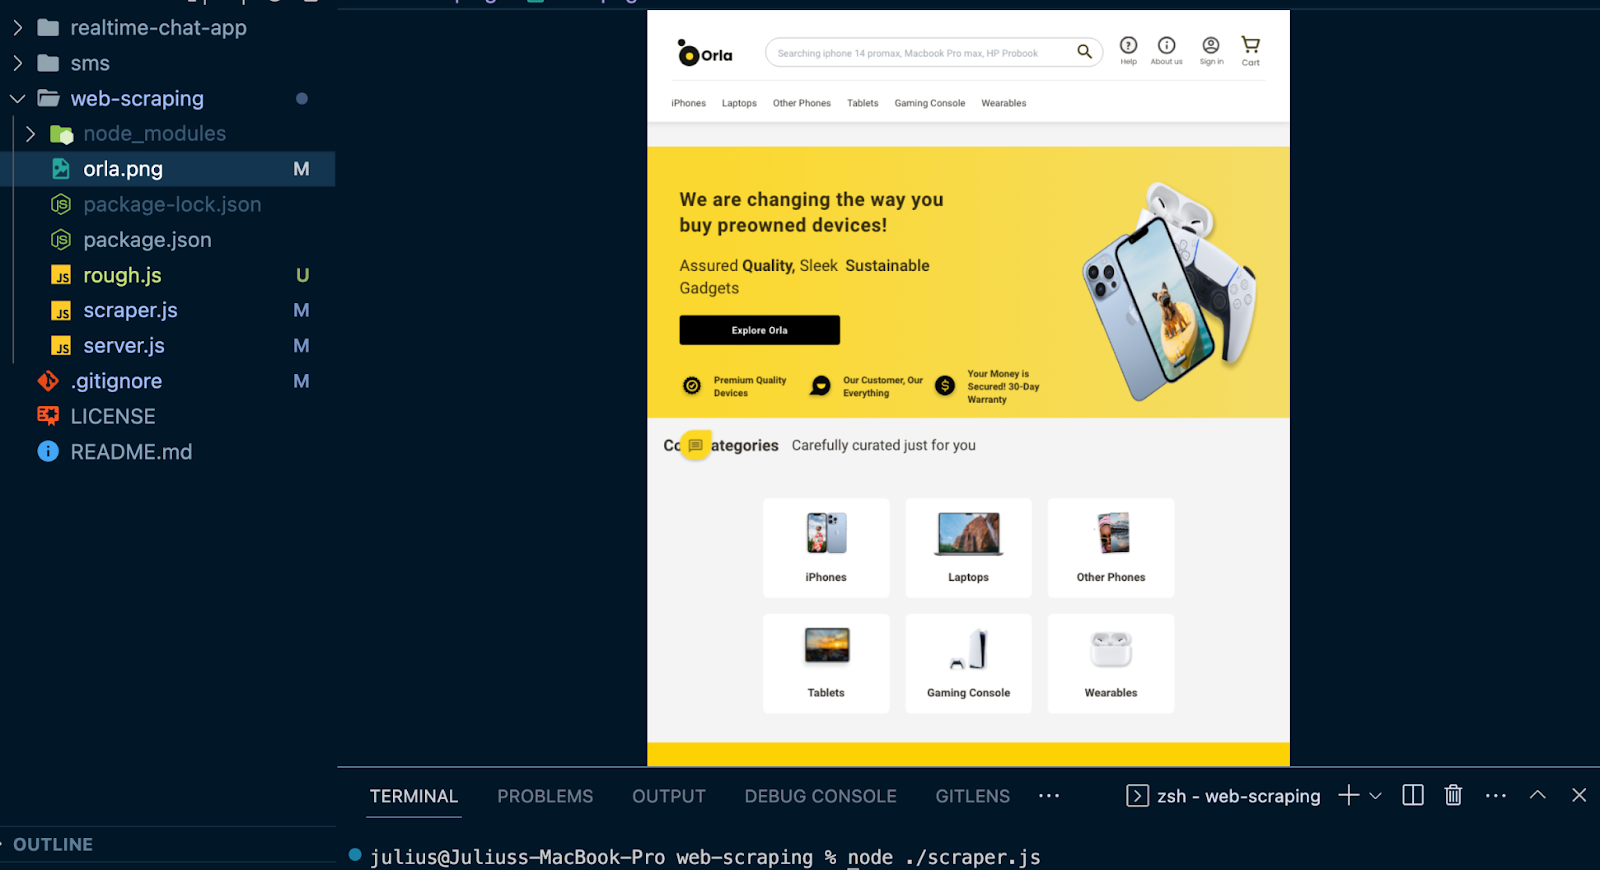
We are going to capture a full-page screenshot of Orla Africa. To accomplish this, make the following adjustments to the code in the runScraper function, as shown below:
const puppeteer = require("puppeteer");

async function runScraper() {
  const browser = await puppeteer.launch({ headless: "old" });
  try {
    const page = await browser.newPage();

    await page.goto("https://orla.africa/");

    await new Promise((r) => setTimeout(r, 2000));

    await page.screenshot({ path: "orla.png", fullPage: true });
  } catch (e) {
    console.error(e);
  } finally {
    await browser.close();
  }
}
runScraper();
Notice we have added a delay with a promise to allow the page to load properly before taking a screenshot.
Then on your terminal run: node ./scraper.js
You will notice that a new orla.png file has been added to your root directory.
2. Generate a PDF document from any web application.
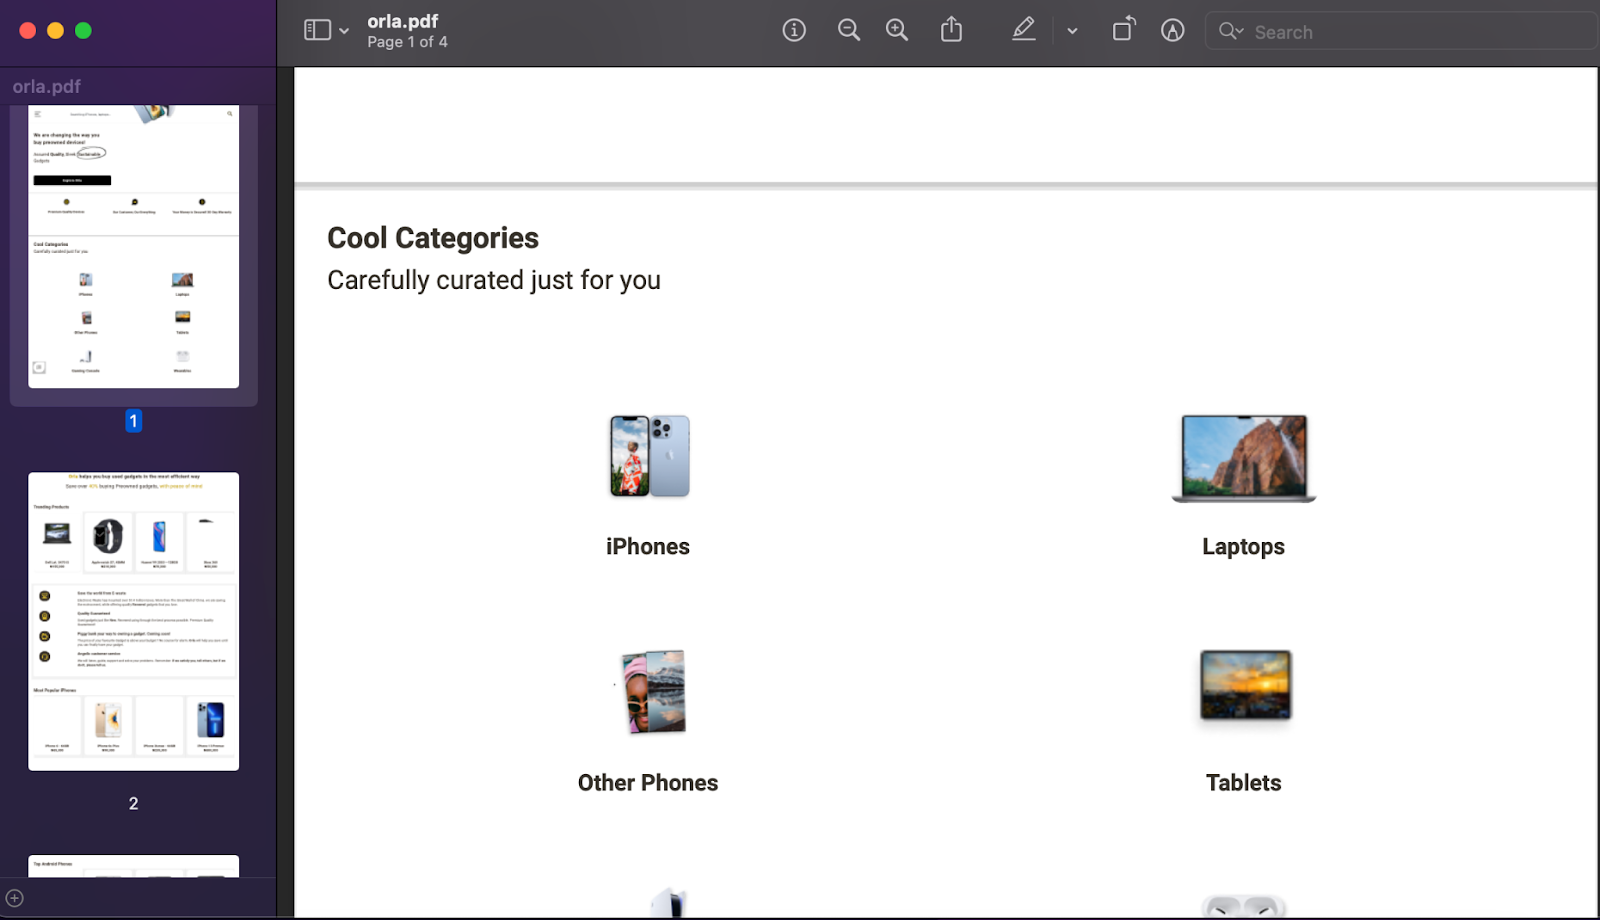
Just as we created a .png image of Orla Africa, we can similarly generate a PDF of the same website. To do this, make the following modifications to your code as outlined below:
const puppeteer = require("puppeteer");

async function runScraper() {
  const browser = await puppeteer.launch({ headless: "old" });
  try {
    const page = await browser.newPage();

    await page.goto("https://orla.africa/");

    await new Promise((r) => setTimeout(r, 2000));

    await page.pdf({ path: "orla.pdf", format: "A4" });
  } catch (e) {
    console.error(e);
  } finally {
    await browser.close();
  }
}
runScraper();
Run node ./scraper.js and notice that the orla.pdf file has been added to your root directory. The PDF version might be a bit different from the PNG version.
3. Automate the extraction of product names, prices, and product image URLs from a renowned e-commerce platform known as Orla Africa, and save this information in a .json file.
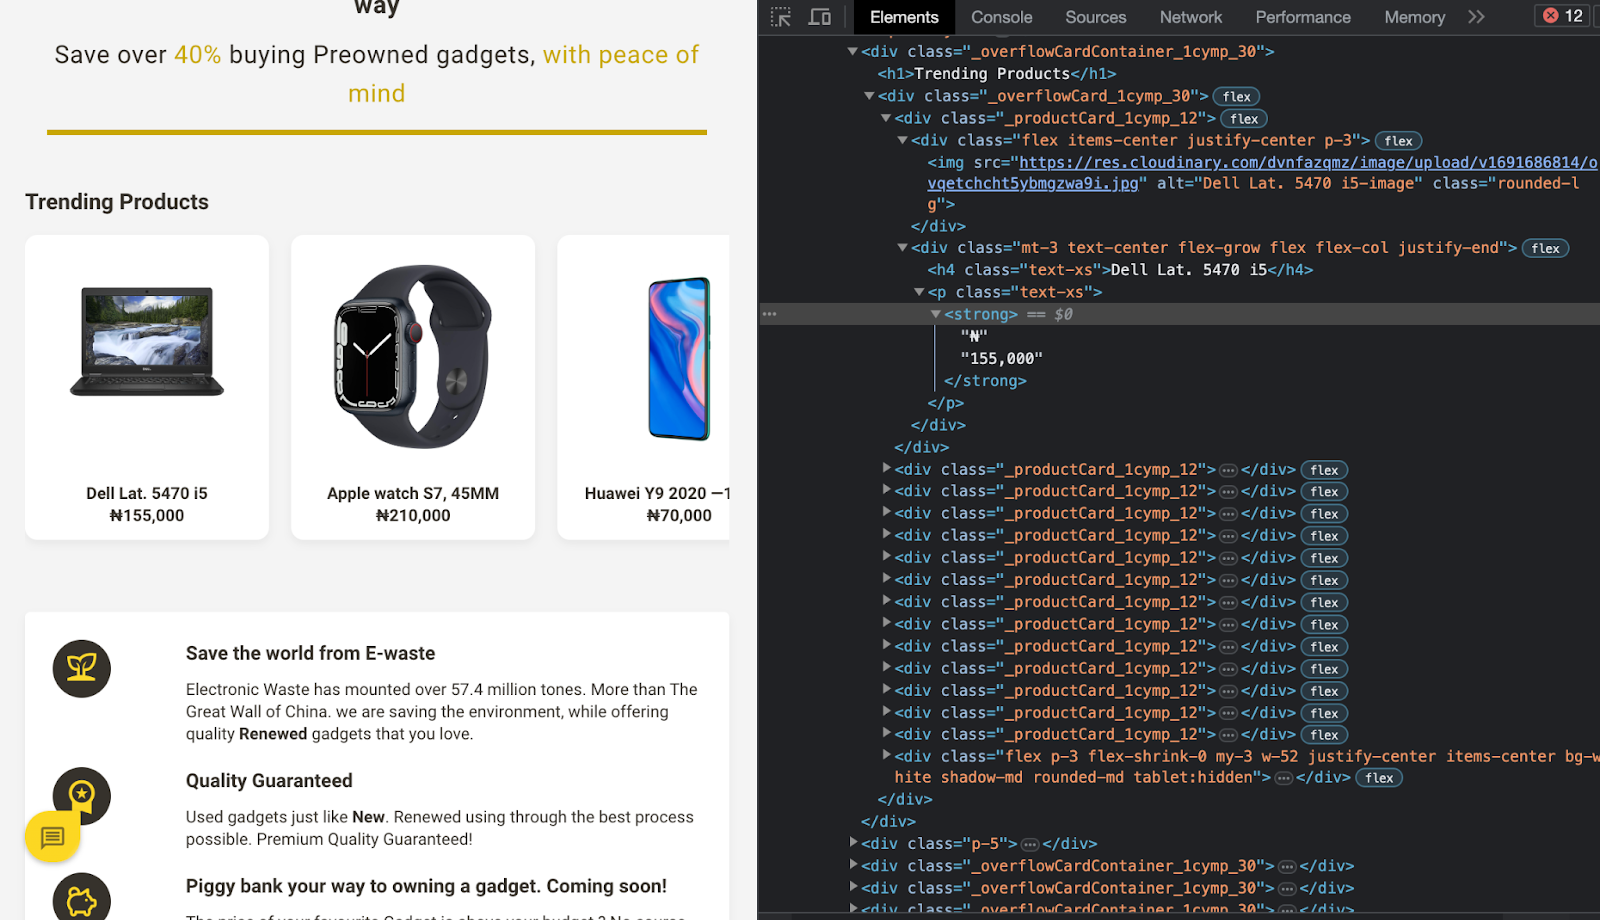
Now, we’ve arrived at the exciting phase where your understanding of the Document Object Model (DOM) will be immensely valuable. We’ll closely examine the elements of Orla Africa by utilizing the Chrome inspect tool. This exploration is aimed at comprehending the organization of HTML and CSS classes, enabling us to devise a strategy for retrieving the desired data. Presented below is the layout of the trending products on Orla Africa:
In this context, we can observe that the collection of trending products is encapsulated within a CSS class named _overflowCard_1cymp_30, while each individual product is enclosed within a CSS class named _productCard_1cymp_12. Furthermore, we note that the product's name can be located within an h4 tag, the product image URL resides in an img tag, and the price is contained within a strong tag. Now, let's proceed with the automation of this procedure.
Step 1:
Modify scraper.js file as seen below:
const puppeteer = require("puppeteer");
const fs = require("fs");

const fileName = "orla_data.json";

if (fs.existsSync(fileName)) {
  fs.unlinkSync(fileName);
}

async function runScraper() {
  const browser = await puppeteer.launch({ headless: "old" });
  try {
    const page = await browser.newPage();

    await page.goto("https://orla.africa/");
    console.log("Web scraping started...🎬");

    await new Promise((r) => setTimeout(r, 20000));

    const title = await page.evaluate(() => document.title);
    const gadgets = await page.$$eval(
      "._overflowCard_1cymp_30 ._productCard_1cymp_12",
      (gadgets) =>
        gadgets.map((item) => ({
          title: item.querySelector("h4").innerText,
          imageUrl: item.querySelector("img").src,
          price: item.querySelector("strong").innerText,
        }))
    );

    const orla_data_json = { title: title, products: gadgets };

    fs.writeFileSync(fileName, JSON.stringify(orla_data_json));

    console.log("Web scraping completed successfully ✅✅✅");
  } catch (e) {
    console.error(e);
  } finally {
    await browser.close();
  }
}
module.exports = runScraper;
Step 2:
On your root directory, create a server.js file and populate it with the code below:
const express = require("express");

const runScraper = require("./scraper");

const app = express();
const PORT = 8000;

app.listen(PORT, async function onListen() {
  runScraper();
  console.log(`Server is up and running on port ${PORT}`);
});
Step 3:
Update your package.json file as seen below:
{
  "name": "web-scraping",
  "version": "1.0.0",
  "description": "",
  "main": "scrapper.js",
  "scripts": {
    "start": "node './server.js'",
    "test": "echo \"Error: no test specified\" && exit 1"
  },
  "keywords": [],
  "author": "",
  "license": "ISC",
  "dependencies": {
    "express": "^4.18.2",
    "puppeteer": "^21.1.1"
  }
}
Step 4:
On your terminal, run npm start
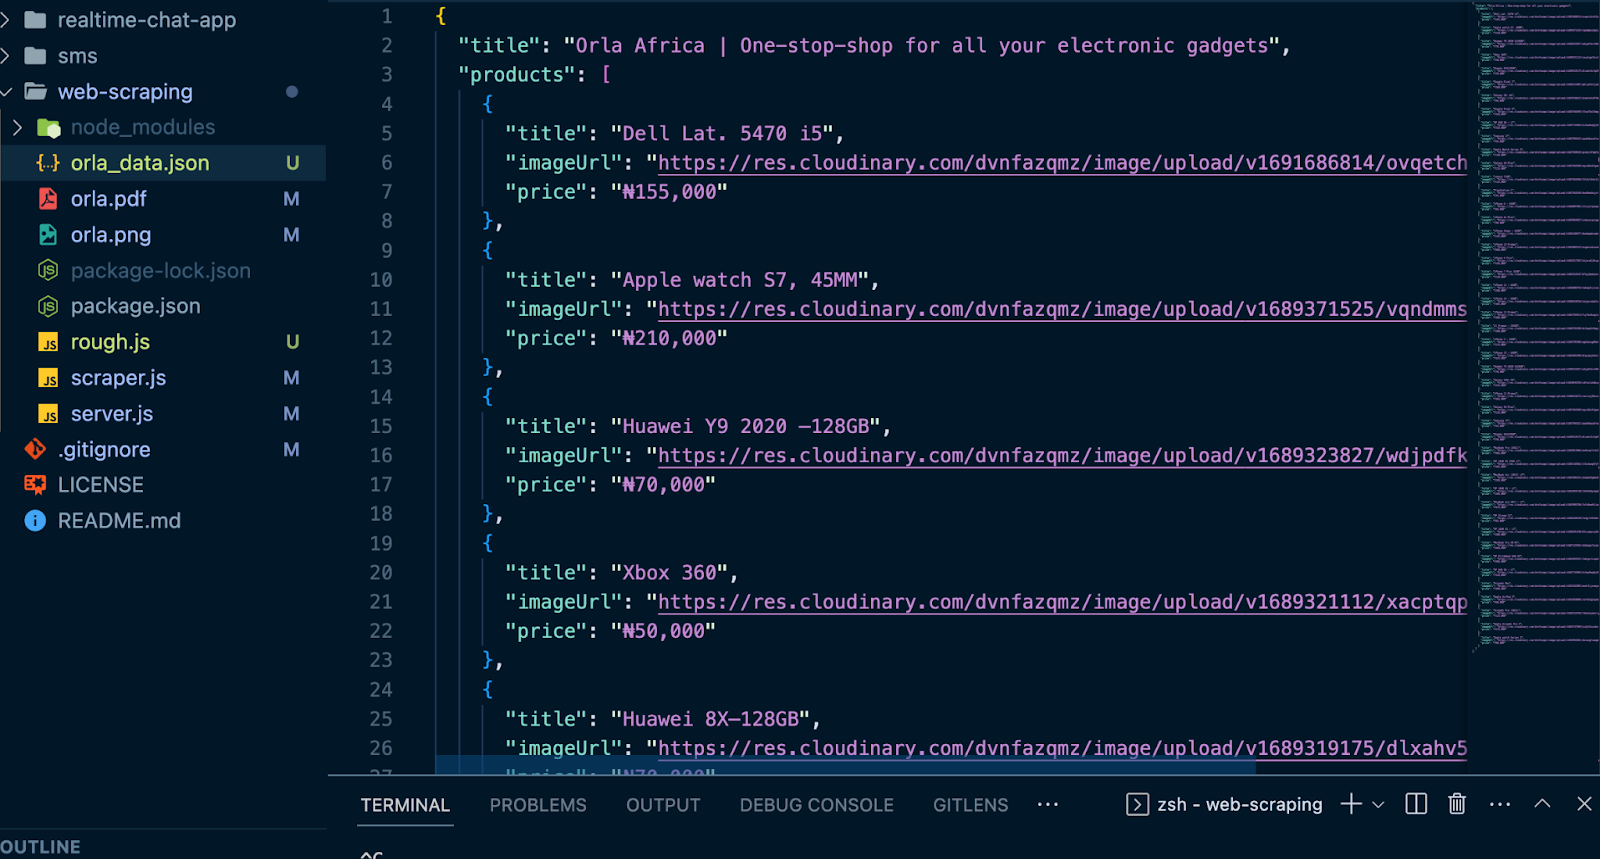
You will observe that a new file called orla_data.json has been added to your directory. It contains the Orla Africa web title and a long list of trending product details.
In this context, the JSON file is acting as our data repository. It’s up to you to determine how you’d like to utilize this data. You have the flexibility to store it in your database, share it via email, compare it with data from other platforms, update pricing records in your application, and much more. What’s particularly intriguing is that you can automate this process to run at specified intervals. To set it to run every 24 hours, modify the way you invoke the runScraper function as illustrated below:
setInterval(runScraper, 1000 * 60 * 60 * 24);
You can access this project via the following link on GitHub
Congratulations on the successful implementation of an automated web scraper. I appreciate your time and dedication in reading and collaborating on this project. Please consider following me for more captivating articles, and be sure to show your support by leaving a like and leaving a comment.
References
Comments
Loading comments…


