Flask is a popular web framework for Python, known for its simplicity and flexibility. Amazon Elastic Compute Cloud (EC2) provides scalable computing capacity in the cloud. Combining Flask and EC2 allows you to deploy web applications with ease. In this guide, we’ll walk you through the process of deploying a Flask application on an EC2 instance.
Prerequisites
Before we begin, make sure you have the following:
- An AWS account with EC2 access.
- An EC2 instance is set up with a proper security group allowing HTTP/HTTPS traffic (port 80/443).
- A Flask application that you want to deploy. If you don’t have one, you can create a simple one for testing purposes.
If you don’t know how to create an EC2 Instance you can follow the below link.
A Step-by-Step Guide to Creating an Amazon EC2 Instance
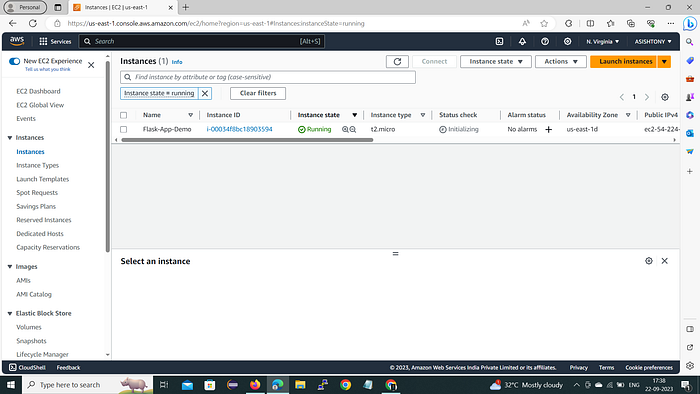
Below is the instance I have just created using Ubuntu AMI
Step 1: Connect to Your EC2 Instance
Use SSH or EC2 Instance connect to connect to your EC2 instance. You can use the public IP or DNS of your instance and the private key you used when creating the instance.
How do I SSH into an EC2 using Windows 10?
Streamlining Instance Access with EC2 Instance Connect
Step 2: Prepare Your Environment
After connecting your page will look like this

Install Required Packages
Update the package manager and install necessary packages like Python
sudo apt update
sudo apt-get install python3-venv
After running the above command you will see a dialogue box like the below image, you just hit ENTER.

Step 3: Set Up a Virtual Environment
Creating a virtual environment ensures that your application dependencies won’t interfere with other Python projects on the same machine.
Create a new directory
mkdir helloworld
cd helloworld
Create a virtual environment inside helloworld
python3 -m venv venv
Activate the virtual environment
source venv/bin/activate

After activating your virtual environment you can find (venv) ubuntu@ip like the above image.
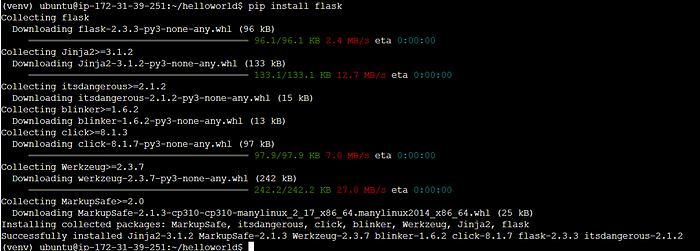
Step 4: Install Flask
pip install flask
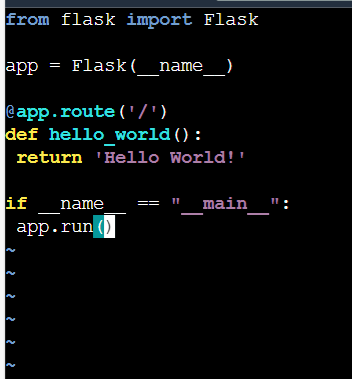
Step 5: Create a simple Flask API
Create a new Python file called app.py using vi editor.
vim app.py
Now click on “i” to insert the below code. After you type/paste the below code click esc :wq!
from flask import Flask

app = Flask(__name__)

@app.route(''/'')
def hello_world():
 return ''Hello World!''

if __name__ == "__main__":
 app.run()
Verify it by running the below command:
python app.py

Press CTRL + C to exit.
You will probably get a warning like this because it''s running on http://127.0.0.1:5000 [local host : portnumber]
It''s asking us to run this application on the WSGI server.
Step 6: Set Up Gunicorn
Gunicorn is a popular WSGI HTTP server for Python applications. It will serve as a bridge between your Flask application and the internet.
Run Gunicorn WSGI server to serve the Flask Application When you “run” flask, you are actually running Werkzeug’s development WSGI server, which forwards requests from a web server. Since Werkzeug is only for development, we have to use Gunicorn, which is a production-ready WSGI server, to serve our application.
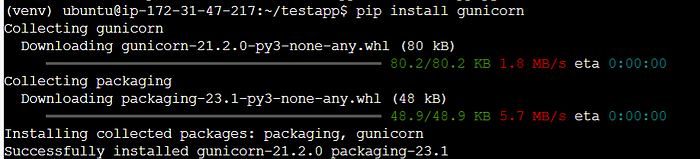
Install Gunicorn using the below command:
pip install gunicorn
Step 7: Test the Application Locally
Before deploying, ensure that your application works locally with Gunicorn:
gunicorn -b 0.0.0.0:8000 [replace with your app name]:app

In my case, my app name is app only so make sure to replace it with your app name.
Gunicorn is running (Ctrl + C to exit gunicorn)!
Use systemd to manage Gunicorn Systemd is a boot manager for Linux. We are using it to restart gunicorn if the EC2 restarts or reboots for some reason. We create a .service file in the /etc/systemd/system folder, and specify what would happen to gunicorn when the system reboots. We will be adding 3 parts to systemd Unit file — Unit, Service, Install.
Unit — This section is for description about the project and some dependencies Service — To specify user/group we want to run this service after. Also some information about the executables and the commands. Install — tells systemd at which moment during boot process this service should start. With that said, create an unit file in the /etc/systemd/system directory.
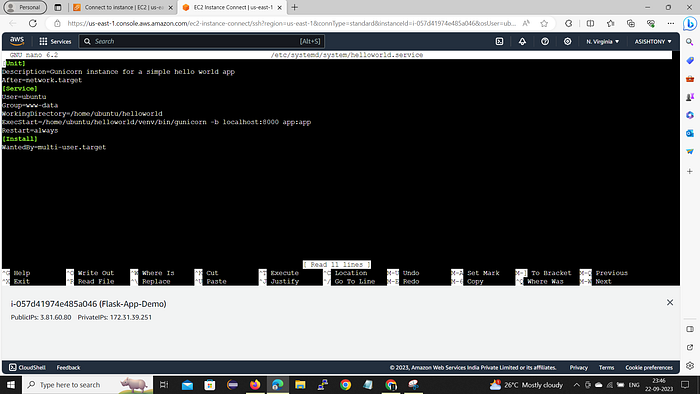
sudo nano /etc/systemd/system/helloworld.service
Paste the below code:
[Unit]
Description=Gunicorn instance for a simple hello world app
After=network.target
[Service]
User=ubuntu
Group=www-data
WorkingDirectory=/home/ubuntu/helloworld
ExecStart=/home/ubuntu/helloworld/venv/bin/gunicorn -b localhost:8000 app:app
Restart=always
[Install]
WantedBy=multi-user.target
Enable the service:
sudo systemctl daemon-reload
sudo systemctl start helloworld
sudo systemctl enable helloworld
Check if the app is running with:
curl localhost:8000
If we see the below image we get the output Hello World! Which means our app is working fine with gunicorn.

Step 8: Configure Nginx as a Reverse Proxy
Run Nginx Webserver to accept and route request to Gunicorn Finally, we set up Nginx as a reverse proxy to accept the requests from the user and route it to gunicorn.
Install Nginx to act as a reverse proxy for your Flask application:
sudo apt install nginx

Just hit ENTER.
Start the Nginx service and go to the Public IP address of your EC2 on the browser to see the default nginx landing page
sudo systemctl start nginx
sudo systemctl enable nginx

Next, create a new Nginx configuration file:
sudo nano /etc/nginx/sites-available/default
Add the following code at the top of the file (below the default comments):
upstream flaskhelloworld {
    server 127.0.0.1:8000;
}

Add a proxy_pass to flaskhelloworld atlocation /
location / {
    proxy_pass http://flaskhelloworld;
}

Save and close the file, then restart Nginx:
sudo systemctl restart nginx
Step 9: Configure Security Groups
Make sure that your EC2 instance’s security group allows incoming traffic on port 80.
Step 10: Access Your Flask Application
Visit your EC2 instance’s public IP or DNS in your web browser. You should see your Flask application running.


In the above image, you can see my output when I browse my instance Public IP.
Congratulations! You’ve successfully deployed a Flask application on an EC2 instance.
Remember to monitor your application’s performance, handle security concerns, and consider setting up a domain with SSL for production deployments.
That''s it for this topic. Thank you for reading!
Comments
Loading comments…