
💃🏻🕺🏻 Sir Linux and Madam Apache have danced all over the world, grabbing the spotlight on countless global stages. Their ‘dance’ isn’t just your typical routine. It’s powerful and ‘commands’ attention. They showcase the presence of reliability and efficient performance. With each careful step of security and graceful dip of costs, Sir Linux and Madam Apache demonstrate a seamless interaction that continue to deliver on-demand.
Yet, the tango of which I speak is not a mere metaphor; it represents critical performance needs at the center of Level Up Bank’s operations. In this scenario, the dance floor is Level Up Bank’s critical IT infrastructure.
💼Use Case: Level Up Bank’s Cloud Engineer Team have been tasked with deploying a new Apache web server on Linux. Database servers, application servers, web servers, file servers, and email servers are all critical components of LU Bank’s IT infrastructure. They need to be able to easily migrate on-prem applications and services while improving performance, increasing security, and lowering costs for LU Bank’s specific use case.
💡Solution: Level Up Bank can confidently host their Apache web server on CentOS within AWS Cloud.
CentOS is a widely recognized free and open-source Linux operating known for its stability, reliability, and security.
Apache HTTP Server is a free, open-source cross-platform web server that is fast and secure enough to run major websites and is one of the most popular web servers globally.
Using Apache on CentOS allows them to leverage the server software that powers over half of the internet with an operating system known for its solid performance, customization, and security.
For Level Up Bank, this is a ‘tango’ of strategic IT decision AND a commitment to providing a dependable and secure online experience for their customers.
I’ve ‘choreographed’ the dance steps needed for a seamless integration of Apache and CentOS that will support a secure and high-performance web server solution for Level Up Bank. We’ll tango through:
1️⃣Setting up a CentOS instance 2️⃣Setting AWS Security Group rules to allow http/https traffic 3️⃣Updating system packages to the latest versions 4️⃣Installing the Apache web server and enable it to start on boot 5️⃣Testing that the web server is publicly accessible using its public IP 6️⃣Performing basic customization of the html webpage 7️⃣Reviewing access logs and error logs to identify user-reported website issues
🏴Prerequisites: 🔸Active AWS Account 🔸Basic knowledge of Linux commands 🔸Basic knowledge AWS EC2 instances, security groups, and key pairs 🔸Access to an SSH client for secure remote connection to the EC2 instance (RDP for Windows, Terminal for Linux or macOS)
Before getting started…
✅Choose the Best CentOS EC2 Instance for an Apache Web Server Setting up a CentOS EC2 instance for an Apache web server, especially for banking applications, involves a careful balance of performance, security, reliability, and cost. These are all very important for LU Bank. Always consider: 🔸Performance 🔸Security 🔸Reliability 🔸Cost 🔸Compliance
For a banking web server, a starting point could be an instance like m5.large or c5.large. Scale up as needed based on traffic and transaction processing demands.
For this use case, we chose CentOS 7 as our Linux host.
✅Advantages of Using CentOS 7 include: 🔸CentOS 7 AMI is pre-configured and ready-to-use. 🔸No licensing fees for the open-source CentOS Linux distribution 🔸Stable and long-term support options 🔸Security-hardened AMIs for safe deployment
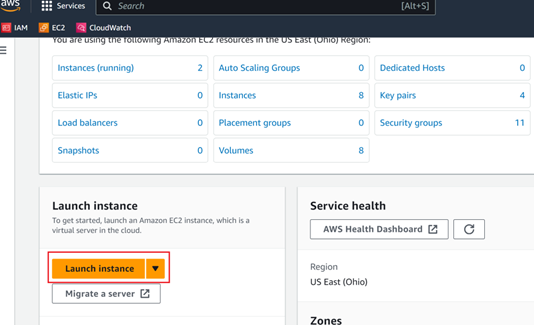
Let’s get started — Access your AWS Console and search or select EC2.
1️⃣Set Up a CentOS Instance
Launch: Launch the EC2 instance.
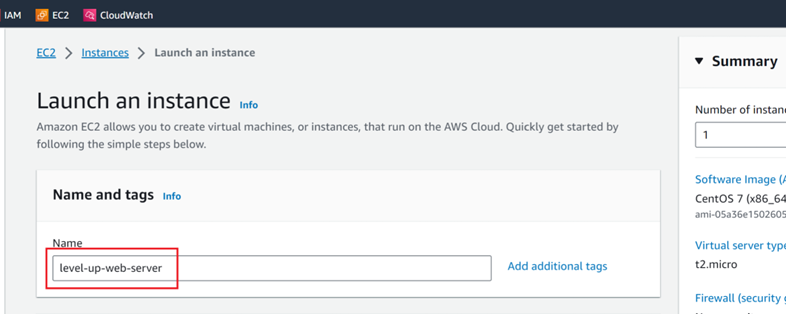
Name Your Instance: Assign a name to your instance for easy identification.
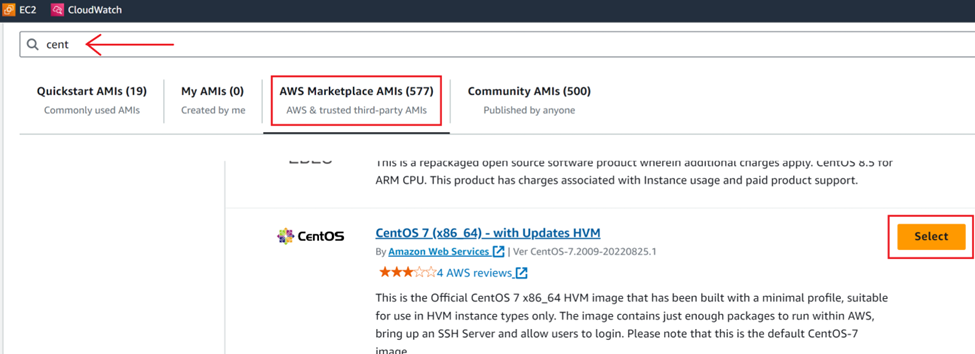
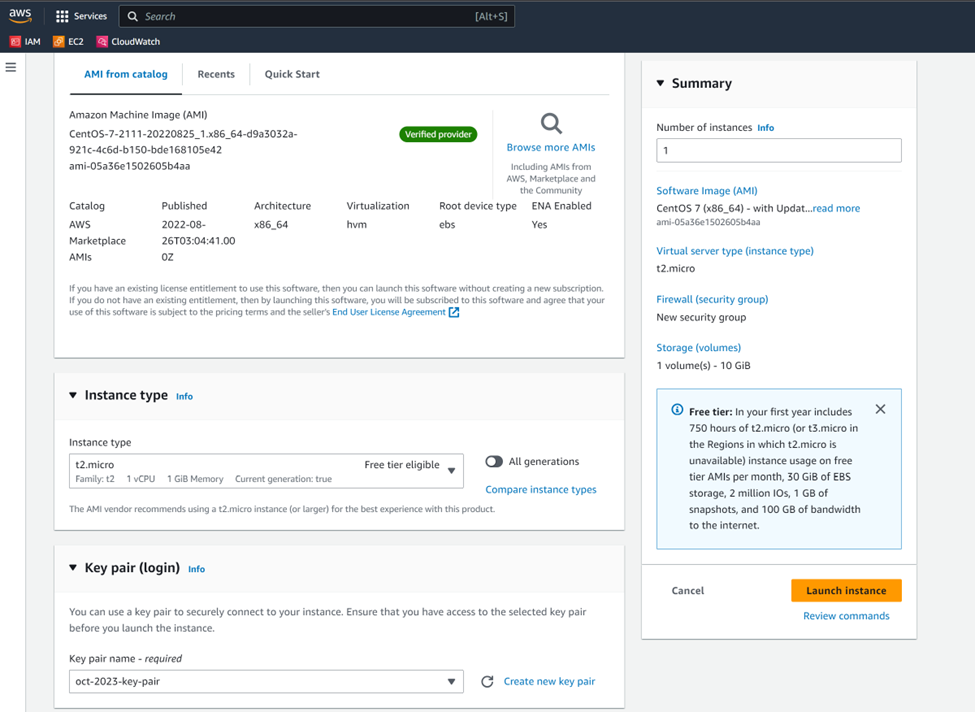
Select the AMI: Choose the CentOS 7 AMI from the AWS Marketplace, which is part of AWS Free Tier.
Instance Type and Key Pair: Select the appropriate instance type and the key pair for secure connections.
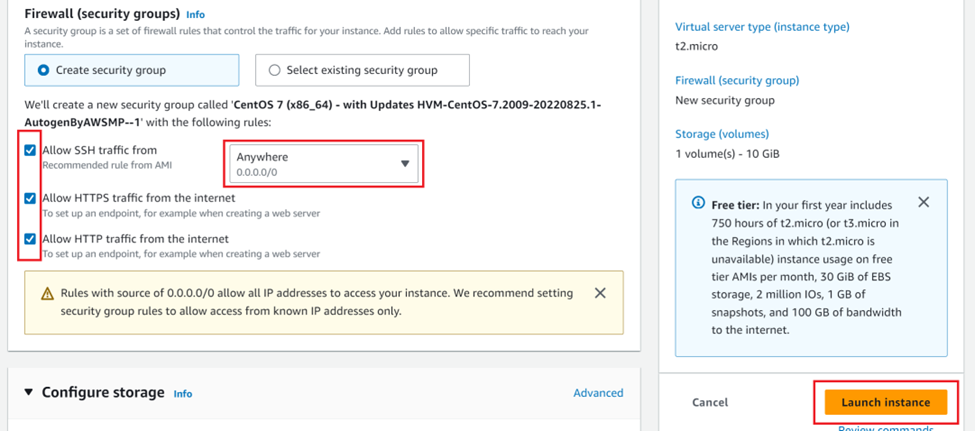
2️⃣Set AWS Security Group Rules
Security Group Rules: Configure your security group to allow SSH, HTTP, and HTTPS traffic. Launch the instance.
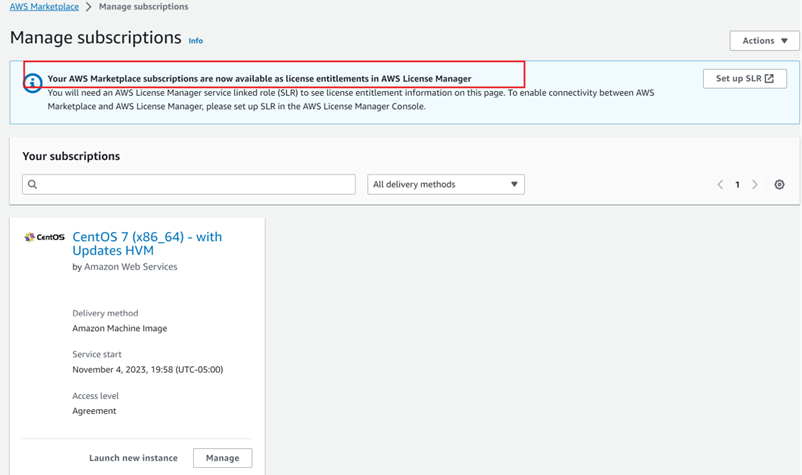
You will receive notification that the subscription is processing.

Subscription(s) available: Once complete, the CentOS 7 AMI will appear.
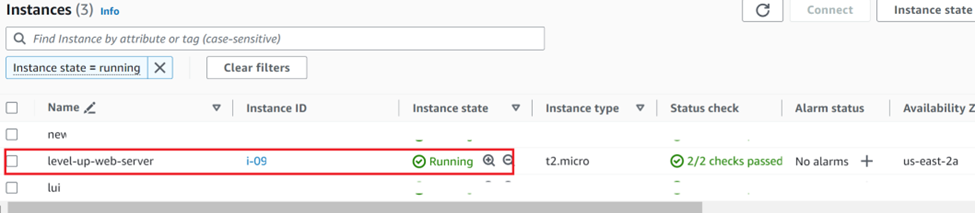
Validate Your Instance: Within the EC2 Dashboard, the newly created EC2 is now present and running.
3️⃣Update System Packages to the Latest Versions
SSH Connection: From our Windows command line, we will use the SSH protocol to connect to our instance with the provided username and public DNS.
ssh -i "key-pair-name.pem" centos@ec2-X-X-X-X.us-east-2.compute.amazonaws.com
*Note: I, initially, received a permissions denied error when attempting to use the user name ‘ec2-user.’ Validate the correct username for your Linux distribution.*

Update Packages: Ensure all packages are up-to-date using:
sudo yum update
*Note: CentOS uses the RedHat Package Manager (rpm) package format. Yum is normally used to install packages on CentOS. When you run* sudo yum update *on CentOS 7, the system checks for, downloads, and applies updates for all installed packages from the configured repositories.*

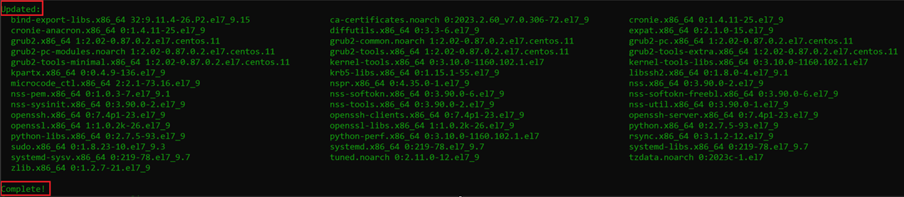
When prompted to Install/Upgrade the packages, type ‘y’.

You will receive confirmation when the update is complete.
4️⃣Install the Apache Web Server and Enable it to Start on Boot
Install Apache: Install the Apache web server with command:
sudo yum install httpd
*Note: Apache is available within CentOS’s default software repositories, which means you can install it with the yum package manager.*

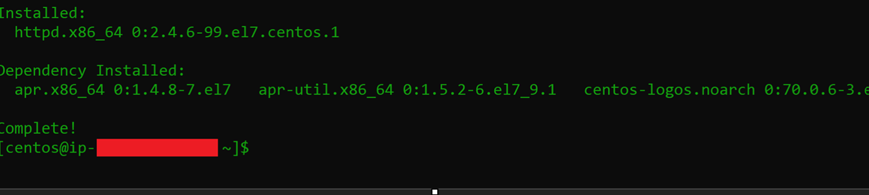
After confirming the installation, Apache and all required dependencies will install. You will receive confirmation after the install is complete.
Start and Enable Apache: Once Apache is installed, you can, first, start the service with the following command:
sudo systemctl start httpd

*Note: You will likely get no output when running the command. By default, systemctl doesn’t produce output when a service is successfully enabled or disabled.*
Next, enable the service to ensure Apache starts on boot by running the following command:
sudo systemctl enable httpd
*Note: This command creates a symlink to manage the startup of the Apache HTTP Server (httpd) service with system.*

5️⃣Test Public Access to the Web Server
Test the Server: Verify that the Apache server is publicly accessible using the server’s public IP.
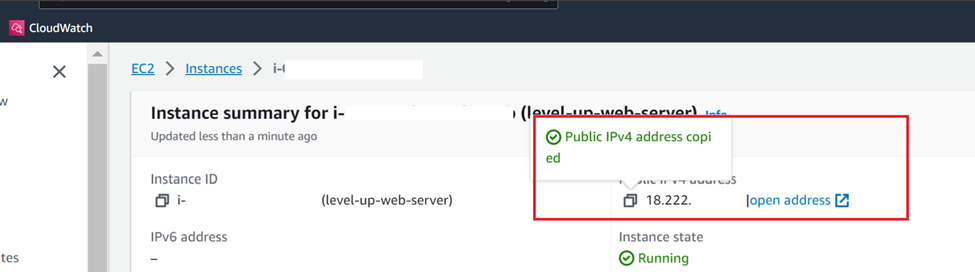
Paste it into a web browser and press enter.
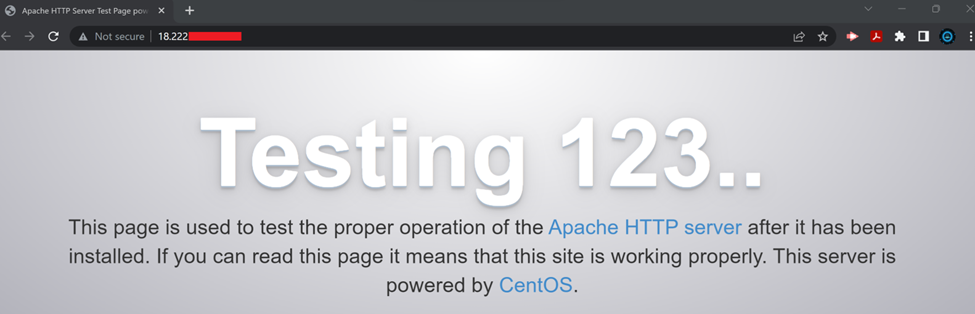
👏We have successfully accessed the newly installed Apache web server. Leave the browser open for the next section.
6️⃣ Create a Basic Custom Html Webpage
For our next step, we will create a custom HTML page that displays: Welcome to LUIT — Black Cohort
Navigate to Web Root: Change to the Apache web root directory:
cd /var/www/html

Create Index File: Create an index.html file and understand and take note of any errors.
*Note: I received a permission denied error.*

Why didn’t this command work as intended?
🔸sudoelevates the privileges for the echocommand only.
🔸echooutputs the string “Welcome to LUIT — Black Cohort”.
🔸The shell (with regular user privileges) tries to redirect the output to index.html.
🔸Since the shell does not have elevated privileges and the /var/www/html directory typically requires root permissions to write to, the shell cannot write to index.html, resulting in a “Permission denied” error.
Correct Command: To resolve this, use the correct command with tee and sudo to create your custom HTML page:
echo "Welcome to LUIT — Black Cohort" | sudo tee index.html

Verify Page: Refresh the public IP in your browser to see the new custom HTML page.

👏We have successfully customized the html page.
7️⃣Review Access and Error Logs to Identify User-Reported Website Issues
In this last section, we’ll tango through how to review the access logs and error logs for the Apache web server. Let’s start with the access logs.
Access Logs: While connected to the CentOS EC2 Instance, type the following command to review the last entries in the access logs:
sudo tail -n 15 /var/log/httpd/access_log
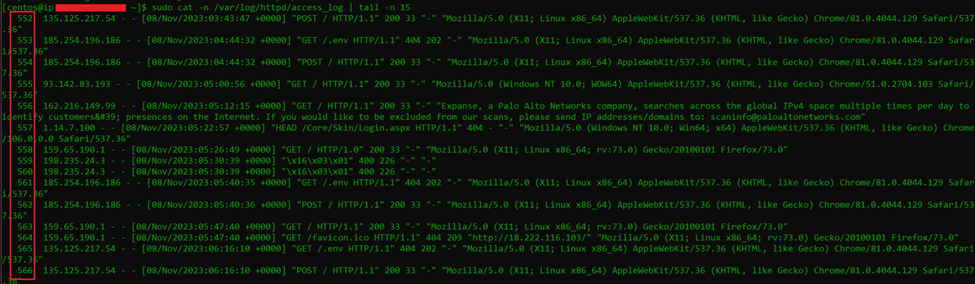
*Note: To view the access logs with each entry numbered, you can use:*
sudo cat -n /var/log/httpd/access_log | tail -n 15
Error Logs: Check the error logs similarly with the following command:
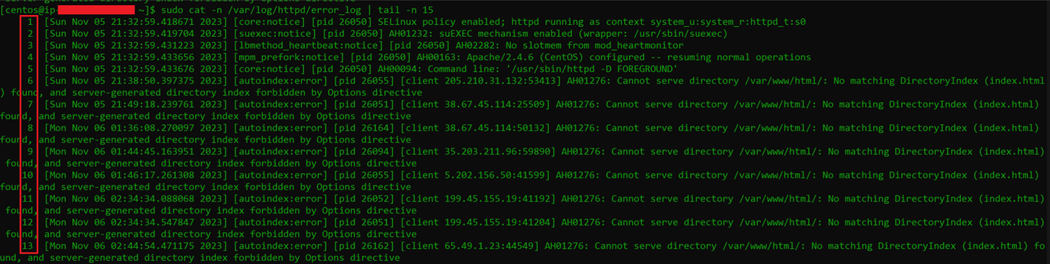
sudo tail -n 15 /var/log/httpd/error_log
*Note: To view the error logs with each entry numbered, you can use:*
sudo cat -n /var/log/httpd/error_log | tail -n 15
Redirect and Save Logs: To redirect those same logs into their own files, AccessLogs_11–07–23 and ErrorLogs_11–07–23, respectively, run the following commands.
🔸Access Logs:
sudo cat -n /var/log/httpd/access_log | tail -n 15 > AccessLogs_11-07-23
🔸Error Logs:
sudo cat -n /var/log/httpd/access_log | tail -n 15 > ErrorLogs_11-07-23

Note: The absence of output when running the command is a good sign
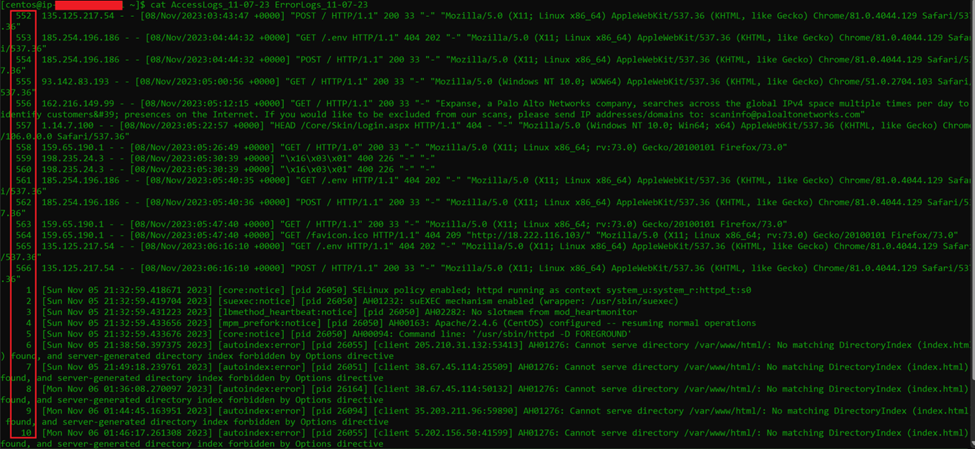
List Contents: You can list out the contents of the files with the ls command to confirm.

Validate Contents: You can also confirm the contents of the files with the cat**** command.
With the Apache server now dancing in sync with CentOS on the AWS cloud stage, Level Up Bank’s web server is set to perform optimally.
Thanks for joining in on this tenacious tango with me! 😄👍
Comments
Loading comments…