Amazon Relational Database Service (Amazon RDS) is a web service that makes it easier to set up, operate, and scale a relational database in the AWS Cloud. It provides cost-efficient, resizable capacity for an industry-standard relational database and manages common database administration tasks.
Prerequisites
An AWS Account --- free tier.
MySQL Workbench GUI tool. Download here based on your OS.
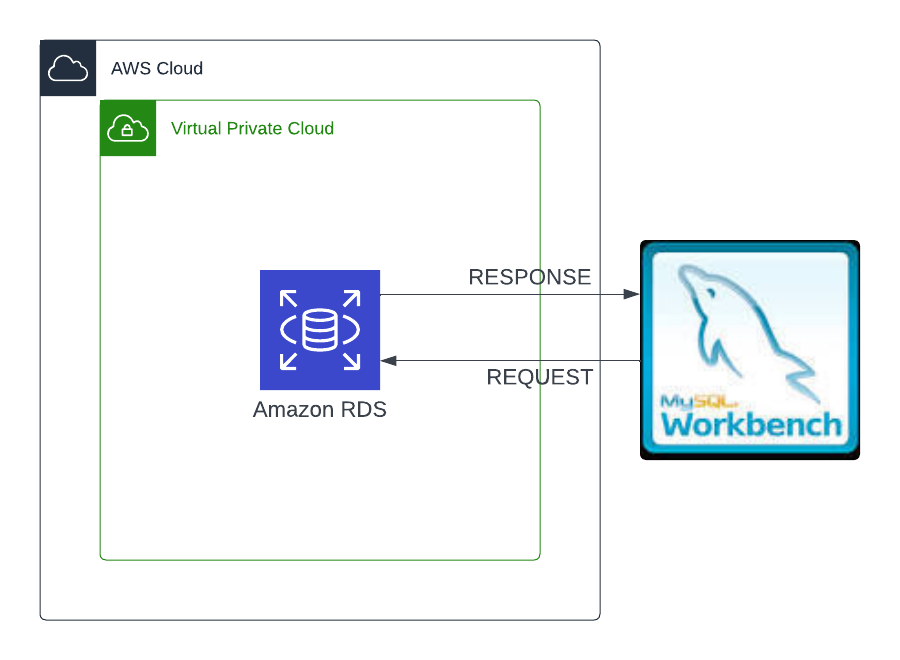
Tasks
1.1 Sign in to the AWS Management Console as an IAM User with administrator Privileges.
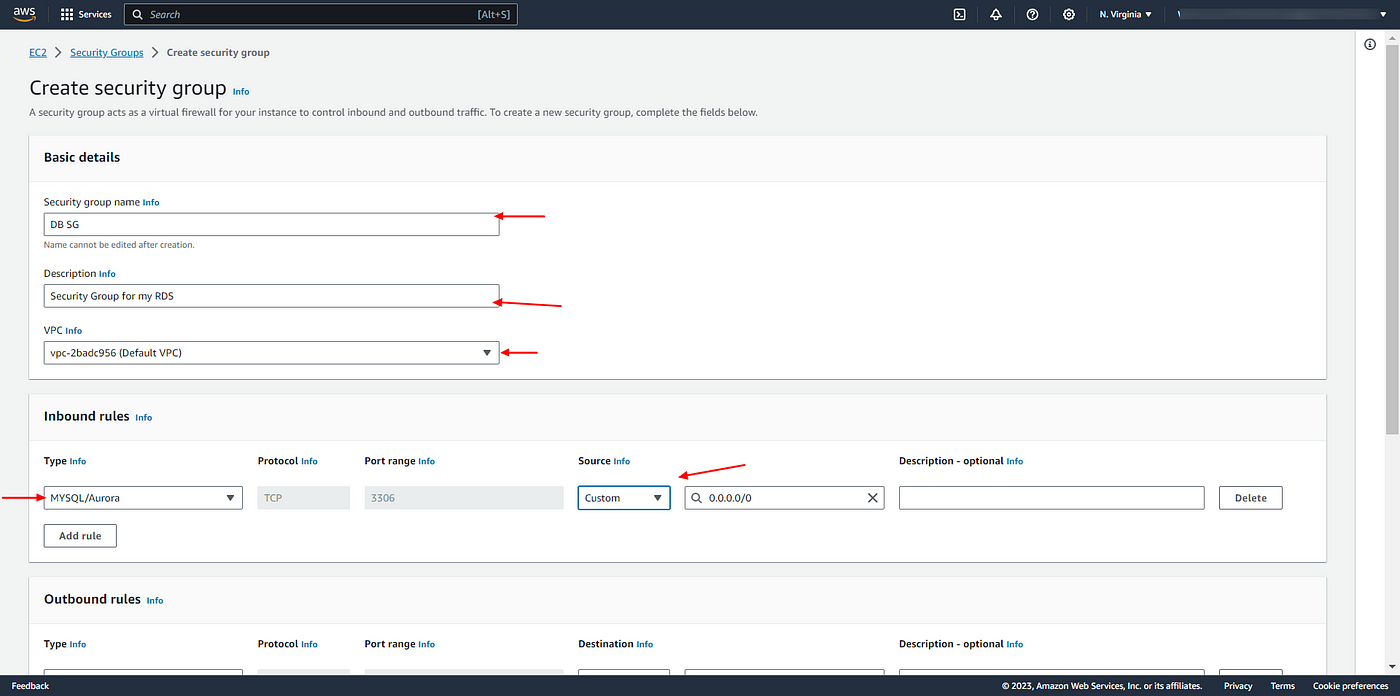
1.2 Let's start by creating a security group for our database, head over to the EC2 dashboard, Then, select security group on the left part. Click on Create Security Group.

1.3 Inside the create security group page specify the security group name as DB SG. For Description enter security group for my RDS, select the default VPC.
1.4 In the inbound rules section select MYSQL/Aurora as type. Select Custom as the source 0.0.0.0/0
1.5 Choose Create Security Group at the bottom of the security group page.
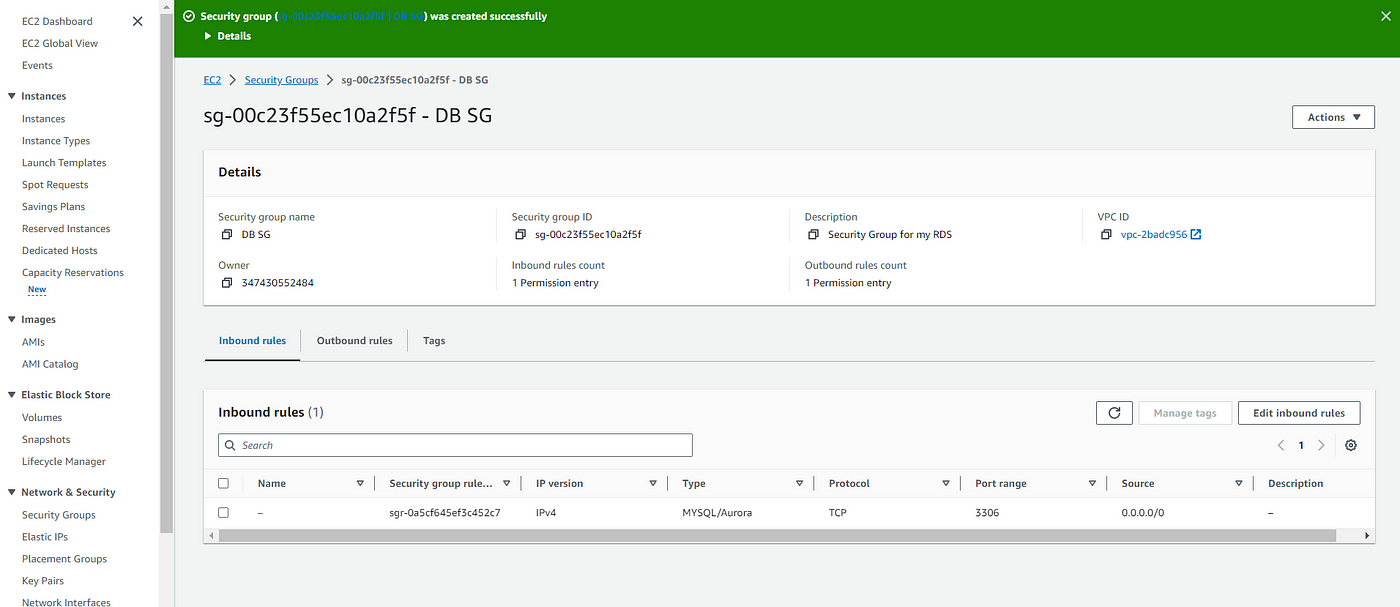
1.6 Confirm that our security group DB SG is created.
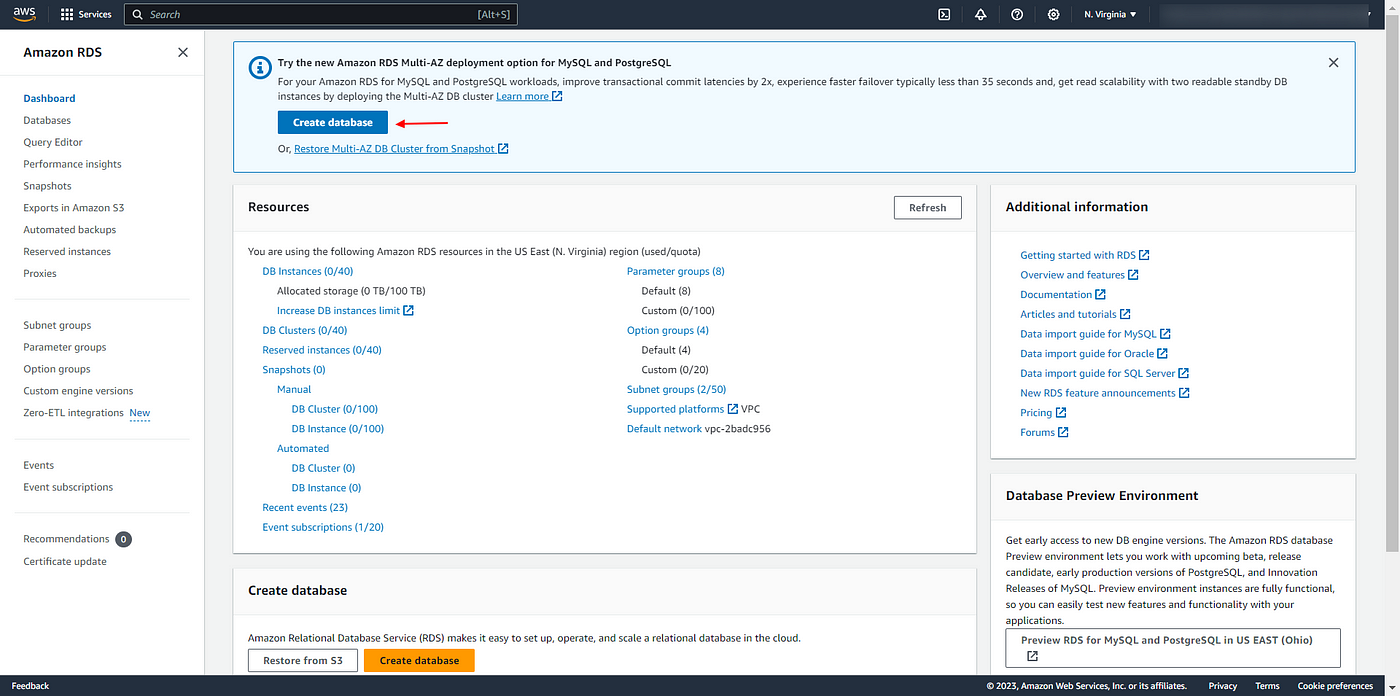
2.1 Now let's create our RDS instance. We will create a MySQL database under the free tier. Head over to the console and search for RDS.
2.2 Choose to Create database.
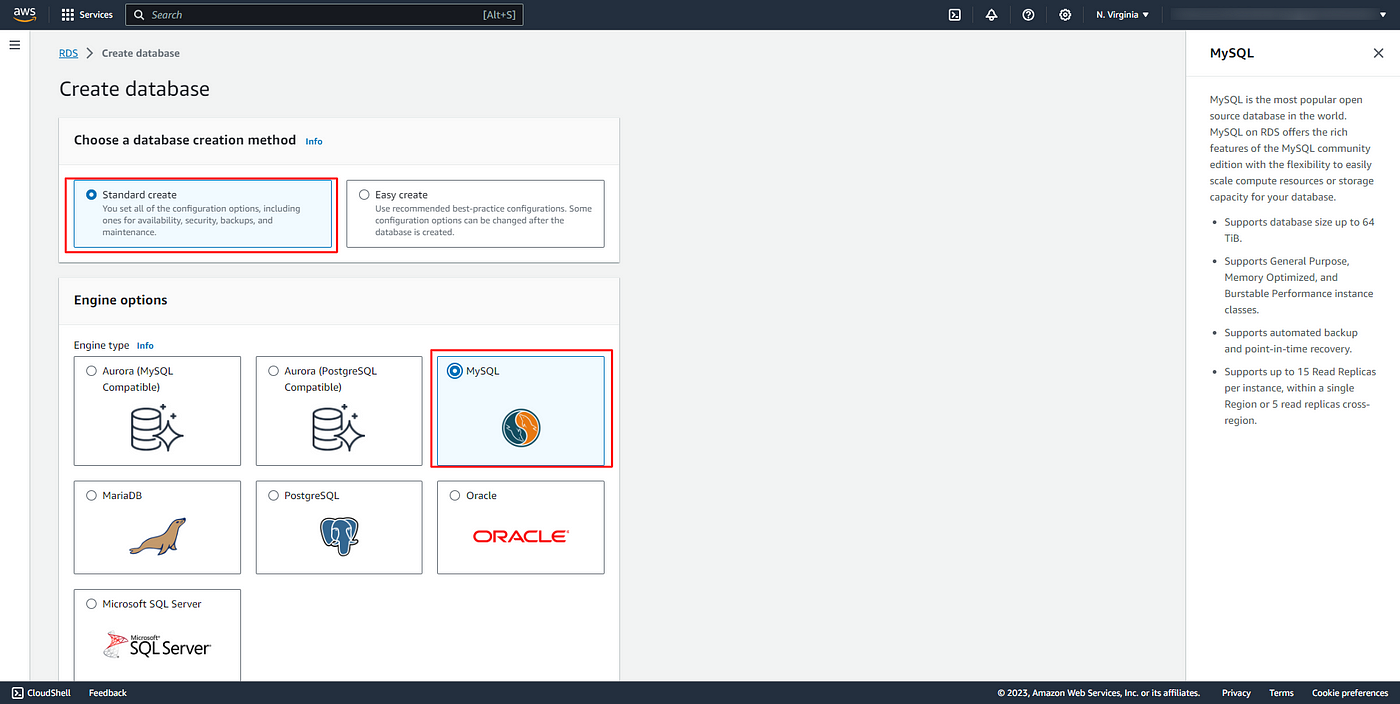
2.3 Inside the create database dashboard, select Standard Create. For the engine type choose MySQL.
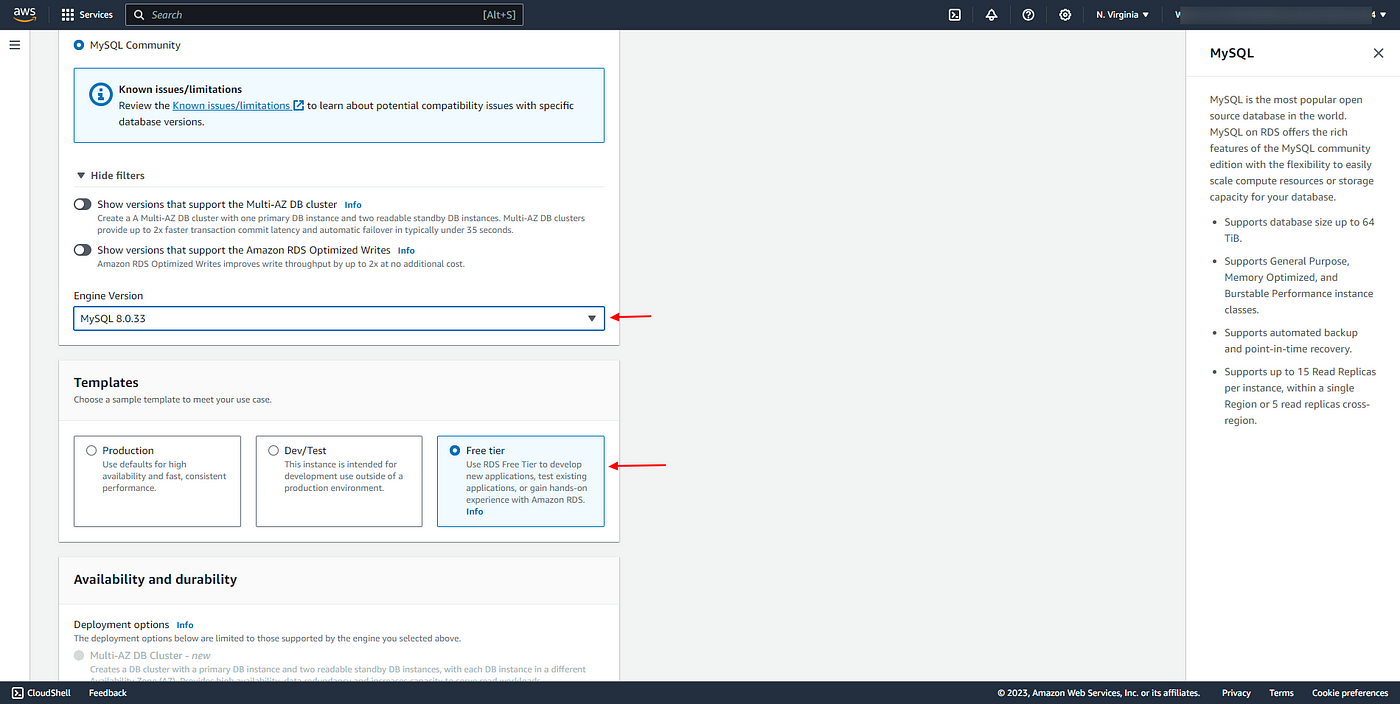
2.4 Leave the engine version as default.
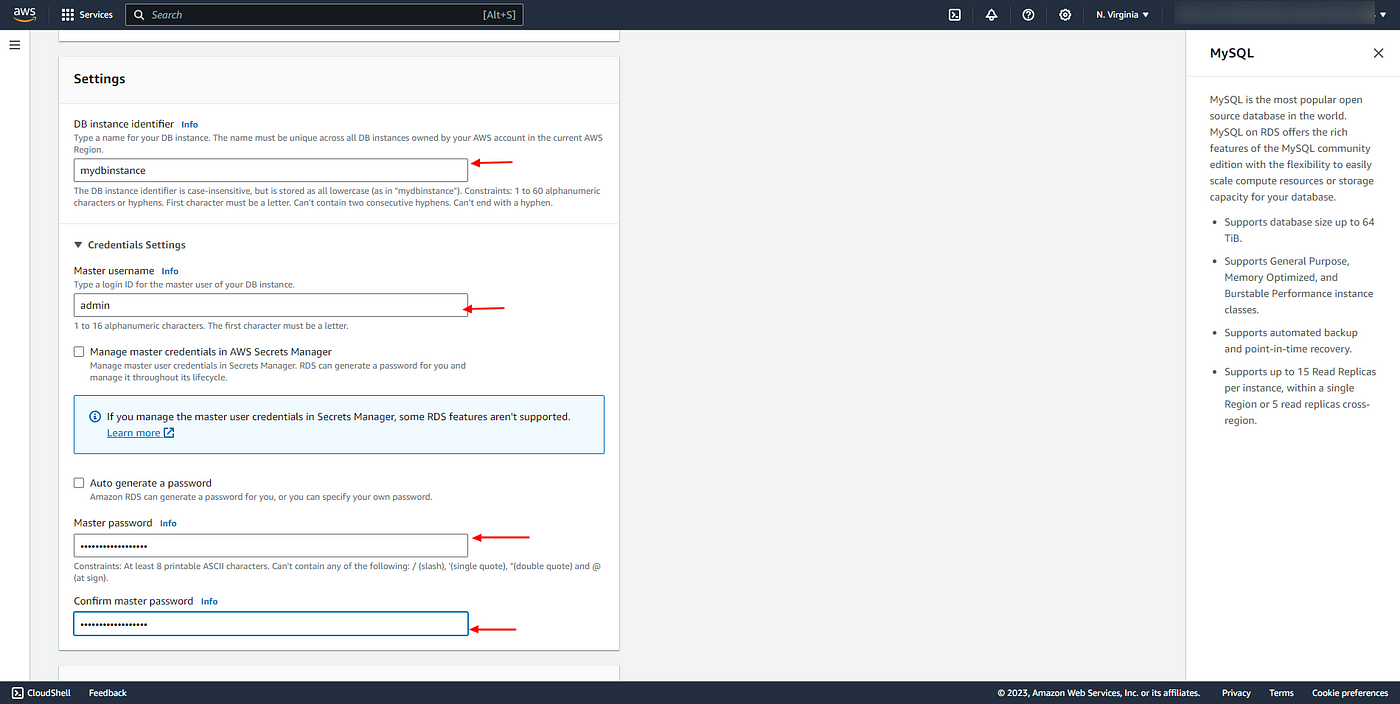
2.5 Inside the settings, Specify the DB identifier as mydbinstance. Under Username Specify as admin.
2.6 Specify the master password and confirm the password.
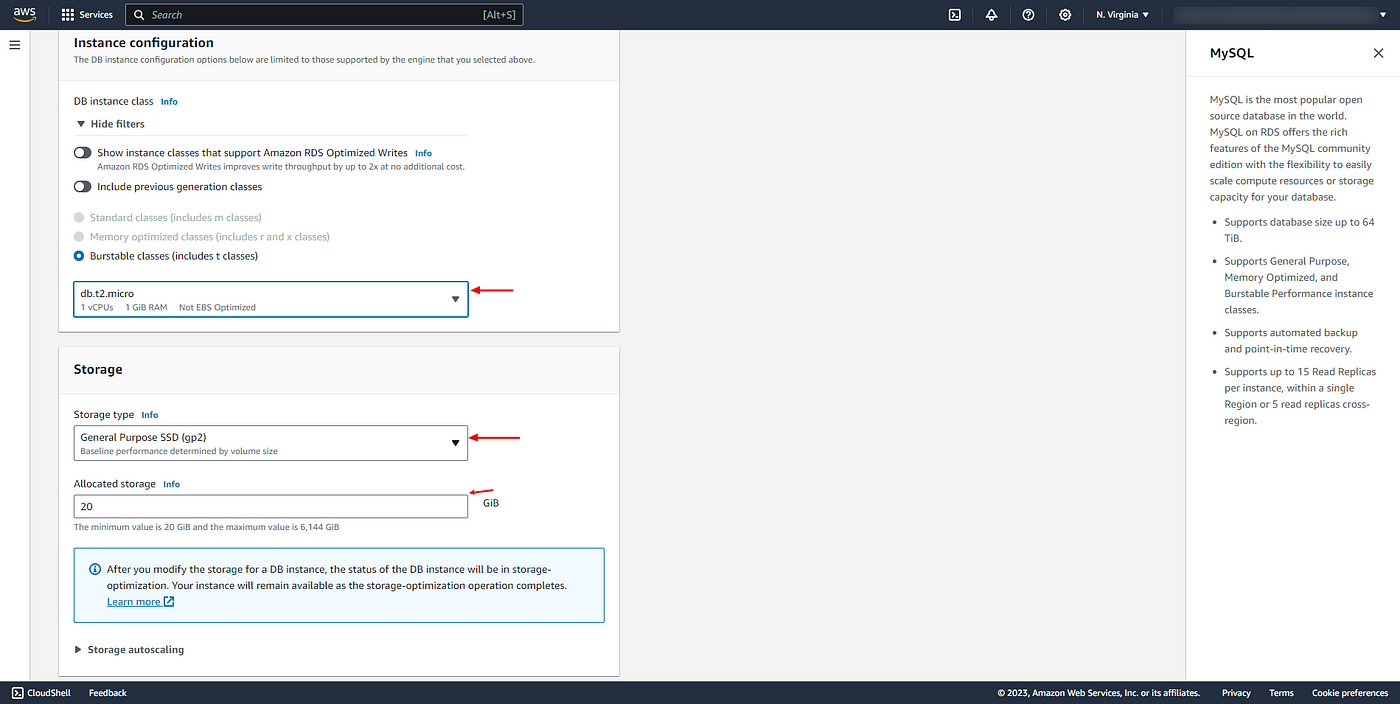
2.7 Under the instance configuration option, select db.t2.micro.
2.8 On storage select the general-purpose SSD.
2.9 Choose the allocated storage as 20 GB.
2.10 Inside Autoscaling, uncheck the Enable storage auto-scaling checkbox.
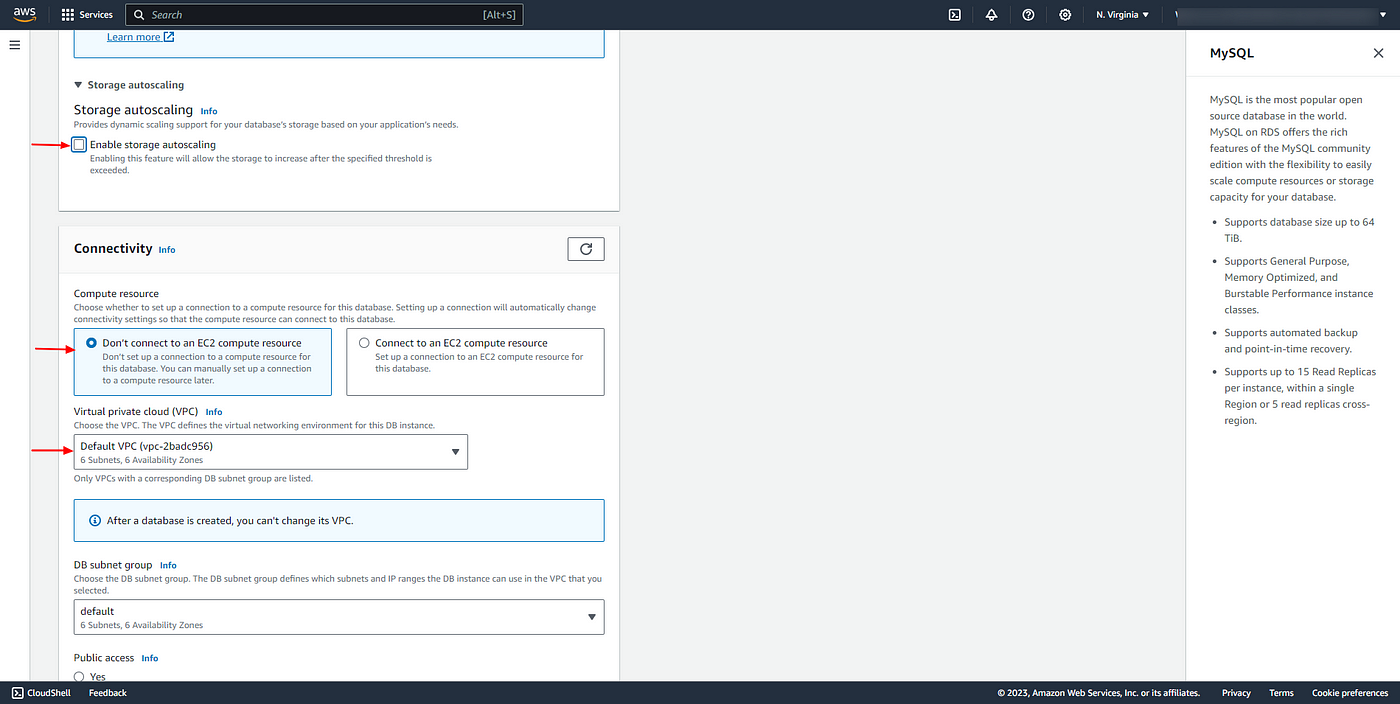
2.11 Scroll down to connectivity, Set Public access as Yes, and under VPC security group choose the DB SG we created earlier.
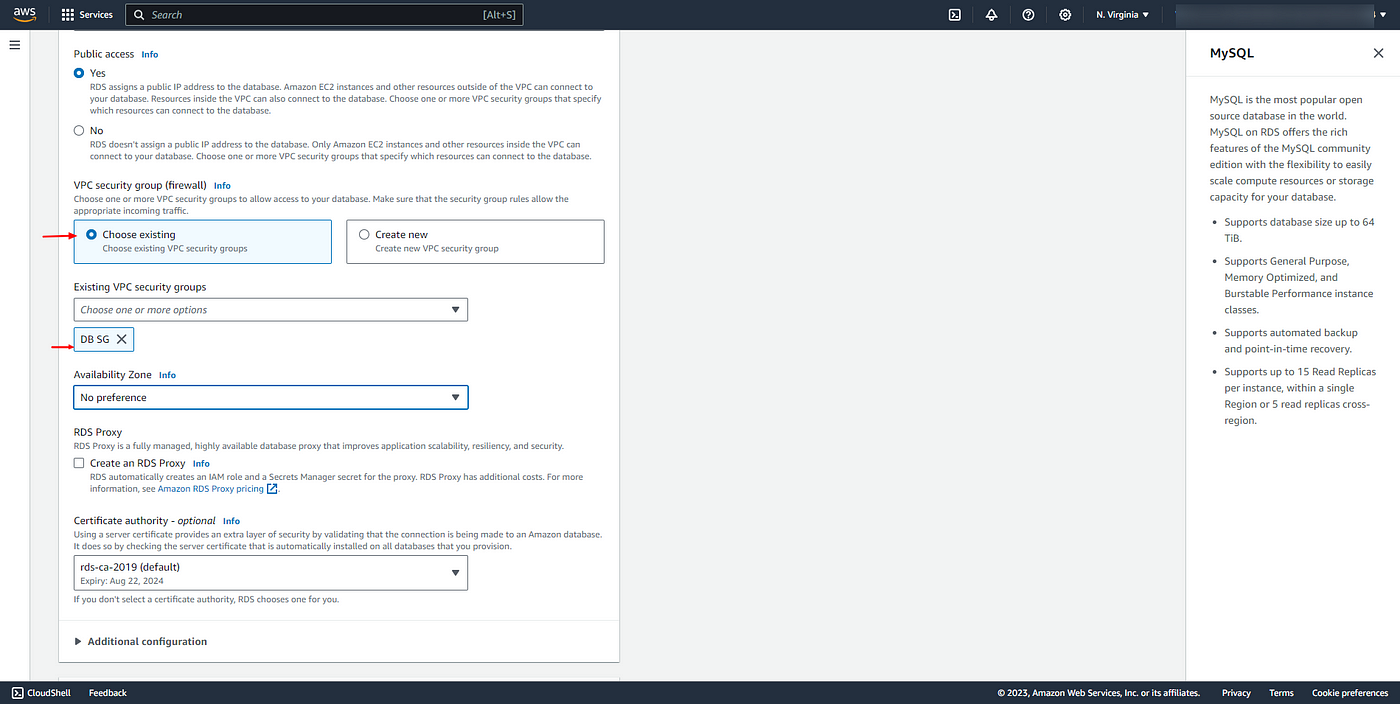
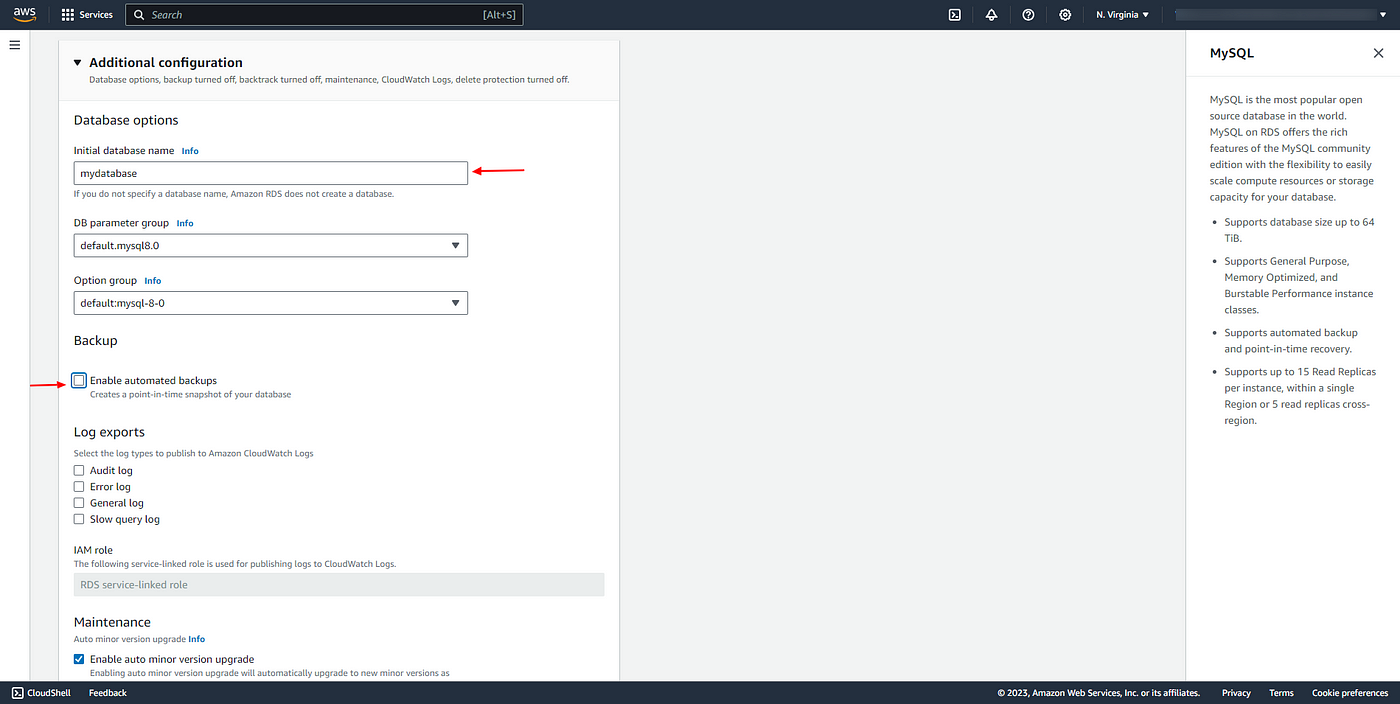
2.12 Scroll down to additional configuration, uncheck the Enable automated backups checkbox. Leave everything as default.
2.13 Choose Create Database at the bottom.
2.14 Confirm the database is creating, and wait for the database status to change to available, it may take a few minutes. Copy the database endpoint for our database since we will require it later.

Establishing connection
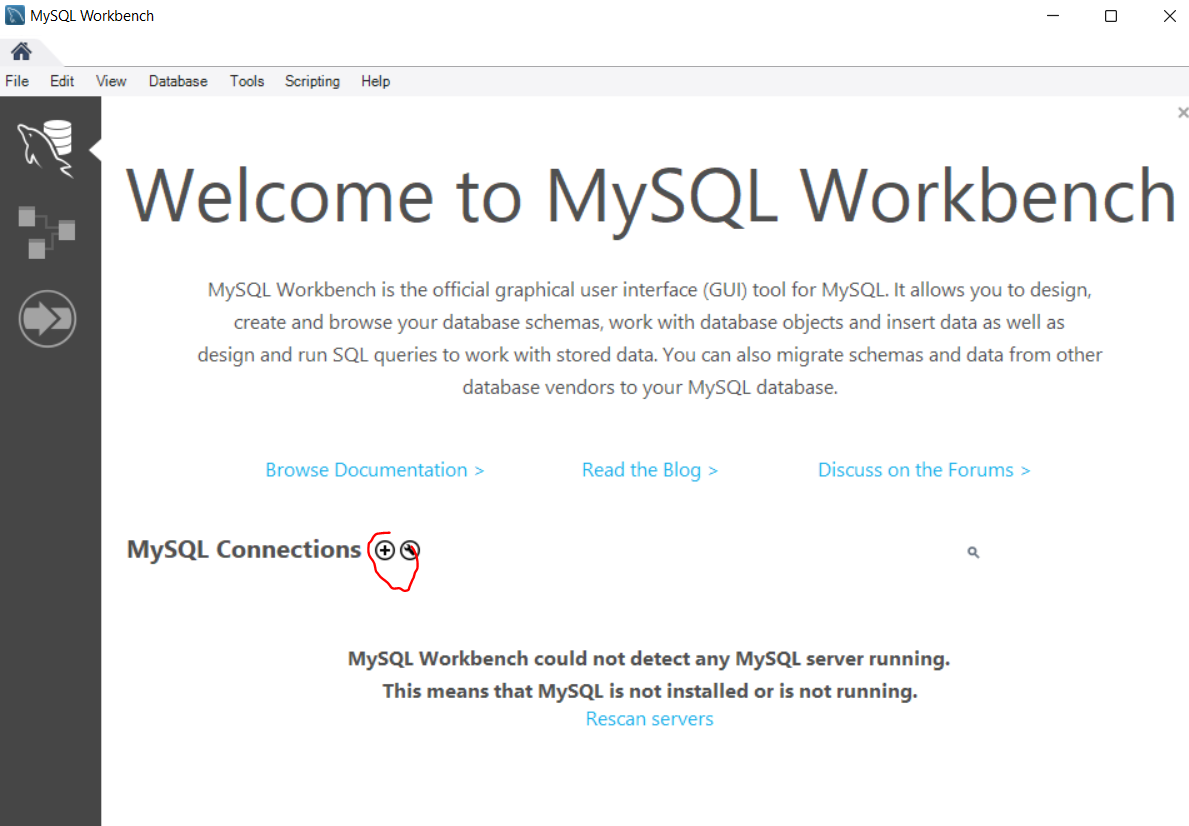
3.1 Open MySQL Workbench then click on the plus icon next to the word MySQL connections.
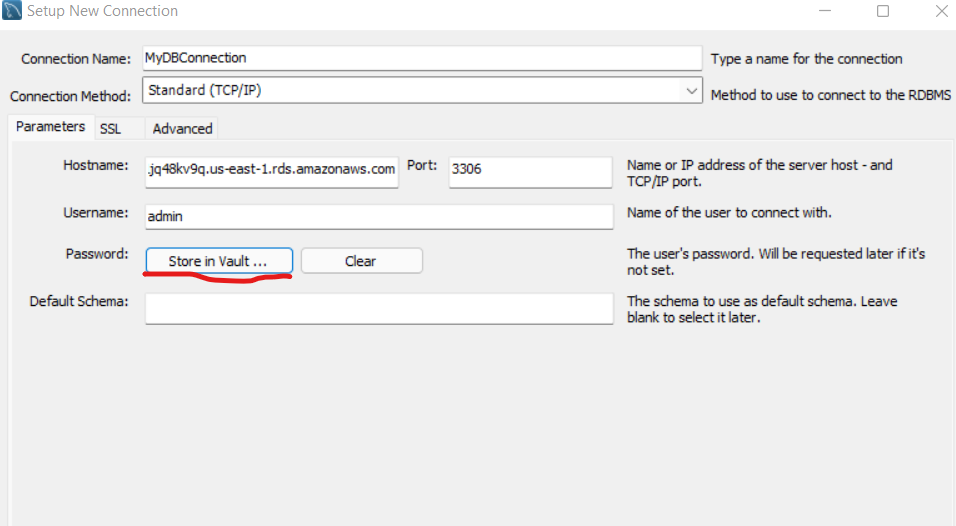
3.2 In the Setup New Connection wizard, set the connection name as MyDBConnection, and choose the connection method as standard TCP/IP. In the parameters section, paste the database endpoint we copied earlier into the Hostname section. Leave the default port as 3306.
3.3 Specify the username as admin which we specified earlier when creating our database.
3.4 Choose the store in Vault button.
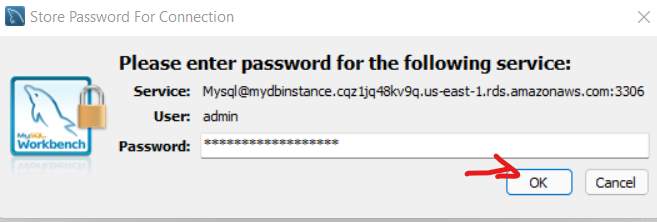
3.5 Inside the Store Password for Connection wizard, Specify the password that we specified when creating our database.
3.6 Click on OK.
3.7 Then click on Test Connection.

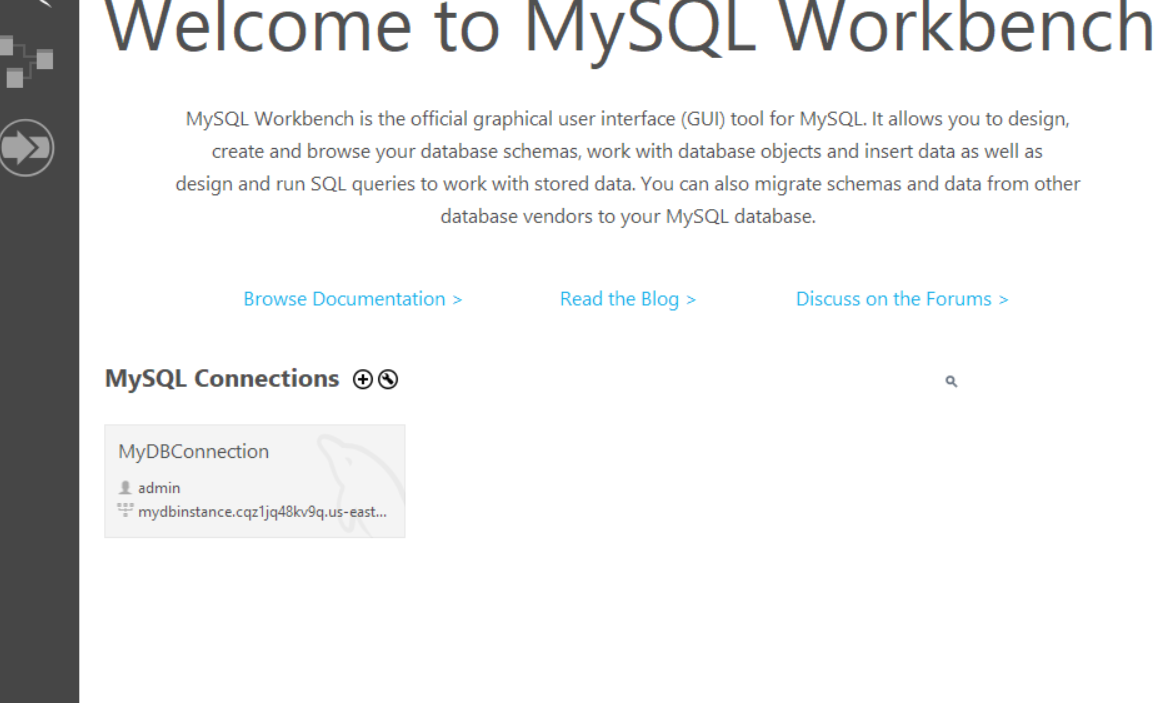
3.8 We can see that MyDBConnection is successfully established. Click on MyDBConnection
3.9 Now we have already access to our database. Choose the schemas tab, here we can perform various operations inside our database.
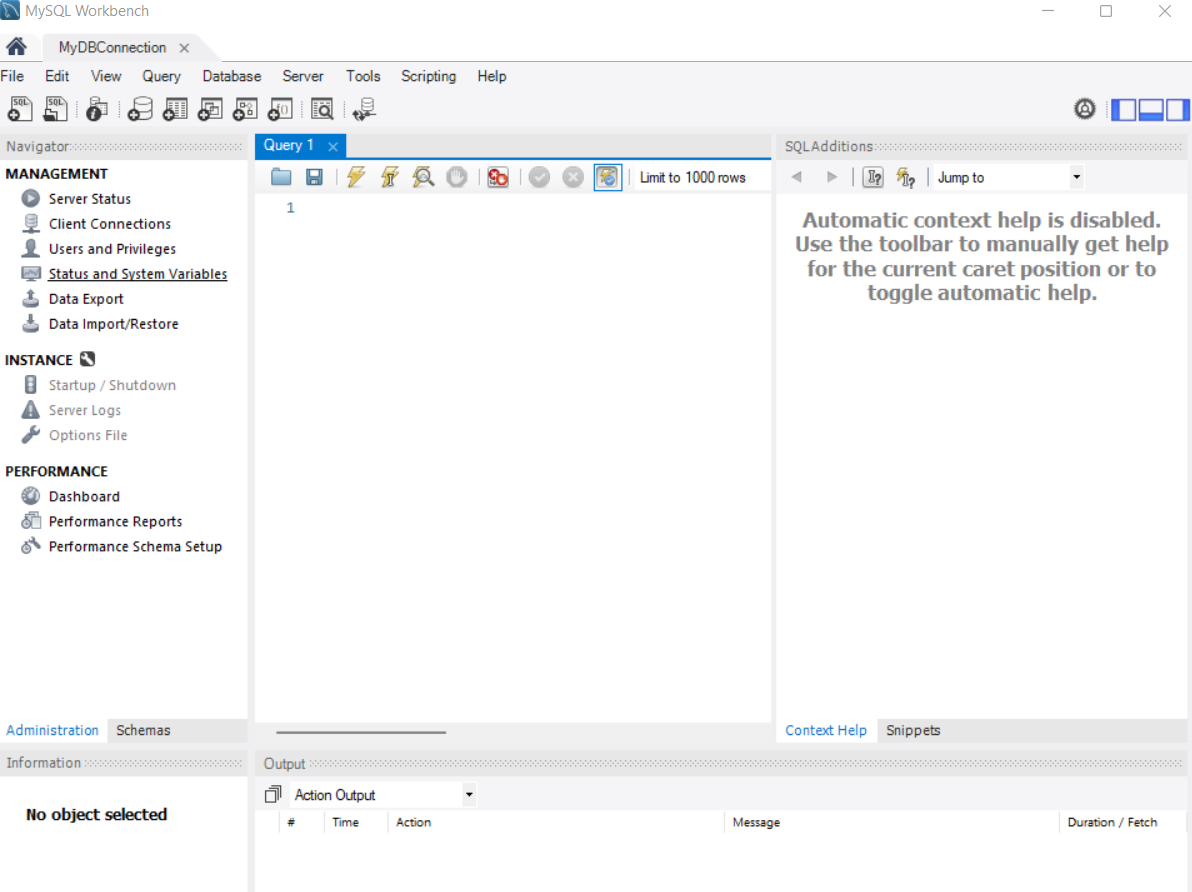
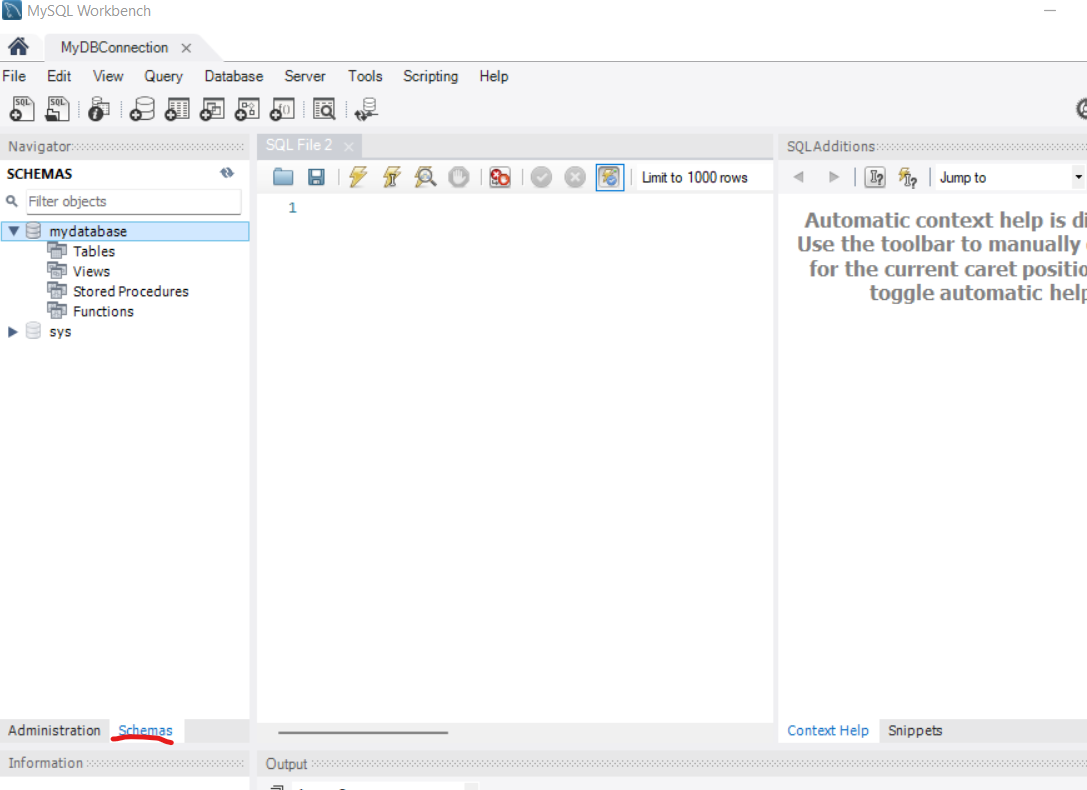
That's it for this exercise you learned how you can establish a connection to MySQL RDS instance using MySQL Workbench.
Once completed delete our RDS Instance.
For more info about RDS visit this link

