
My Journey
After I started testing component interactions with Testing Library, I soon realized that the single hardest task was retrieving the right DOM elements. This was the critical path to testing. After all, if you can’t query the thing you want to test, you can’t test it! The first thing I learned was getByText and it covered a decent amount of test cases. But soon, as I went on to test more complex components, it wasn’t good enough. Through all my trials and tribulations, this has become my query strategy.
1. Screen Debug
Testing Library’s screen.debug is my go-to tool to come up with queries. Instead of looking at the code and imagining how it is represented on the DOM in my head, I can use Testing Library’s logging tool to immediately log a prettified DOM tree in the console with all the element attributes. Seeing all this visually, helps me quickly formulate my query strategy. By default it will log document.body.
import { render, screen } from '[@testing](http://twitter.com/testing)-library/react';

test('screen debug default', () => {
  render(
    <div role="group">
      <button className="secondary">Secondary</button>
      <button className="primary">Primary</button>
    </div>
  );
  screen.debug();
  // output:
  //   <body>
  //     <div>
  //       <div role="group">
  //         <button className="secondary">
  //           Secondary
  //         </button>
  //         <button className="primary">
  //           Primary
  //         </button>
  //       </div>
  //     </div>
  //   </body>
});
screen.debug also accepts a DOM element to log specifically that element. This is useful to quickly validate whether a query works as expected.
test('screen debug element', () => {
  render(
    <div role="group">
      <button className="secondary">Secondary</button>
      <button className="primary">Primary</button>
    </div>
  );
  screen.debug(document.querySelector('.primary'));
  // output:
  //   <button className="primary">
  //     Primary
  //   </button>
});
2. Query By Text
Query by text returns an element based on its text content and is by far my most commonly used query. It is my default query method not only because of how easy it is to understand and use, but also because of how closely it mimics actual user behavior and interactions on web applications.
import { render } from '@testing-library/react';

test('should return element based on its text', () => {
  const { getByText } = render(<button>Button</button>);
  expect(getByText('Button')).toMatchInlineSnapshot(`
    <button>
      Button
    </button>
  `);
});
3. Query By Label Text
Query by label text returns an element based on an associated label element text content or aria-label attribute. This query method really depends on implementation because it requires an under-the-hood association. It will find a label element based on its text content (similar to querying by text), find the input element associated with that label, and return that input element. This association can be done either through nesting
test('should return element based label nesting', () => {
  const { getByLabelText } = render(
    <label>
     Field
     <input />
   </label>
 );
 expect(getByLabelText('Field')).toMatchInlineSnapshot(`<input />`);
});
through htmlFor
test('should return element based on label htmlFor', () => {
  const { getByLabelText } = render(
   <>
    <label htmlFor="field">Field</label>
    <input id="field" />
   </>
 );
 expect(getByLabelText('Field')).toMatchInlineSnapshot(`
   <input
     id="field"
   />
  `);
});
or through aria-labelledby.
test('should return element based on label aria-labelledby', () => {
  const { getByLabelText } = render(
   <>
     <label id="field">Field</label>
     <input aria-labelledby="field" />
   </>
 );
 expect(getByLabelText('Field')).toMatchInlineSnapshot(`
    <input
      aria-labelledby="field"
    />
  `);
});
Because of this specific implementation requirement, it is a bit more difficult to use. But the real reason this is my second go-to query method is because this can also query based on the aria-label attribute which can be anything you want (within reason of course). This not only makes querying for testing easier, but also helps with accessibility.
test('should return element based on its aria-label', () => {
  const { getByLabelText } = render(<div aria-label="label" />);
  expect(getByLabelText('label')).toMatchInlineSnapshot(`
    <div
      aria-label="label"
    />
 `);
});
4. Query By Role
This returns an element based on its role attribute. Like querying by aria-label, querying by role helps with both testing and accessibility. The only difference is that role has fairly well-defined values and is therefore, less flexible. Nonetheless, it’s my next go-to query method because of it’s dual roles in testing and accessibility, pun intended.
test('should return element based on its role', () => {
 const { getByRole } = render(<div role="button" />);
 expect(getByRole('button')).toMatchInlineSnapshot(`
   <div
     role="button"
   />
 `);
});
5. Within
Testing Library’s within allows you to use nest queries. This is useful if multiple elements are returned for a given query. Instead of querying the element that you want to test immediately, you break it up into multiple queries, each building off the previous, until you can uniquely query for the desired element. within will bind the Testing Library queries to a DOM element so you can perform the subqueries.
import { render, within } from '@testing-library/react';

test('should return element based on its role', () => {
  const { getAllByRole } = render(
    <table>
      <tbody>
        <tr role="row">
          <td>Cell</td>
        </tr>
        <tr role="row">
          <td>Cell</td>
        </tr>
        <tr role="row">
          <td>Else</td>
        </tr>
      </tbody>
    </table>
  );
  const [row1, row2, row3] = getAllByRole('row');
  expect(within(row1).getByText('Cell')).toBeTruthy();
  expect(within(row2).getByText('Cell')).toBeTruthy();
  expect(within(row3).queryByText('Cell')).toBeNull();
});
Bonus: Chrome Extensions
To make querying even easier, there are a couple of chrome extensions that automate this.
**Testing Library: which query** is a chrome extension that will automatically generate basic queries when you select an element through the right-click menu or the element inspector tool.
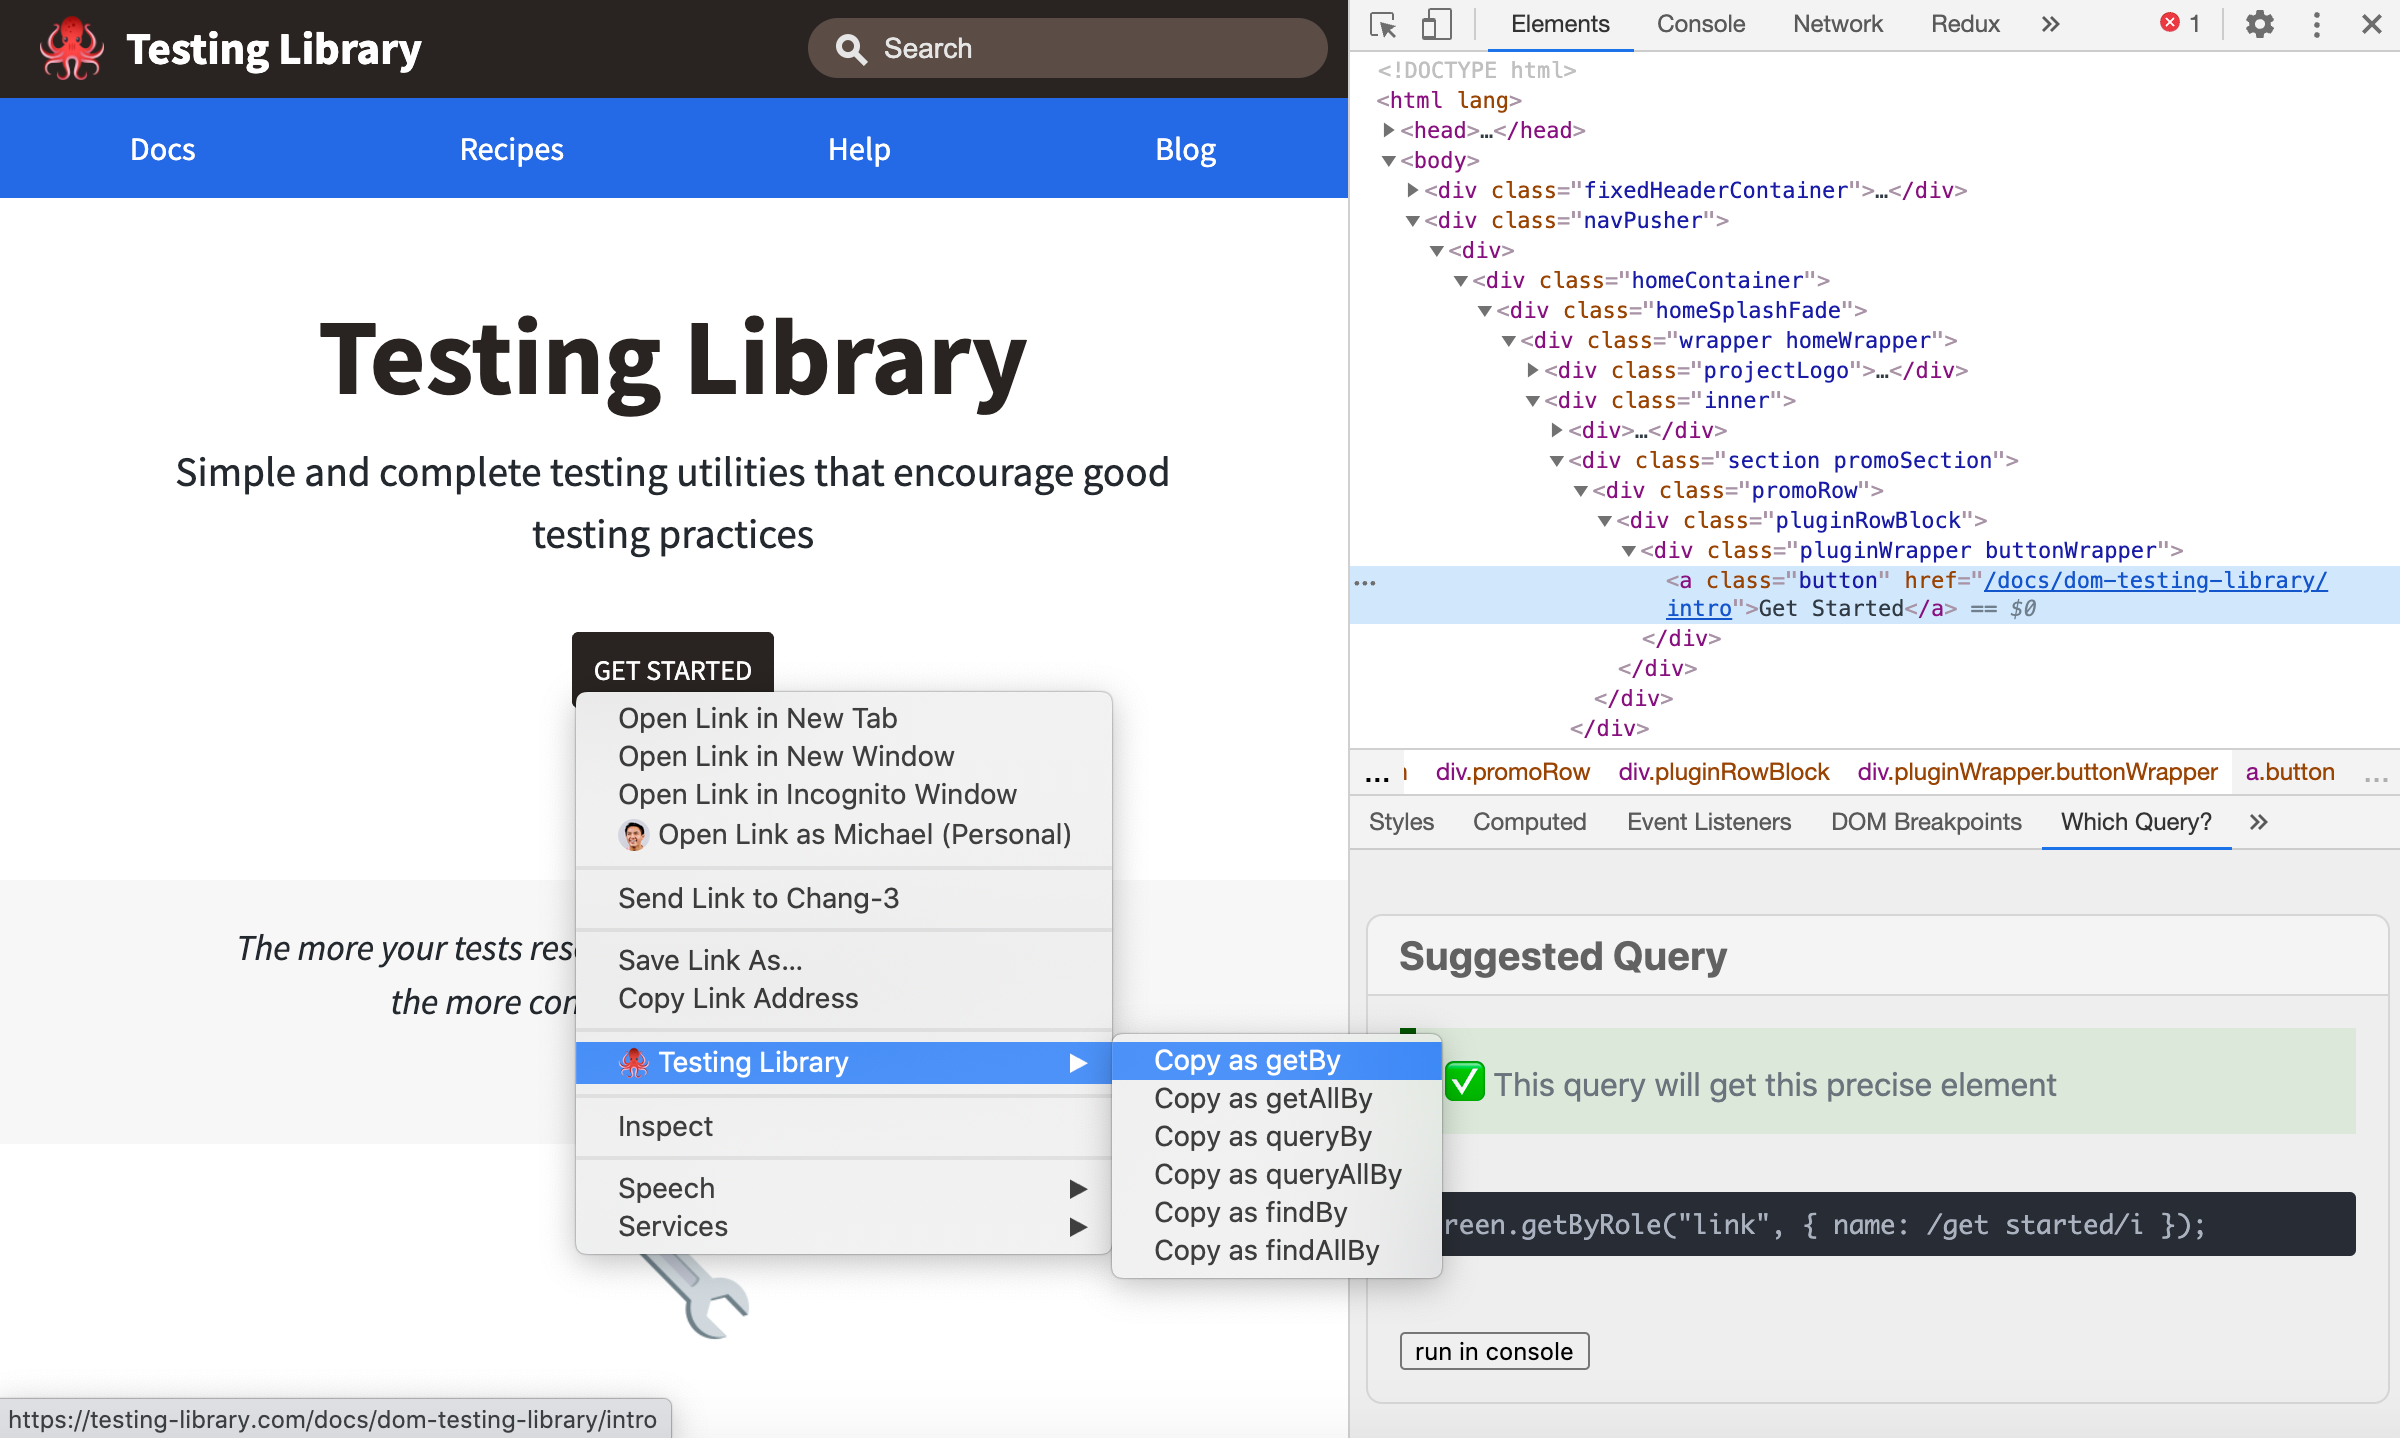 Testing Library: which query Chrome Extension
**Testing Playground** is another chrome extension that does a similar thing but enhances the query building process by displaying additional data that can help you help you understand the query better such as the prettified DOM tree, helpful queryable attributes, and better query suggestions for the selected element.
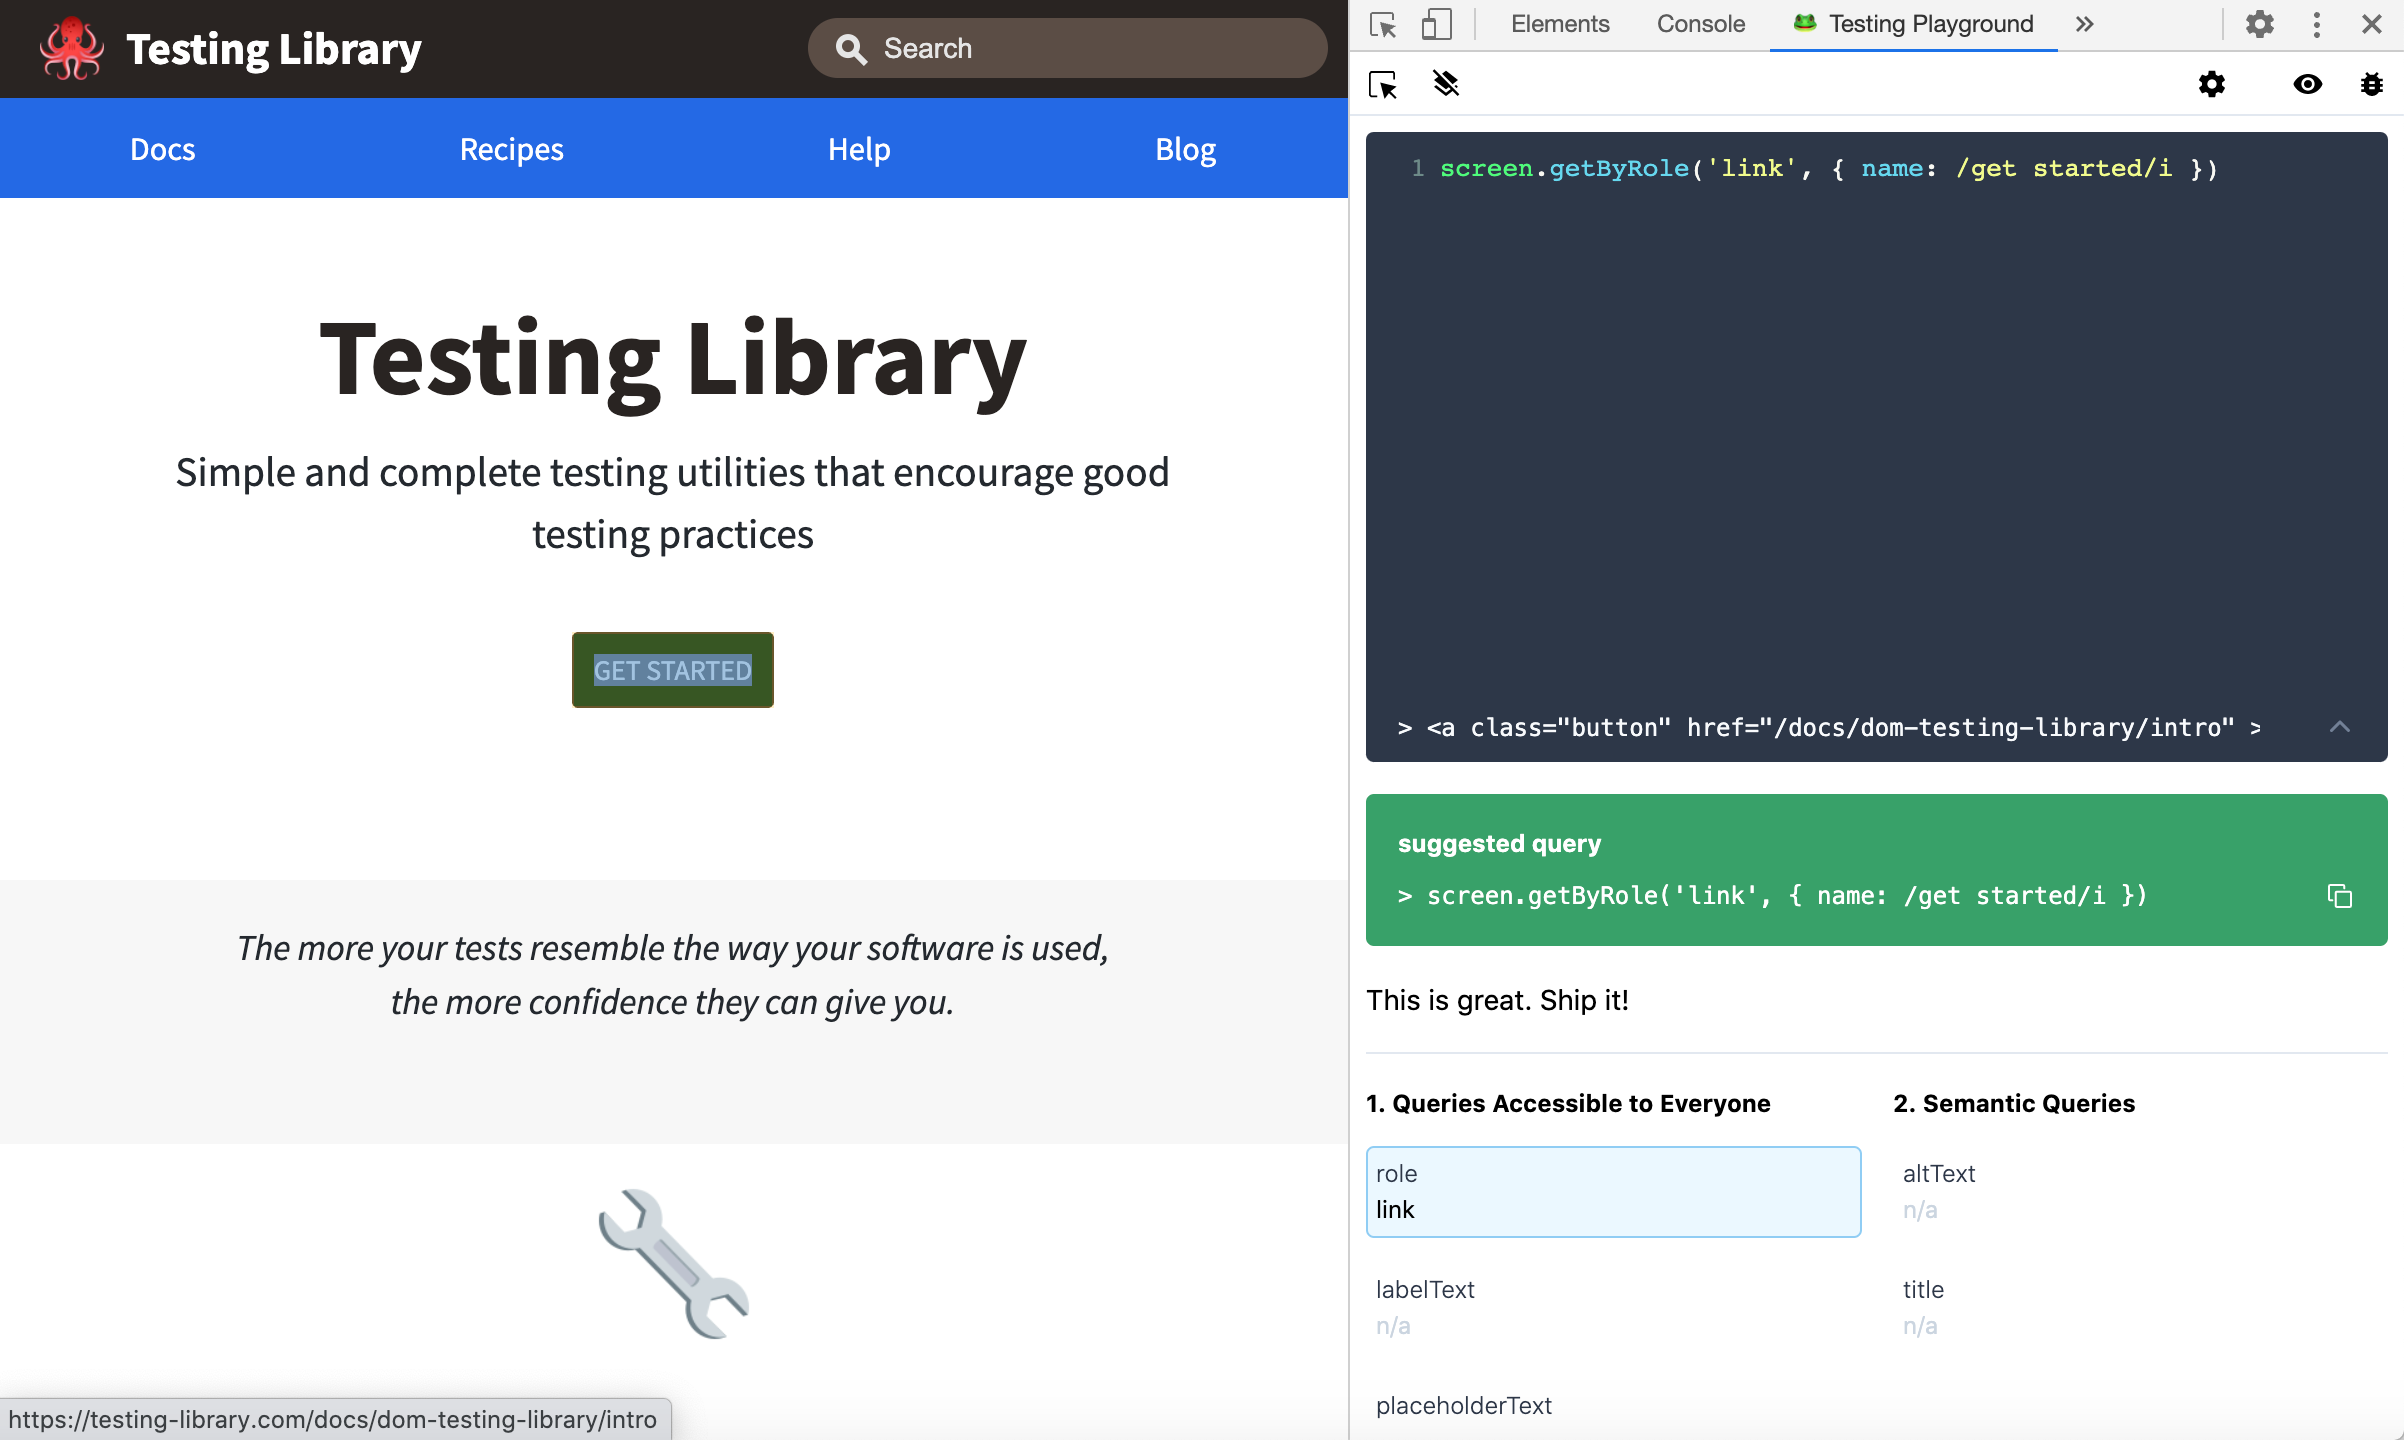 Testing Playground Chrome Extension
Of course, make sure to verify that these generated queries to ensure they work completely as expected!
Final Thoughts
Testing Library is a fantastic library for component interaction testing and it does an amazing job to make testing easier and accessible. Even so, querying the right elements to test can still be challenging. From my experience, these five strategies can help you generate queries for any possible scenario. And on top of that, you can use the chrome extensions to do most of this for your automatically. Now go test — you have no more excuses!
Comments
Loading comments…