Photo by nicole duncan on Unsplash
1. Picture
The <picture> tag gives web developers more flexibility in specifying image resources. The most common use of the picture element is for responsive design.
The <picture> element contains two tags: one or more <source> tags and one <img> tag.
The browser will look for the first <source> element that matches the media query, which is got by the srcset attribute. If none of the media queries is matched, the browser will use the <img> element.
Example:
<picture>
   <source media="(min-width:1024px)" srcset="dog-big.jpg">
   <source media="(min-width:465px)" srcset="dog-small.jpg">
   <img src="cat.jpg" alt="Flowers" style="width:auto;">
 </picture>
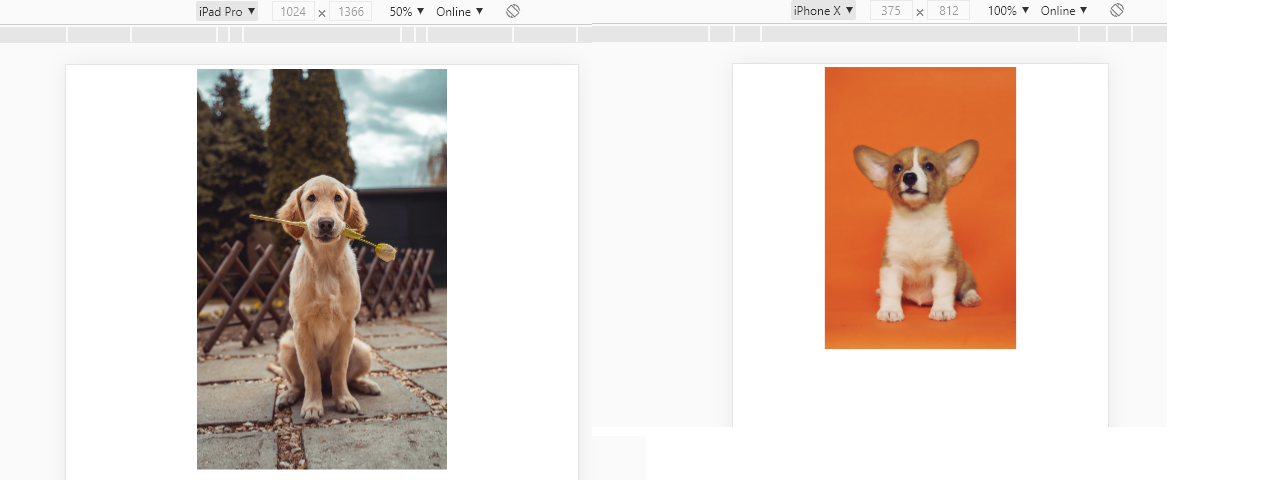
Img cred Alvan Nee & Richard Brutyo
2. Color Picker
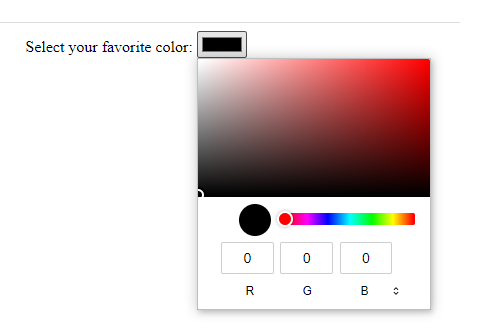
An <input> element with a type of “color” provides a UI element that lets the user specify a color.
The default value is #000000 (black).
Color Picker HTML
Example:
<label for="favcolor">Select your favorite color:</label>
<input type="color" id="favcolor" name="favcolor">
If you want a default color that is not black you just need to set the value. The value must be in seven-character hexadecimal notation.

Color Picker HTML
Example:
<label for="favcolor">Select your favorite color:</label>
<input type="color" id="favcolor" name="favcolor" value="#e66465">
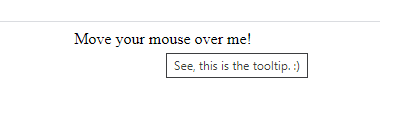
3. Title Tooltip
A nice easy way to do a tooltip over some text by just specifying the title attribute.
HTML Tooltip
Example:
<span title=”See, this is the tooltip. :)”>Move your mouse over me!</span>
4. Content Editable
Maybe not the most useful one with some JavaScript but still a neat trick.
By using some JavaScript event handlers, you can transform your web page into a full and fast rich text editor.

Content Editable (HTML)
Example:
<div contenteditable="true">
  User can edit this div!
</div>
5. Refresh the browser
Refresh the browser with a meta tag.
Place the below in <head> tag and the page will refresh every 3 seconds:
<meta http-equiv="refresh" content="3">
The content attribute defines how often in seconds you want to refresh. You can also do redirect to another site. The below will redirect to google.com in 3 seconds:
<meta http-equiv="refresh" content="3; url=https://google.com/">
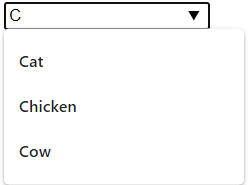
6. Datalist
The <datalist> tag is used to provide an "autocomplete" feature for <input> elements. You will see a drop-down list of pre-defined options as you type.
<datalist>
Example:
<input list="animals" name="animal" id="animal">

<datalist id="animals">
    <option value="Cat">
    <option value="Dog">
    <option value="Chicken">
    <option value="Cow">
    <option value="Pig">
  </datalist>
The <datalist> id attribute (see bold items above) must be equal to the list attribute of the <input>, this is what binds them together.
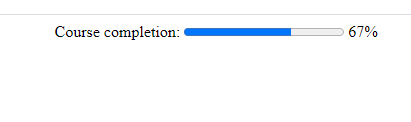
7. Progress
The <progress> element represents the completion progress of a task.
<progress> HTML element
Example:
<label for="course">Course completion:</label>
<progress id="course" value="67" max="100"></progress> 67%
8. Meter
The <meter> element fines a scalar measurement within a known range or a fractional value.

<meter> HTML element
Example:
<label for="disk_g">Disk usage G:</label>
<meter id="disk_g" value="2" min="0" max="10">2 out of 10</meter>

<br>

<label for="disk_h">Disk usage H:</label>
<meter id="disk_h" value="0.7">70%</meter>
Meter vs progress
progress to mark up the completion rate/degree of progress of an “in progress” task through a progress bar, use progress element.
meter to represent a gauge use meter element.
You can think like that: progress = dynamic ; meter = static
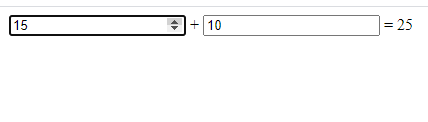
9. Output
The <output> is a container element into which a user site can inject the results of a calculation or the outcome of a user action.
Example:
<form oninput="result.value=parseInt(a.value)+parseInt(b.value)">
      <input type="number" id="b" name="b" value="10" /> +
      <input type="number" id="a" name="a" value="10" /> =
      <output name="result" for="a b">20</output>
 </form>
for attribute a space-separated list of other elements' ids, indicating that those elements contribute to the input values.
form The <form> element to associate the output with. The value of this attribute must be the id of a <form> in the same document.
If you the attribute is not set (like above) the <output> is associated with its ancestor <form> element, if any.
Conclusion
Hopefully, you've learnt some new elements which you can show off to your colleagues. Having a wide range of HTML elements you're comfortable with can be so useful, a lot of developers jump straight to JavaScript and CSS when it's not really needed
Hope you've enjoyed reading!
Comments
Loading comments…