Learn how to seamlessly integrate Facebook Pixel into your Next.js 14 app using the new App Router. Follow our step-by-step guide to optimize your web tracking and boost your marketing efforts.
In today’s digital marketing landscape, tracking user interactions on your website is crucial. One of the most effective tools for this is the Facebook Pixel, which helps you understand and target your audience better. If you’re using Next.js 14 and its new App Router, integrating the Facebook Pixel might seem daunting, but it’s quite straightforward. This guide will walk you through the process step-by-step.
What is Facebook Pixel?
Facebook Pixel is a piece of code that you place on your website to collect data. This data helps you track conversions from Facebook ads, optimize ads, build targeted audiences for future ads, and remarket to people who have already taken some kind of action on your website.
Why Use Facebook Pixel with Next.js 14?
Next.js 14 offers a robust and flexible way to build React applications with server-side rendering, static site generation, and API routes. By integrating Facebook Pixel, you can leverage its tracking capabilities to enhance your marketing strategies and make data-driven decisions.
Step 1: Create a Facebook Pixel
- Log in to your Facebook Business Manager.
- Navigate to Events Manager and click on Pixels.
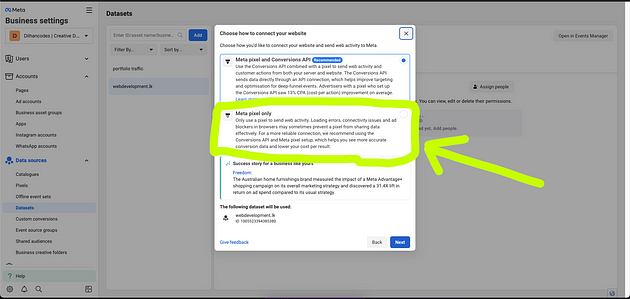
- Click on “Add a New Data Source” and select “Facebook Pixel”.
- Enter a name for your Pixel and click “Continue”.
- Copy the Pixel CODE, which you will need in the next steps.
Facebook Pixel Adding to Nextjs 14 App router:
Step 2: Install Facebook Pixel in Your Next.js 14 App
Next.js 14 provides an easy way to include external scripts using the <Script> component.
1. Add Facebook Pixel Script
You need to include the Facebook Pixel script in your Next.js application. You can do this by using the <Script> component provided by Next.js.
- Install the Next.js script component (if not already installed):
npm install next/script
- Include the Script in Your Application
Update your app/layout.js in the App Router to include the Facebook Pixel script:
import Script from "next/script";


const MainLayout = ({ children }) => {
  return (
    <html lang="en">
      <Head>
        <link rel="icon" href="/favicon.ico" />
        <link rel="canonical" href="https://www.webdevelopment.lk" />
      </Head>
      <body>
        <Navbar />
        <main>{children}</main>
        <Analytics />
        <SpeedInsights />

        <Footer />

       <Script
        id="facebook-pixel"
        strategy="afterInteractive"
      >
        {`
          !function(f,b,e,v,n,t,s)
          {if(f.fbq)return;n=f.fbq=function(){n.callMethod?
          n.callMethod.apply(n,arguments):n.queue.push(arguments)};
          if(!f._fbq)f._fbq=n;n.push=n;n.loaded=!0;n.version='2.0';
          n.queue=[];t=b.createElement(e);t.async=!0;
          t.src=v;s=b.getElementsByTagName(e)[0];
          s.parentNode.insertBefore(t,s)}(window, document,'script',
          'https://connect.facebook.net/en_US/fbevents.js');
          fbq('init', 'YOUR_PIXEL_ID');
          fbq('track', 'PageView');
        `}
      </Script>
      <noscript>
        <img
          height="1"
          width="1"
          style={{ display: "none" }}
          src={`https://www.facebook.com/tr?id=YOUR_PIXEL_ID&ev=PageView&noscript=1`}
        />
      </noscript>
      </body>

    </html>
  );
};

export default MainLayout;
Replace 'YOUR_PIXEL_ID' with your actual Facebook Pixel ID.
Step 3: Verify Facebook Pixel Installation
After you have integrated the Facebook Pixel into your Next.js 14 app, you should verify that it is working correctly.
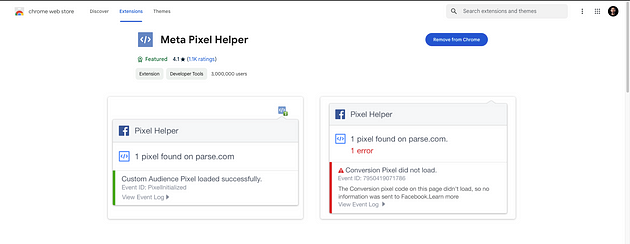
- Install the Facebook Pixel Helper Chrome extension.
Facebook Meta Pixel Helper:
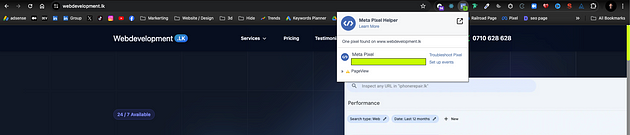
2. Visit your website and the extension should show if the Pixel is working correctly.
After adding extention go to your website and check here:
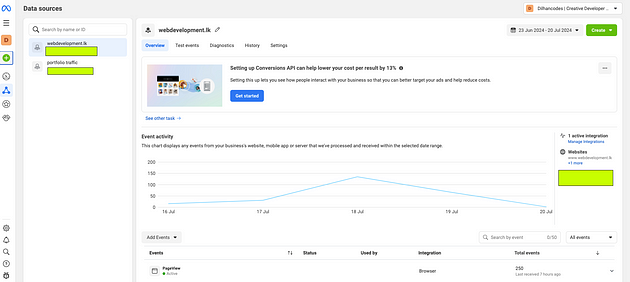
3. Check your Events Manager in Facebook to see if data is being sent.
Facebook Pixel data should be recieving:
Conclusion
Integrating Facebook Pixel into your Next.js 14 app using the App Router is a simple yet powerful way to enhance your web tracking and marketing strategies. By following this step-by-step guide, you can start collecting valuable data and making informed decisions to grow your business.
Happy coding!
If you need any assistance with setting up Facebook Pixel or any other web development services, feel free to contact me at contact@dilhancodes.dev I’m here to help you achieve your digital marketing goals!
Comments
Loading comments…